CADDesign
Overview of Works
Simulation of Tangential Motion in Disc-type Cam Structures
Motion Effect
Component Engineering Drawing
Pendulum motion simulation
Motion Effect
Timeline Process
Motion Simulation of Four-bar Mechanism

Motion Simulation of Cam Mechanisms
Schmidt Coupling


Disc cam structure tangent motion simulation Modelling process
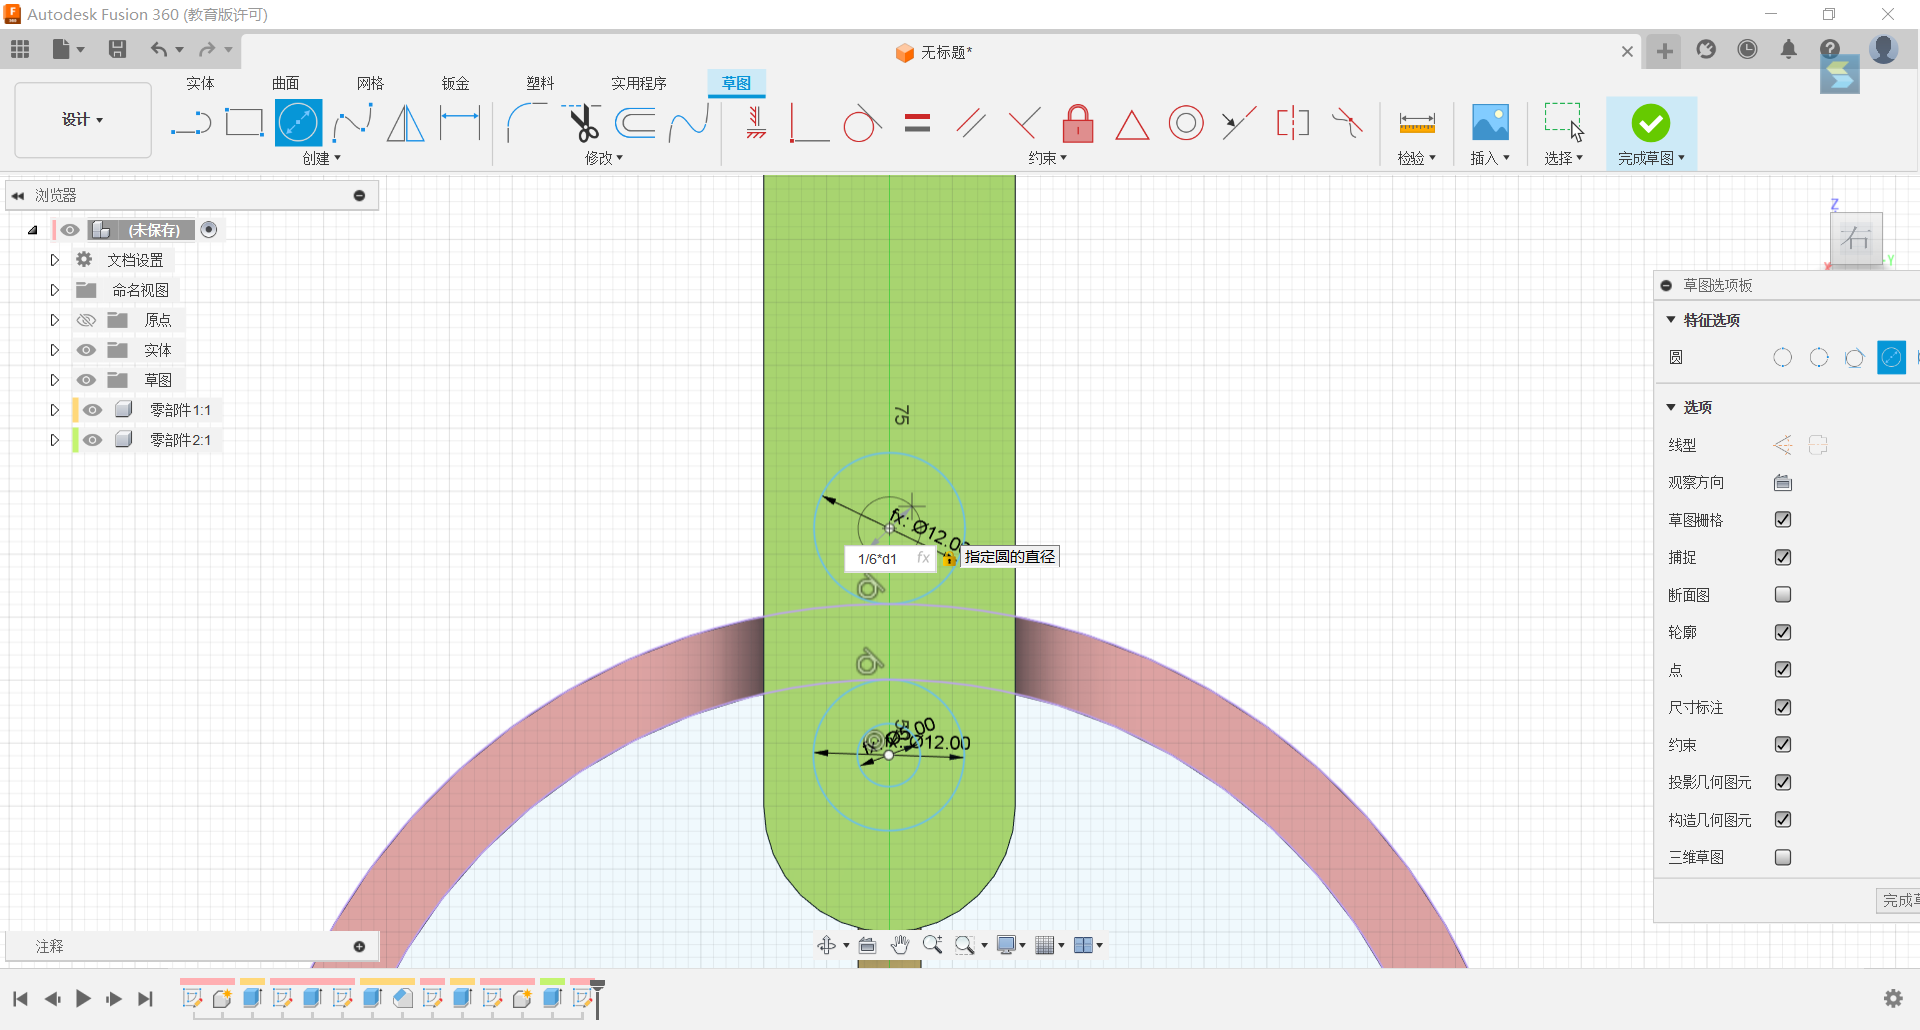
1.Draw a circle with a diameter of 30mm and its centre at the origin.
2.Set a circle with diameters of 3d1+0.1, 3d1+12.1 above the origin of the y-axis.
3.Stretch the set circle to a distance of 1/6*d1 from the circle.
4.Set up a rectangle on the plane with width 1/6*d1 and height 57mm and make the rectangle symmetrical to the y-axis.
5.Circle the rectangle with the origin as the centre point for 3
6.Stretch these three rectangles by -1/6*d1 and merge them with the cylinder.

7.Return to the plane and set up a circle with a diameter of 2/3*d1 centred on the origin.
8.Stretch the circle by 5/6*d1.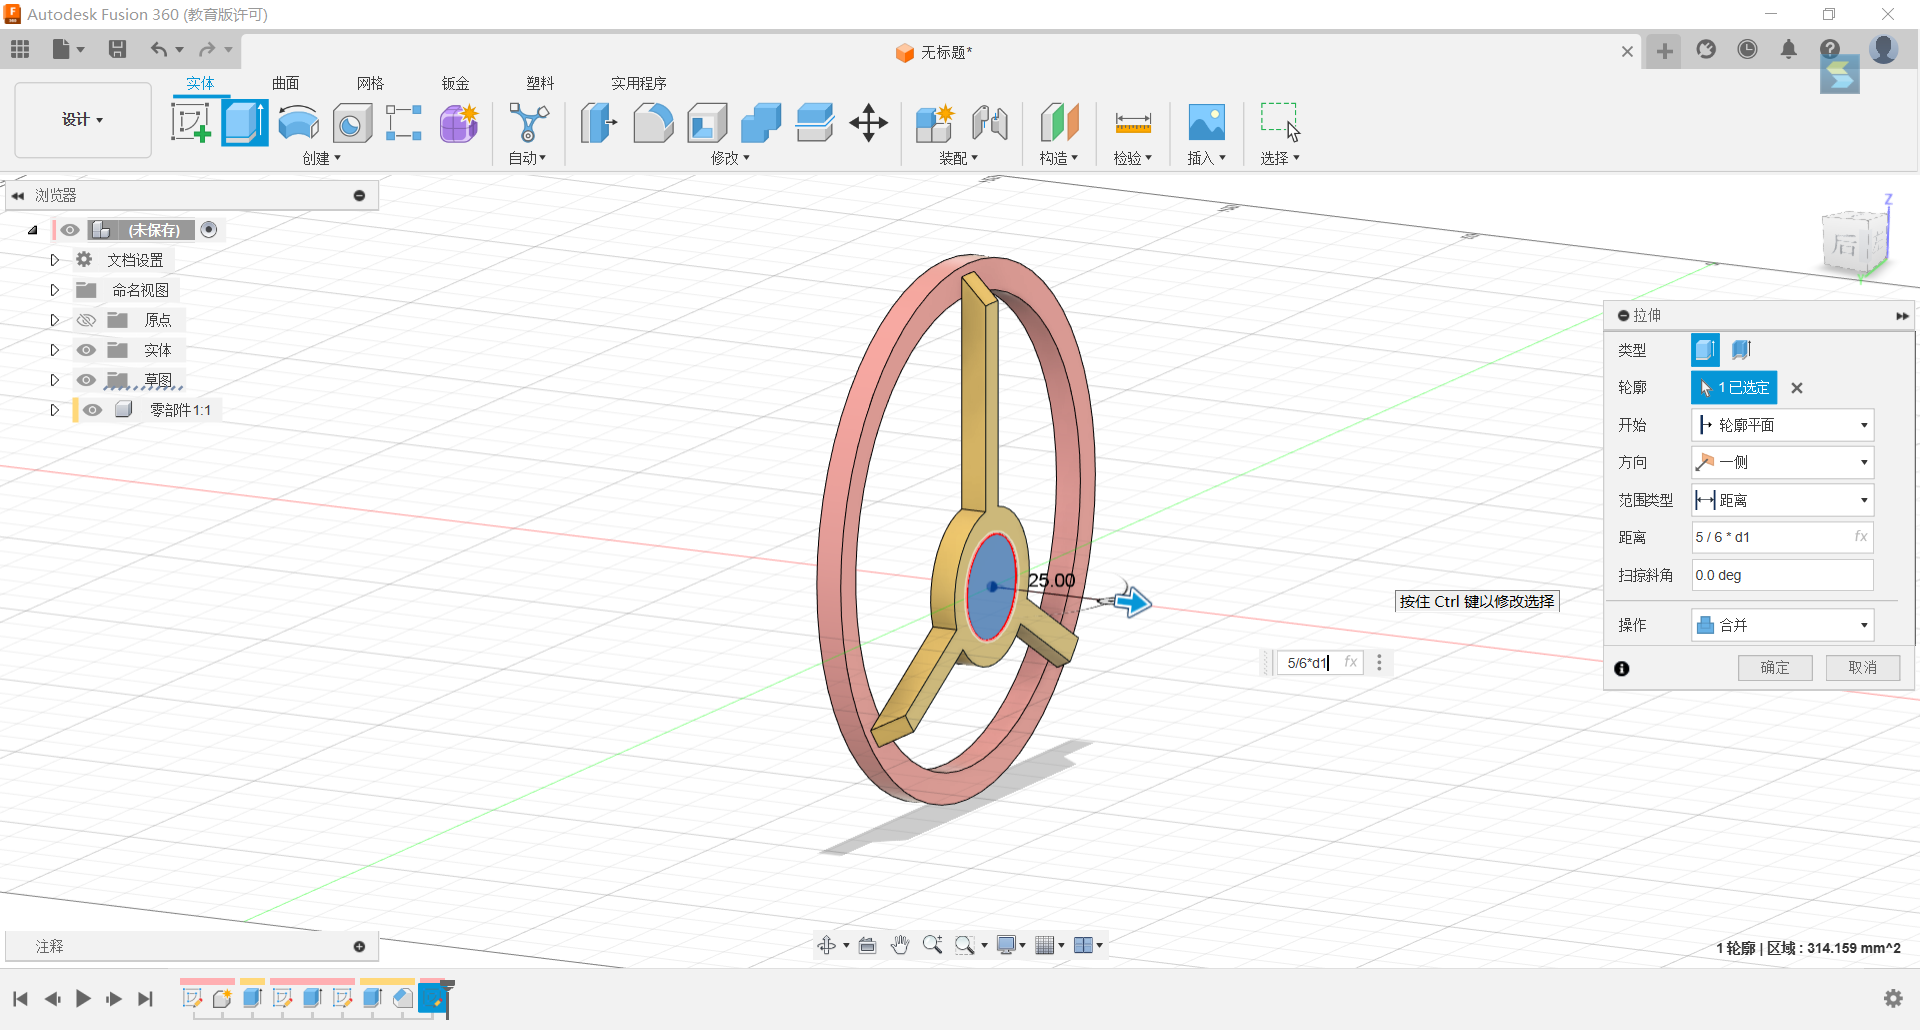
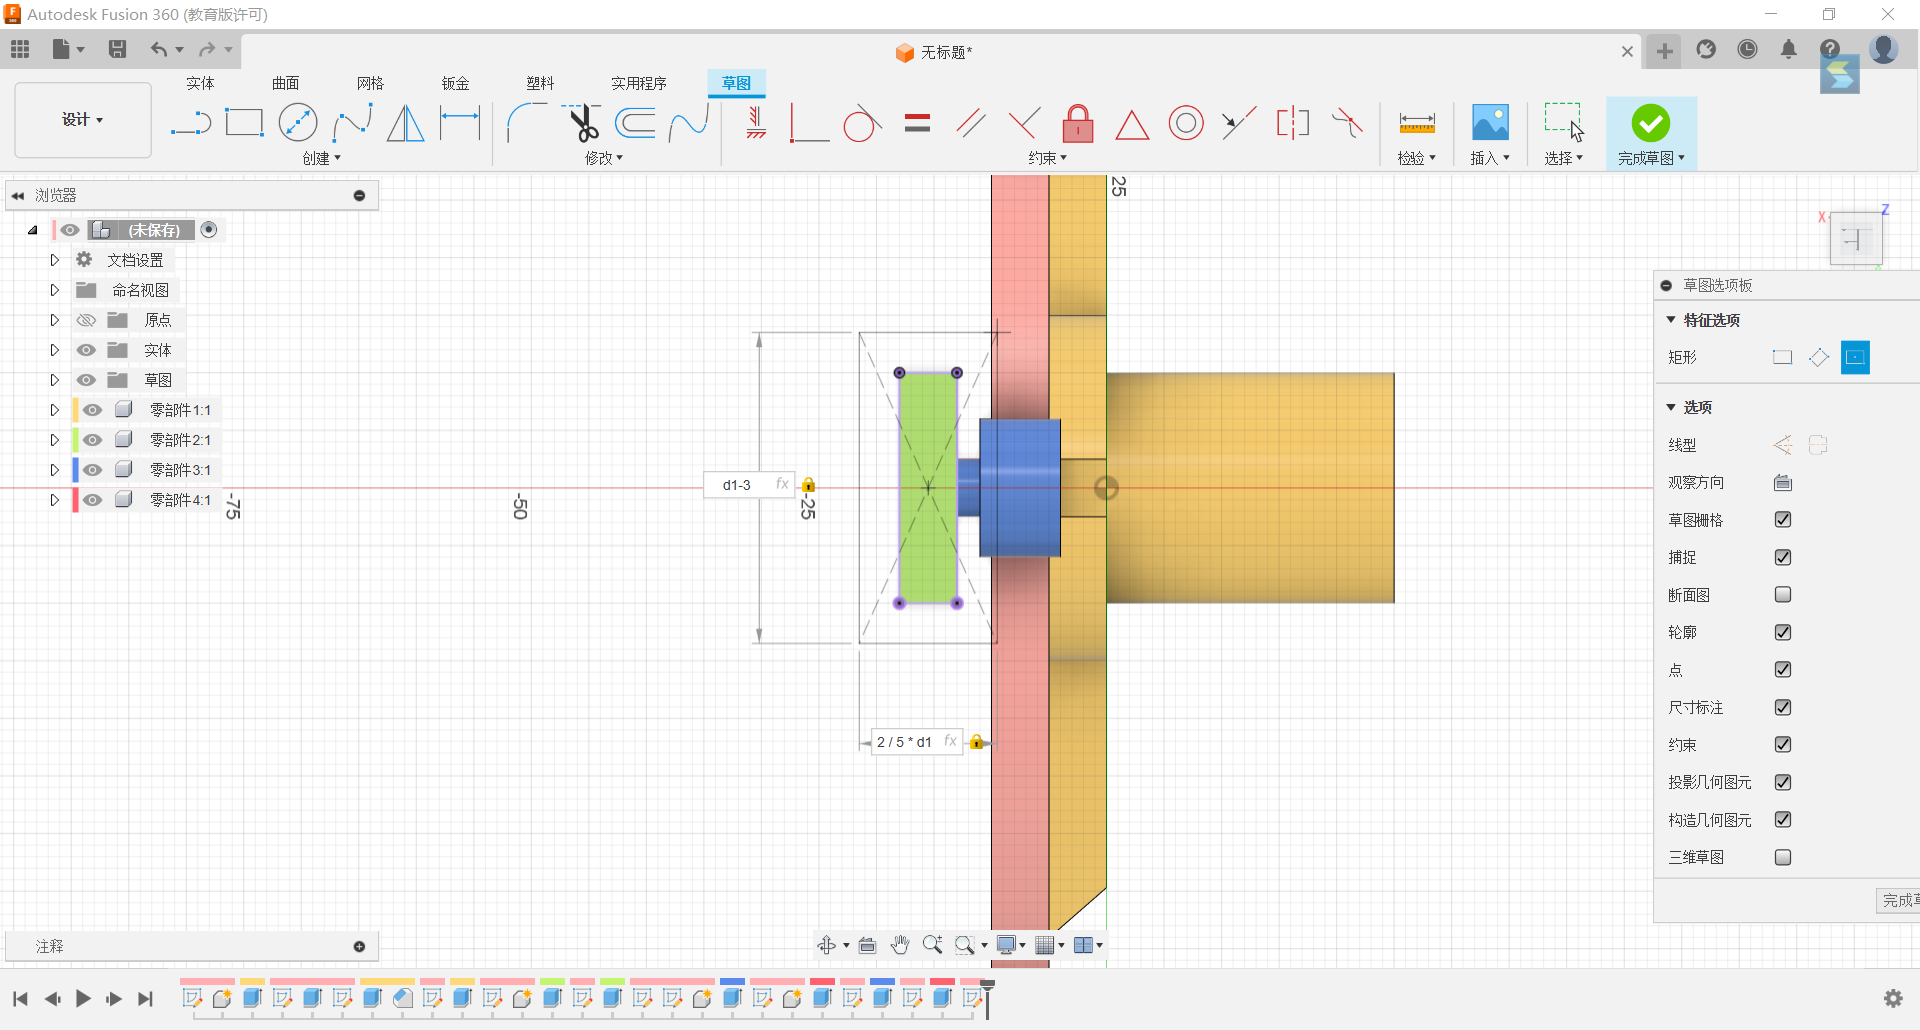
9.Set up a slot in the y-axis and stretch it on both sides with a distance of 4/15d1 on one side and -1/10d1 on the other side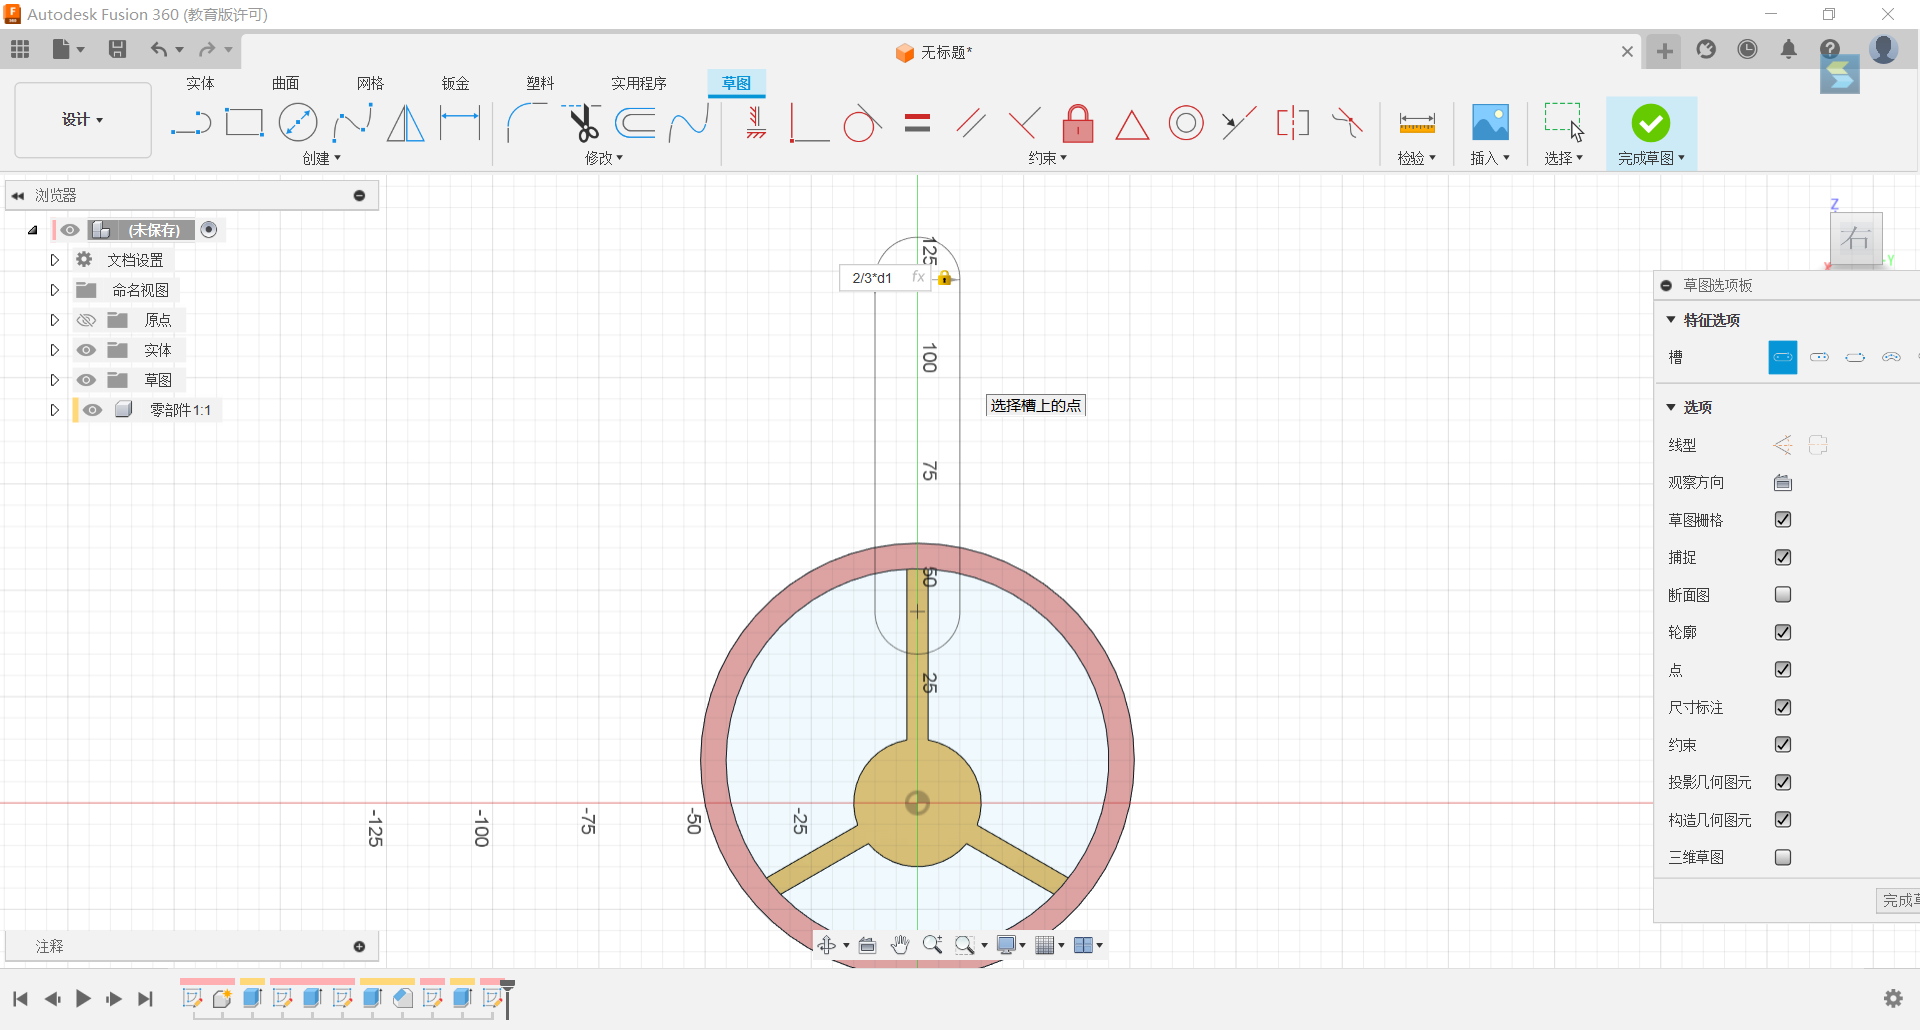

10.Set a rectangle along the left edge of the slot with the centre of the upper circle
11.Set up circles with diameters of 1/6d1 and 2/5d1 centred on the lower centre of the groove, with both circles having the same centre, and tangent the larger circle to the inside of the ring.
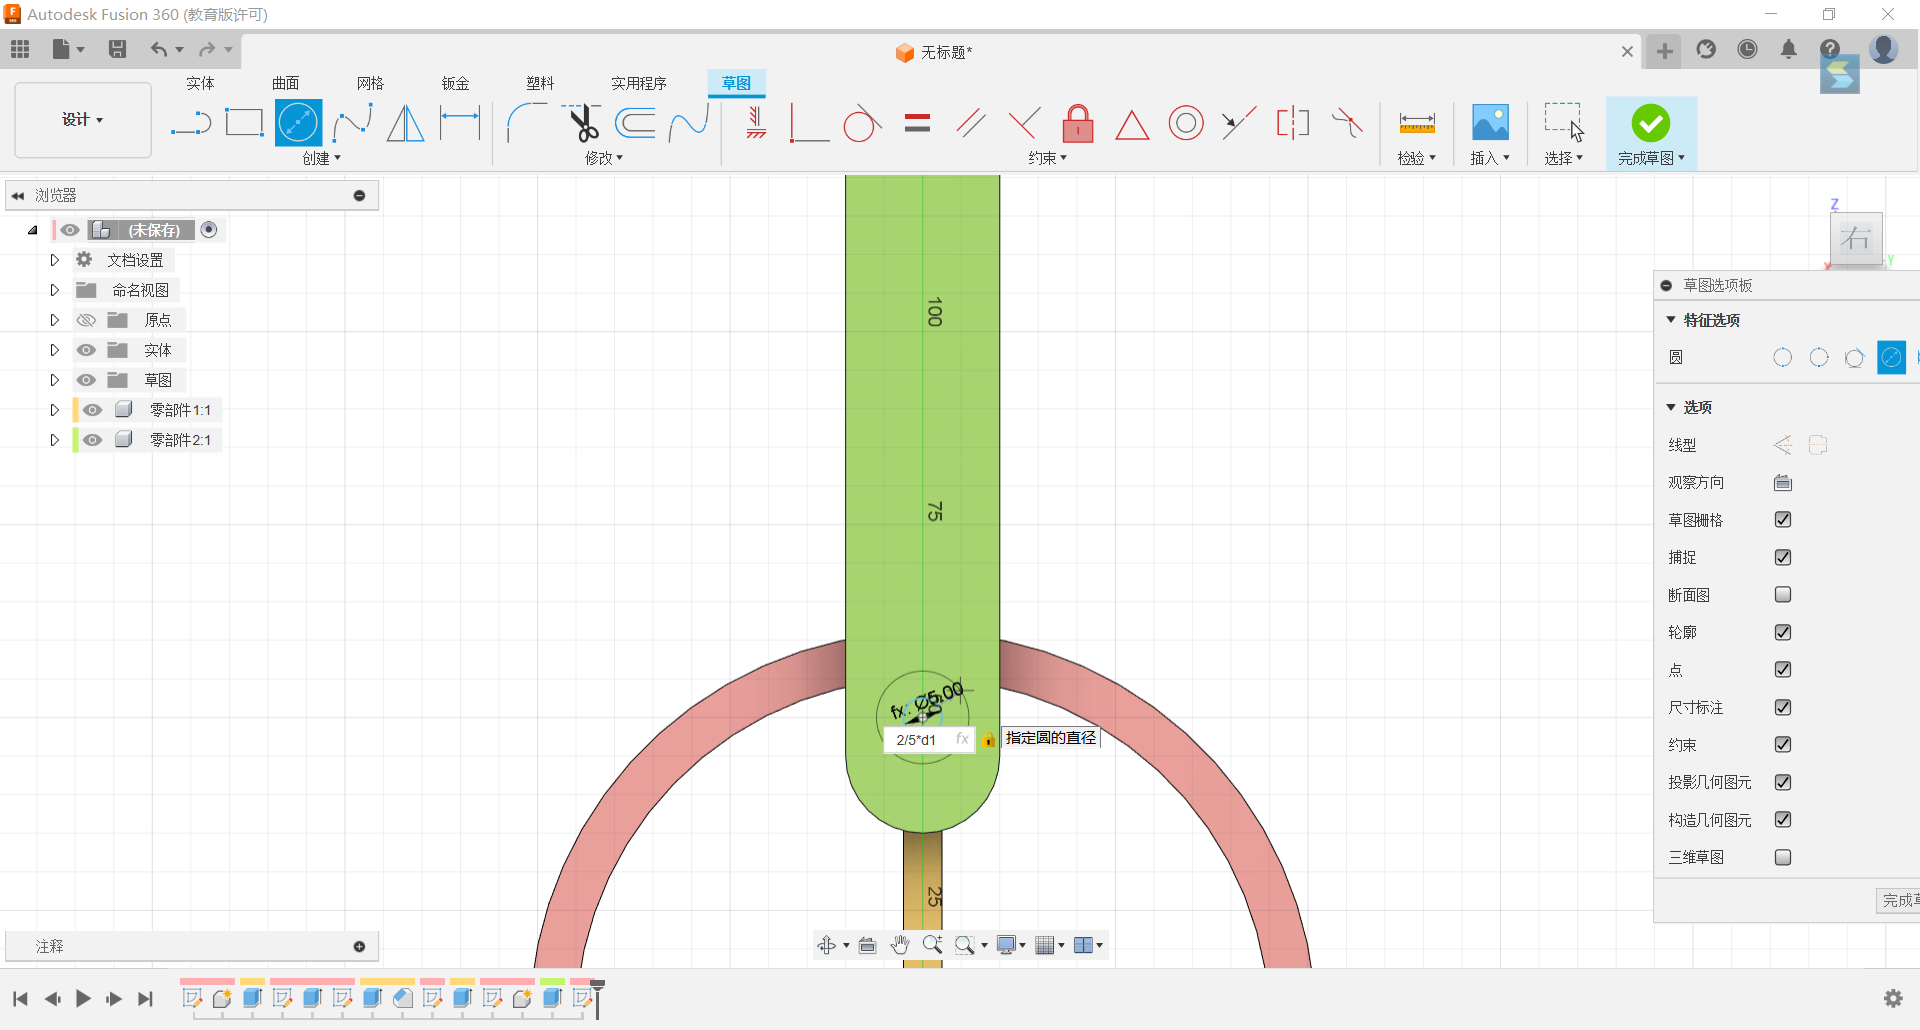
12.Set circles of diameters 2/5d1, 1/6d1 above the lower centre of the groove, with the two circles having the same centre, and tangent the large circle to the outside of the ring.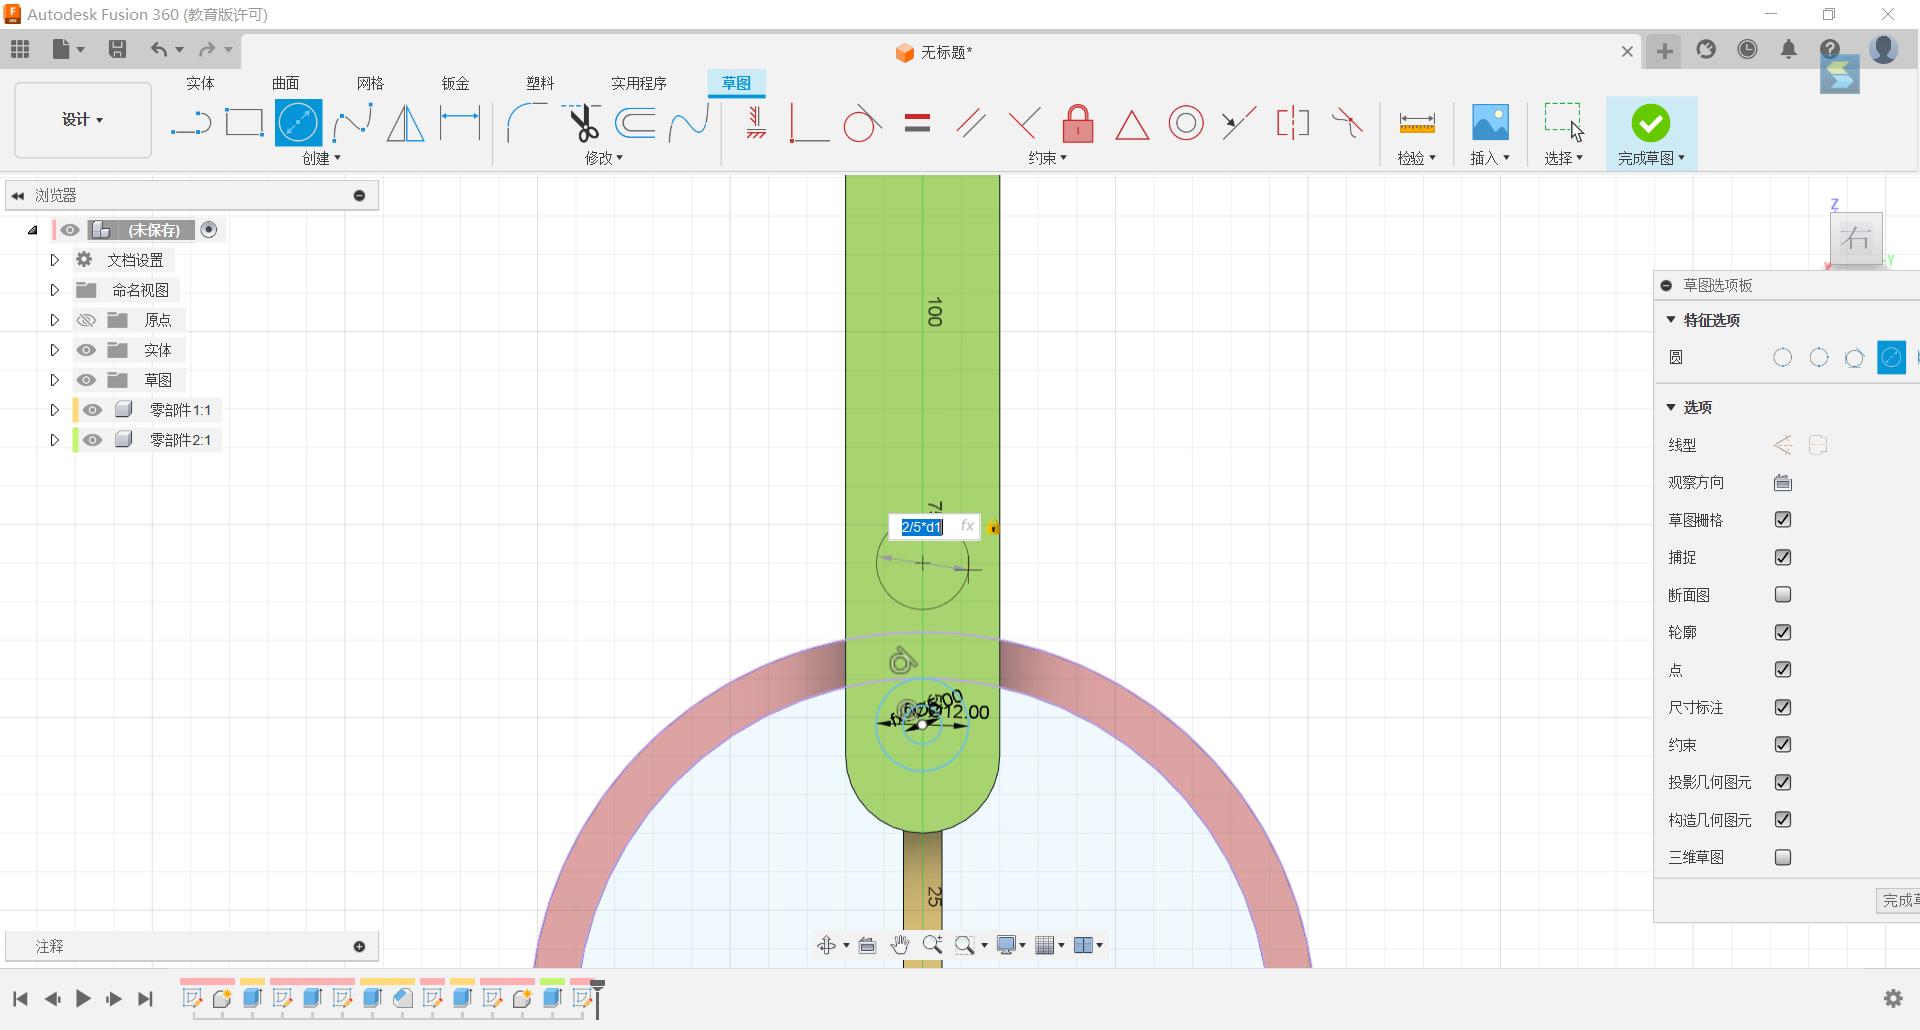
13.Stretch the set rectangle by 50mm.
14.Stretch the two small circles into holes and create a new part.
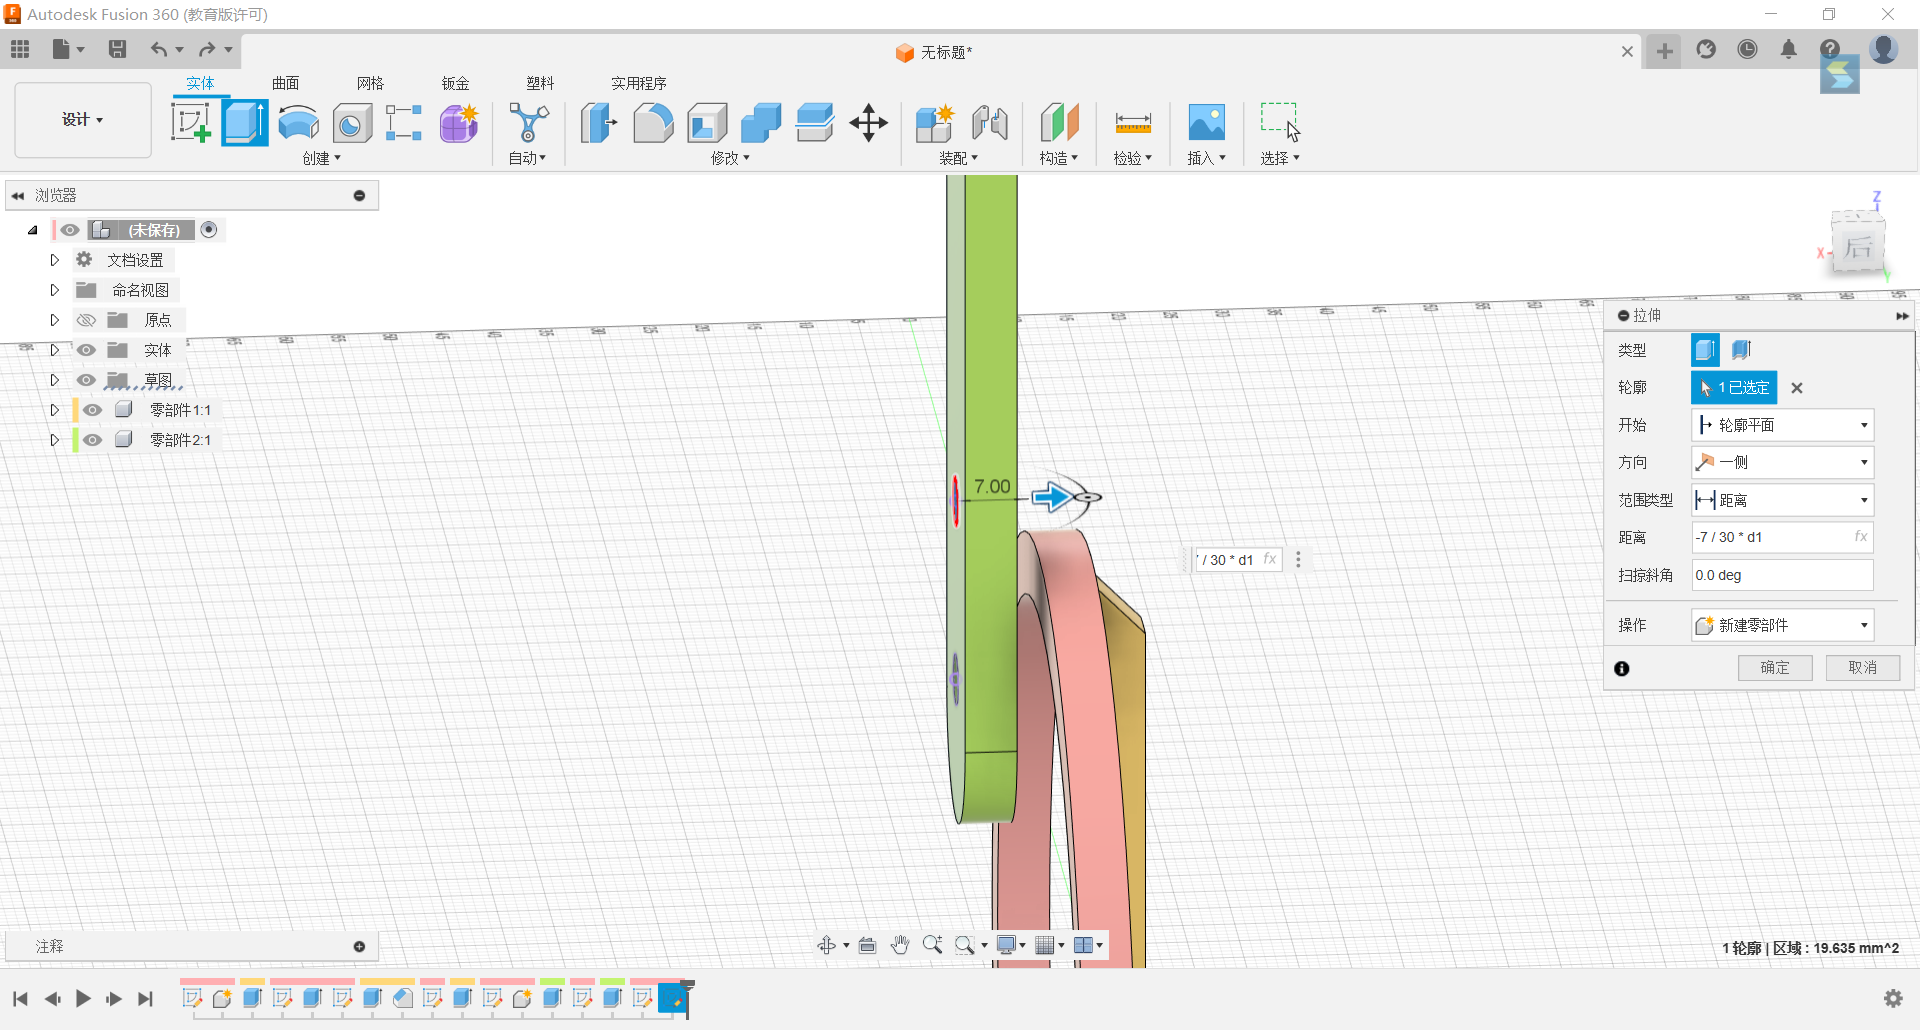
15.Stretch the two small cylinders new part -7/30*d1
16.Stretch the two large circles 7/30*d1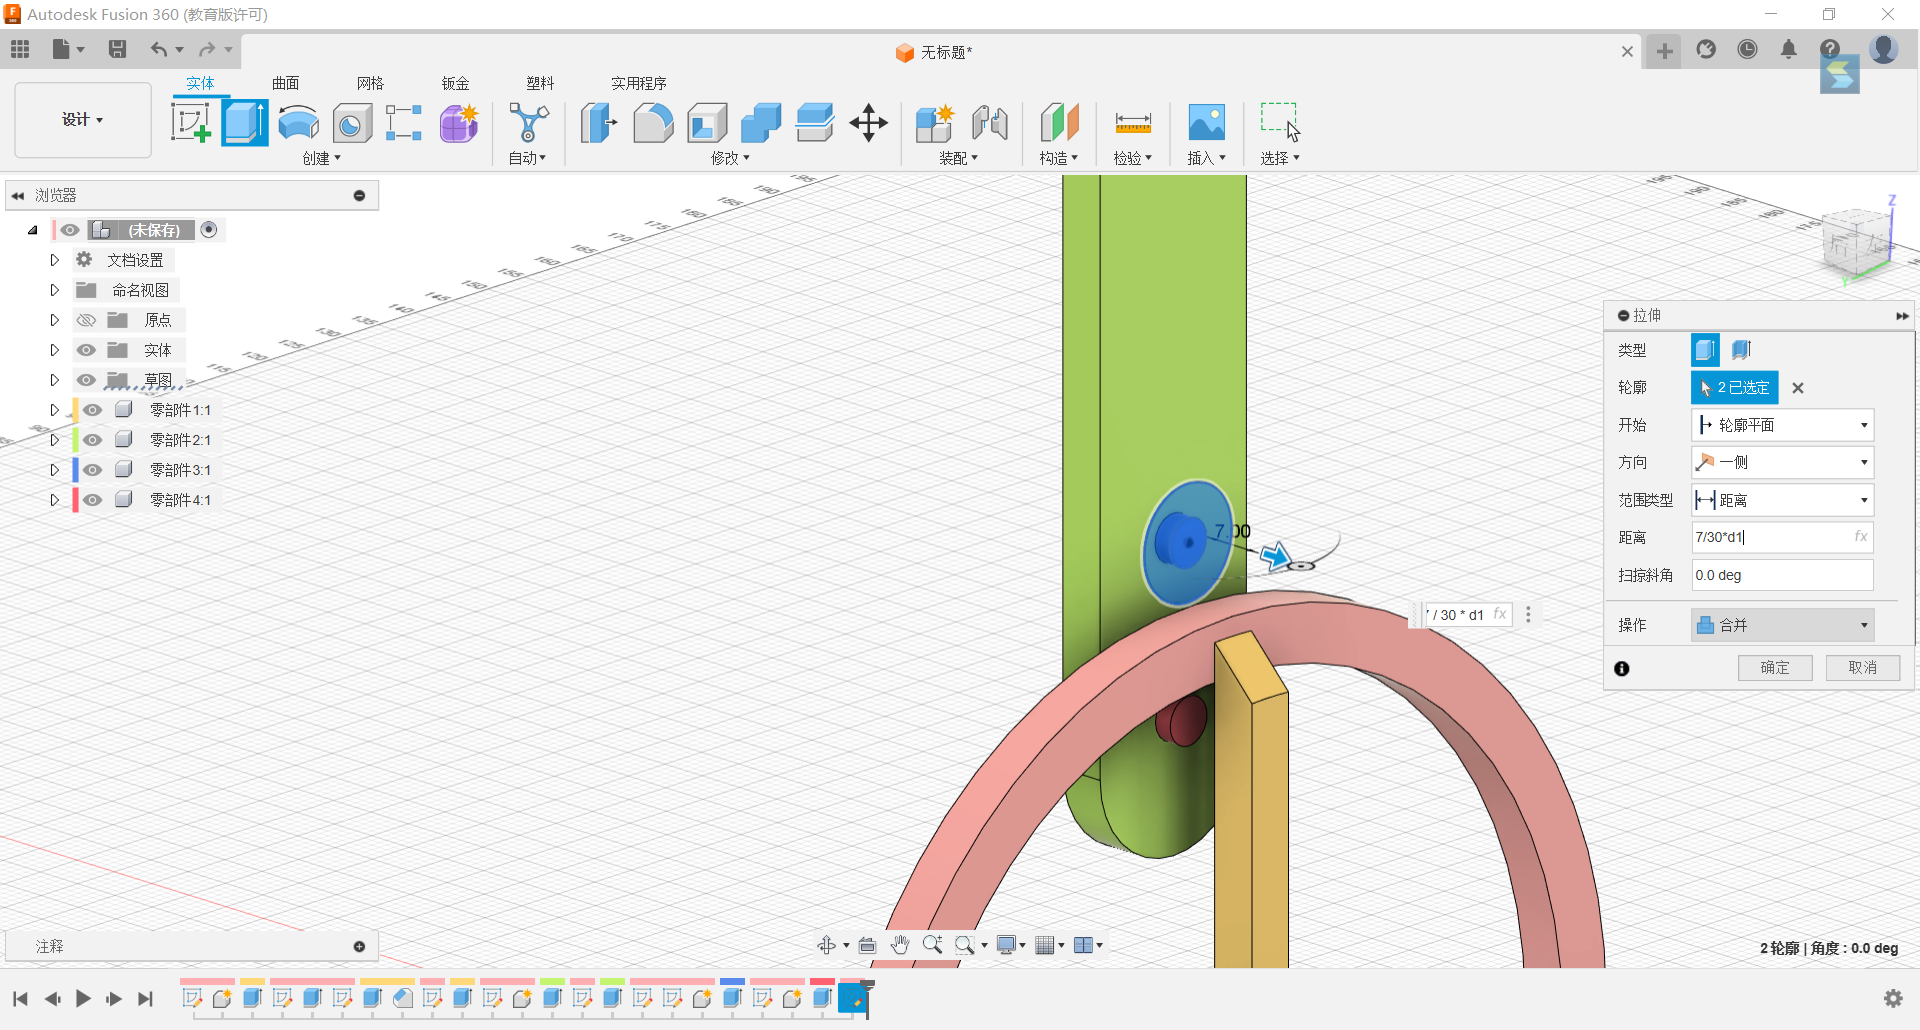
17.Project the top outer circle of the slot and set a rectangle at the top with the same scale and centre as the outer edge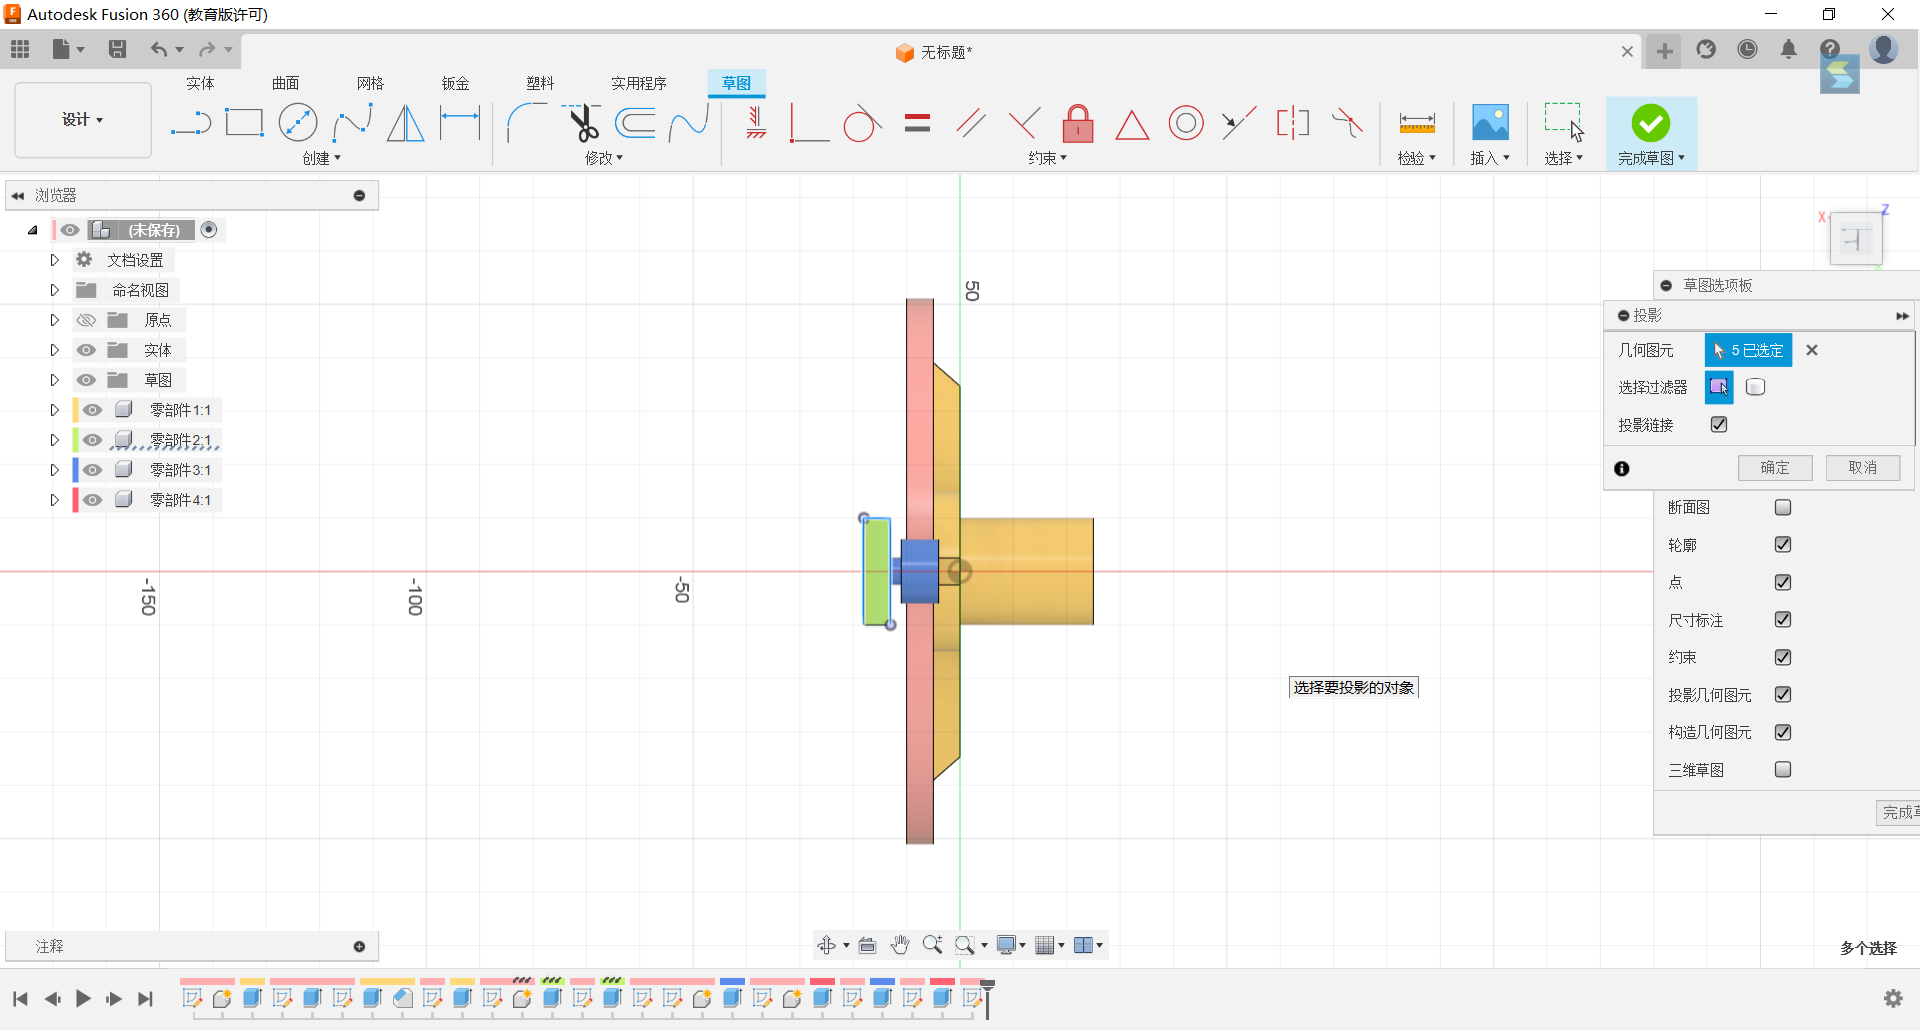
18.Stretch both sides of the rectangle, one side -1/6*d1, and d1+5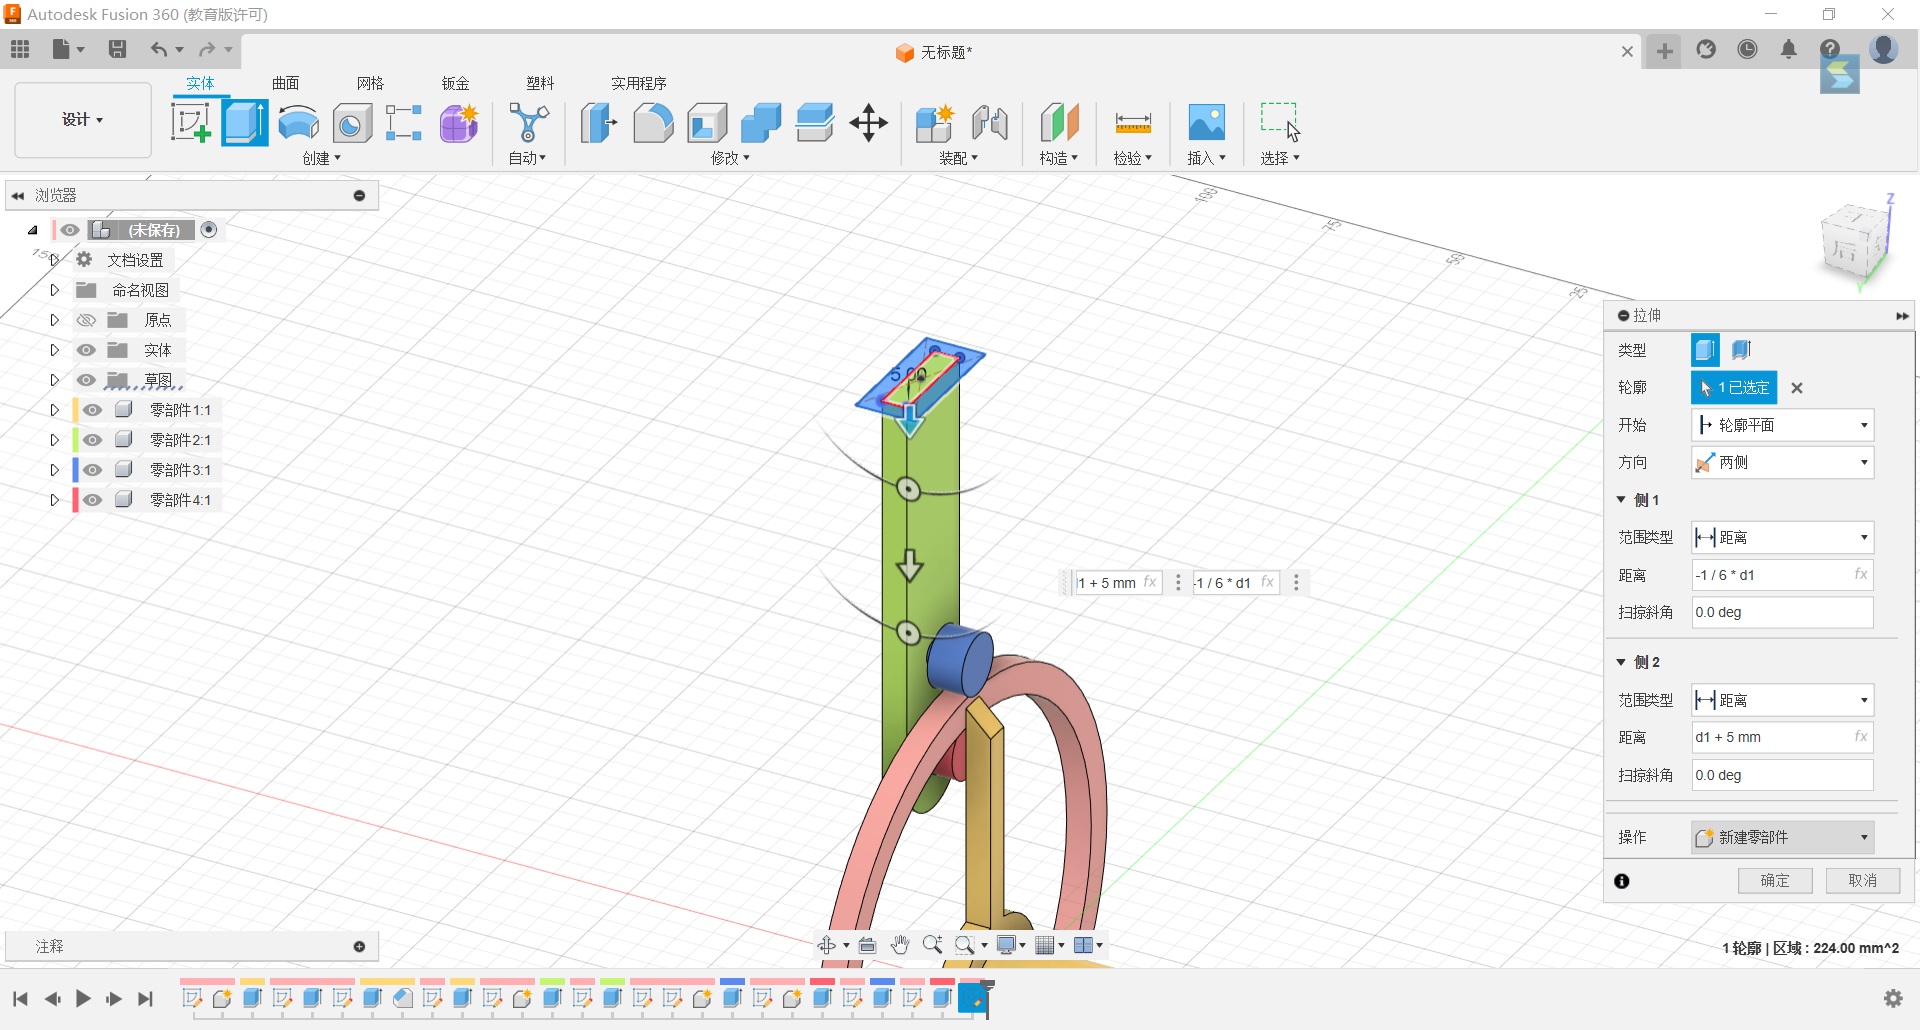
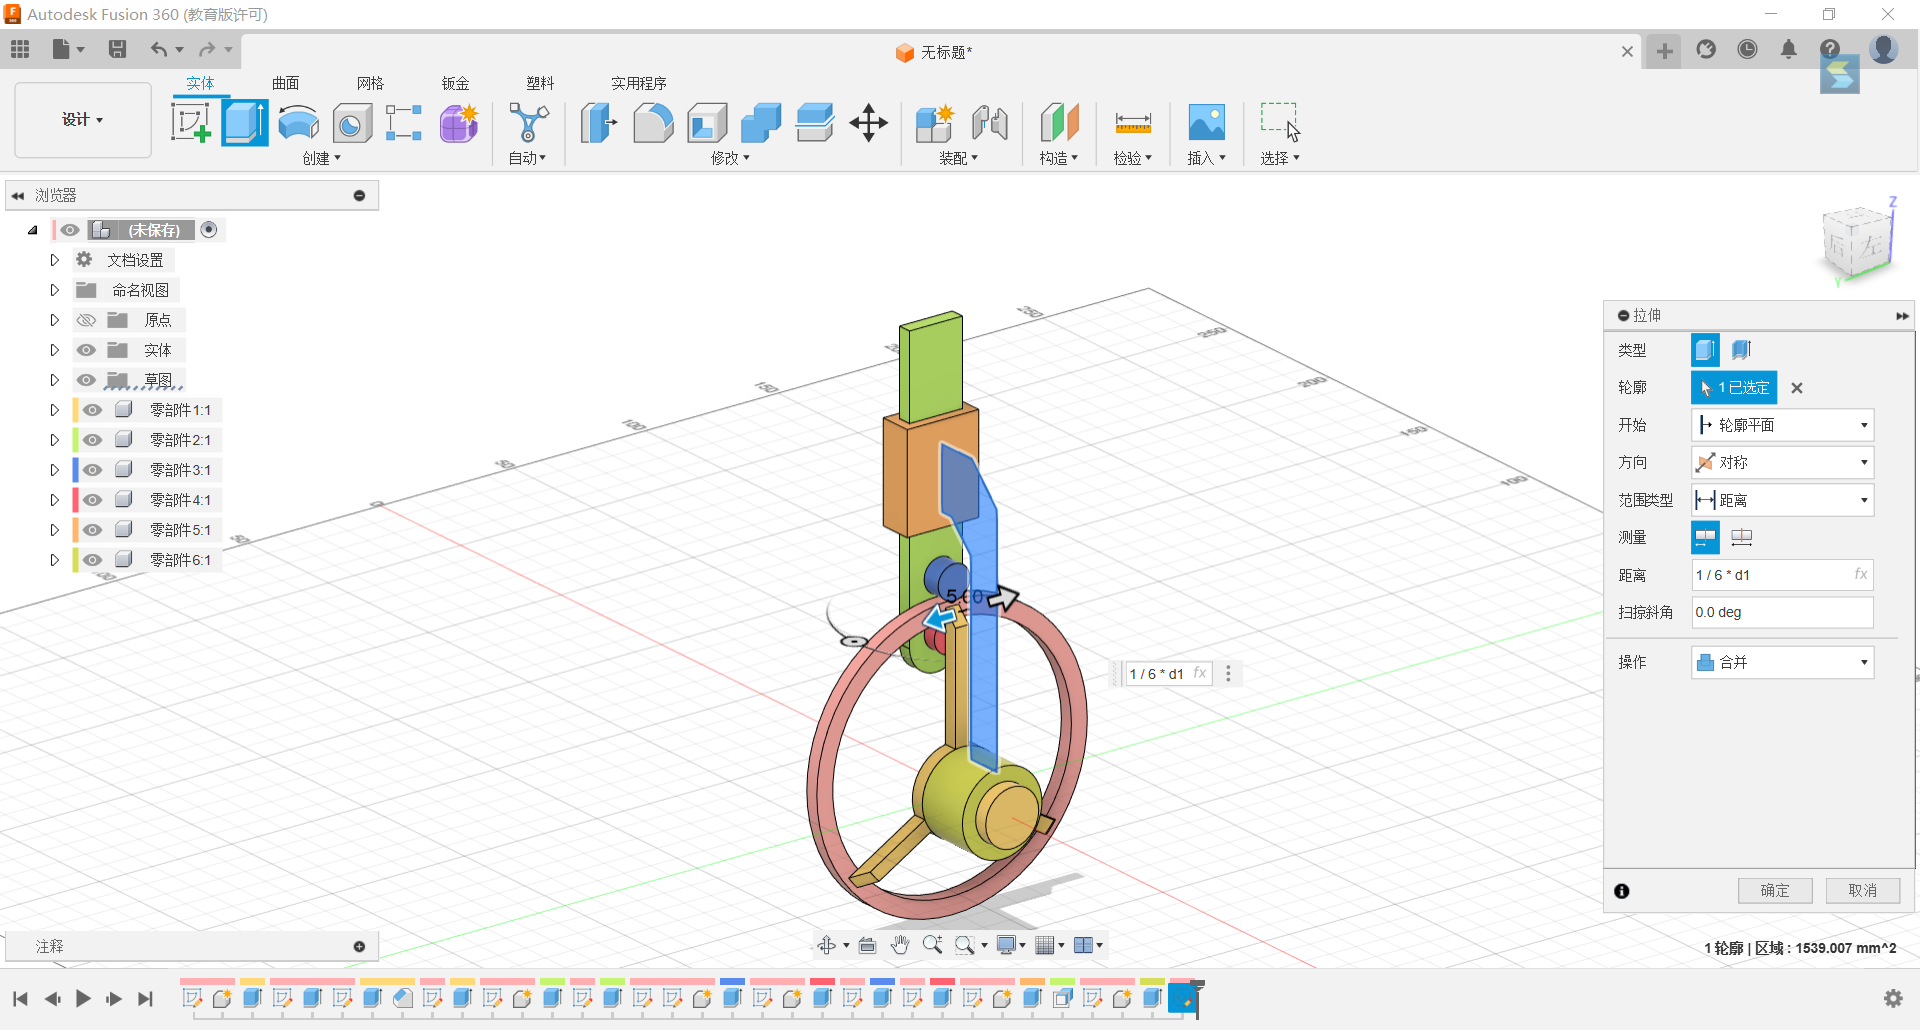
19.Stretch the circle outside the initial circle 2/3*d1
20.set an alien in the yz plane and stretch it symmetrically 1/6*d1
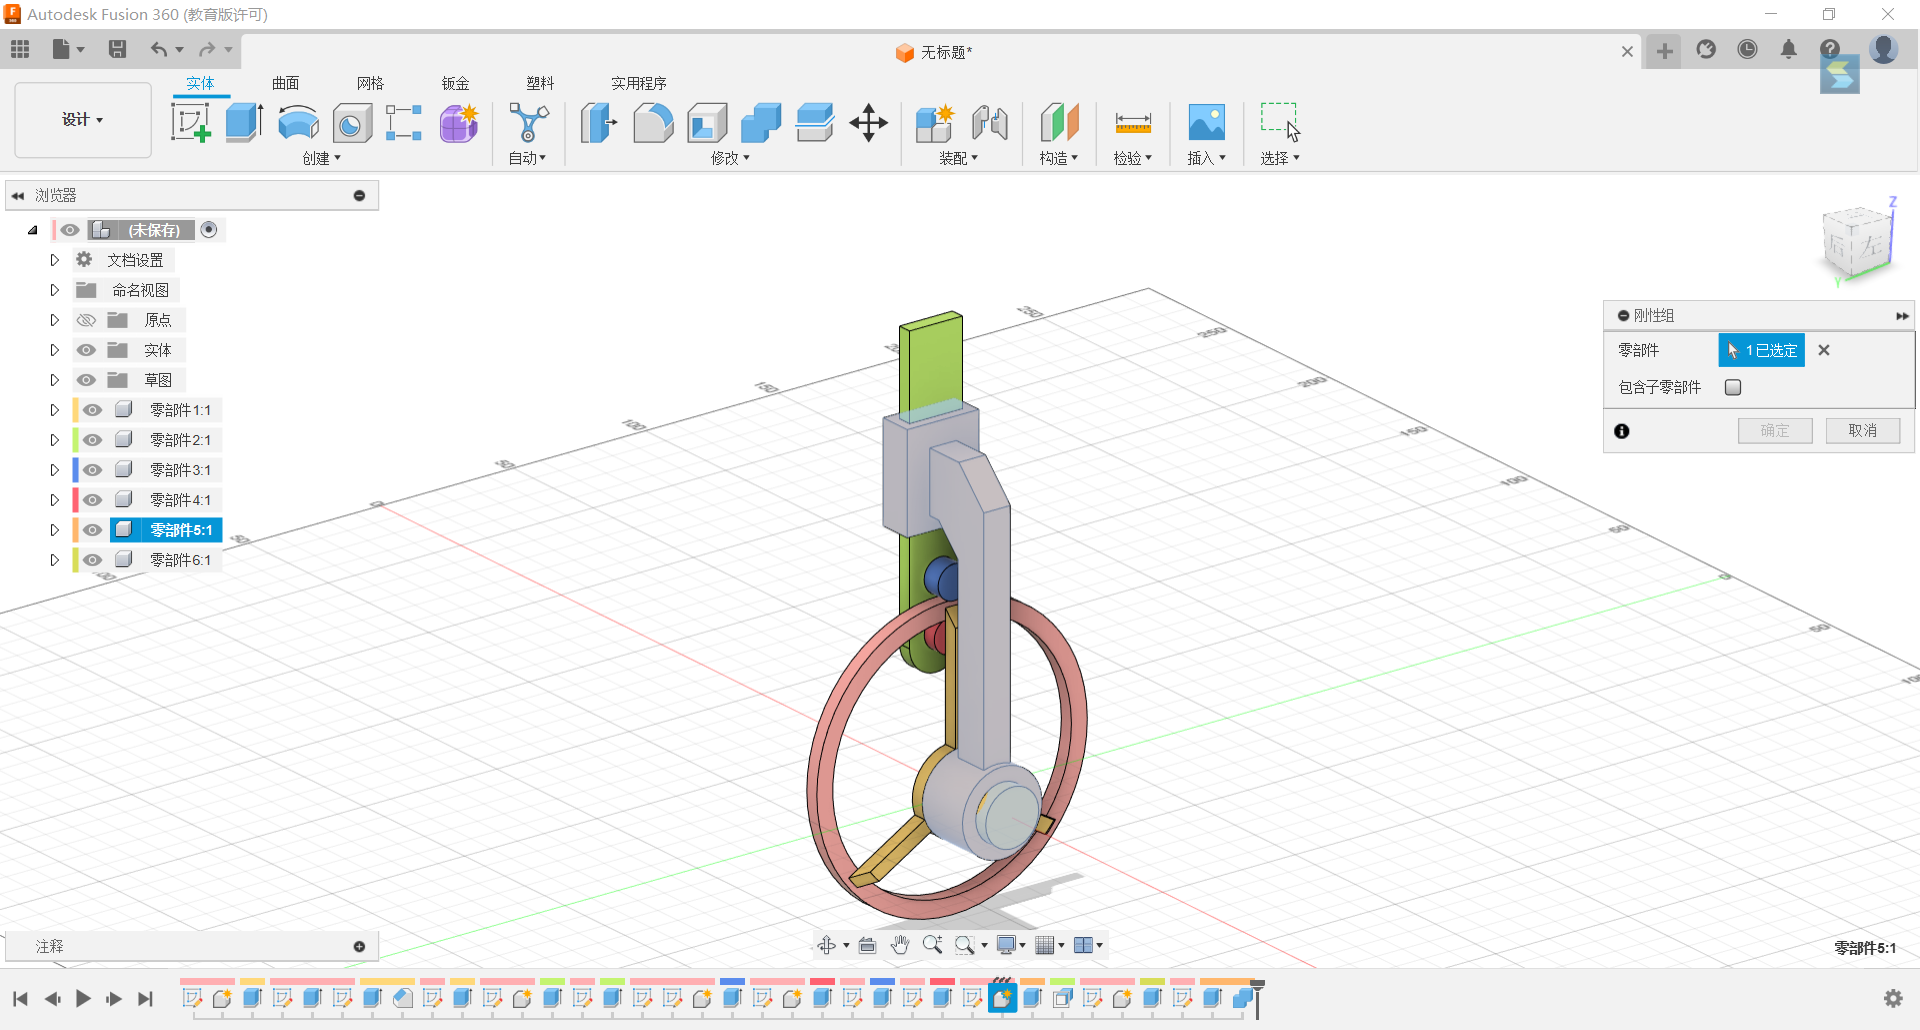
21.Merge the resulting shape with the rectangular body with the circular body and set it to the rigid group
22.Set the “Mercedes-Benz Label” shape to rotate the z-axis connection.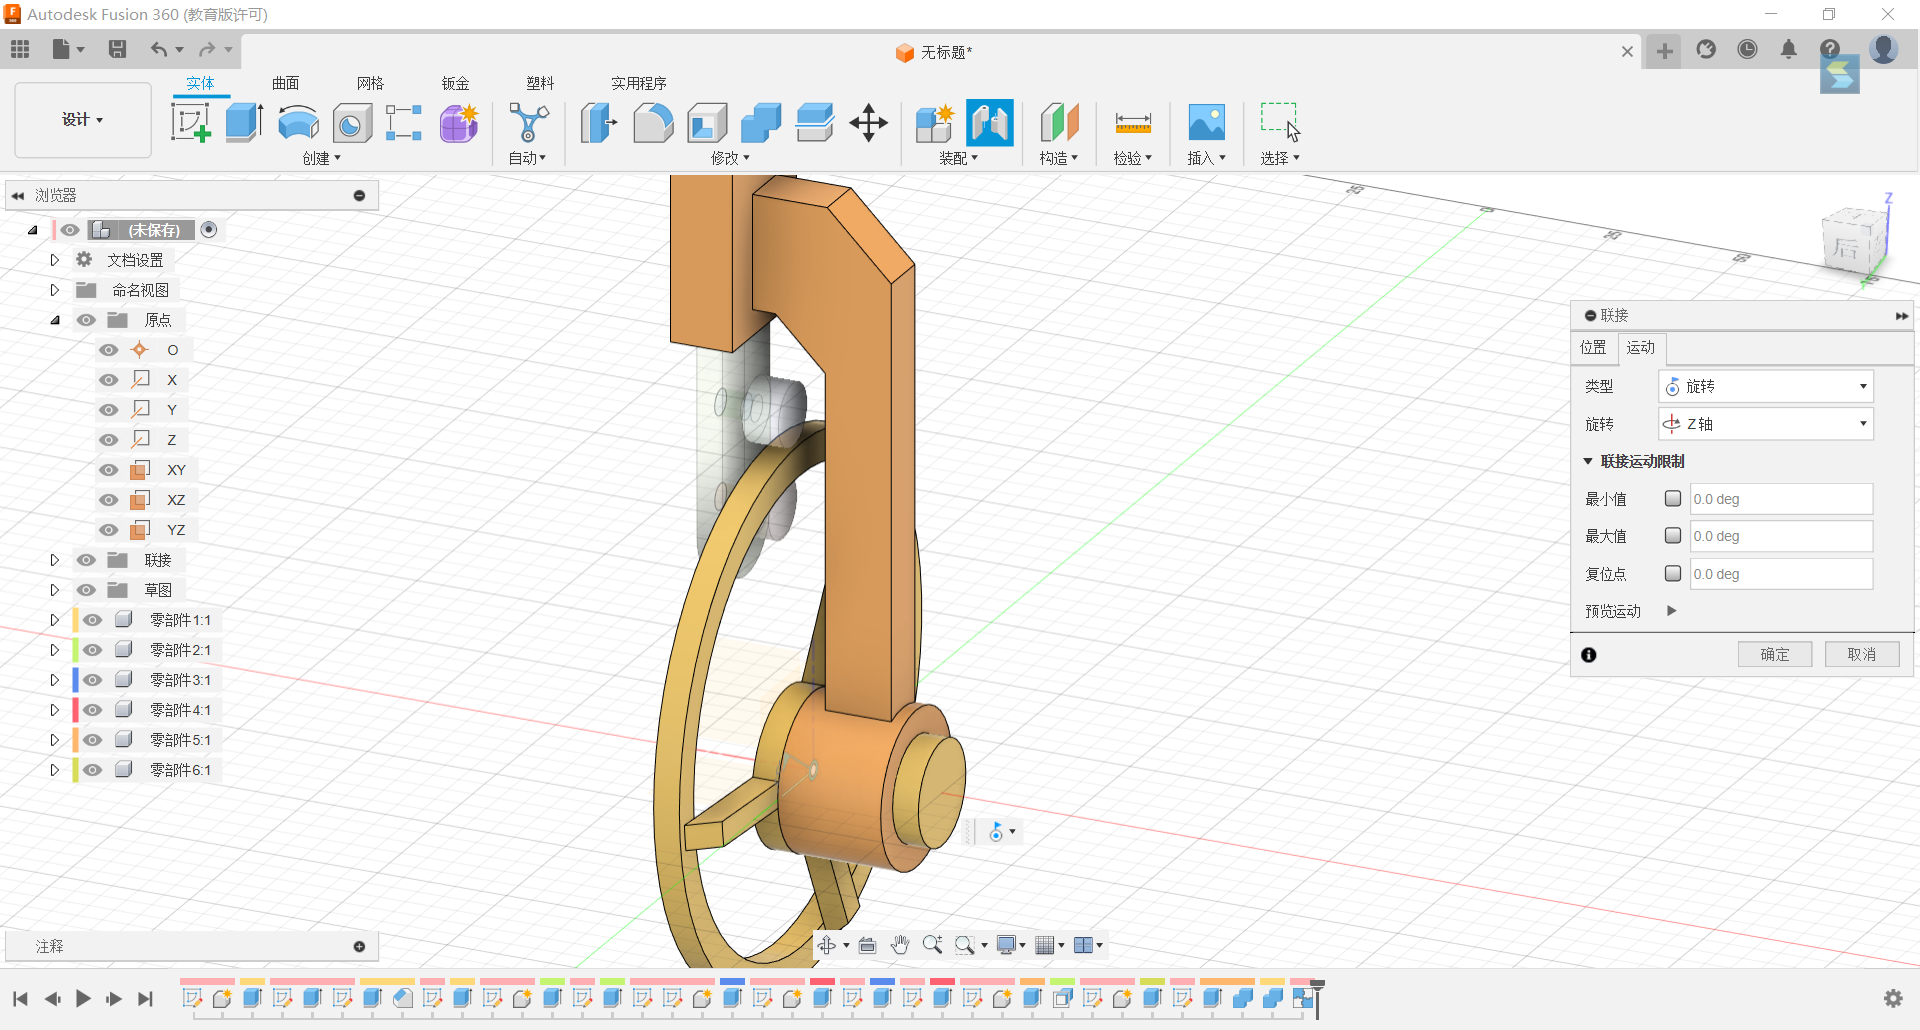
23.Set up a rotational connection between two small cylinders.
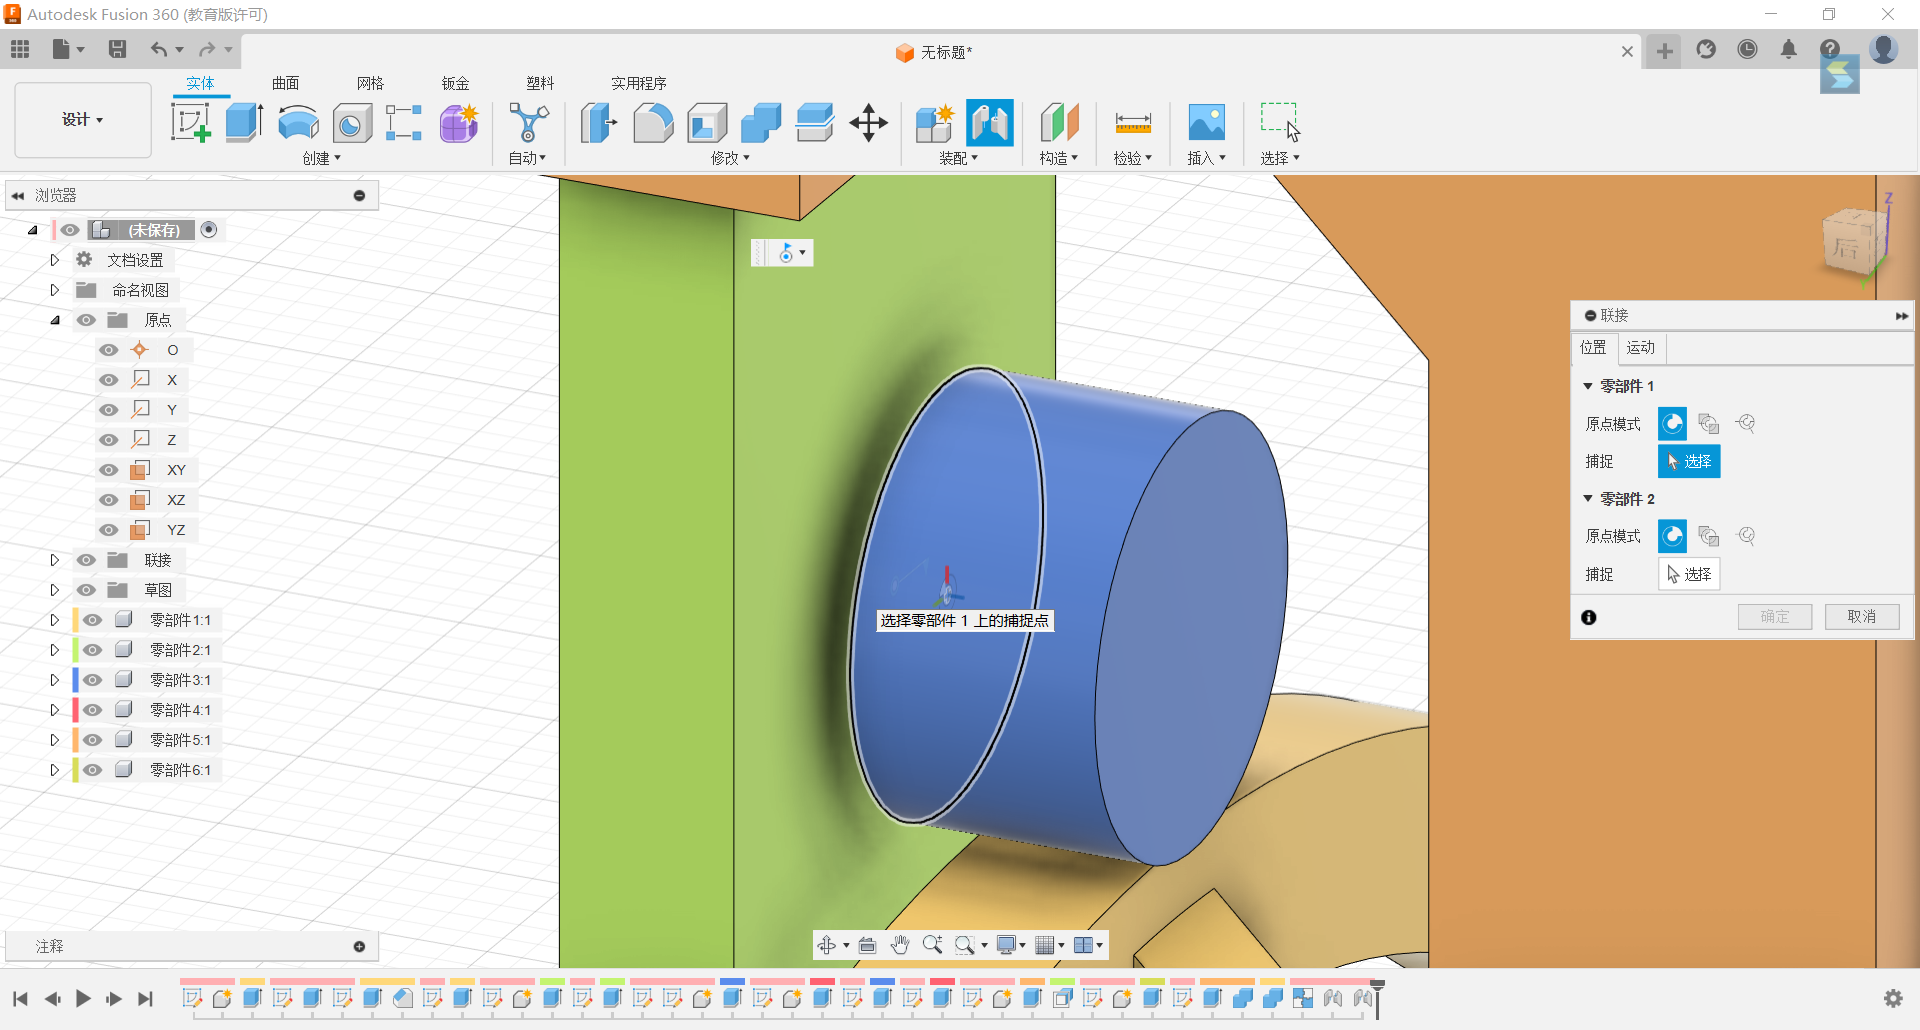
24.Slide coupling of slots along the z-axis.
25.Form a tangent relationship between the upper small cylinder and the ring.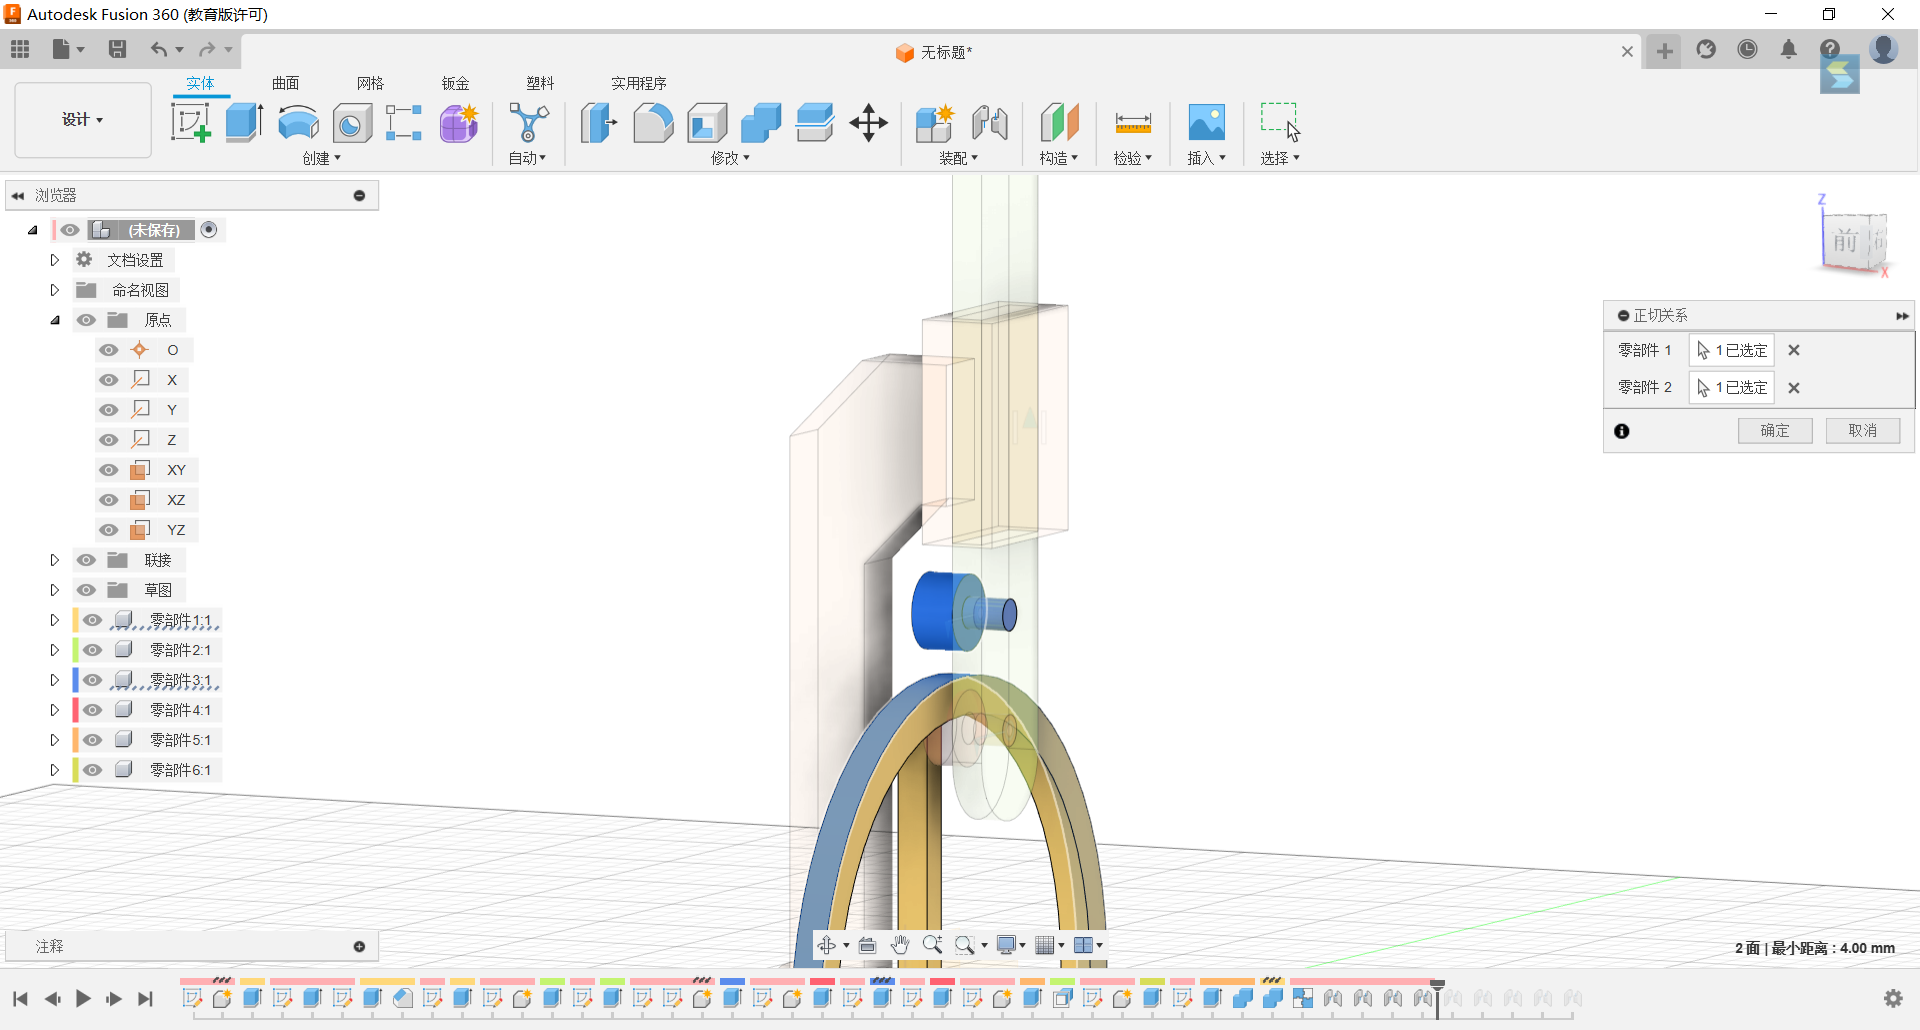
26.Final GIF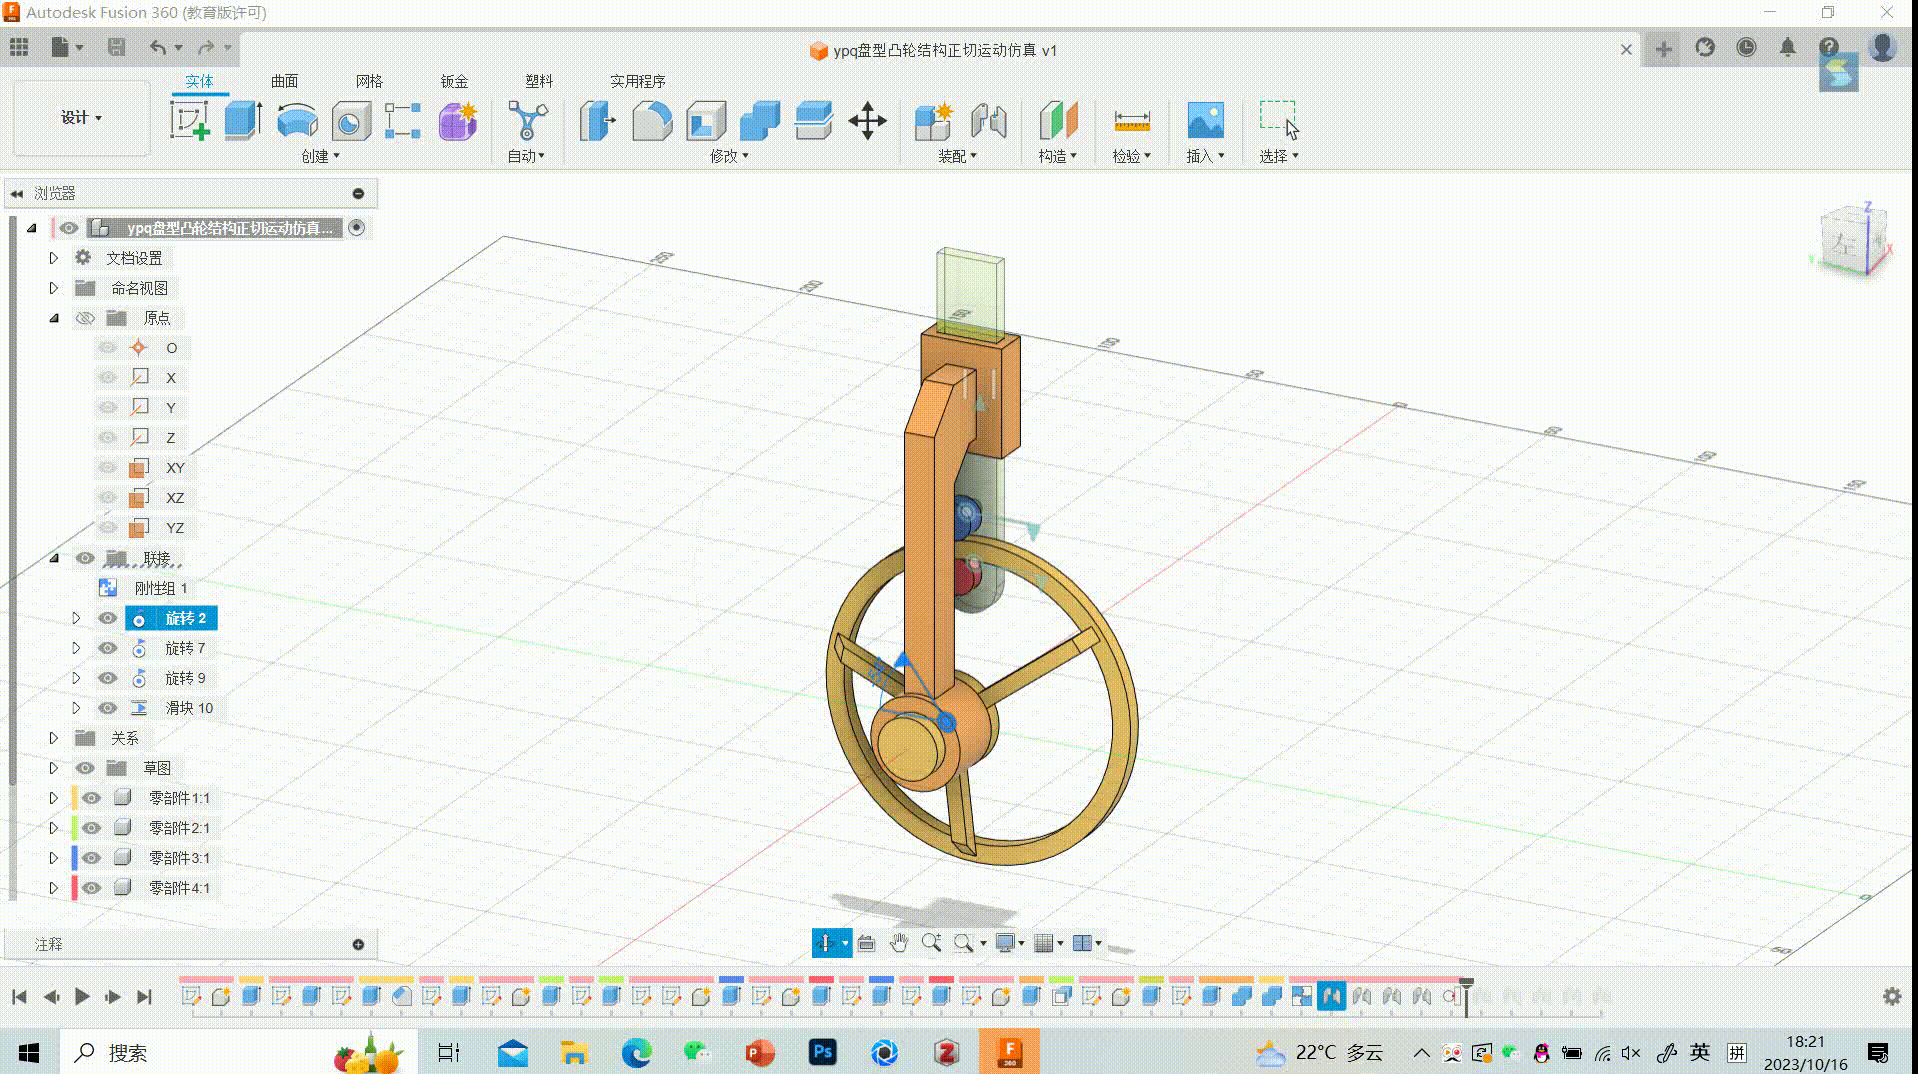
27.Showing data parameters
Schmidt Coupling Modeling Process
The design for this project is a simplified structure of a Schmidt coupling. Below are the specific modeling steps:
1.First, create a sketch of three main axes, and select the top view as the sketch plane. Use a circular array to obtain all three sides as shown in the sketch below:
2.Extend the sketch of the main axes, and repeat the previous steps as shown in the following diagram. In the end, you will have three main axes as depicted in the image:
3.Draw a sketch for the connecting shaft as shown in the image.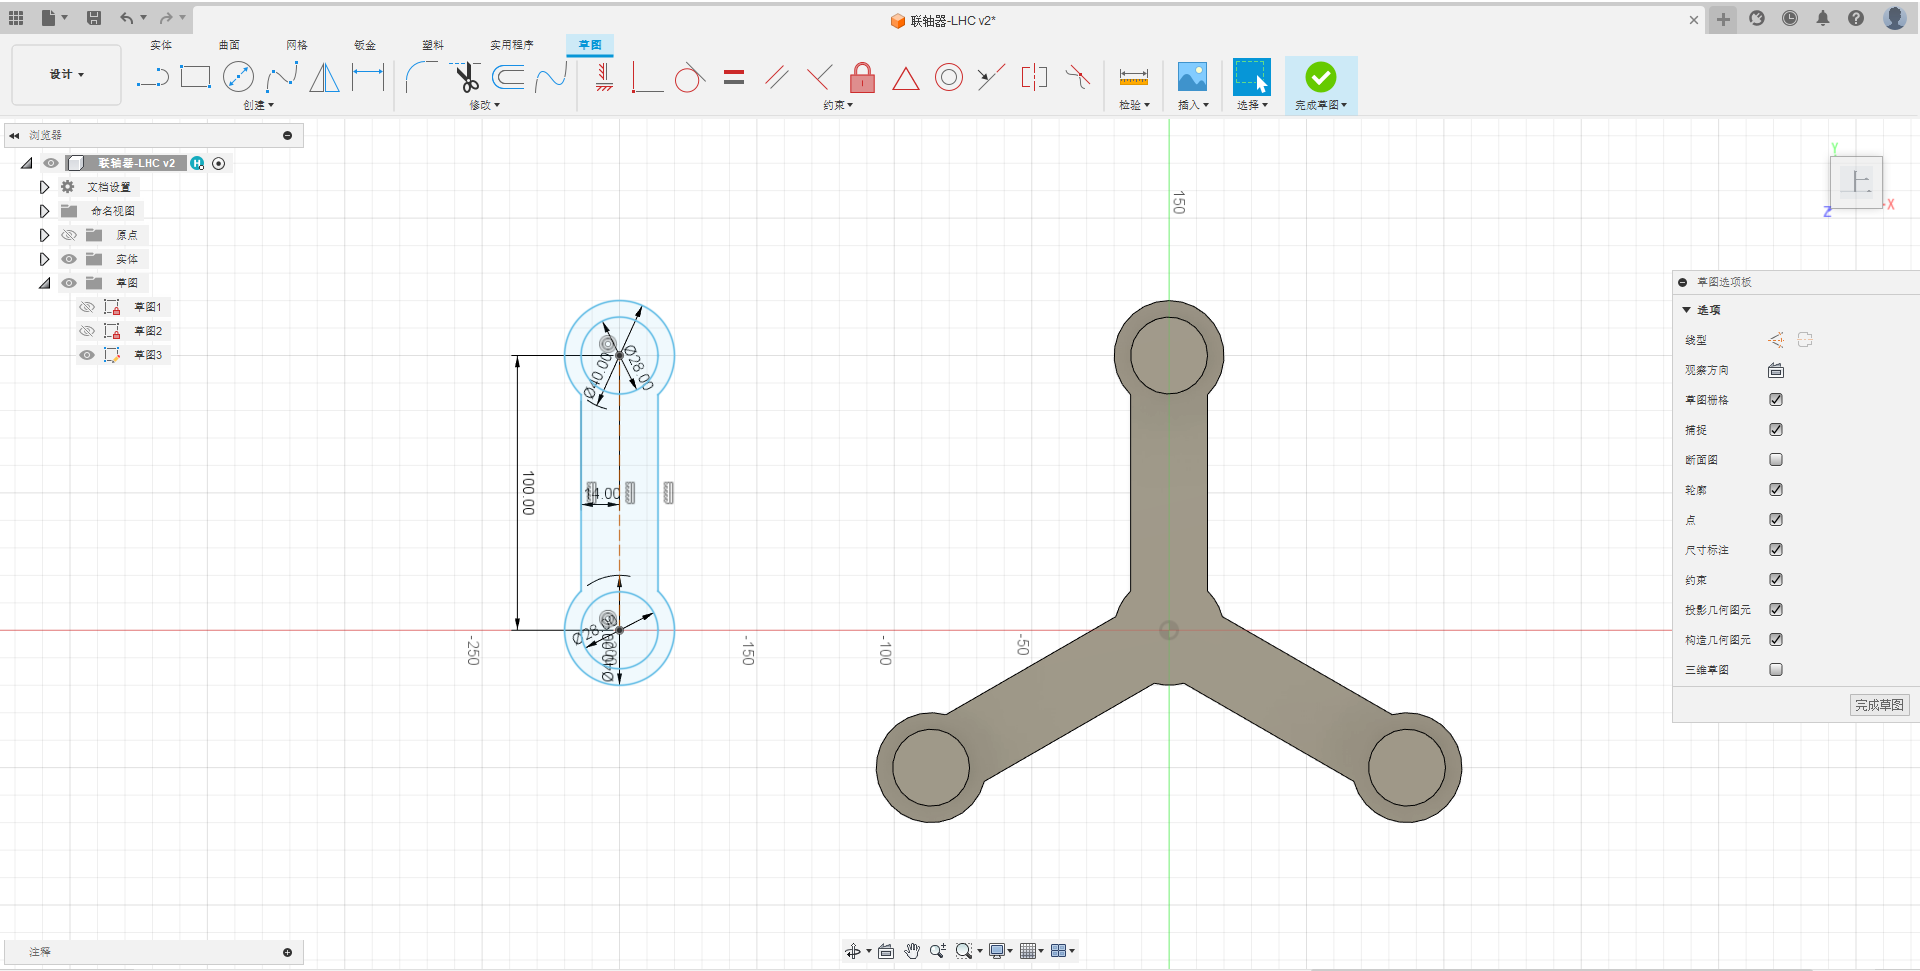
4.After extending the connecting shaft, perform a move/copy operation to obtain the desired quantity of connecting shafts as shown in the image: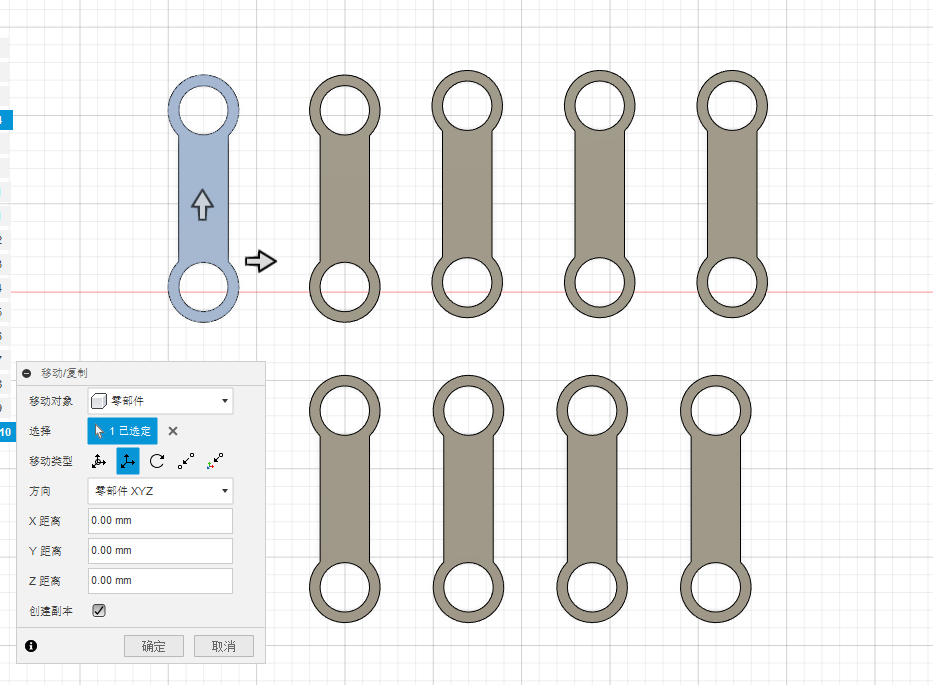
5.Select a palne on the main axis to create a sketch, then establish a secondary connecting shaft as shown in the image: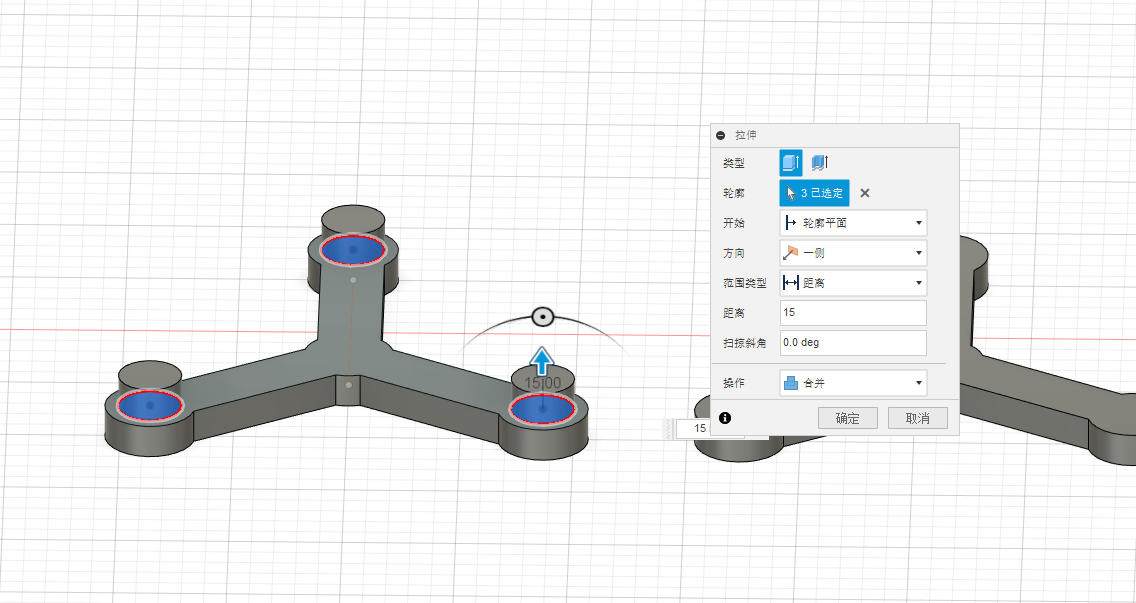
6.After repeating the above operations, you will obtain the required components as shown in the image:
7.Once you’ve converted the entities into components, assemble the various parts by selecting the center and the plane, then choose a rotational motion as shown in the image:
8.Repeat the above steps to connect all the shafts and secure the base. The assembly is now complete.
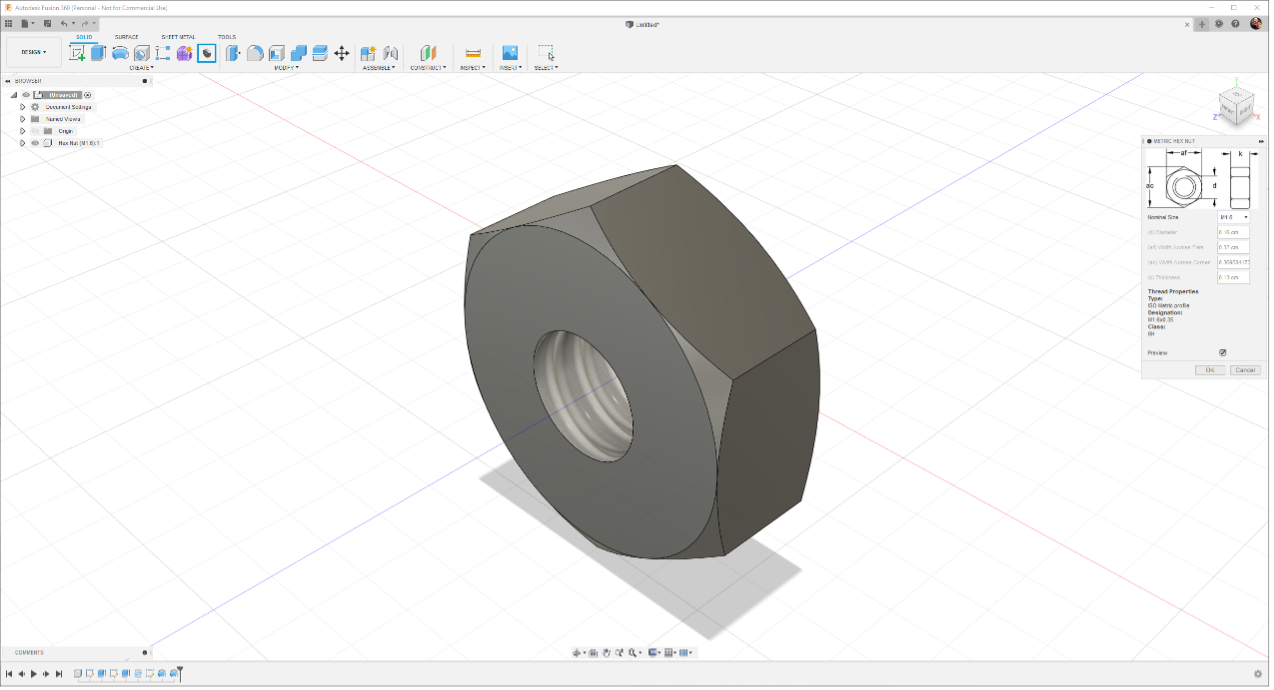
Try one plugins and used in our design
What our group tried was the Metric Hex Nut Generator plugin.
- First of all, we search for Fusion360 plugins on the AUTODESK App Store.
- We chose the Metric Hex Nut Generator plugin to try.

- Install the plug-in in the software.

- Next you can use the plug-in to make Metric Hex Nut Generator.

- And you can also set your own parameters to adjust to the desired shape.
Introduction to other modeling software.
Blender

Blender is a free and open-source 3D computer graphics software used for creating, rendering, and animating 3D content. It offers a wide range of features, including 3D modeling, material and texture creation, rendering, animation, compositing, layout, and more, making it widely used in various fields such as film production, game development, architectural visualization, scientific visualization, virtual reality, and more.
Here are some key features and functions of Blender:
3D Modeling: Blender allows users to create various 3D models, including geometries, characters, buildings, landscapes, and more. It provides multiple modeling tools, such as polygon modeling, subsurface subdivision modeling, and sculpting tools, enabling users to precisely shape their models.
Materials and Textures: Users can create materials for their models and then add textures and maps to enhance the appearance and texture of the models.
Rendering: Blender includes a powerful rendering engine for generating realistic images and animations. It supports ray tracing, real-time rendering, and various rendering effects.
Animation: Blender allows users to create animations for objects, including keyframe animation, skeletal animation, and physics simulations, making it an ideal tool for producing animated films and games.
Compositing and Special Effects: Users can perform video compositing and add special effects within Blender, making it a top-notch tool for video post-processing.
Layout and Design: Blender also features a set of layout tools for creating graphic design, animated titles, interfaces, and interactive content.
Scripting and Plugin Support: Blender is extensible, and users can write custom tools and plugins using Python scripting to meet their specific needs.
Free and Open Source: Blender is free to download and use. It is also open-source software, allowing users to view and modify its source code.
Blender’s user interface may be a bit steep for beginners, but it has a strong community and numerous online tutorials and resources to help users get started. Whether you are an artist, designer, game developer, or animator, Blender is a powerful tool to help you realize various 3D creative projects.
ZBrush
ZBrush is a professional digital sculpting and 3D modeling software developed by Pixologic. It is widely used in the fields of digital art, 3D modeling, character design, and sculpting to create highly detailed 3D models. Here are some key features and functions of ZBrush:
Digital Sculpting: One of the primary functions of ZBrush is digital sculpting, allowing artists to paint and sculpt on 3D models using fine brushes and tools. This enables users to create highly complex and detailed models, including characters, creatures, environments, and more.
High-Resolution Models: ZBrush supports very high model resolutions, which means users can add minute details such as textures, wrinkles, skin textures, etc., without losing detail.
Polygon and Subdivision Modeling: Users can create basic polygon models and then refine them with subdivision surfaces to add more detail. This workflow allows artists to make fine modifications to the model.
ZBrush Brush System: ZBrush has an extensive brush library, including standard brushes, array brushes, deform brushes, and more, allowing artists to achieve various effects and textures.
Polygon Painting and Sculpting: ZBrush allows users to paint polygons directly on the model without the need for manual topology drawing, making model creation and modification more flexible.
Facial Modeling and Character Design: ZBrush is powerful for creating character models and facial expressions, suitable for digital character design and animation production.
Real-Time Preview and Rendering: Users can perform real-time rendering in ZBrush to see how the model looks under different lighting conditions, enhancing their understanding of the final appearance.
ZRemesher and Polygon Retopology: ZBrush provides automatic retopology tools to help users generate clean polygon topology for subsequent modeling and animation.
Plugin Support: ZBrush supports plugins to extend its functionality, adding extra tools and effects.
ZBrush is a preferred tool for digital artists, game developers, visual effects professionals, and modelers, as it offers excellent sculpting and modeling tools to create high-quality 3D models and characters. While ZBrush may have a learning curve for beginners, it excels in creating complex digital art and 3D models.