Exercise 2: Arduino Basic
Learn basic Arduino input and output operations, including button detection and LED control.
Exercise Content
• Digital pin configuration (INPUT/OUTPUT)
• Pull-up and pull-down resistors
• Button debouncing
• LED brightness control with PWM
• Serial monitor for debugging
Components used: Arduino Uno, breadboard, jumper wires, push buttons, LEDs, resistors.
Assignment Content
📄 Arduino OUTPUT - Assignment Documentation
Hardware
Arduino UNO R4 WiFi
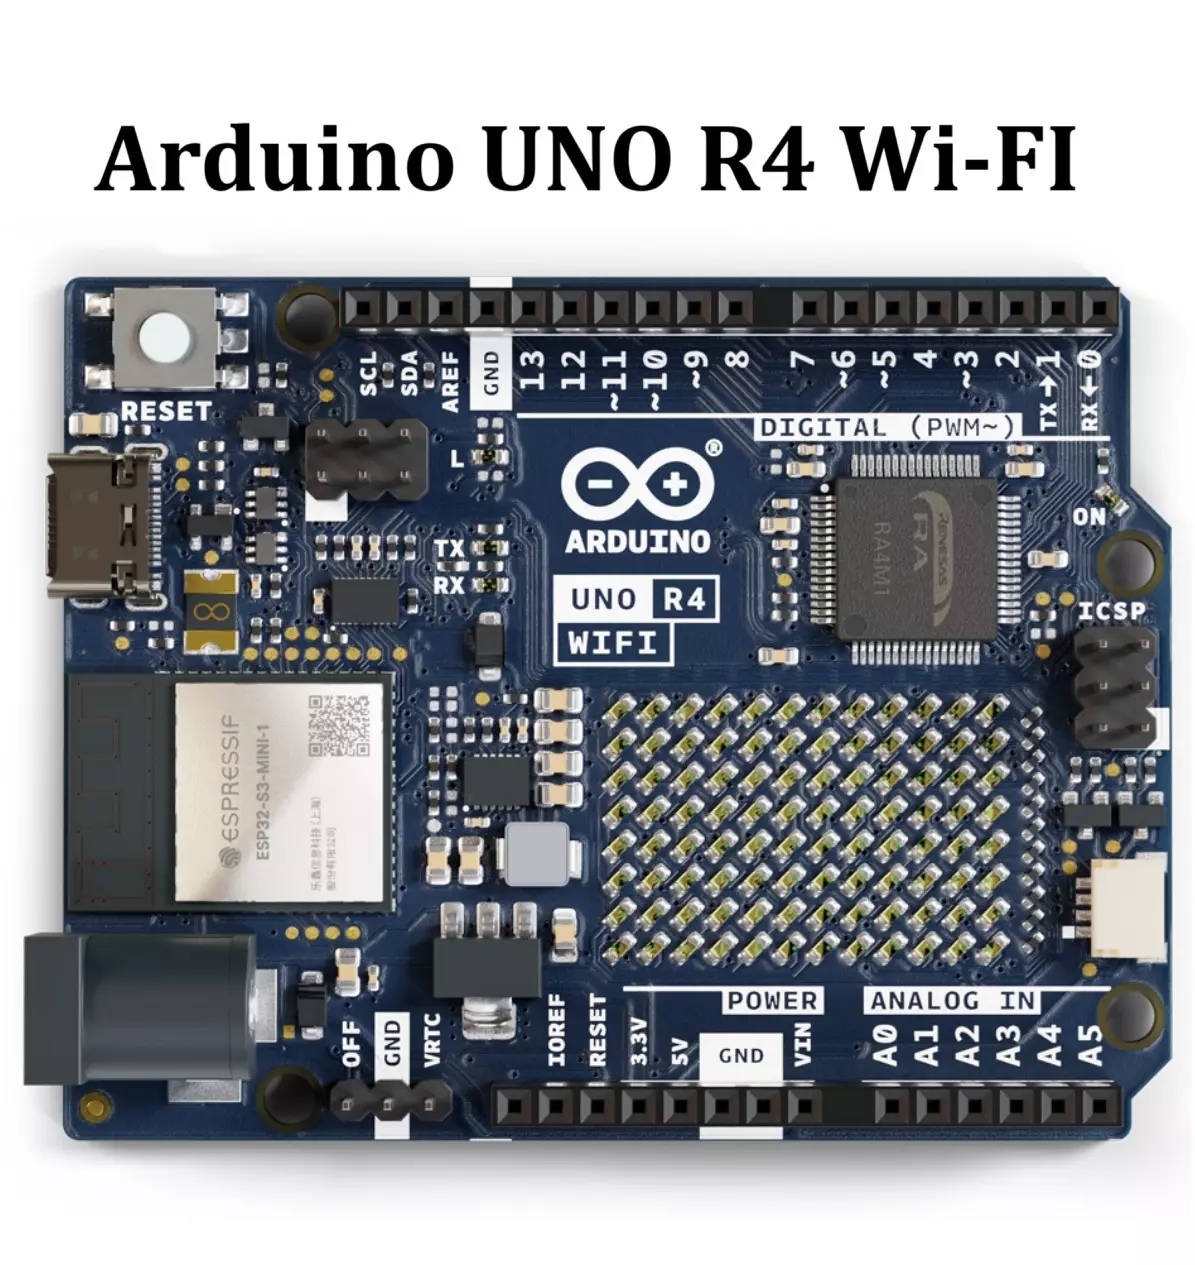
Image source: https://www.hackatronic.com/tag/arduino-uno-r4-specifications/
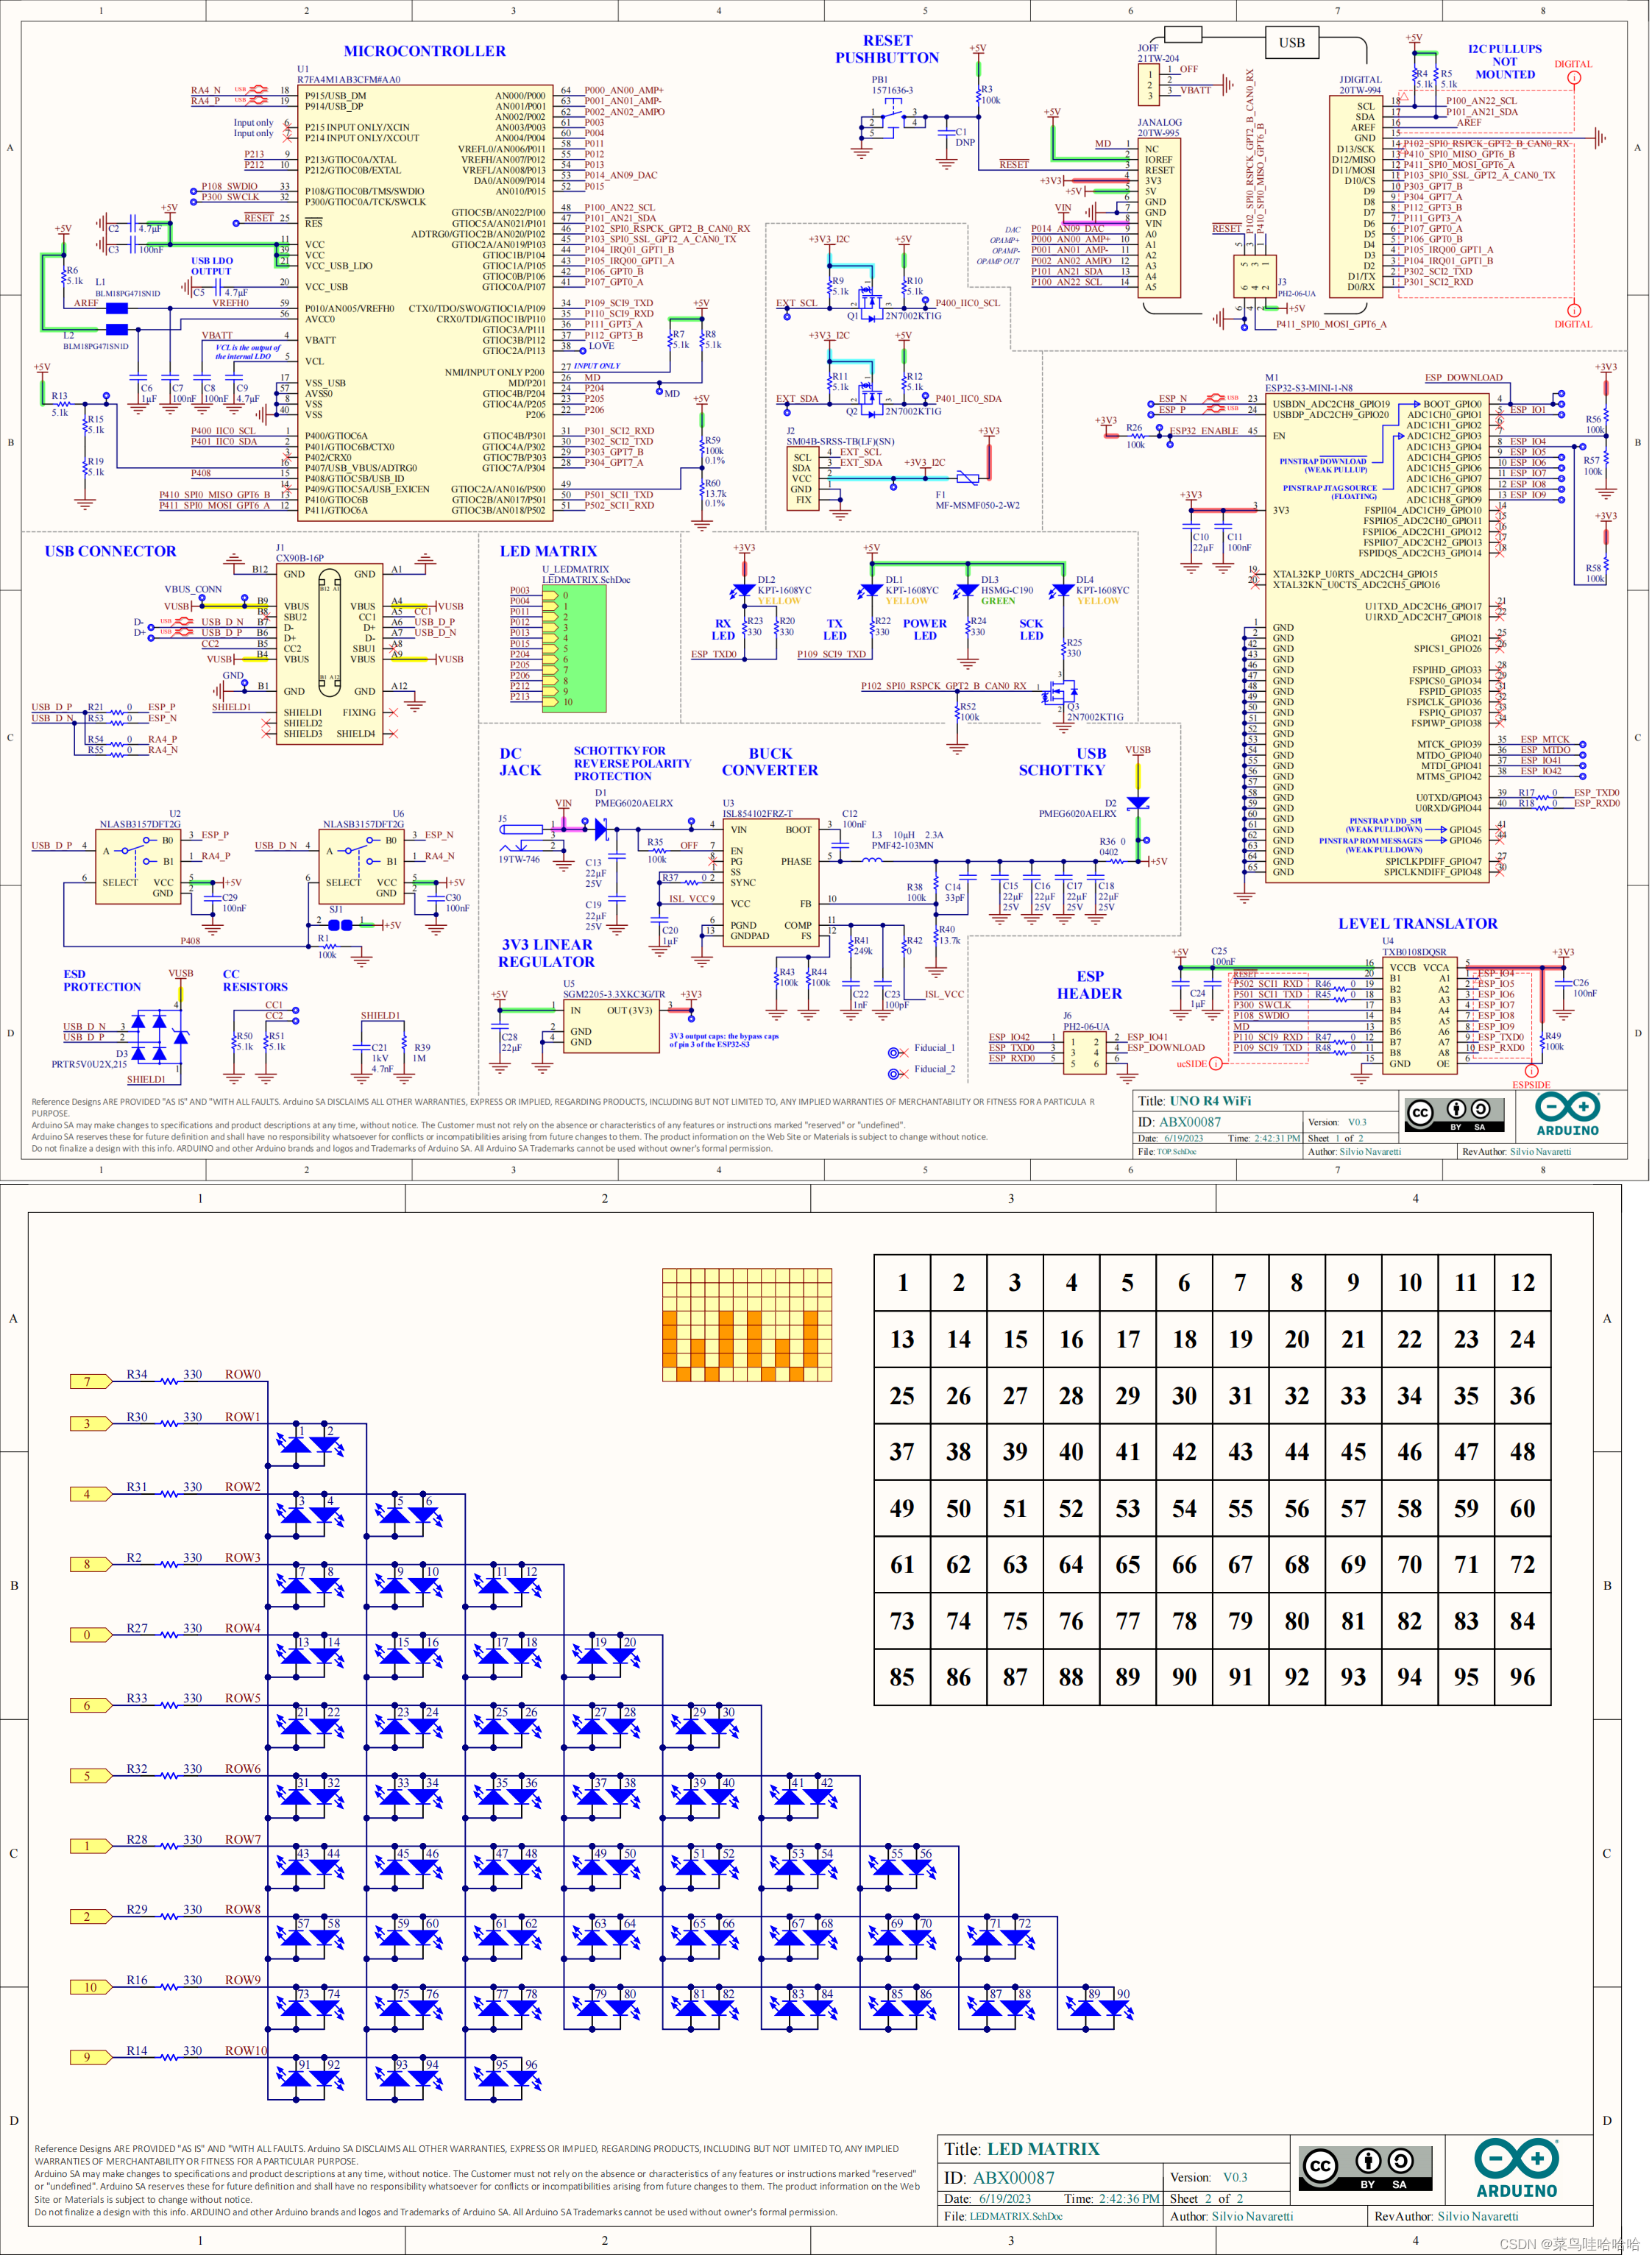
Image source: https://blog.csdn.net/avanyway/article/details/131532127
It retains the classic UNO appearance, the main controller is a Renesas RA4M1 32-bit MCU, and the board also comes with an ESP32 module, supporting Wi-Fi / Bluetooth, and there is also a 12×8 LED Matrix that is very suitable for making 'interactive signals'.
Advantage
- There are plenty of beginner resources, and the Arduino ecosystem is well-established.
- Can quickly connect sensors, buzzers, buttons, LEDs, and ultrasonic modules. Easy to get started with in the Arduino IDE.
- Comes with built-in wireless capability, making it convenient later for 'vehicle status broadcasting,' 'mobile client auxiliary reminders,' and 'remote debugging'.
Overview of the Arduino IDE

Image source: https://seeklogo.com/vector-logo/593165/arduino
1. Definition and Features
Arduino IDE is a lightweight development environment based on C/C++, mainly used for:
- Writing Arduino programs (called Sketches)
- Compiling code
- Uploading programs to development boards (such as Arduino Uno, Nano, Mega, etc.)
Its core features include:
- Simplified syntax: Encapsulates standard C/C++ (e.g., automatically generates the main function)
- Cross-platform: Supports Windows / macOS / Linux
- Open source: Both the IDE and core libraries are open source
- Rich library ecosystem: Supports a large number of third-party sensors and modules
Arduino IDE Official Website →
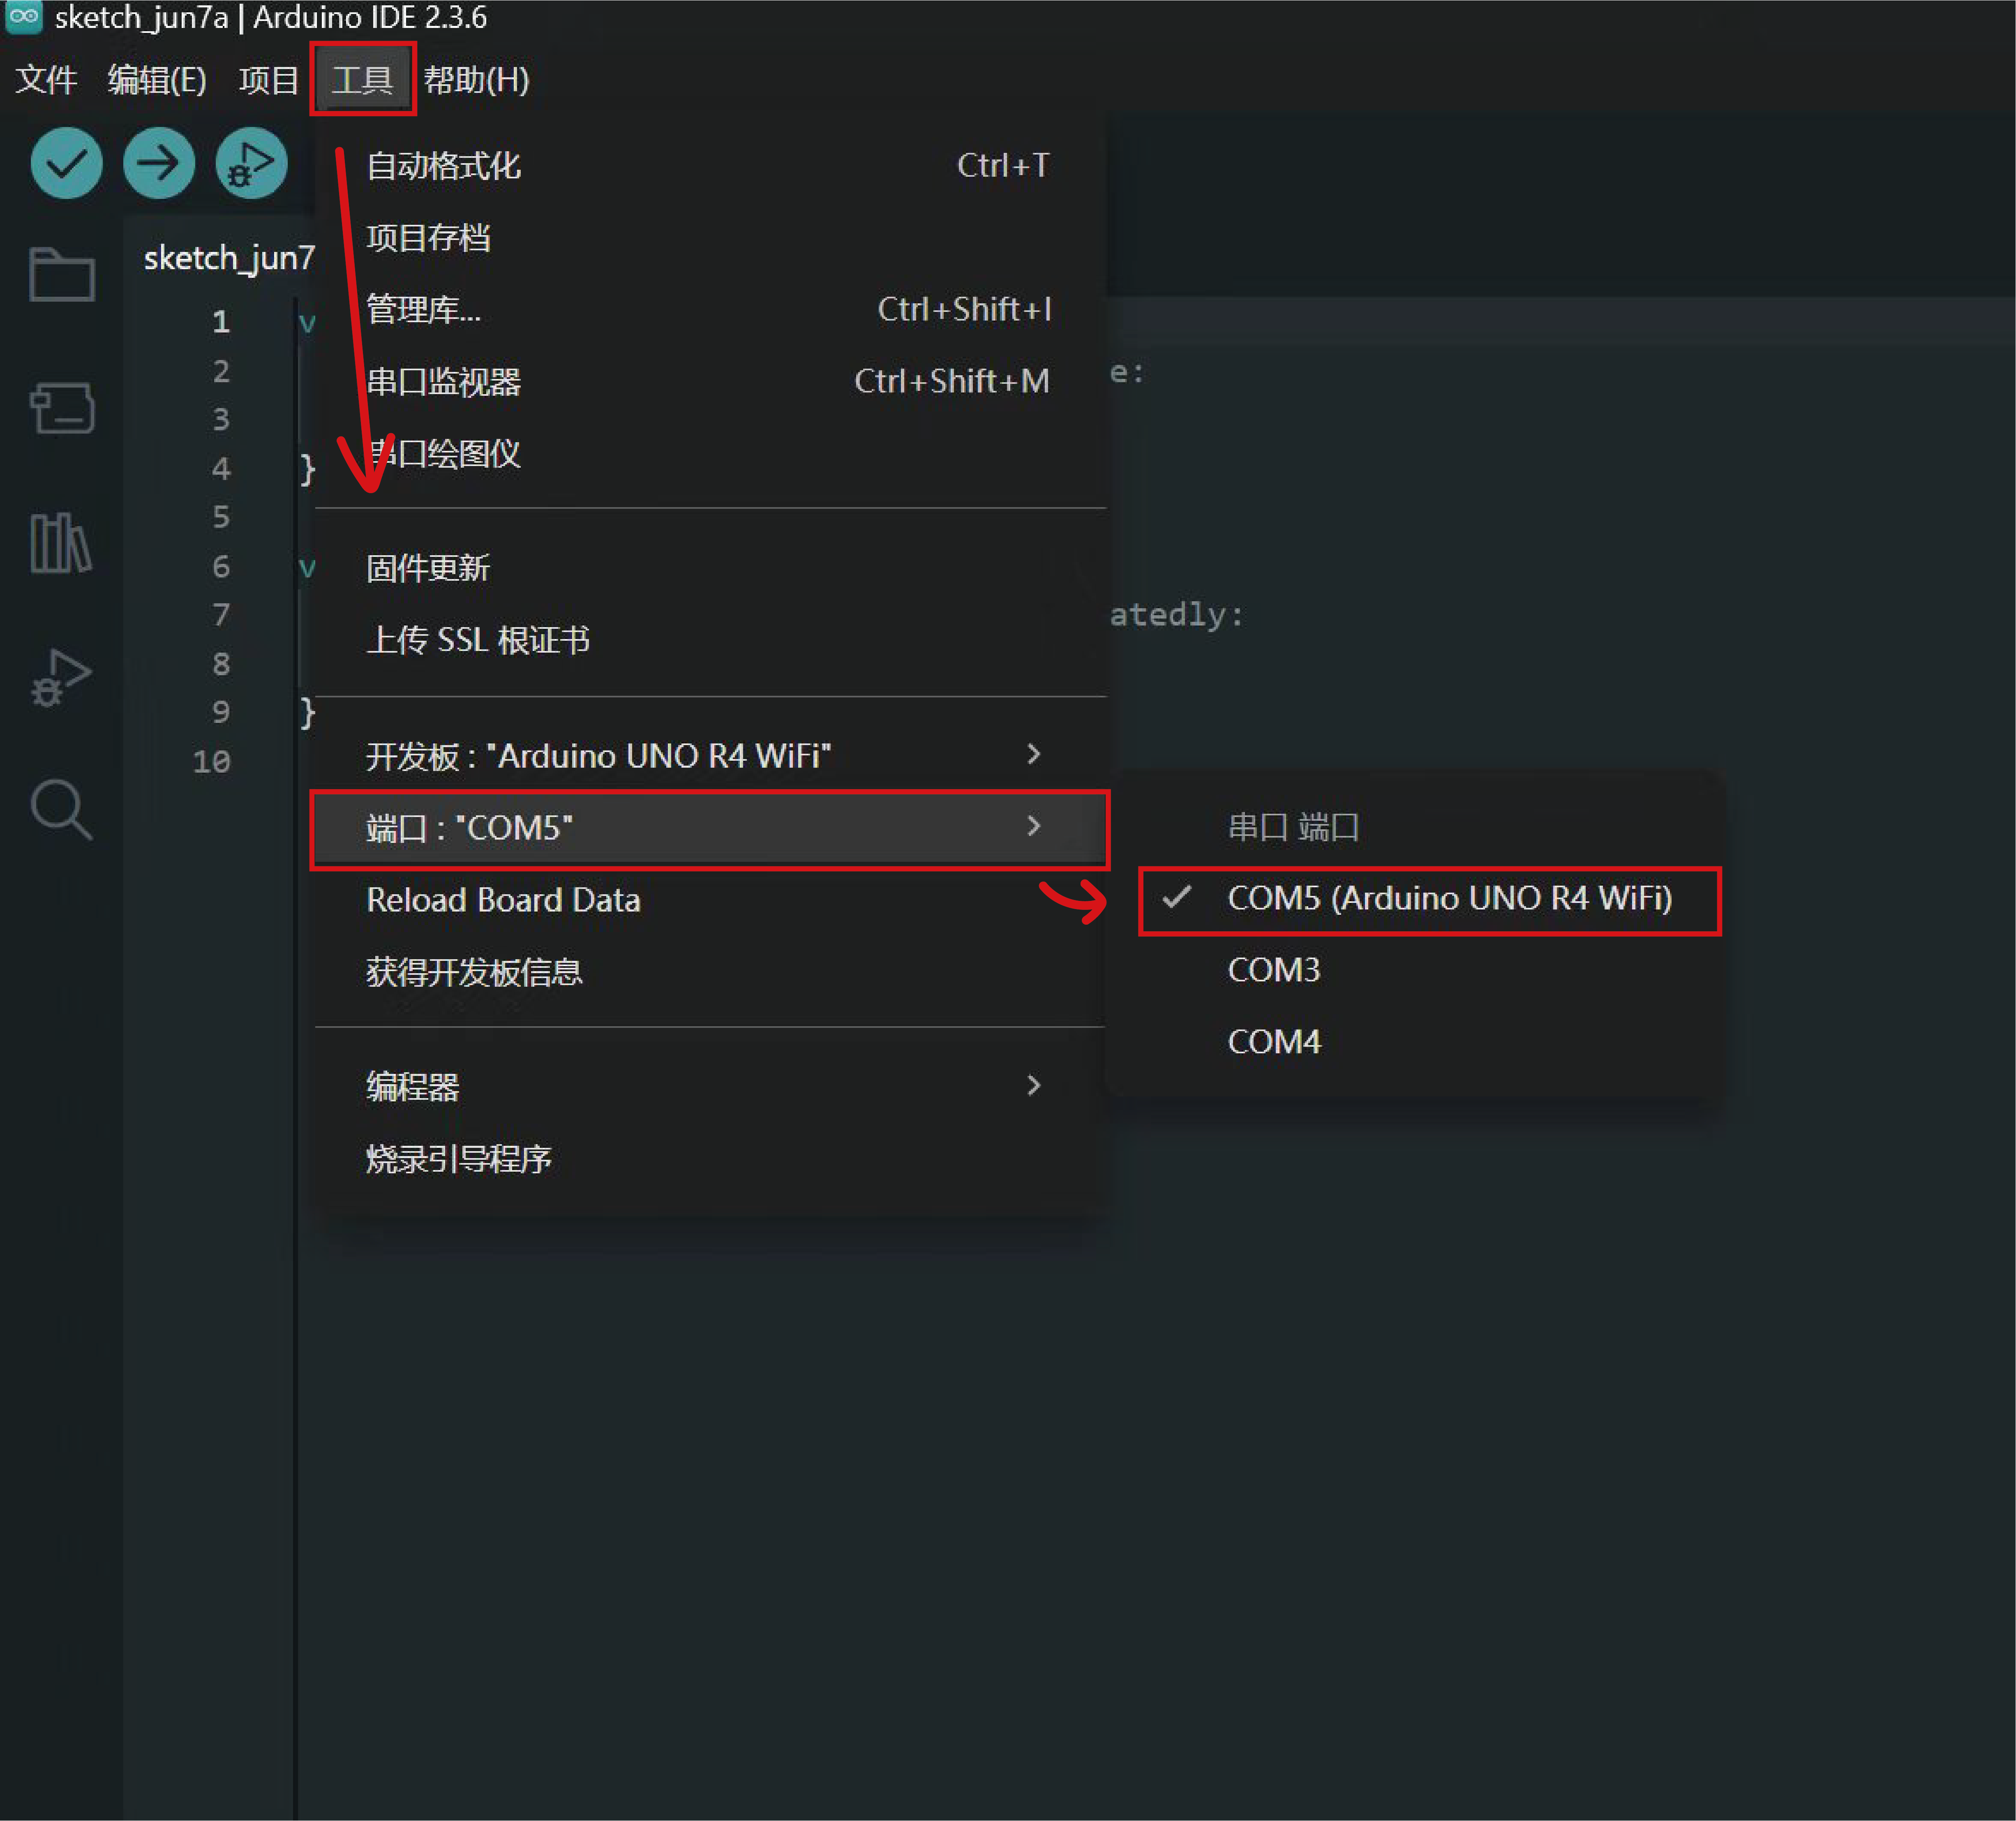
Arduino IDE Interface Diagram
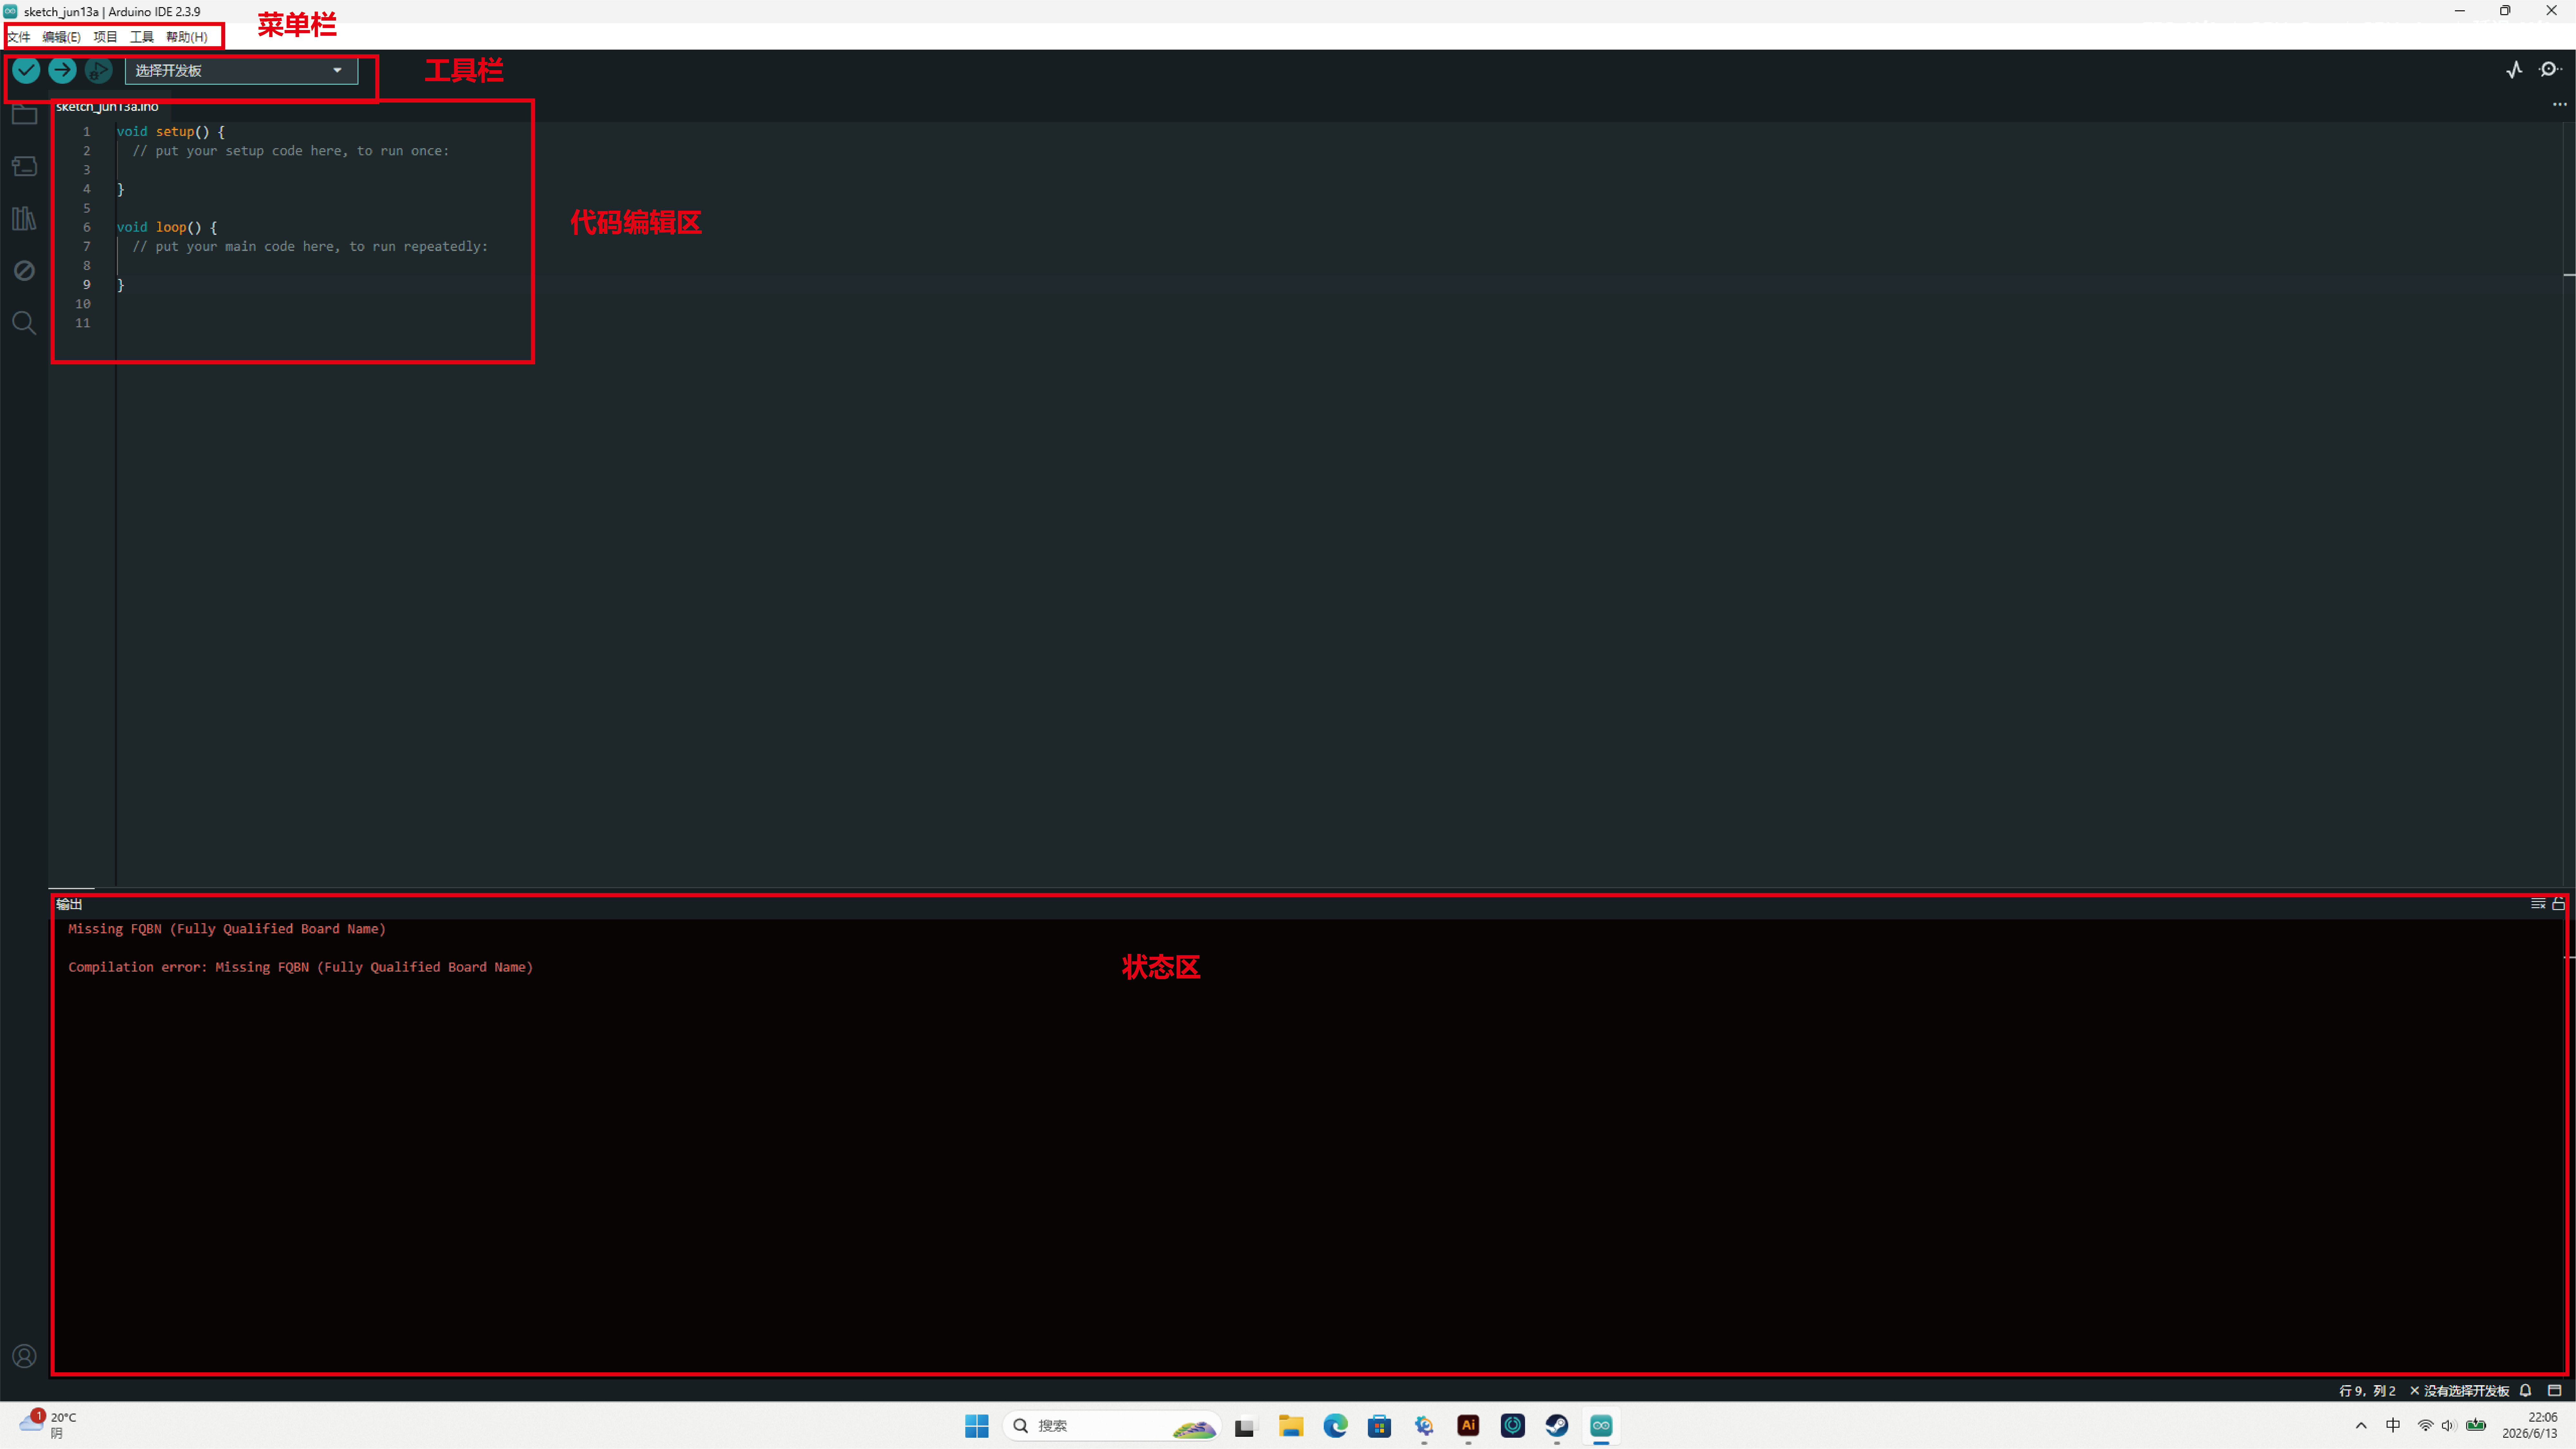
Basic flowchart for using the Arduino IDE
Write code ↓ Verify code ↓ Connect Arduino development board ↓ Select development board model ↓ Select serial port ↓ Upload program ↓ Observe running effect
Must be set before use
1. Development board model
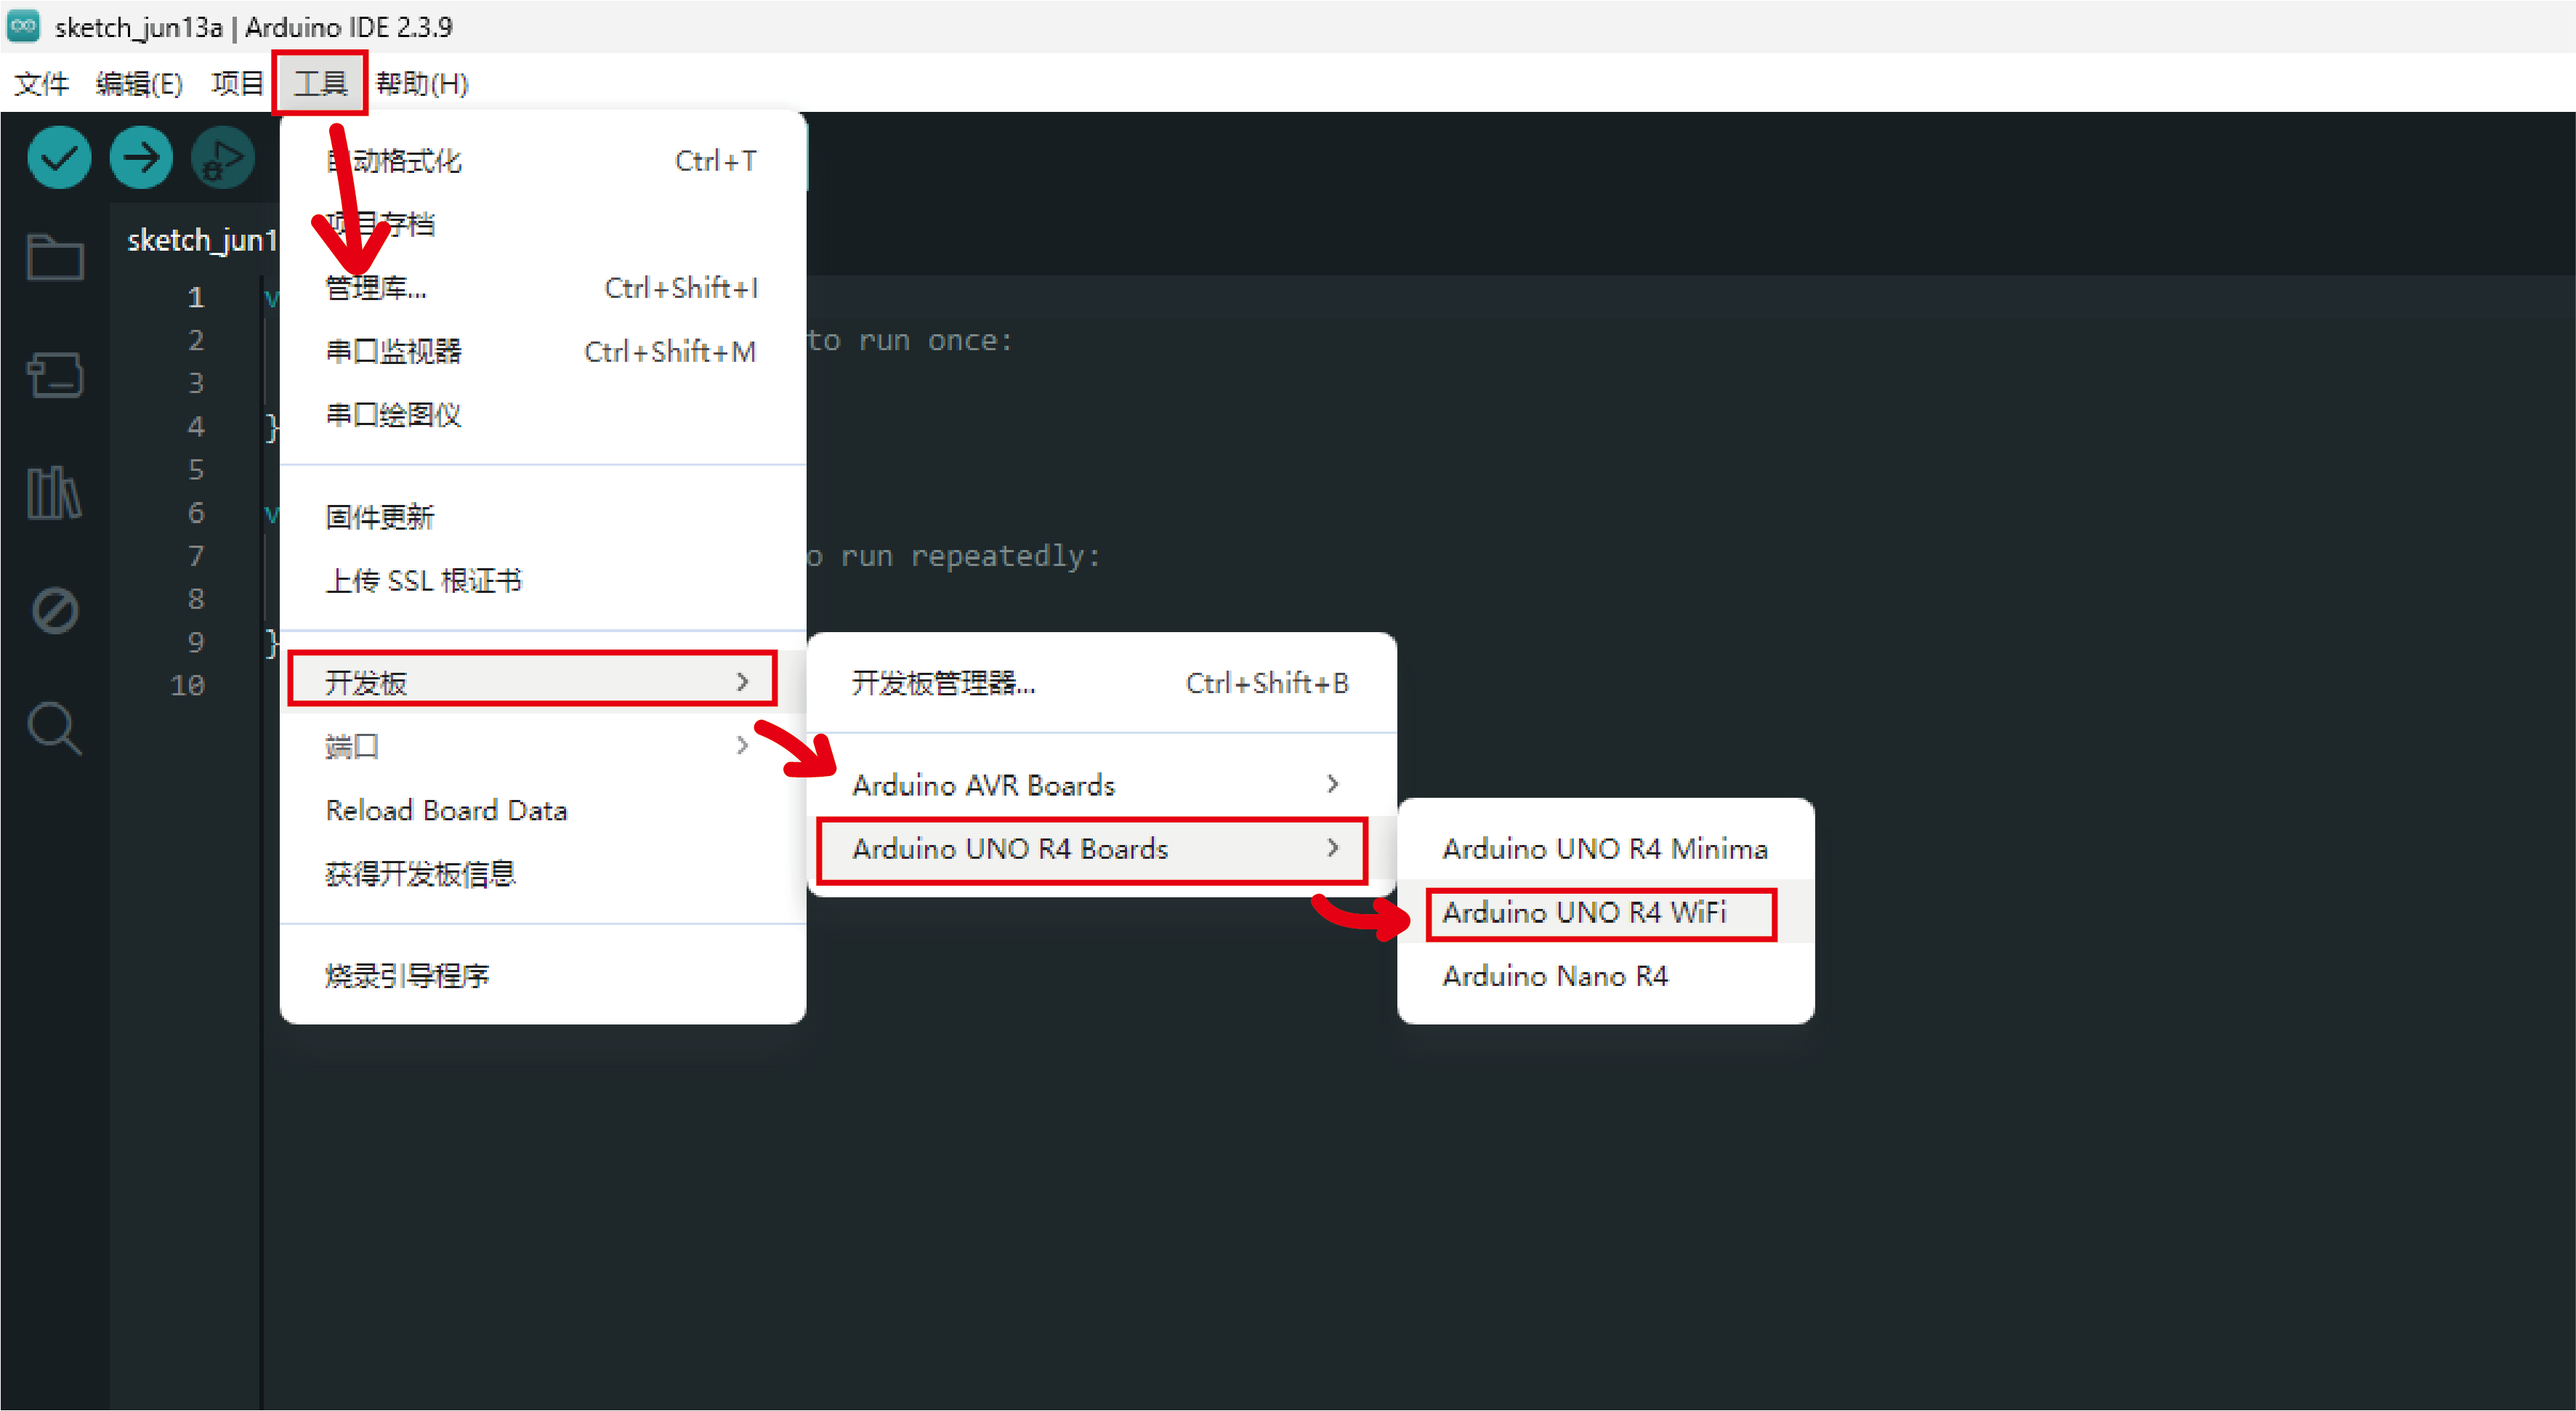
2. Serial port
Arduino Coding Methods
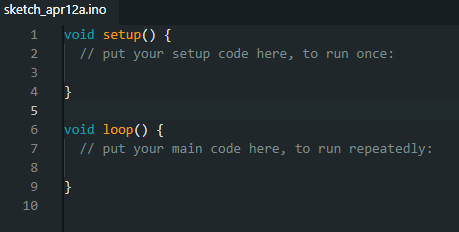
Almost every program has two core functions:
                                    void setup() {

                                        // Runs only once here

                                    }


                                    void loop() {

                                        // Loops repeatedly here

                                    }
What do they mean respectively?
1. setup()
- Execute first after powering on
- Execute only once
- Commonly used for 'initialization'
- For example: Set a certain pin as output, Open the serial port
2. loop()
- Repeatedly executing
- is the main body of the program
- For example: Turn on the light → Wait for one second → Turn off the light → Wait for another second → Repeat continuously
Program execution process
Power on ↓ setup() executes once ↓ loop() 1st time ↓ loop() 2nd time ↓ loop() 3rd time ↓ keeps looping...
Hardware connection
1. Basic Principles of Arduino Hardware Connection:
When performing hardware connections, the following principles need to be followed:
- First, check the working voltage of the module to confirm whether it is 5V or 3.3V;
- First connect the power and ground lines to ensure all modules share the same ground;
- Then connect the signal lines, and connect them to digital or analog pins according to the signal type;
- Finally, check whether the connections are correct to avoid short circuits or reversing connections.
2. Common Connection Objects
The following electronic component images are all from https://www.taobao.com/
LED lights:WS2812 LED
We used a total of 60 LED light beads in the WS2812 light strip for our final assignment
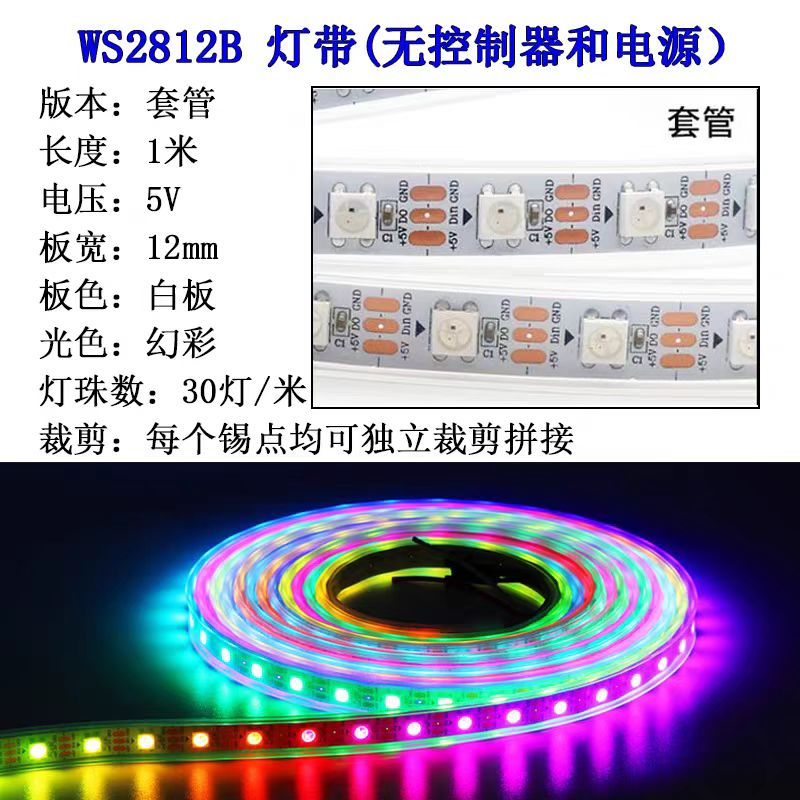
Image source: https://e.tb.cn/h.RtR1RQcC6L2Wota?tk=L39wgR5cKYN
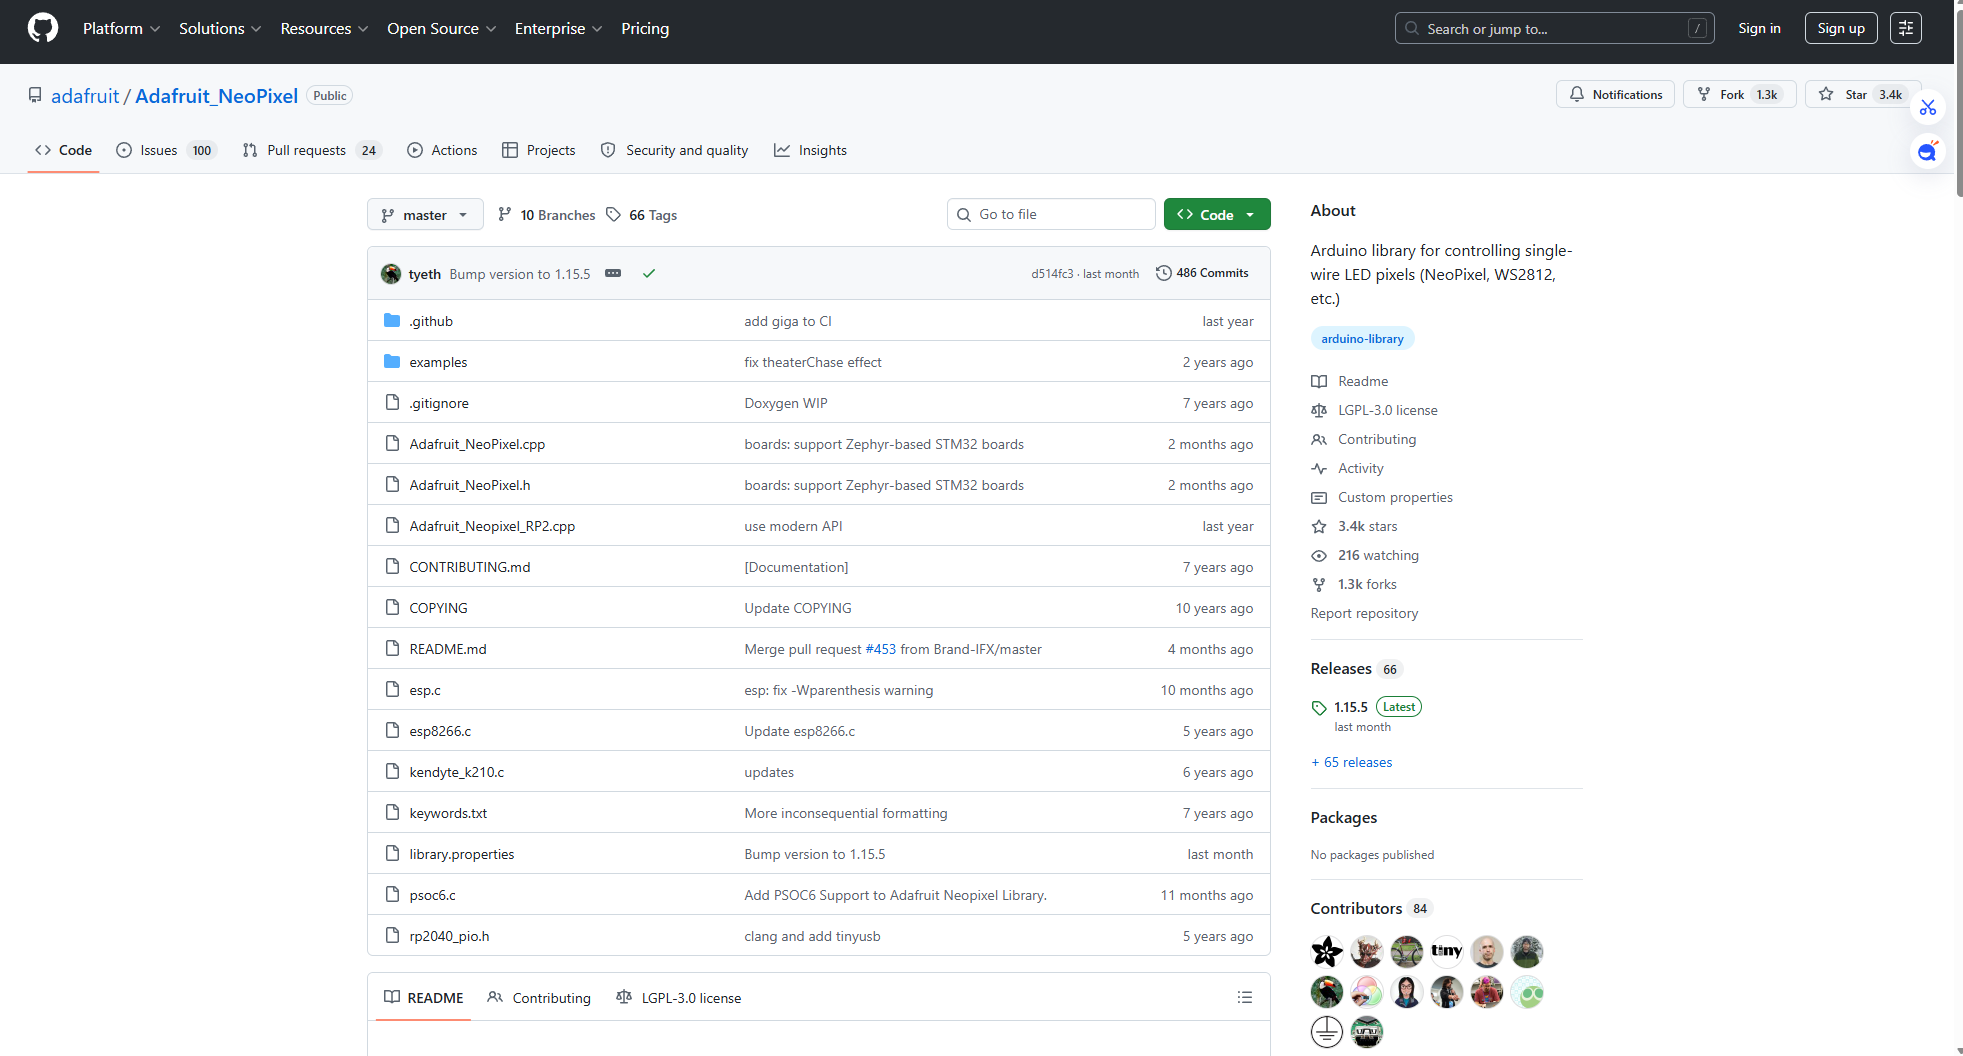
The runtime library used for WS2812 LED strip:adafruit/Adafruit_NeoPixel
Source link:https://github.com/adafruit/Adafruit_NeoPixel
Resistors
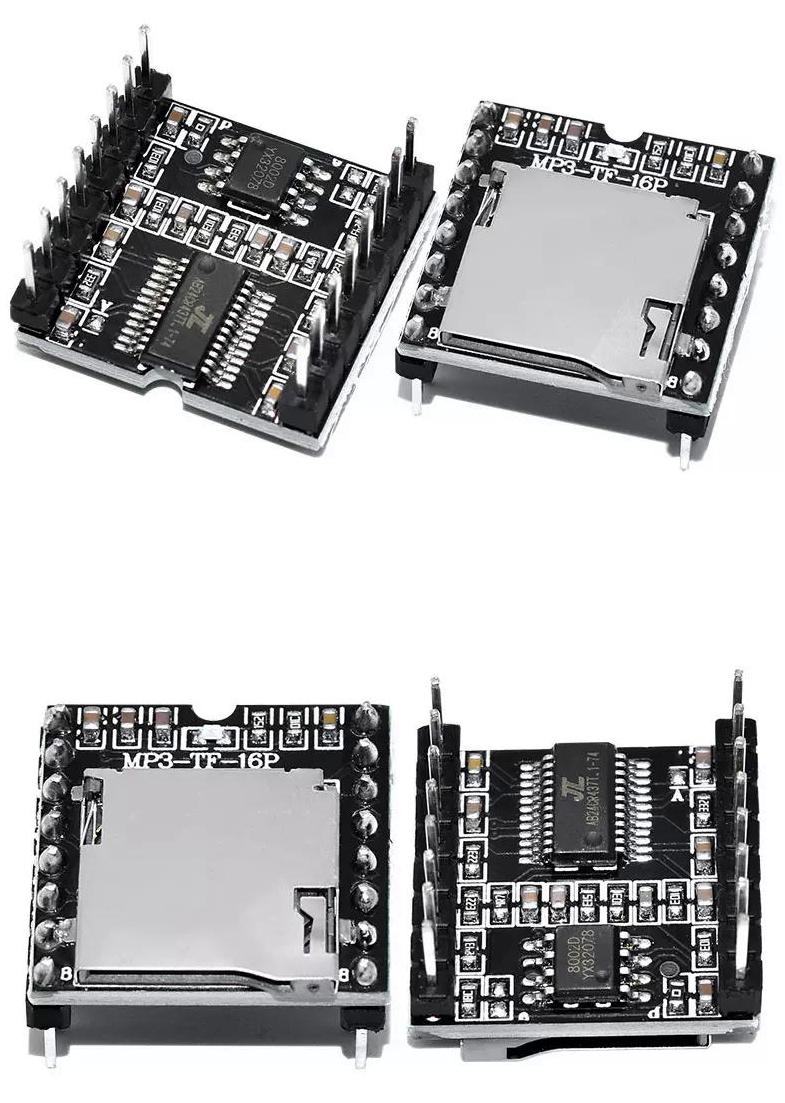
Image source: https://e.tb.cn/h.RsYsCDOQt5diZ1G?tk=Hg6hgRUcnSk
Buttons
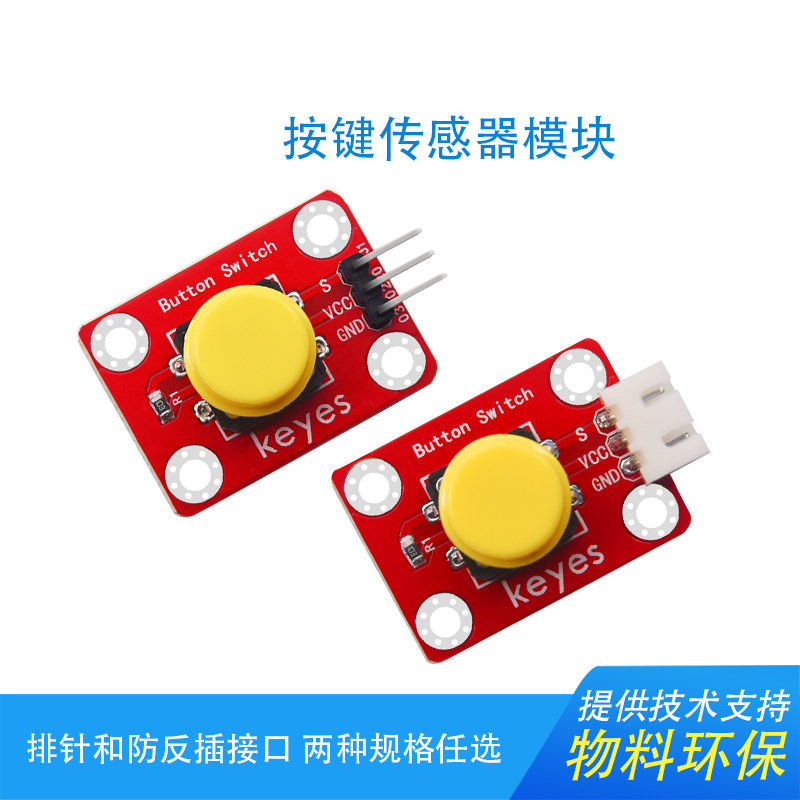
Image source: https://e.tb.cn/h.RIUAzRwSCXgIsE8?tk=SfjxgR5taDx
Buzzers
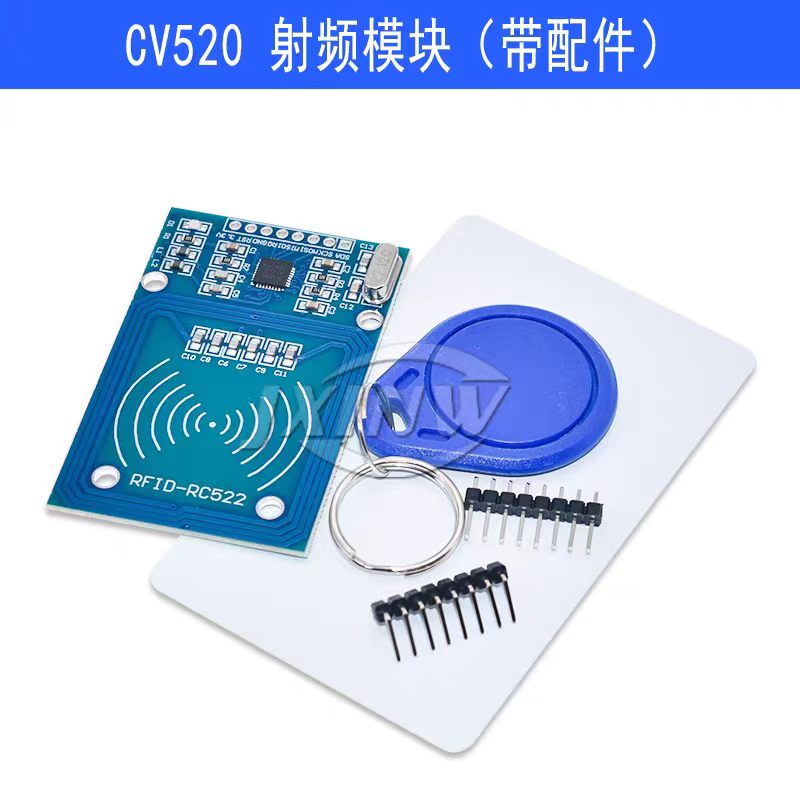
Image source: https://e.tb.cn/h.Rs1oLr8VHVJbft8?tk=m7MkgR5ZoRj
Ultrasonic modules
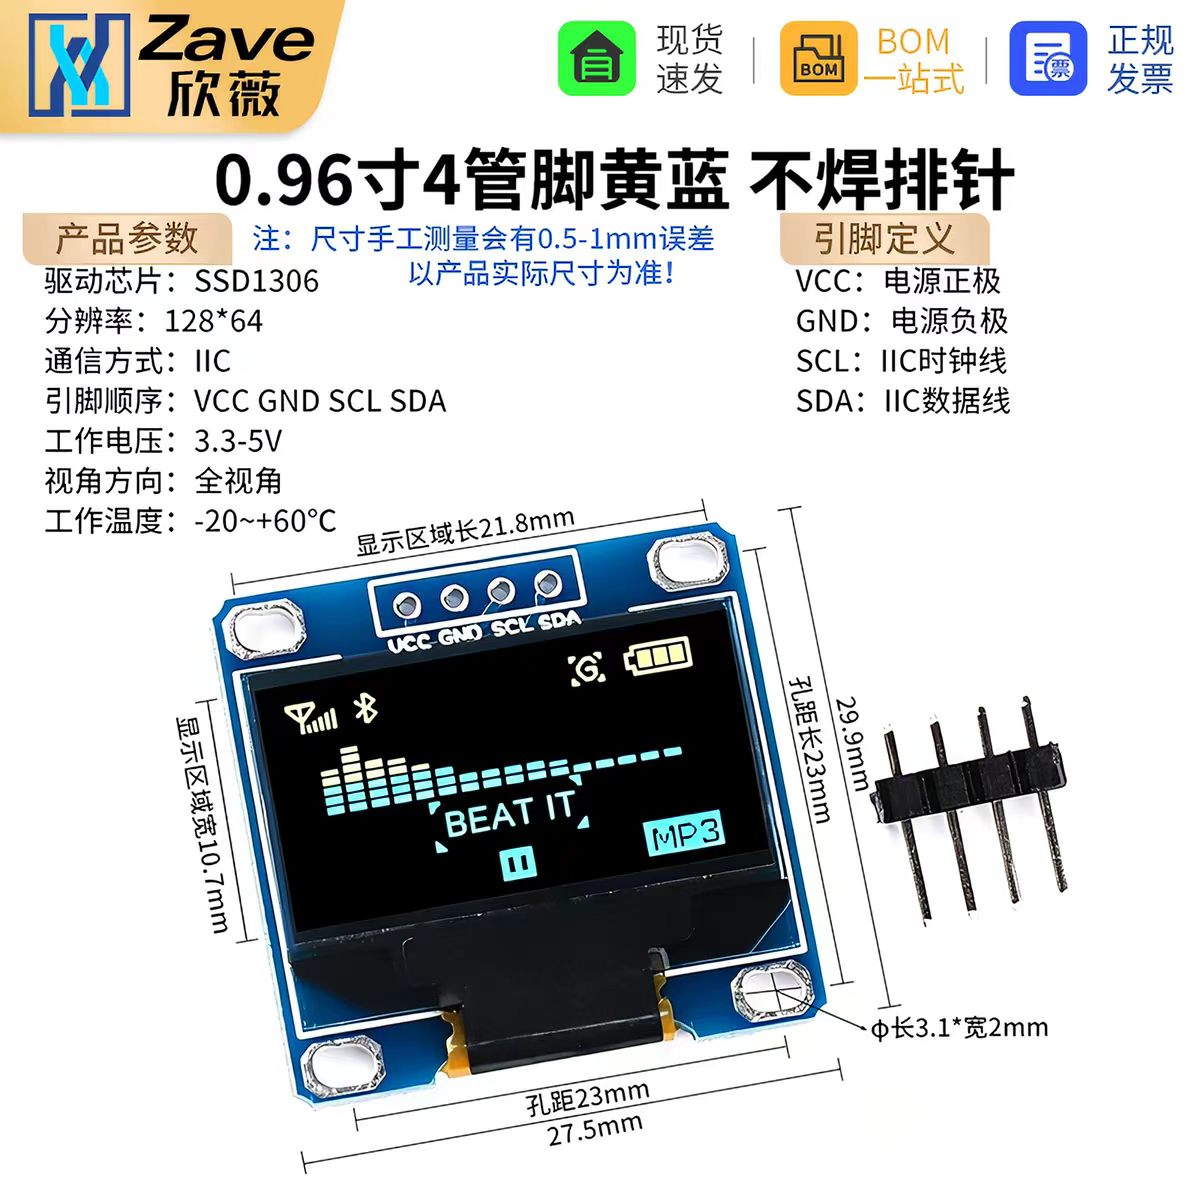
Image source: https://e.tb.cn/h.Rs1oLr8VHVJbft8?tk=m7MkgR5ZoRj
Running an example project for Arduino IDE
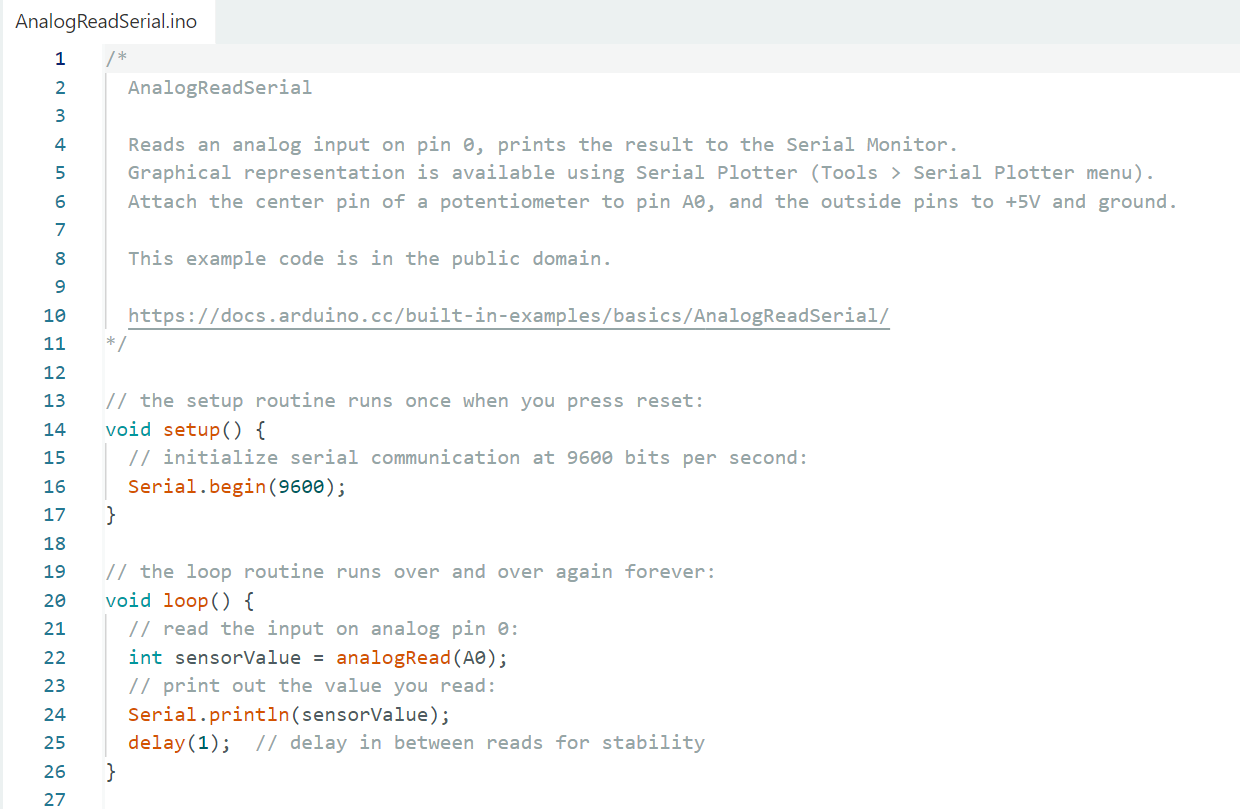
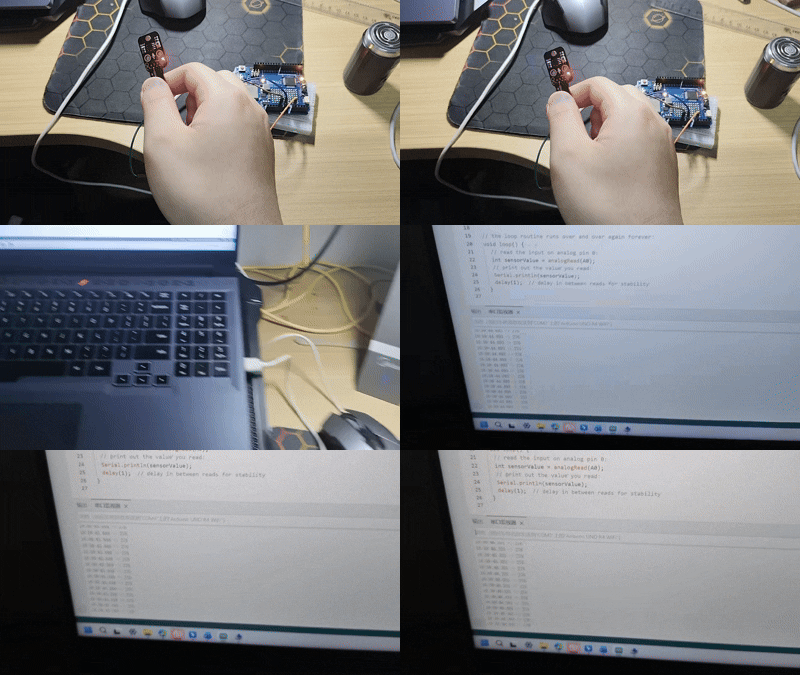
Example project: AnalogReadSerial
Code
Actual operation display
A. Autoware
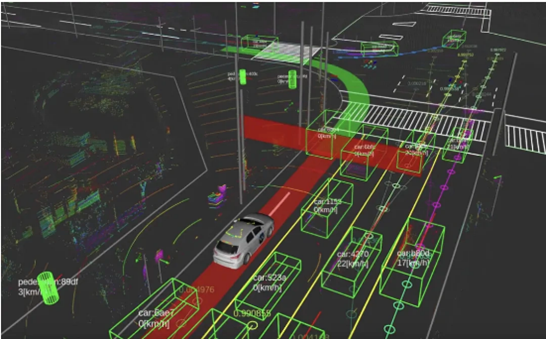
Autoware is currently one of the most representative open-source autonomous driving software stacks, based on ROS, and its goal is a software system for autonomous vehicles. Both the official site and GitHub clearly position it as an open-source project for autonomous driving. The repository currently uses the Apache-2.0 license.
Advantages:
- The main autonomous driving link is complete and has the highest reference value.
- The community is mature, and the level of engineering is much higher than that of typical student projects.
- Suitable for your reference 'Where does vehicle status come from': Perception, Localization, Planning, Control
Disadvantage:
- Too big and too heavy, not suitable for you to use directly for Arduino beginners
- It leans more towards 'whether the car can drive,' rather than specifically addressing 'whether elderly or special groups can understand the car's intentions.'
Inspiration
Refer to its 'vehicle status interface' and then translate these statuses into concise, perceptible external signals
B. Autonomous Vehicle eHMI Prototype
https://www.mdpi.com/1424-8220/21/9/2912
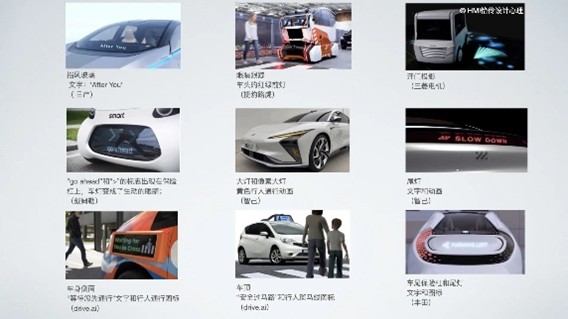
This GitHub project explicitly states that it is about external Human-Machine Interfaces (eHMIs) for autonomous vehicle-to-pedestrian communication, that is, 'external human-machine interfaces for communication between autonomous vehicles and pedestrians'
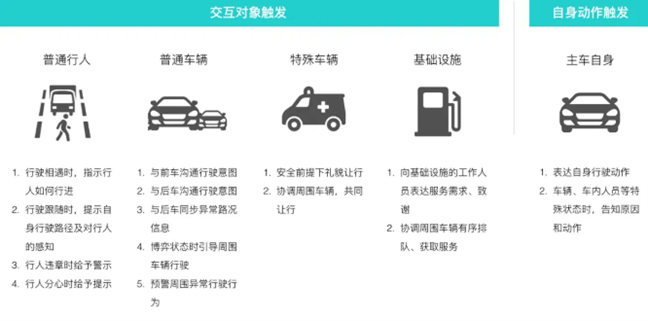
Advantages:
- Directly study 'how to express intentions outside the car'
- It is suitable to first conduct interface semantic verification, such as which is easier to understand: text, color, arrows, or animations.
Disadvantage:
- More like an interactive prototype or simulation, not a mature hardware system
- Multimodal adaptation for the elderly, visually impaired, and hearing-impaired groups is not obvious enough
Inspiration:
- High-contrast large icons
- Short text
- Rhythmic lighting
- Buzzer/voice
- Close-range vibration alert
C. Harmoware-HMI
https://github.com/Harmoware/Harmoware-HMI
This project leans more towards 'human-computer interaction in autonomous driving,' including voice interaction, nod/shake confirmation, speed voice control, etc. It is focused on in-car scenarios, but it can give you strong inspiration for 'user-friendly interaction for special groups'.
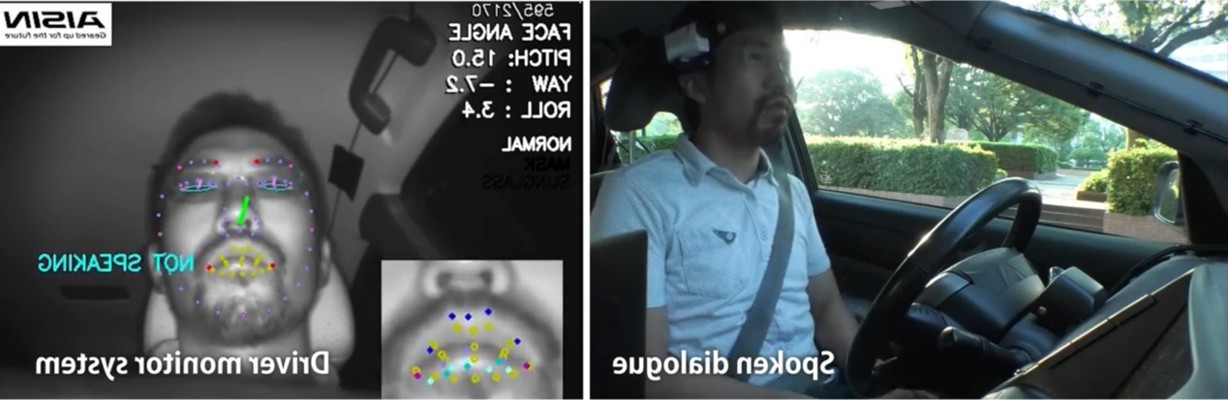
Advantages:
- Clearly emphasize human-computer interaction, not just algorithms
- Strong multimodal interaction ideas, suitable for reference in elderly scenarios
Disadvantage:
- Biased towards in-vehicle HMI, not the main scenario for communication between pedestrians and vehicles outside the car
- Design of external signal lights and external prompts provides limited help
Inspiration:
- You can learn 'do not rely on only one channel for a signal'; it's best to use both visual and auditory channels.
- For the elderly, redundant cues are usually more reliable than single cues.
D. Smart Cane
The Smart-cane project on GitHub is aimed at visually impaired and elderly users. Its core approach is to use multiple ultrasonic sensors and buzzers for real-time obstacle alerts. The project description explicitly states that its target users are visually impaired and elderly people, and it plans to further add features such as Bluetooth, GPS, and vibration feedback.


Advantages:
- Very close to 'special group assisted interaction'
- Low cost, easy to replicate
- It is suitable to first study 'whether the prompt method is clear and whether it is overloaded'
Disadvantage:
- It is mainly for single-person close-range obstacle avoidance, not vehicle-person interaction.
- The medium is somewhat single in type, mainly focused on sound
- Limited capability in noisy environments and complex road scenarios
Inspiration:
- You can refer to the 'multimodal alert' approach: sound, vibration, light
- You can refer to 'simplified interactions for elderly users': few and clear, do not give too many signals at the same time.
E. OpenHapticGlove
https://github.com/vidklopcic/openhapticglove
OpenHapticGlove is an open-source haptic glove designed for navigation for the visually impaired, using ToF distance sensing and vibration feedback. It is not an in-vehicle system, but it is well suited for your research on 'non-visual interaction.' This approach is valuable for the elderly, low-vision users, or users in bright light environments.
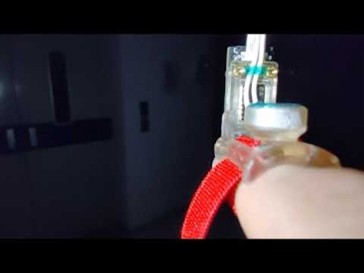
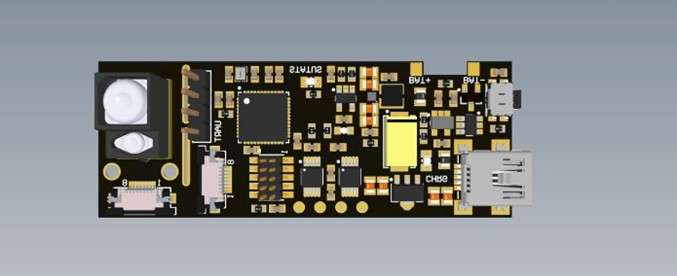
Advantages:
- Haptic feedback is naturally suitable for people who have difficulty looking at screens or lights.
- More private than a simple buzzer, and not easily drowned out by environmental noise
- Very suitable to complement visual signals outside the vehicle
Disadvantage:
- Users need to wear the device
- Cost, comfort, and range all need to be considered additionally
- May require training for first-time users
Inspiration:
- It doesn't necessarily have to only make the 'car send signal'; it can also design a 'human-end receiver'.
- It's best not to bet on a single channel for special group projects; tactile sense is worth preserving.
F. Smartpole-VR-AWSIM
https://github.com/tlab-wide/Smartpole-VR-AWSIM
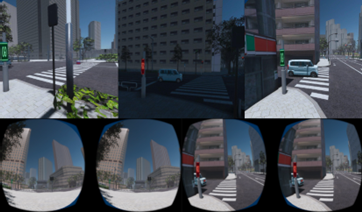
This project combines AWSIM/Autoware/ROS 2/Unity/VR to simulate the impact of infrastructure eHMI (external human-machine interface) on pedestrians, aiming to assess the safety, clarity, and timing of signals. Its research path is very close to your 'autonomous driving interactive signaling system,' except that it is more oriented towards a simulation evaluation platform.
Advantages
- Very close to the autonomous driving interaction signal research scenario
- Able to quickly test different signal designs without actually being on the road
- Can conduct VR human factors experiments, suitable for comparing 'GO/STOP/path projection' and other schemes
Disadvantage:
- The tech stack is heavier, and the threshold is much higher than Arduino.
- More suitable for 'design verification' rather than 'rapid hardware prototyping'
- High requirements for the team's software/simulation capabilities
Inspiration:
It can be divided into two stages:
- The first stage: Arduino for low-cost interactive prototyping;
- The second stage: CARLA/AWSIM/Unity for human factor validation and scenario simulation
Introduction and Legal Explanation of MIT License
1. Basic Definition
The MIT License is a permissive open source license derived from the Massachusetts Institute of Technology (MIT), and is one of the shortest, most popular, and business friendly open source licenses in the world.

2. Core authorization (what can be done)
- Free use: Personal, internal, and commercial closed source projects can all be used
- Free modification: freely modify the source code
- Free distribution: publish, copy, sublicense, sell
- Free closed source: The modified version can be closed source without the need for open-source derivative code
3. Sole legal obligation
The original copyright statement and full MIT license must be retained in all copies and important parts of the software.
4. Full text of the standard (in English)
Copyright (c) <year> <copyright holder>

Permission is hereby granted, free of charge, to any person obtaining a copy
of this software and associated documentation files (the "Software"), to deal
in the Software without restriction, including without limitation the rights
to use, copy, modify, merge, publish, distribute, sublicense, and/or sell
copies of the Software, and to permit persons to whom the Software is
furnished to do so, subject to the following conditions:

The above copyright notice and this permission notice shall be included in all
copies or substantial portions of the Software.

THE SOFTWARE IS PROVIDED "AS IS", WITHOUT WARRANTY OF ANY KIND, EXPRESS OR
IMPLIED, INCLUDING BUT NOT LIMITED TO THE WARRANTIES OF MERCHANTABILITY,
FITNESS FOR A PARTICULAR PURPOSE AND NONINFRINGEMENT. IN NO EVENT SHALL THE
AUTHORS OR COPYRIGHT HOLDERS BE LIABLE FOR ANY CLAIM, DAMAGES OR OTHER
LIABILITY, WHETHER IN AN ACTION OF CONTRACT, TORT OR OTHERWISE, ARISING FROM,
OUT OF OR IN CONNECTION WITH THE SOFTWARE OR THE USE OR OTHER DEALINGS IN THE
SOFTWARE.
5. Key Legal Points
- No 'Copyleft' (contagious): Unlike GPL, which forces derivative works to be open sourced
- Strong disclaimer: 'AS IS provided as is', the author assumes no responsibility for any use risks, defects, or losses
- Patent ambiguity: No clear patent authorization granted (compared to Apache 2.0)
- Highly compatible: can be mixed with most protocol codes such as GPL