a tool similar with processing--p5.js
P5.js is a creative programming framework based on JavaScript, aimed at making programming more accessible and interesting.
It is based on the ideas and syntax of Processing and provides a simple and easy-to-use API, allowing users to easily create interactive works, visual arts, and data visualization projects.
Through p5.js, users can use JavaScript language to draw graphics, create animations, process user input, etc., without the need to learn complex graphics libraries or computer graphics knowledge.
P5.js emphasizes the core idea of creative programming, encouraging users to express their ideas and creativity through programming, thereby promoting the process of learning and exploration.P5.js provides rich documentation and examples to help users quickly get started and start creating their own projects. It is widely used in various fields such as education, art creation, and visual design, and is loved by many creative professionals and programming enthusiasts.Overall, P5.js is a powerful and flexible tool that provides an ideal platform for those interested in creative programming and visual arts, allowing them to explore and implement their creative ideas through programming.
Do one demo in processing which can use mouse or keyboard to interactive
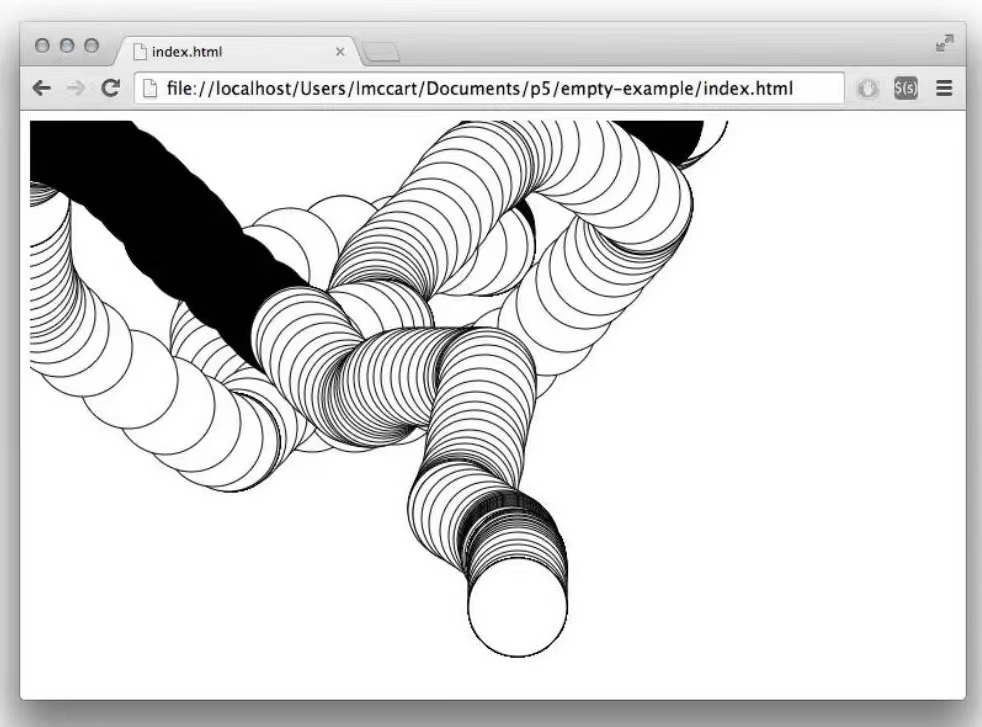
Moving the mouse changes the position and size of each box.Use the mouse to interact, below is the code and comments, and there are video effects.
                  void setup() {
                      size(640, 360);
                      noStroke();
                      rectMode(CENTER); // Set mode for drawing rectangles
                  }

                  void draw() {
                      background(51);
                      fill(255, 204); // Set fill with transparency
                      rect(mouseX, height/2, mouseY/2+10, mouseY/2+10); // Rect follows mouse on x-axis
                      fill(255, 204); // Set fill with transparency
                      int inverseX = width-mouseX; // Inverted x-coordinate
                      int inverseY = height-mouseY; // Inverted y-coordinate
                      rect(inverseX, height/2, (inverseY/2)+10, (inverseY/2)+10); // Rect mirrors the first
                  }


Interfacing Arduino with Processing
It is based on the ideas and syntax of Processing and provides a simple and easy-to-use API, allowing users to easily create interactive works, visual arts, and data visualization projects.
Through p5.js, users can use JavaScript language to draw graphics, create animations, process user input, etc., without the need to learn complex graphics libraries or computer graphics knowledge.
P5.js emphasizes the core idea of creative programming, encouraging users to express their ideas and creativity through programming, thereby promoting the process of learning and exploration.P5.js provides rich documentation and examples to help users quickly get started and start creating their own projects. It is widely used in various fields such as education, art creation, and visual design, and is loved by many creative professionals and programming enthusiasts.Overall, P5.js is a powerful and flexible tool that provides an ideal platform for those interested in creative programming and visual arts, allowing them to explore and implement their creative ideas through programming.
Do one demo in processing which can use mouse or keyboard to interactive
Moving the mouse changes the position and size of each box.Use the mouse to interact, below is the code and comments, and there are video effects.
void setup() {
size(640, 360);
noStroke();
rectMode(CENTER); // Set mode for drawing rectangles
}
void draw() {
background(51);
fill(255, 204); // Set fill with transparency
rect(mouseX, height/2, mouseY/2+10, mouseY/2+10); // Rect follows mouse on x-axis
fill(255, 204); // Set fill with transparency
int inverseX = width-mouseX; // Inverted x-coordinate
int inverseY = height-mouseY; // Inverted y-coordinate
rect(inverseX, height/2, (inverseY/2)+10, (inverseY/2)+10); // Rect mirrors the first
}
Interfacing Arduino with Processing
void setup() {
size(640, 360);
noStroke();
rectMode(CENTER); // Set mode for drawing rectangles
}
void draw() {
background(51);
fill(255, 204); // Set fill with transparency
rect(mouseX, height/2, mouseY/2+10, mouseY/2+10); // Rect follows mouse on x-axis
fill(255, 204); // Set fill with transparency
int inverseX = width-mouseX; // Inverted x-coordinate
int inverseY = height-mouseY; // Inverted y-coordinate
rect(inverseX, height/2, (inverseY/2)+10, (inverseY/2)+10); // Rect mirrors the first
}
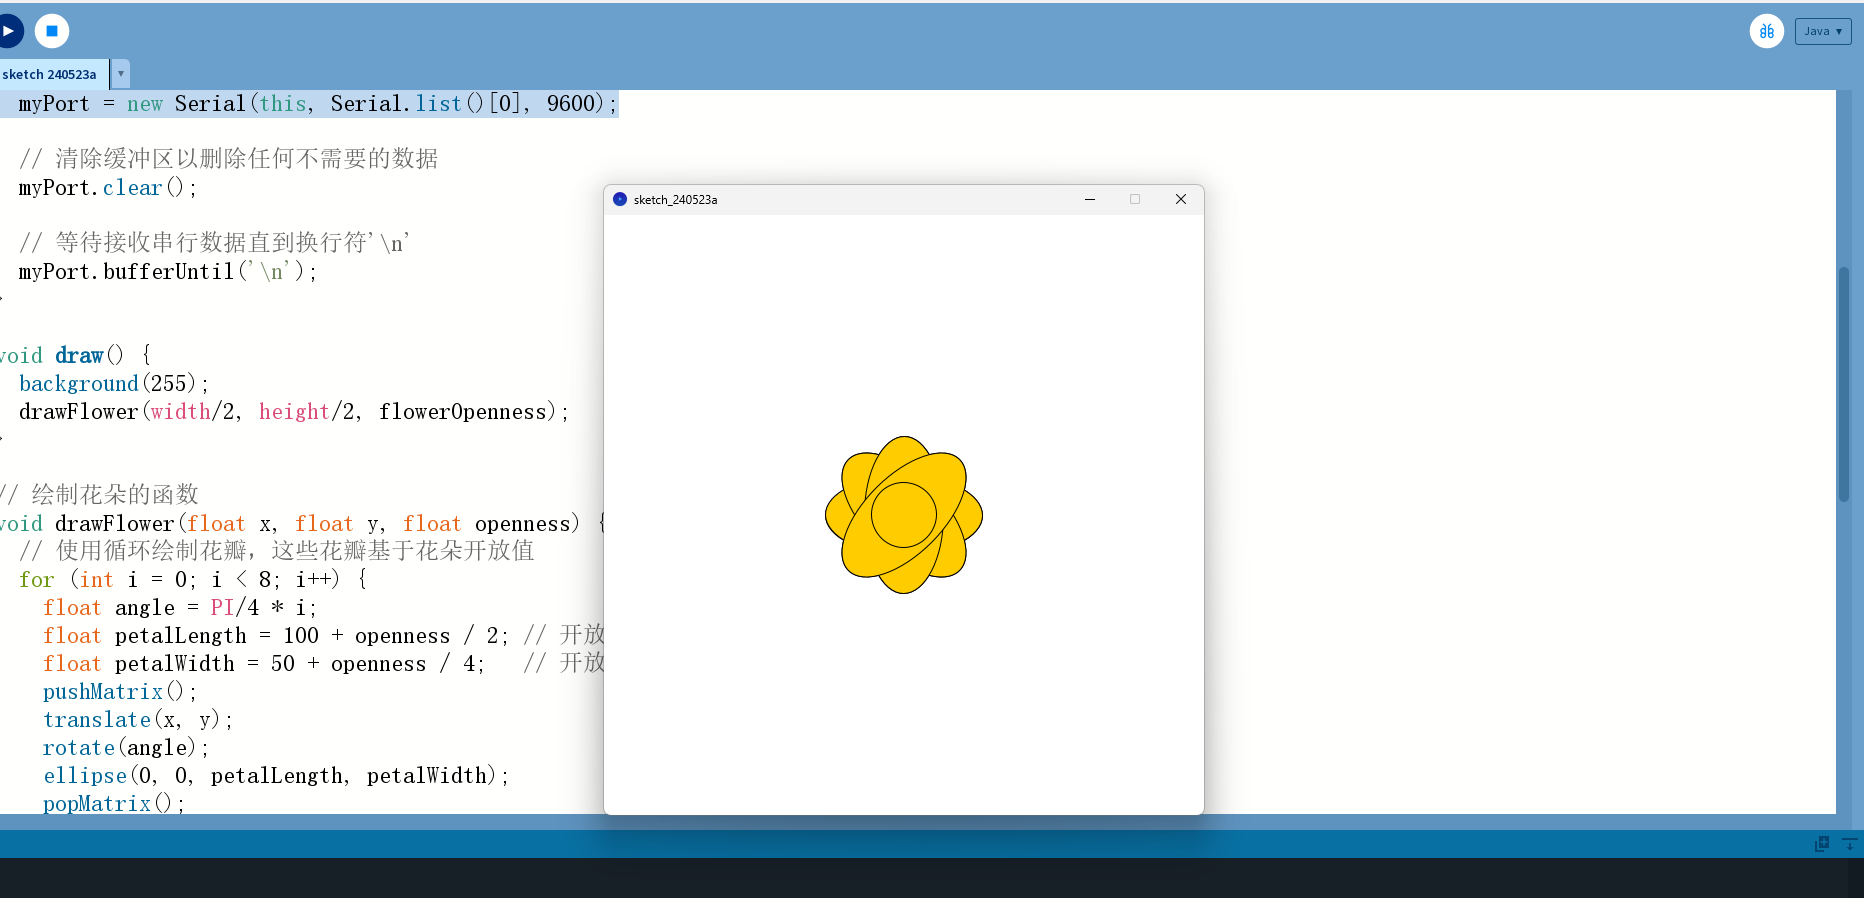
This guide demonstrates how to interface an Arduino with Processing to visualize data from an HC-SR04 ultrasonic sensor by animating a flower's opening and closing based on distance measurements.
Components Needed
- Arduino Nano or any comparable Arduino board
- HC-SR04 Ultrasonic Sensor
- Jumper wires
- Breadboard
- USB Cable
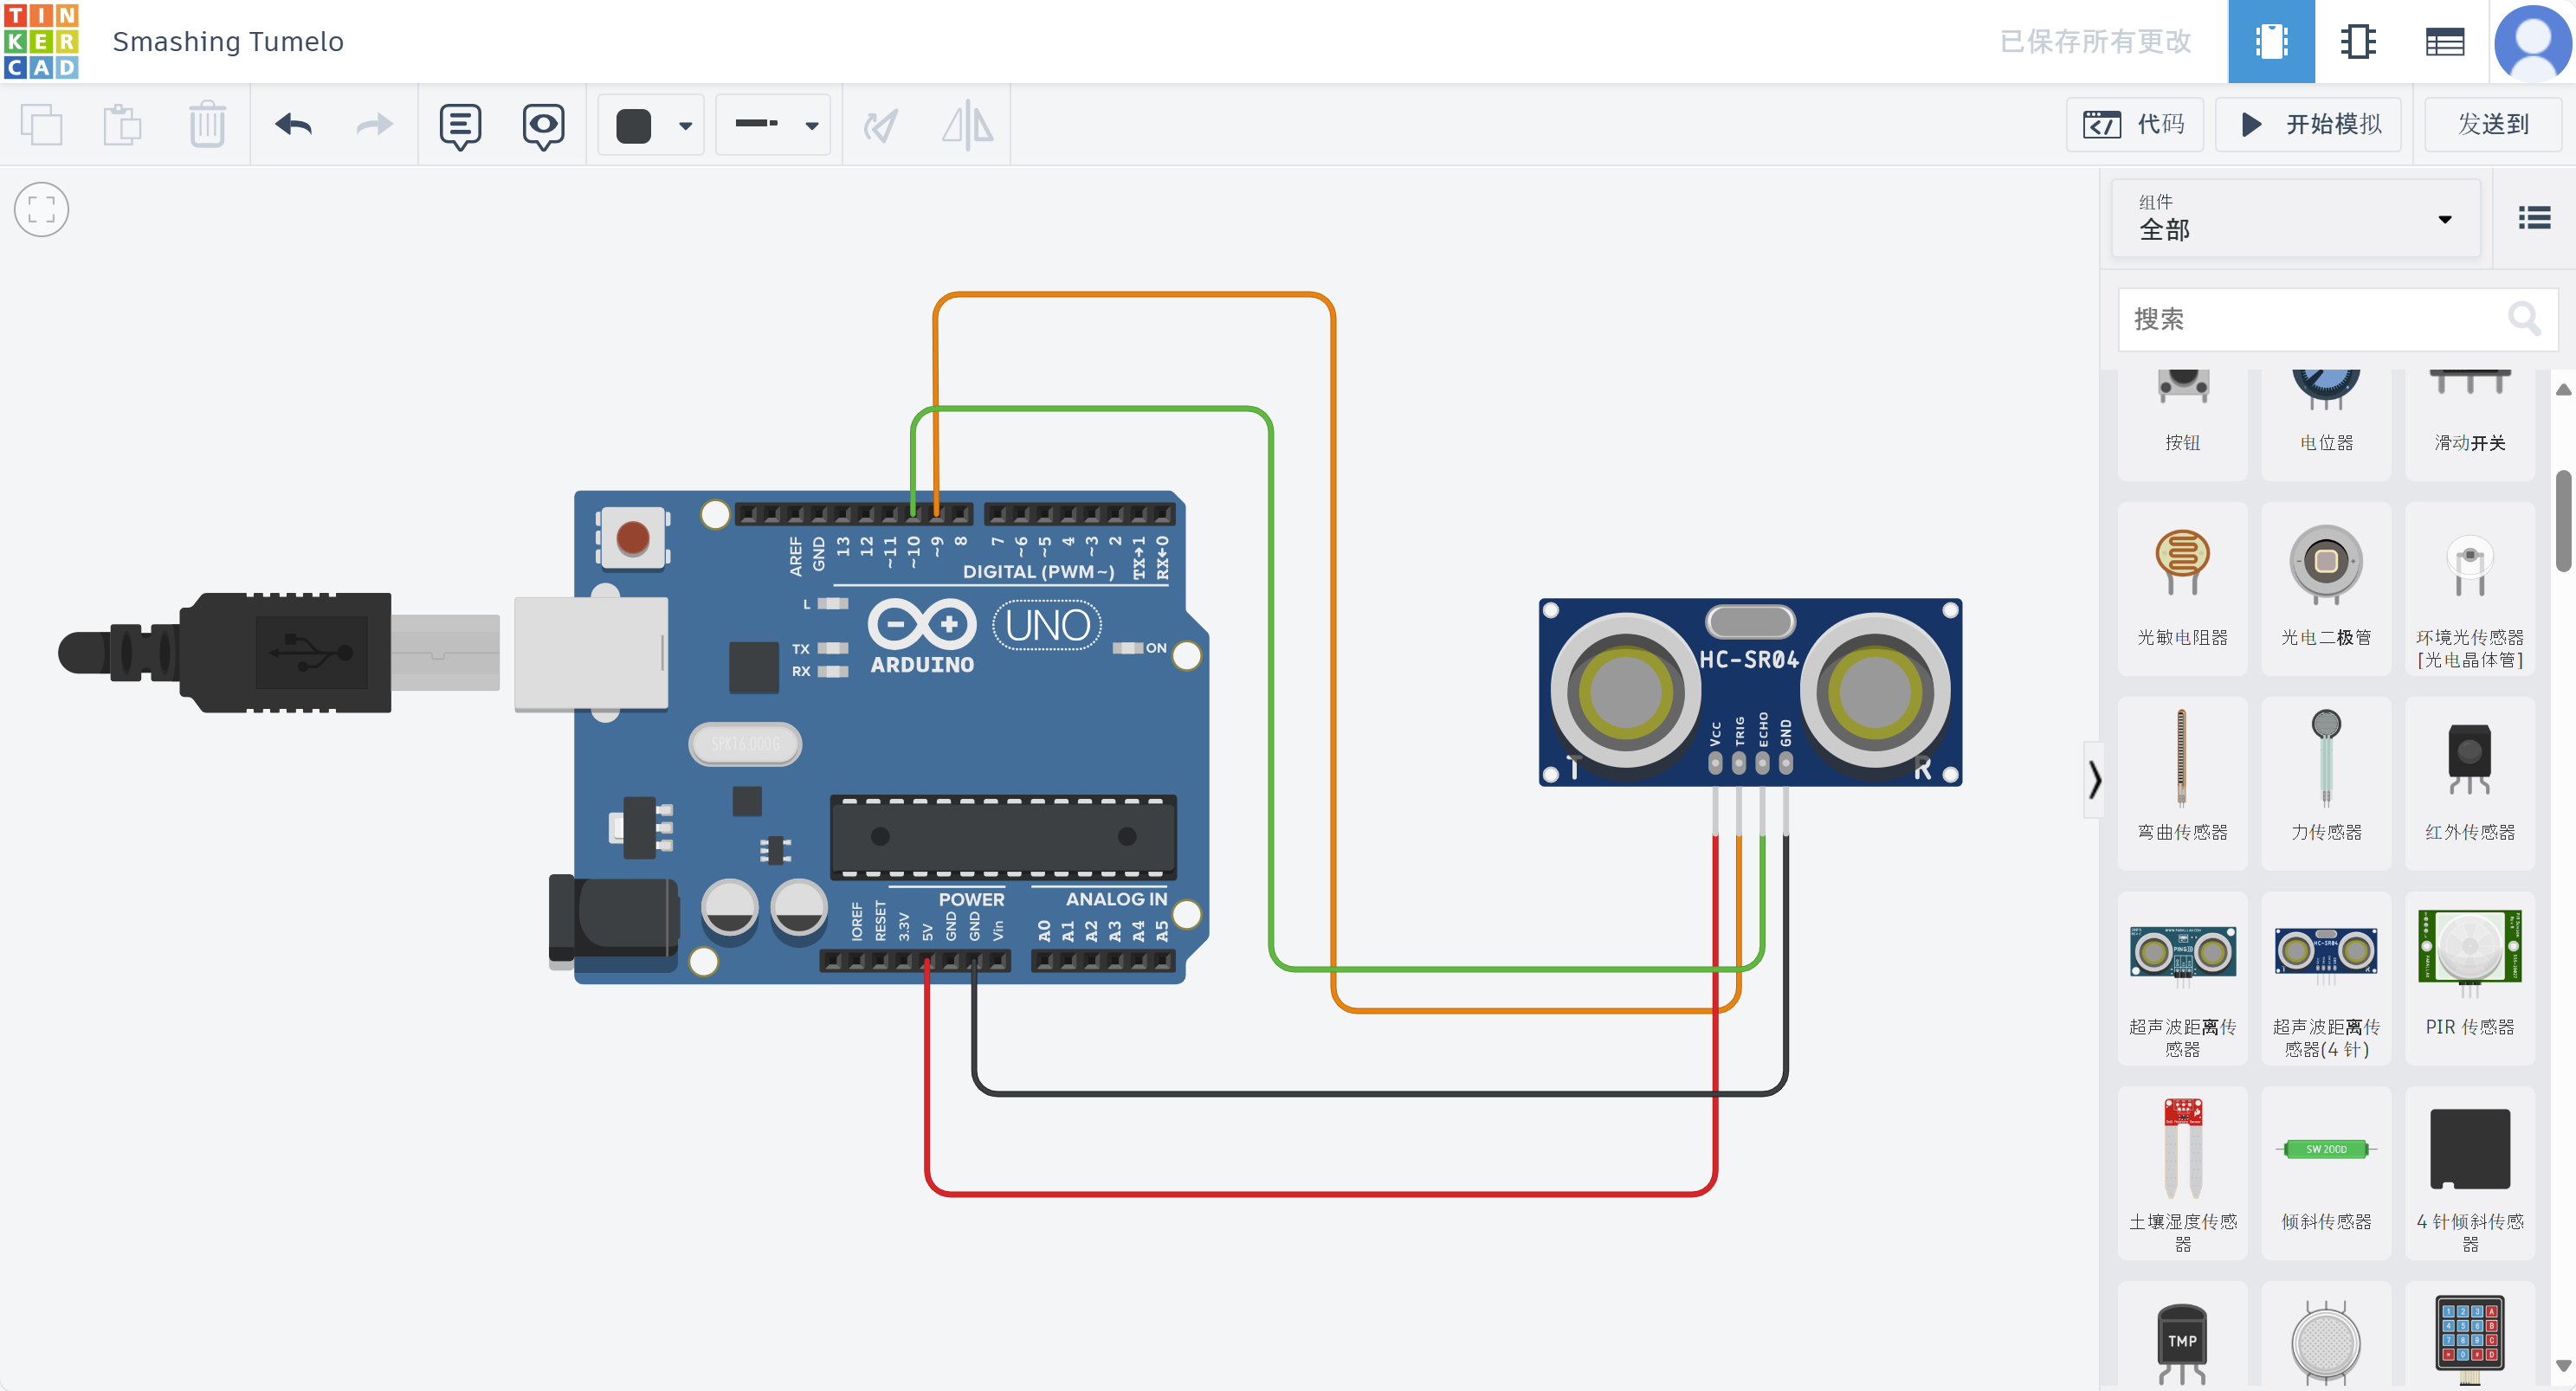
Arduino Wiring
Connect the components as follows:
- HC-SR04 VCC to Arduino Nano 5V
- HC-SR04 GND to Arduino Nano GND
- HC-SR04 Trig to Arduino Nano Digital Pin 9
- HC-SR04 Echo to Arduino Nano Digital Pin 10
Arduino Code
                  // Define pins for the ultrasonic sensor
                  const int trigPin = 9;
                  const int echoPin = 10;

                  // Initialize variables for duration and distance
                  long duration;
                  int distance;

                  void setup() {
                      // Set up the input and output pins
                      pinMode(trigPin, OUTPUT);
                      pinMode(echoPin, INPUT);
                      // Start serial communication at 9600 baud
                      Serial.begin(9600);
                  }

                  void loop() {
                      // Clear the trigPin
                      digitalWrite(trigPin, LOW);
                      delayMicroseconds(2);

                      // Set the trigPin high for 10 microseconds
                      digitalWrite(trigPin, HIGH);
                      delayMicroseconds(10);
                      digitalWrite(trigPin, LOW);

                      // Read the echoPin, return the sound wave travel time in microseconds
                      duration = pulseIn(echoPin, HIGH);

                      // Calculate the distance based on the echo time
                      distance = duration * 0.034 / 2; // Speed of sound division by 2 (round trip)

                      // Send distance to the serial port
                      Serial.println(distance); // This will be read by Processing

                      // Short delay before next reading
                      delay(10);
                  }
Processing Code
              import processing.serial.*; // 导入串行库

              Serial myPort;              // 创建一个串行对象
              int distance;               // 用于存储接收到的距离的变量
              float smoothDistance = 0;   // 平滑后的距离值初始化
              float flowerOpenness = 0;   // 表示花朵开放的程度

              // 平滑算法参数
              float alpha = 0.5;          // 平滑系数,0-1之间

              void setup() {
                size(600, 600);
                background(255);

                // 在控制台列出所有可用的串行端口
                printArray(Serial.list());

                // 打开与你的Arduino相对应的端口
                myPort = new Serial(this, Serial.list()[0], 9600);

                // 清除缓冲区以删除任何不需要的数据
                myPort.clear();

                // 等待接收串行数据直到换行符'\n'
                myPort.bufferUntil('\n');
              }

              void draw() {
                background(255);
                drawFlower(width/2, height/2, flowerOpenness);
              }

              // 绘制花朵的函数
              void drawFlower(float x, float y, float openness) {
                // 使用循环绘制花瓣,这些花瓣基于花朵开放值
                for (int i = 0; i < 8; i++) {
                  float angle = PI/4 * i;
                  float petalLength = 100 + openness / 2; // 开放度影响花瓣长度
                  float petalWidth = 50 + openness / 4;   // 开放度影响花瓣宽度
                  pushMatrix();
                  translate(x, y);
                  rotate(angle);
                  ellipse(0, 0, petalLength, petalWidth);
                  popMatrix();
                }

                // 绘制花朵的中心
                fill(255, 204, 0);
                ellipse(x, y, 50 + openness / 8, 50 + openness / 8);
              }

              // 当串行端口上有新数据可用时调用的函数
              void serialEvent(Serial myPort) {
                // 读取串行端口
                String inString = myPort.readStringUntil('\n');

                if (inString != null) {
                  // 从字符串中去掉回车和换行符
                  inString = trim(inString);

                  try {
                    // 将字符串转换为整数
                    distance = int(inString);

                    // 使用平滑算法计算平滑后的距离
                    smoothDistance = alpha * distance + (1 - alpha) * smoothDistance;

                    // 将平滑后的距离映射到花朵的开放度
                    flowerOpenness = map(smoothDistance, 10, 100, 0, 300); // 根据你的设置调整数值
                  }
                  catch(NumberFormatException e) {
                    // 如果字符串格式存在错误,这里进行捕获错误。
                  }
                }
              }
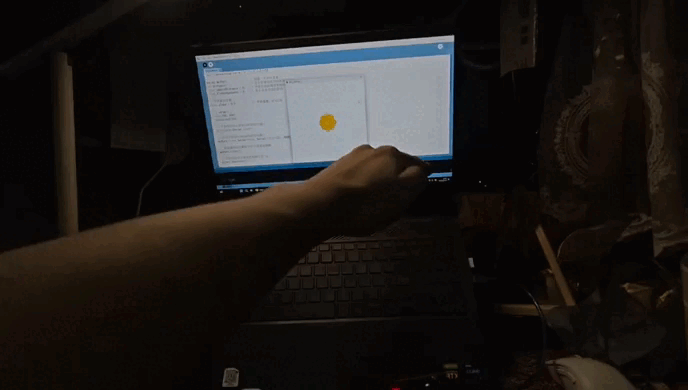
Demo Animation
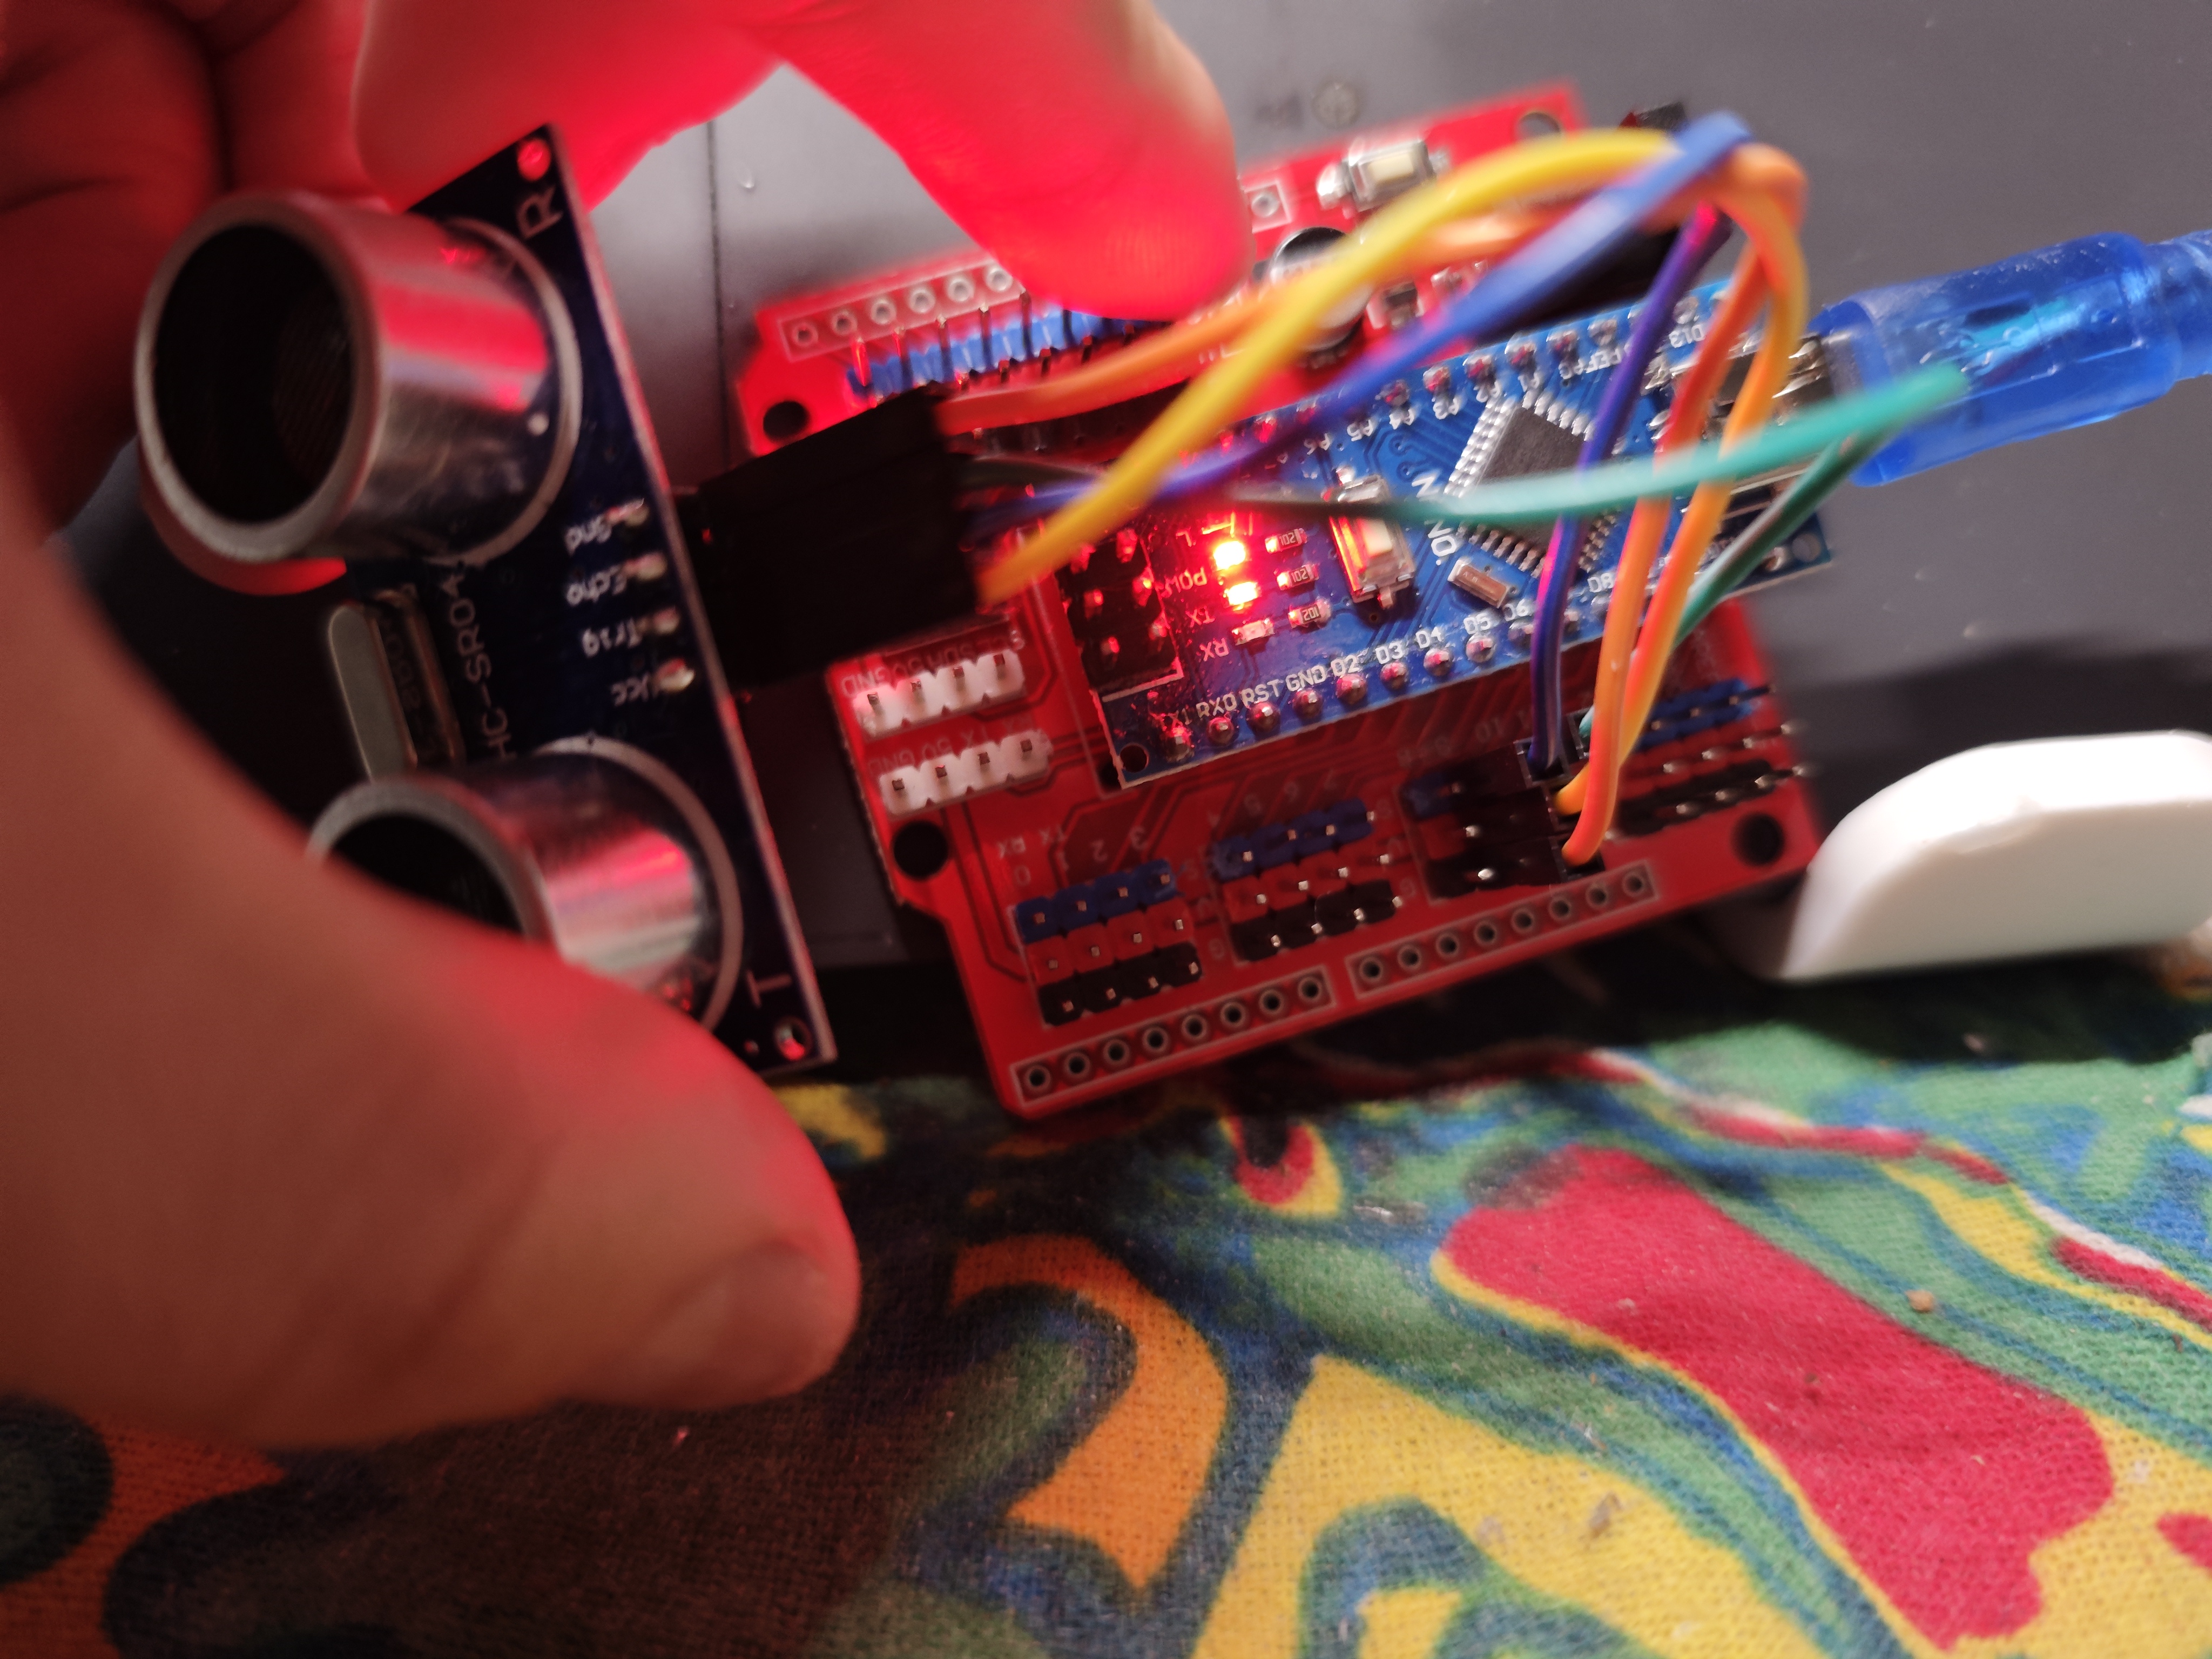
This is a real shot of the arduino wiring diagram:
This is the processing interface diagram:
This animated GIF demonstrates the expected outcome when the ultrasonic sensor detects an object: