Here are some codes I have written, I hope you will like them.
How to configure a website?
First.
Installing all the tools needed to develop the software
1.Git:It serves as a control system for tracking changes to the code base, collaborating, managing
project versions, which allows us to clone, commit, and push changes to GitHub.
2.Github:For our website,we utilize the github service.
3.Github Desktop: To move or push our coding from local to GitHub, we used github desktop.
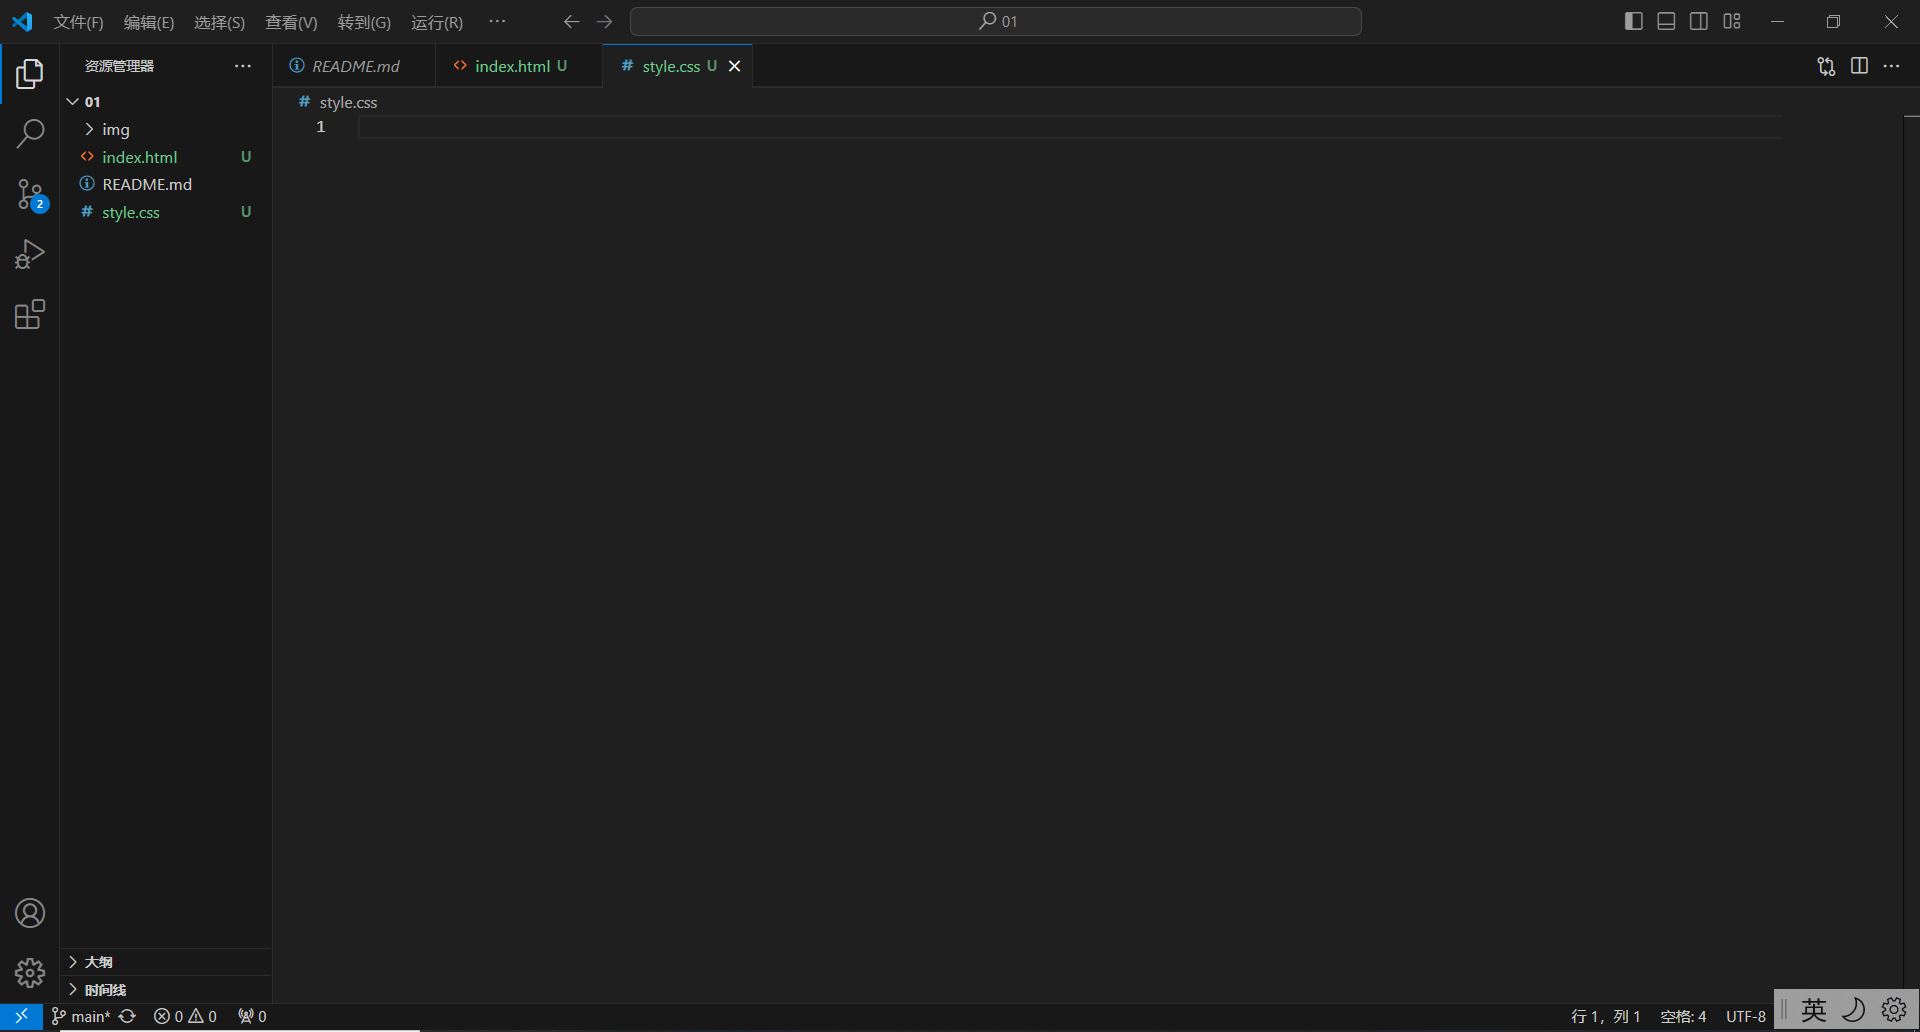
4.VScode:We used the Visual Studio code to write down our documents.
5.Markdown and Html language:to write our document.
6.CSS: Corresponds with html. Used to style the website
Second
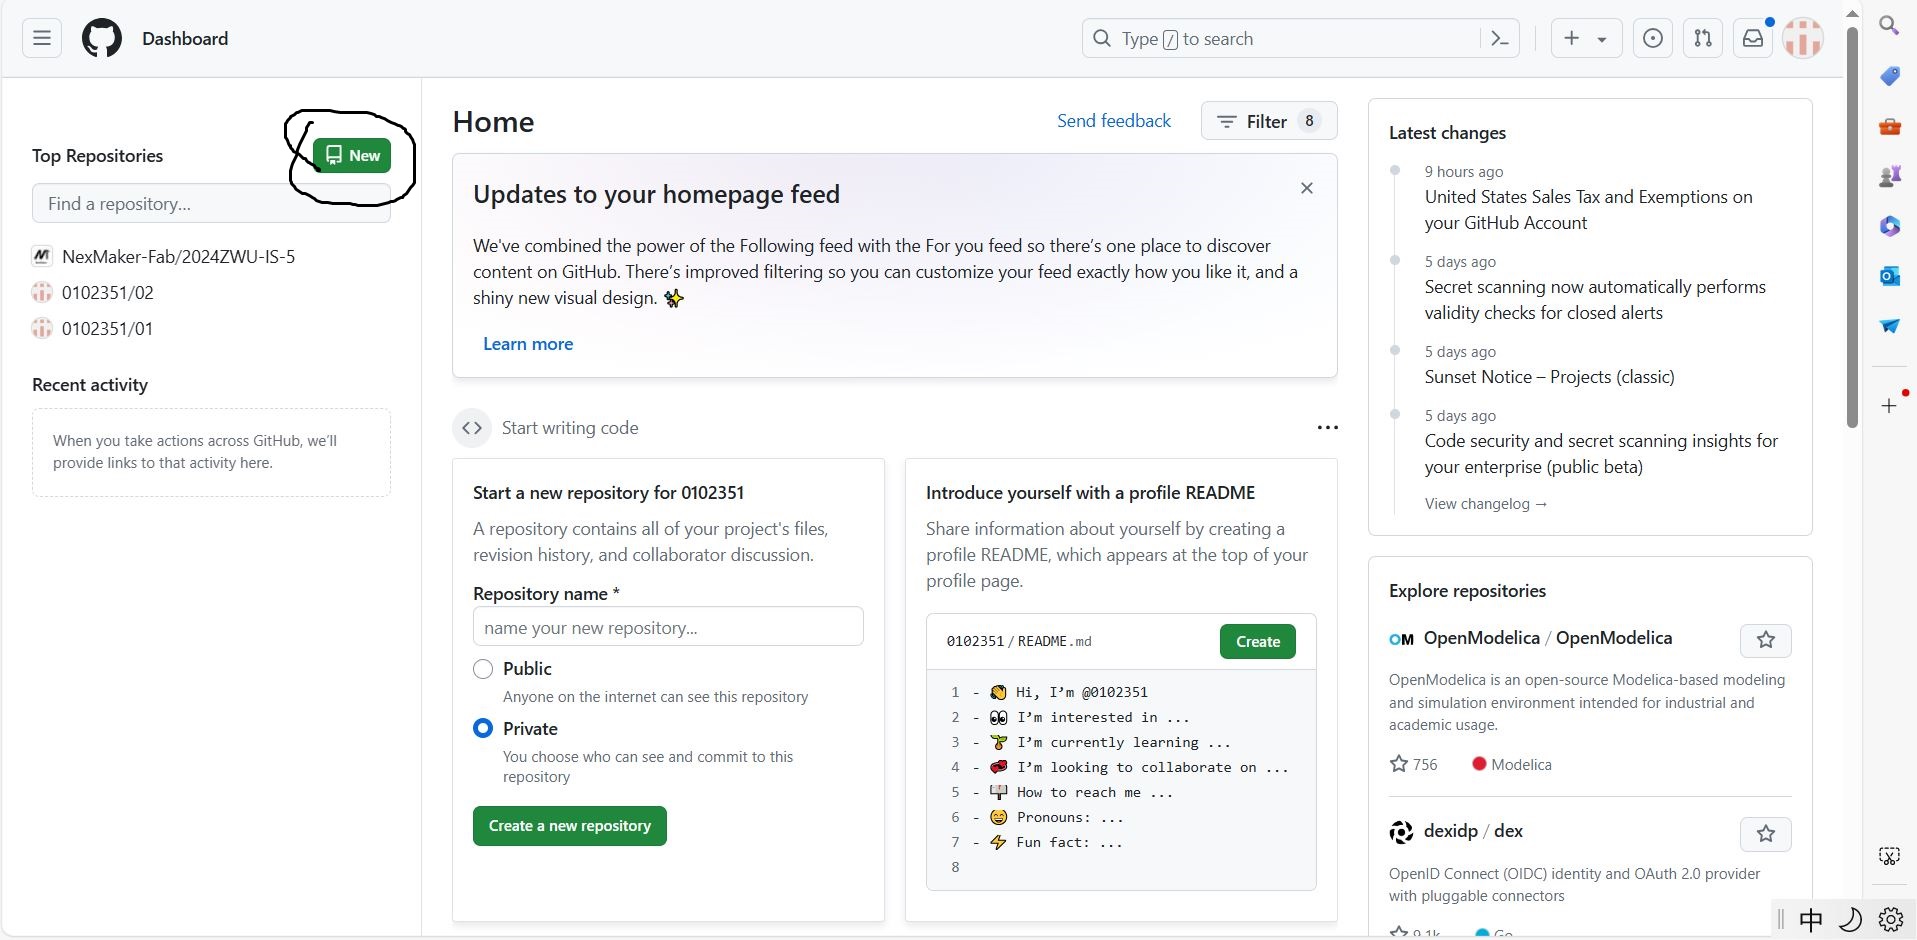
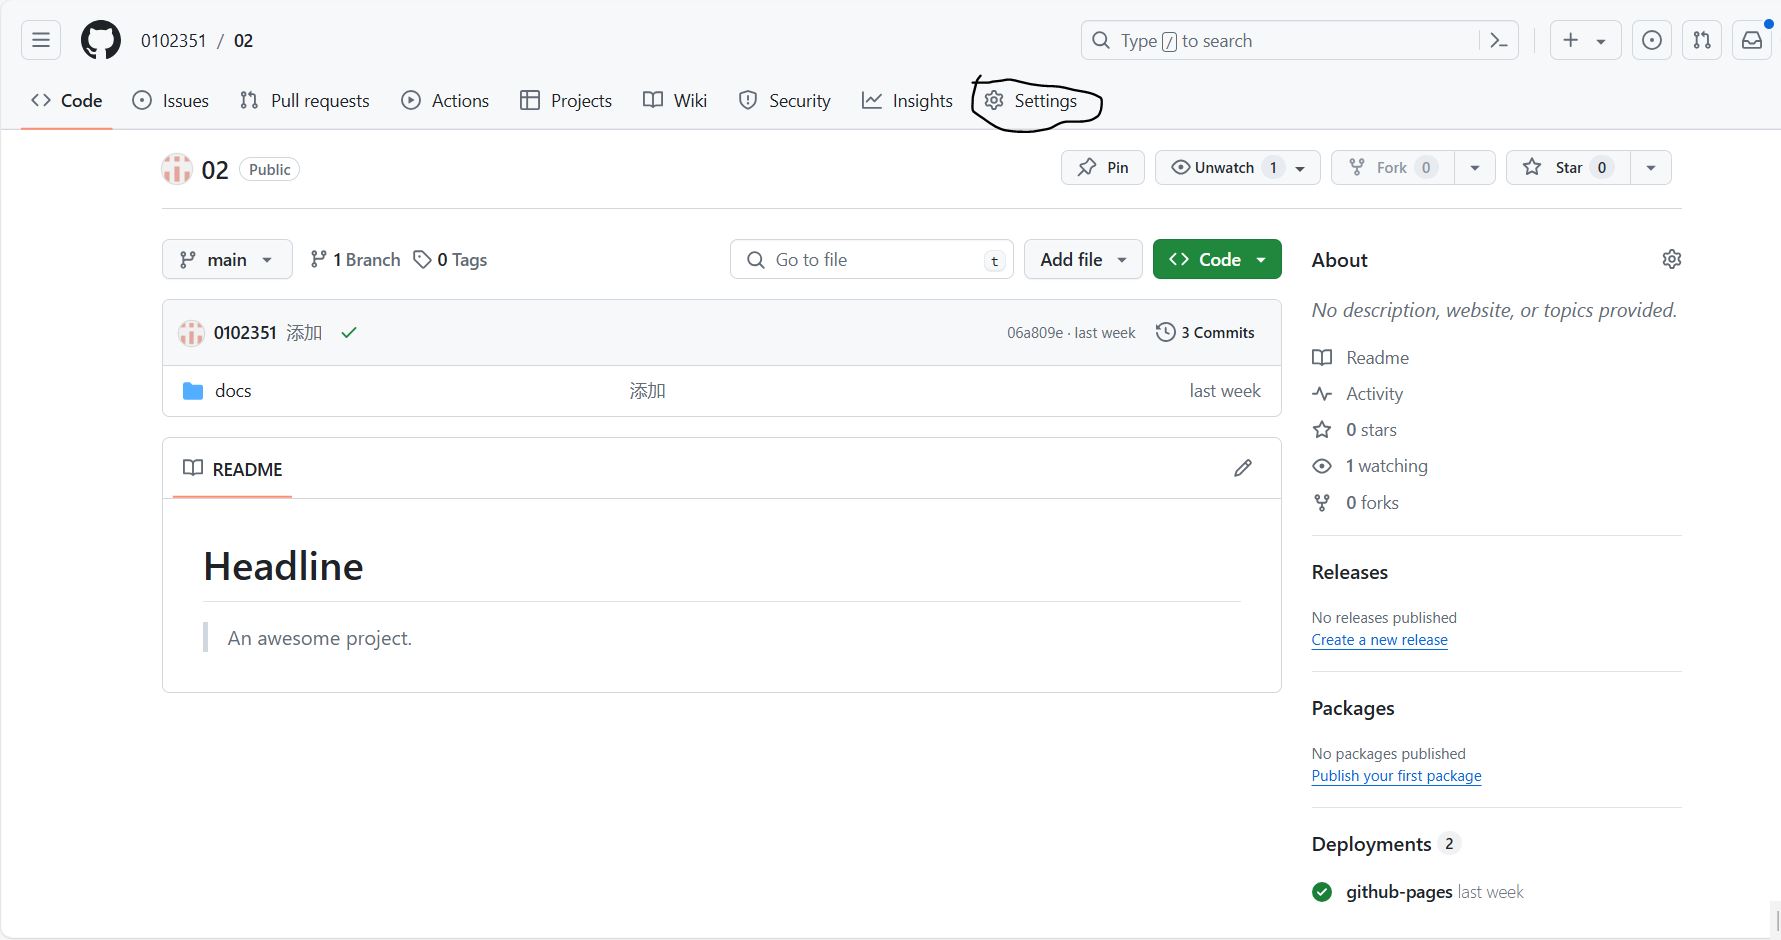
Open this website and click here
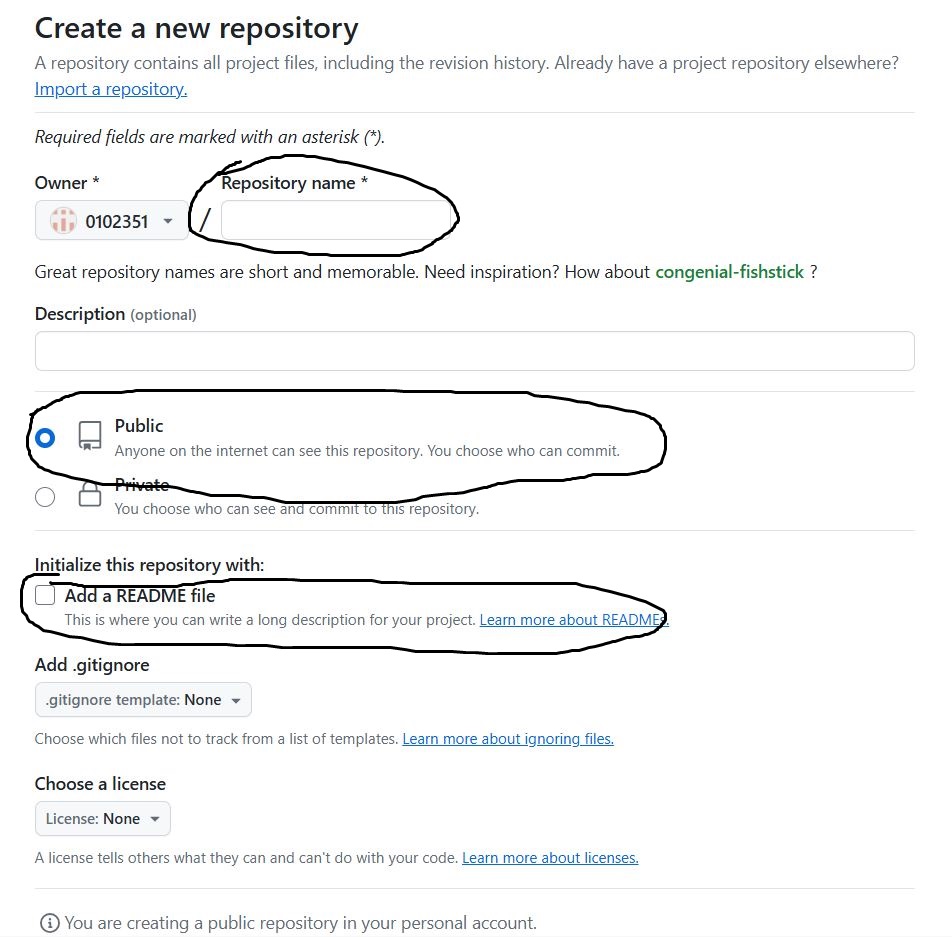
Set your warehouse name and click on the two buttons below
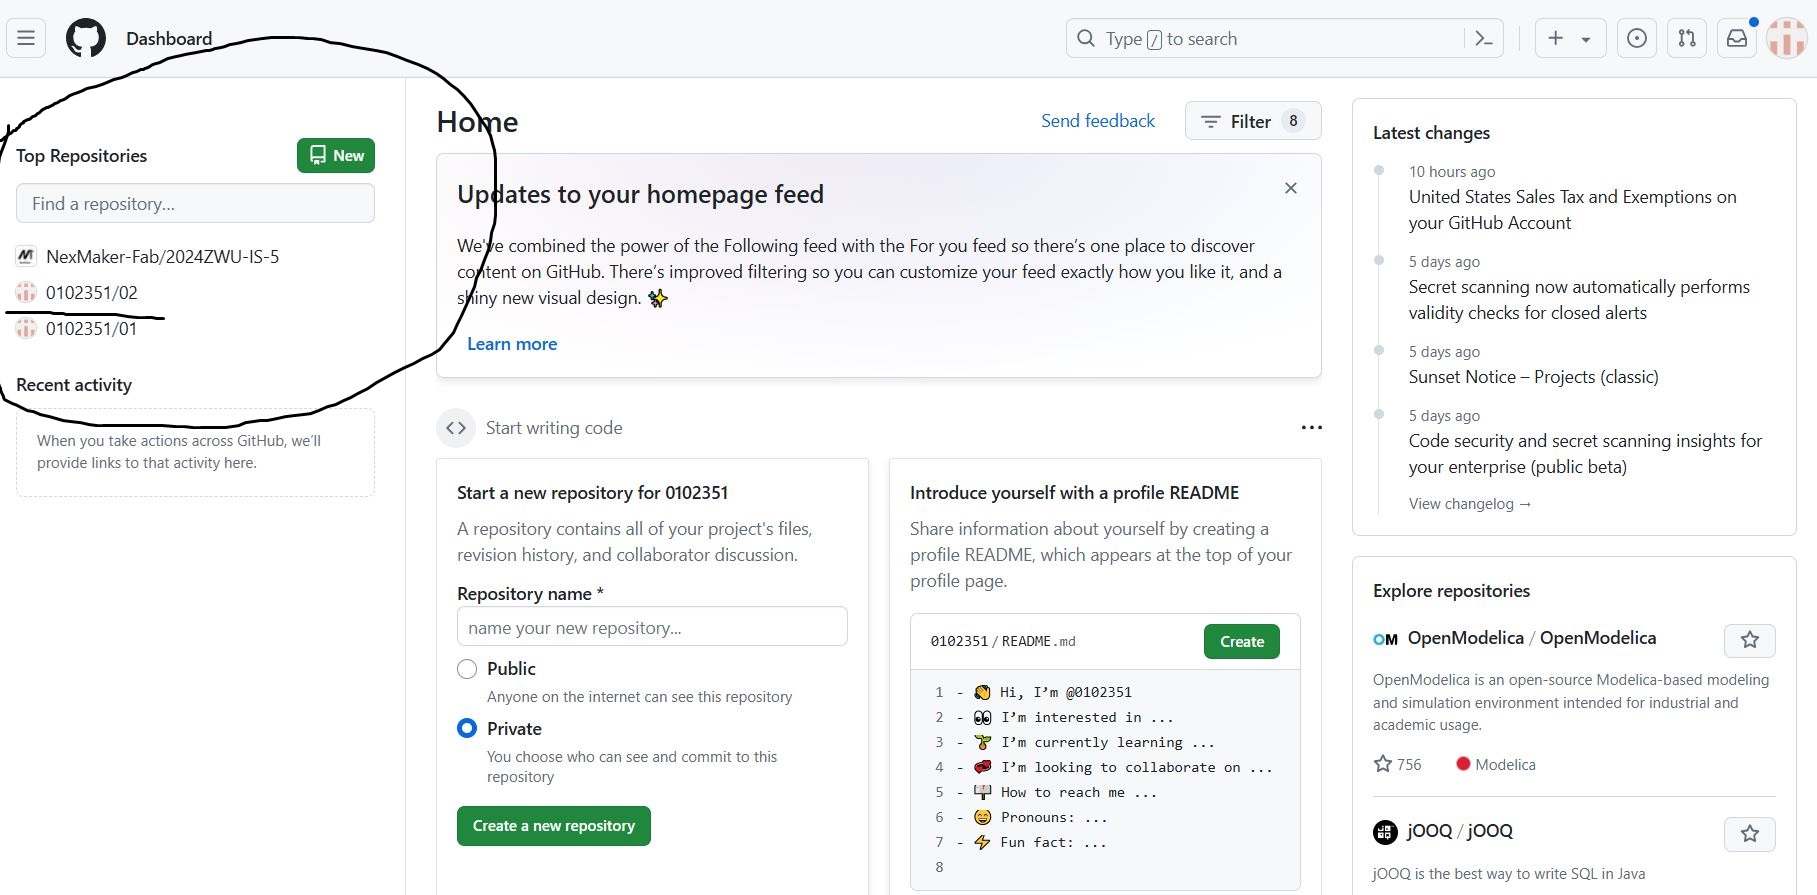
Find your library and click on it
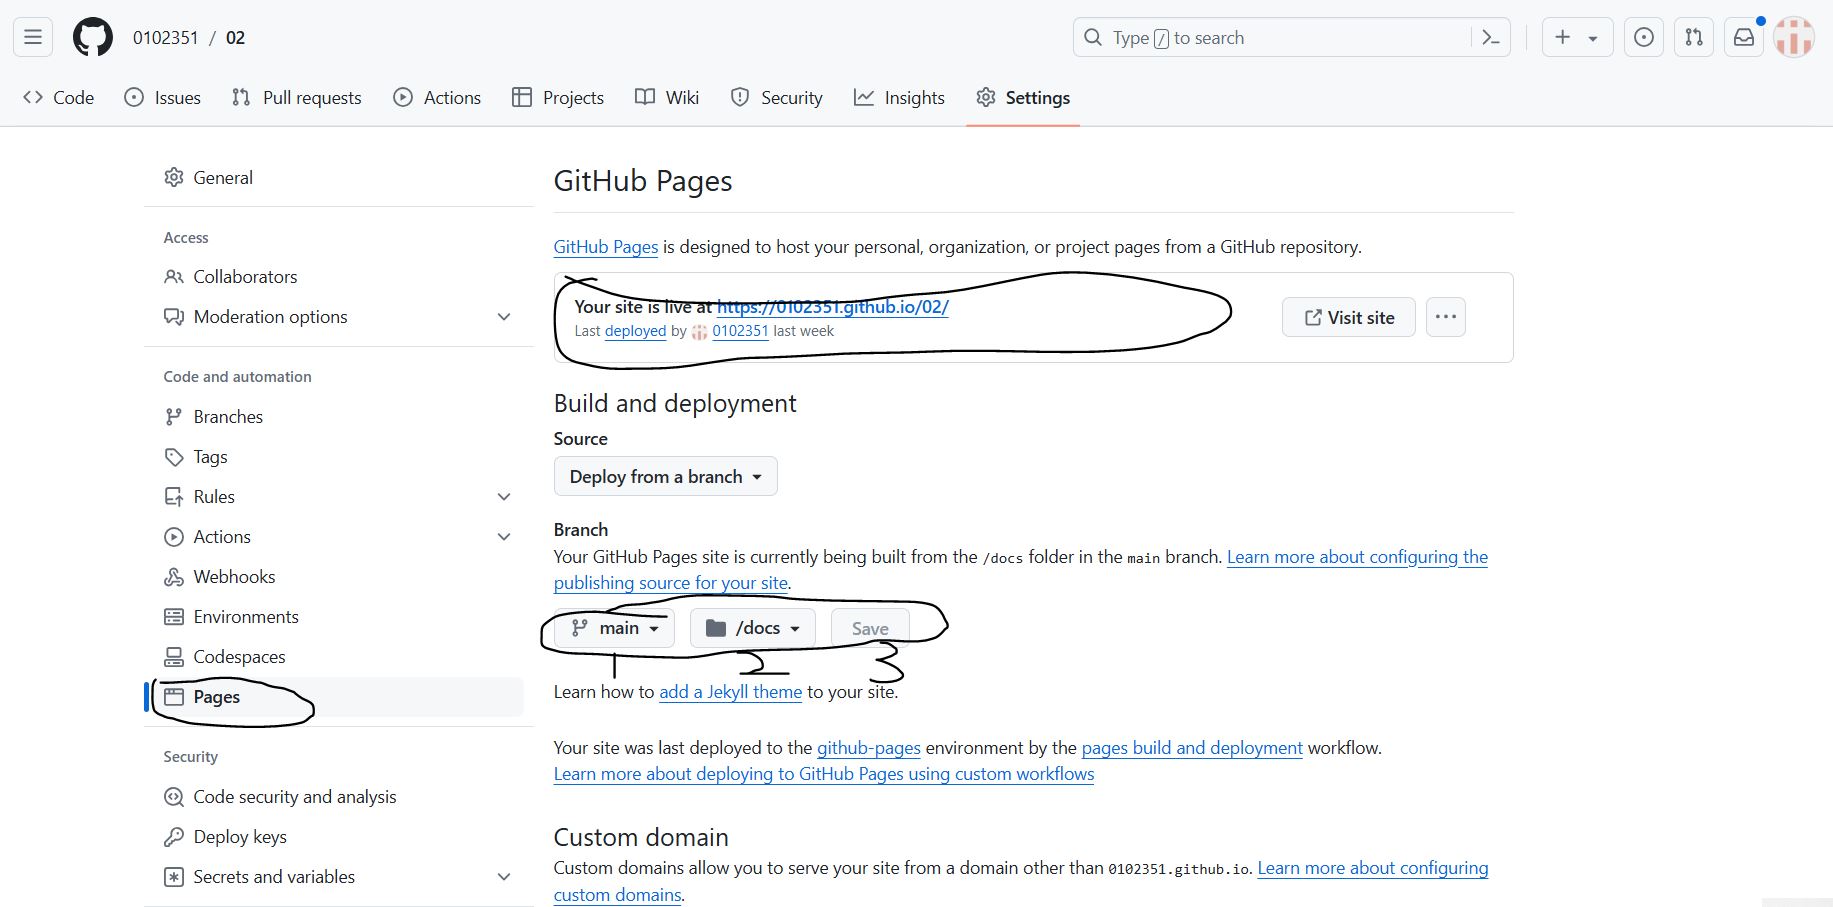
Click on Settings, then click on the webpage and
set the location of your library in the order of 123. Okay, a basic library prototype is completed
Thrid
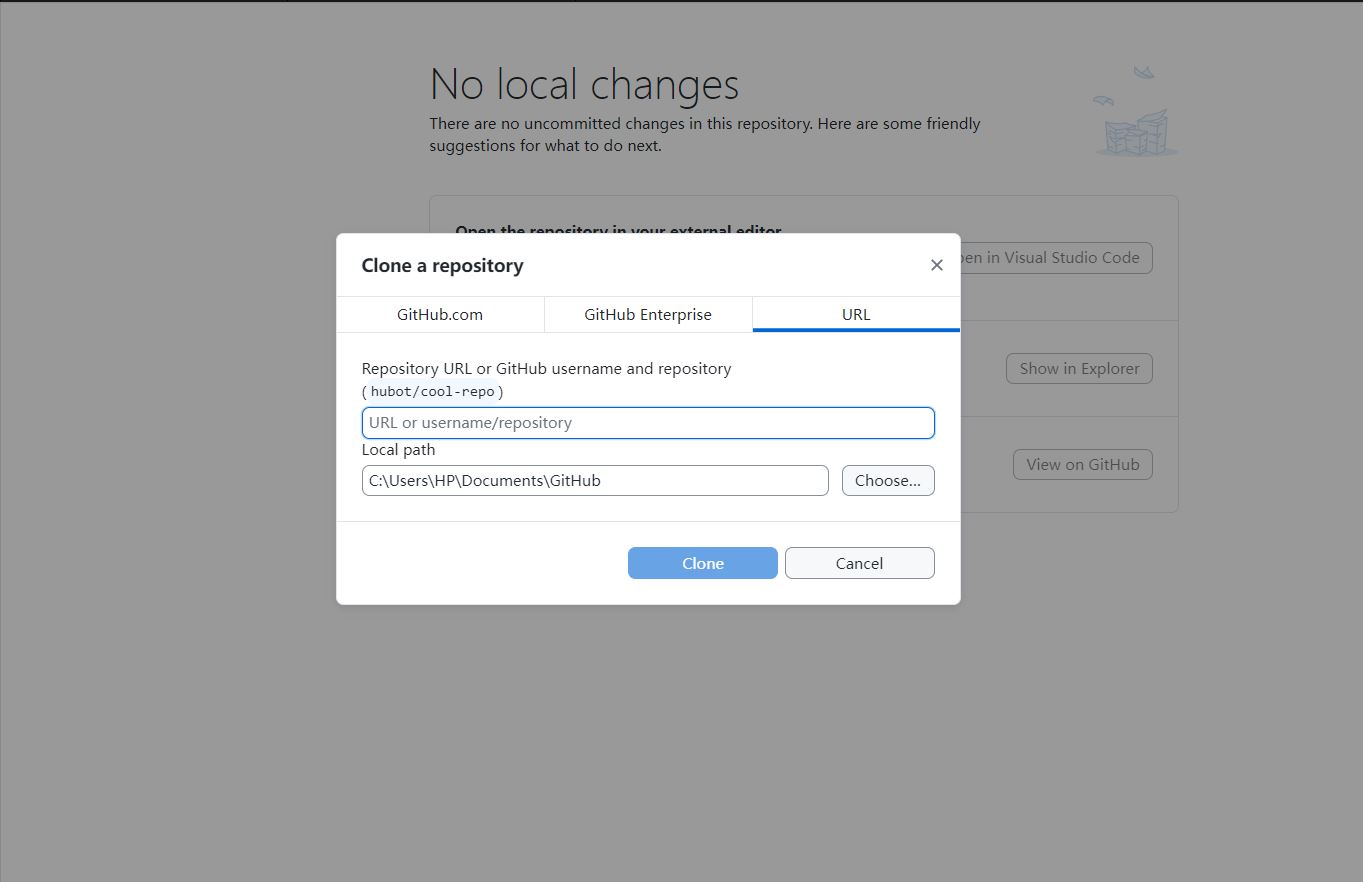
open your Github Desktop!Look at the black circles and create a new library
Do you remember the library you just created on the webpage? Find its way to clone it
like it
fourth
Now let's open VS code and start making your own webpage seriously!
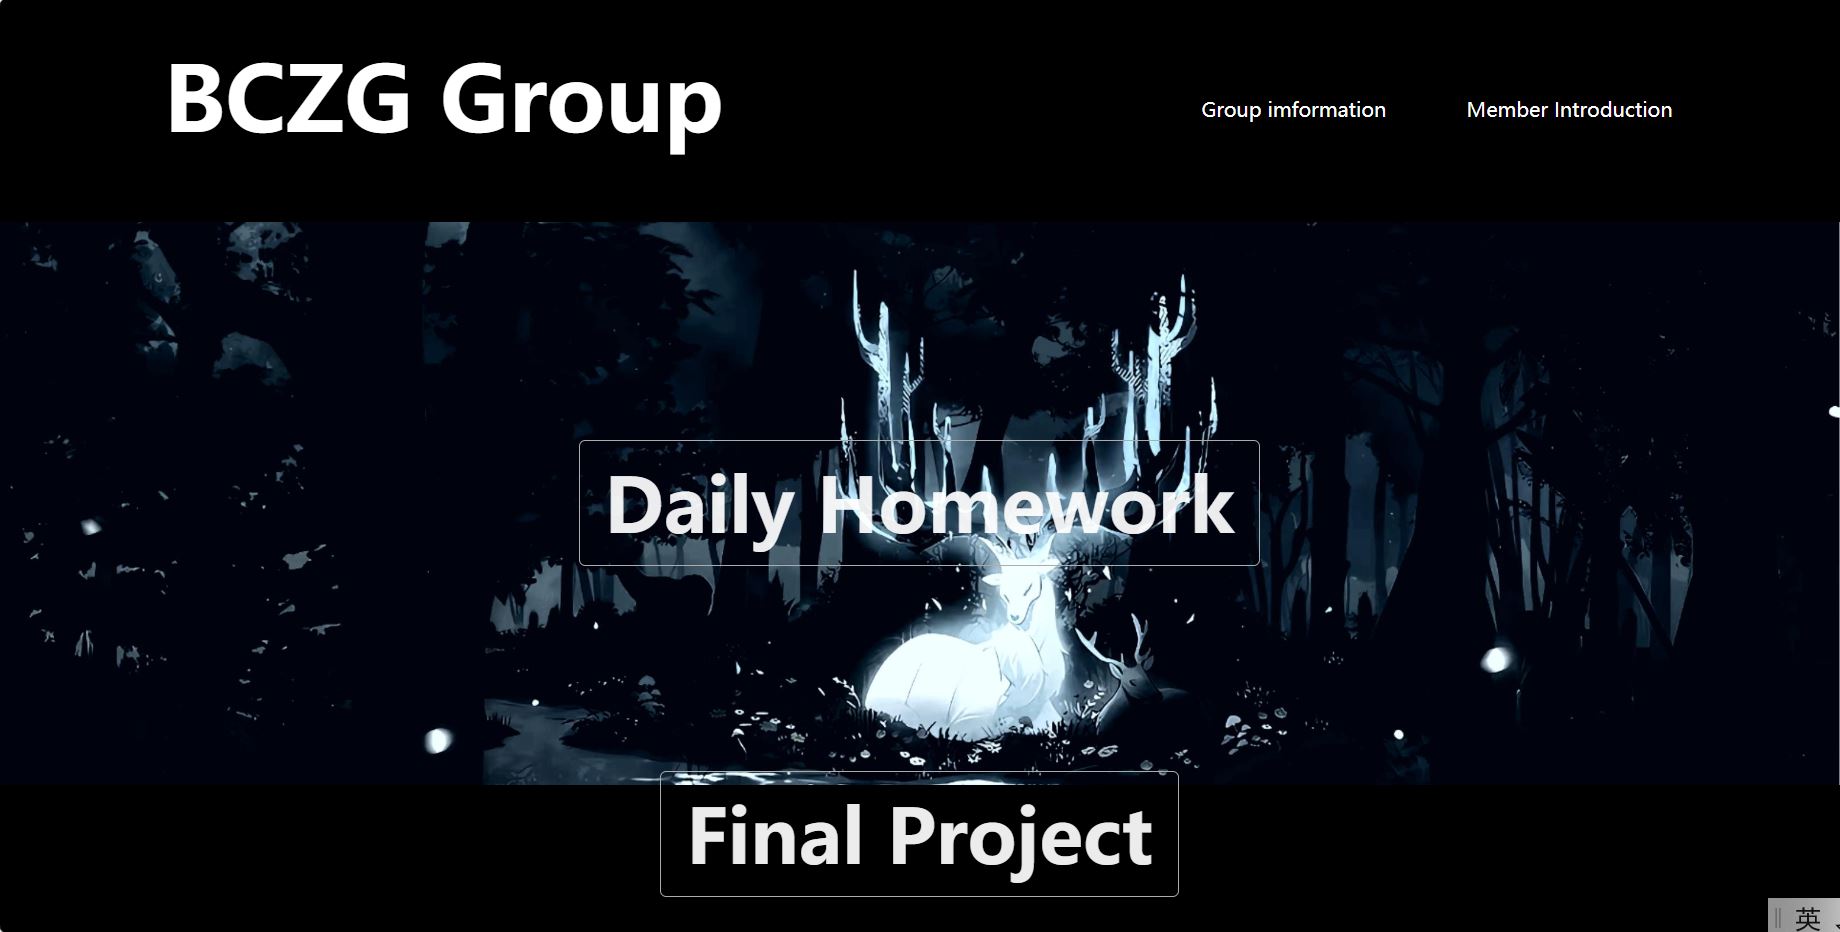
How to design web pages?
                let's analyze the overall layout of the webpage, including three parts: text, background color, background image, and links

                For this, you need to write two sided code in VS, which is the two sided code I will show next

                HTML is the core of a webpage, and key information needs to be input from it. CSS is mainly responsible for polishing web pages
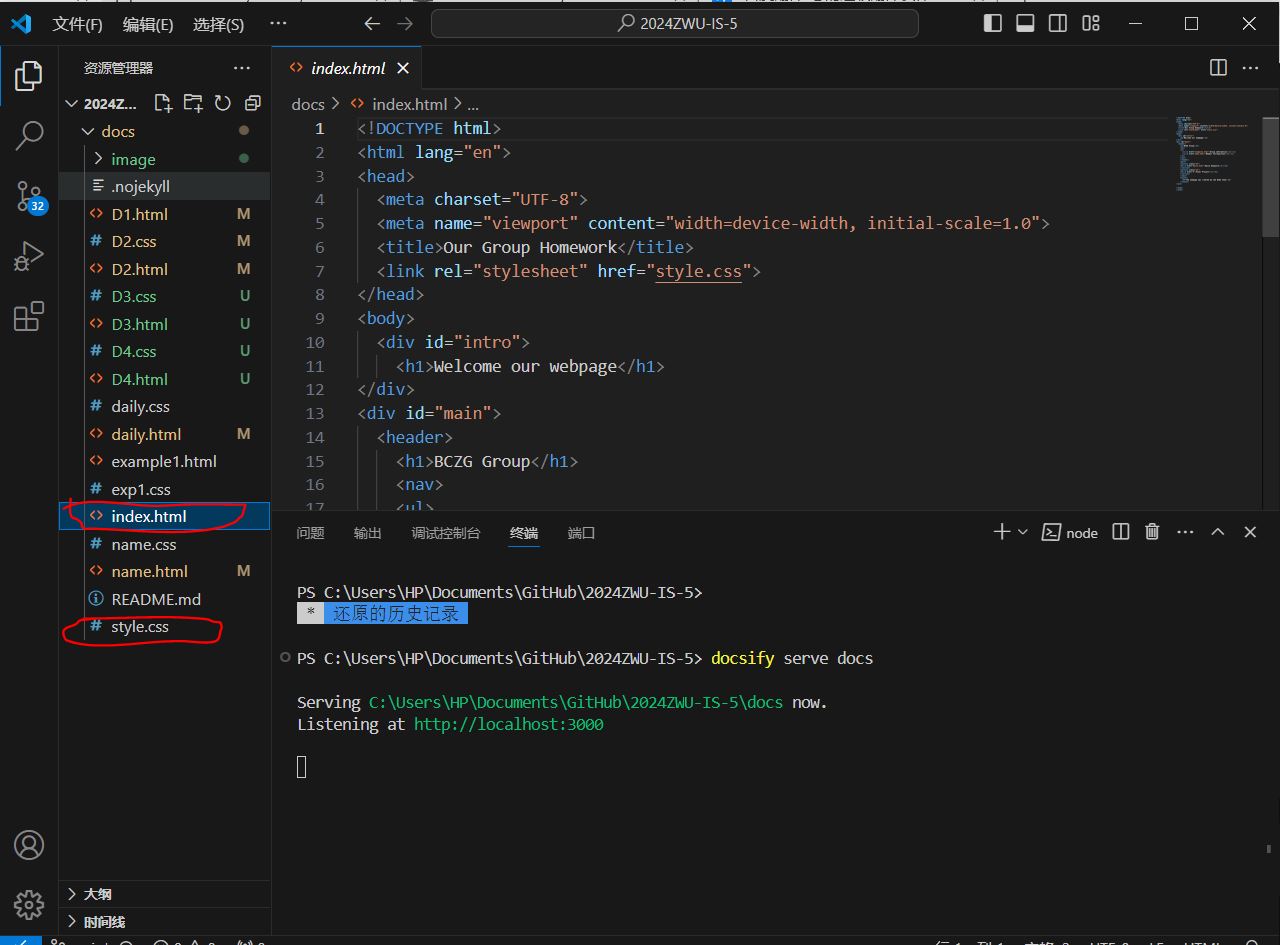
HTML section of homepage code
                !DOCTYPE html
                html lang="en"
                head
                  meta charset="UTF-8"
                  meta name="viewport" content="width=device-width, initial-scale=1.0"
                  title Our Group Homework /title
                  link rel="stylesheet" href="style.css"   //将index.html和style.css联系在一起
                /head
                body
                  div id="intro"  //定义id,使得css中可以使用intro修改开头动画属性
                    h1 Welcome our webpage /h1      //开头动画文字展示
                /div
                div id="main"
                  header //网页头部
                    h1 BCZG Group /h1
                    nav
                    ul
                      li  a href="example1.html" Group imformation /a  /li  //类似代码作用:为文字添加链接,点击文字可链接到相应的HTML
                      li  a href="name.html" Member Introduction /a  /li
                    /ul
                    /nav
                    /header
                    main //网页中心部分
                    section class="w1"  //用section分类相同前置条件(比如同一字体同一位置)的代码文字,也可重复利用
                    h2  a href="daily.html" Daily Homework /a  /h2
                    /section
                    section class="w2"
                    h2  a href="#" Final Project /a  /h2
                    /section
                    /main
                    footer //网页尾部
                      h6 The webpage was created by the BCZG team /h6
                    /footer
                /div

                /body
                /html
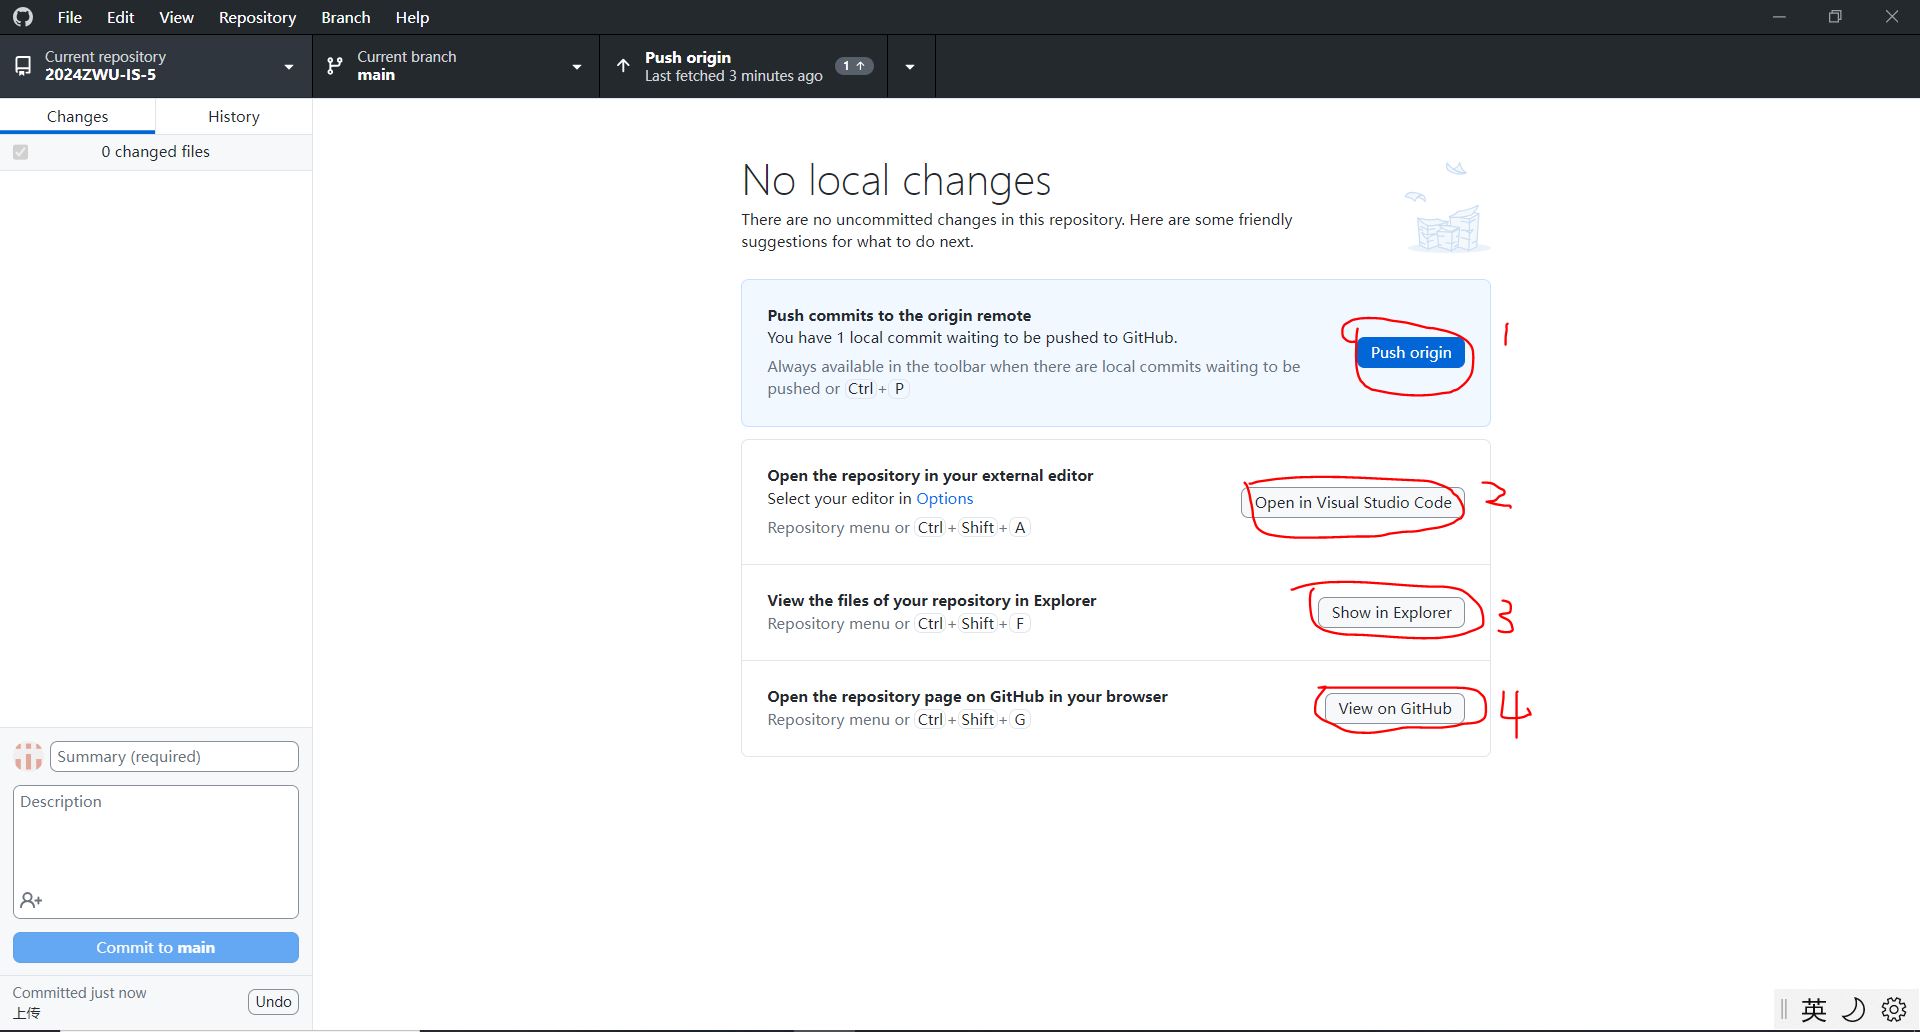
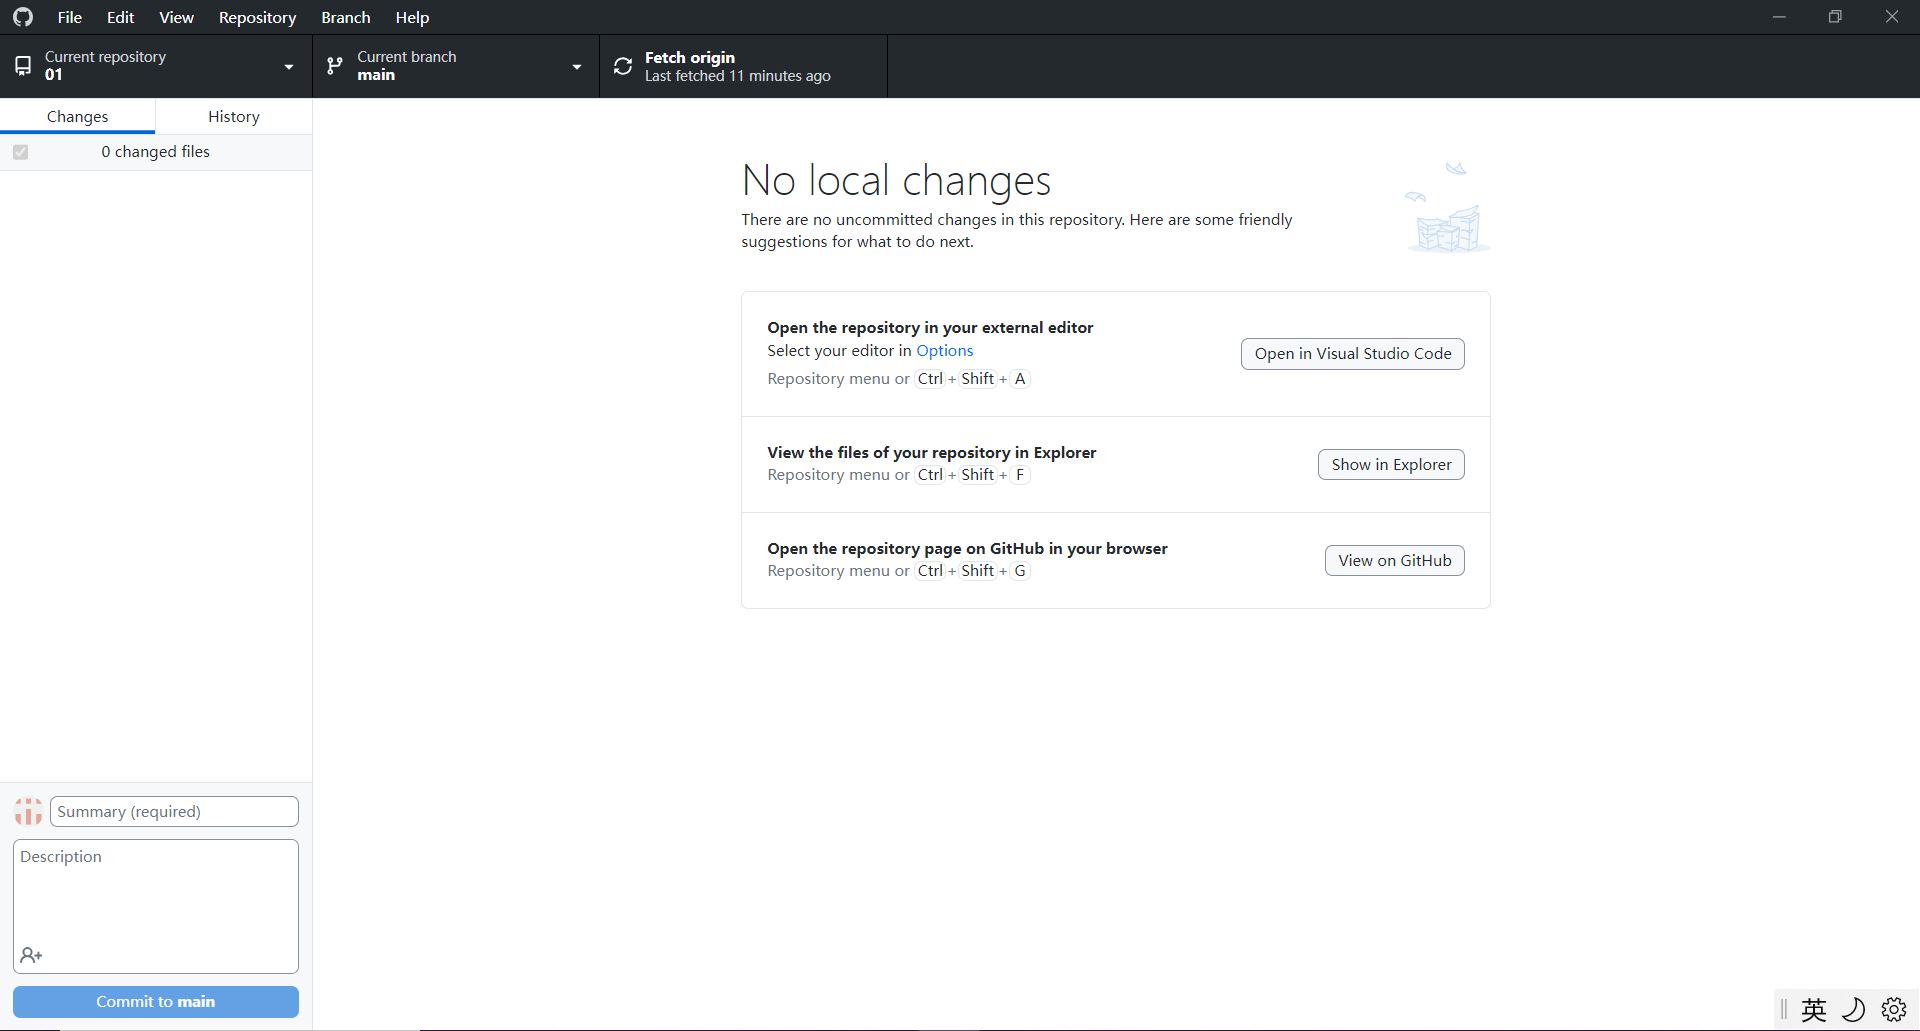
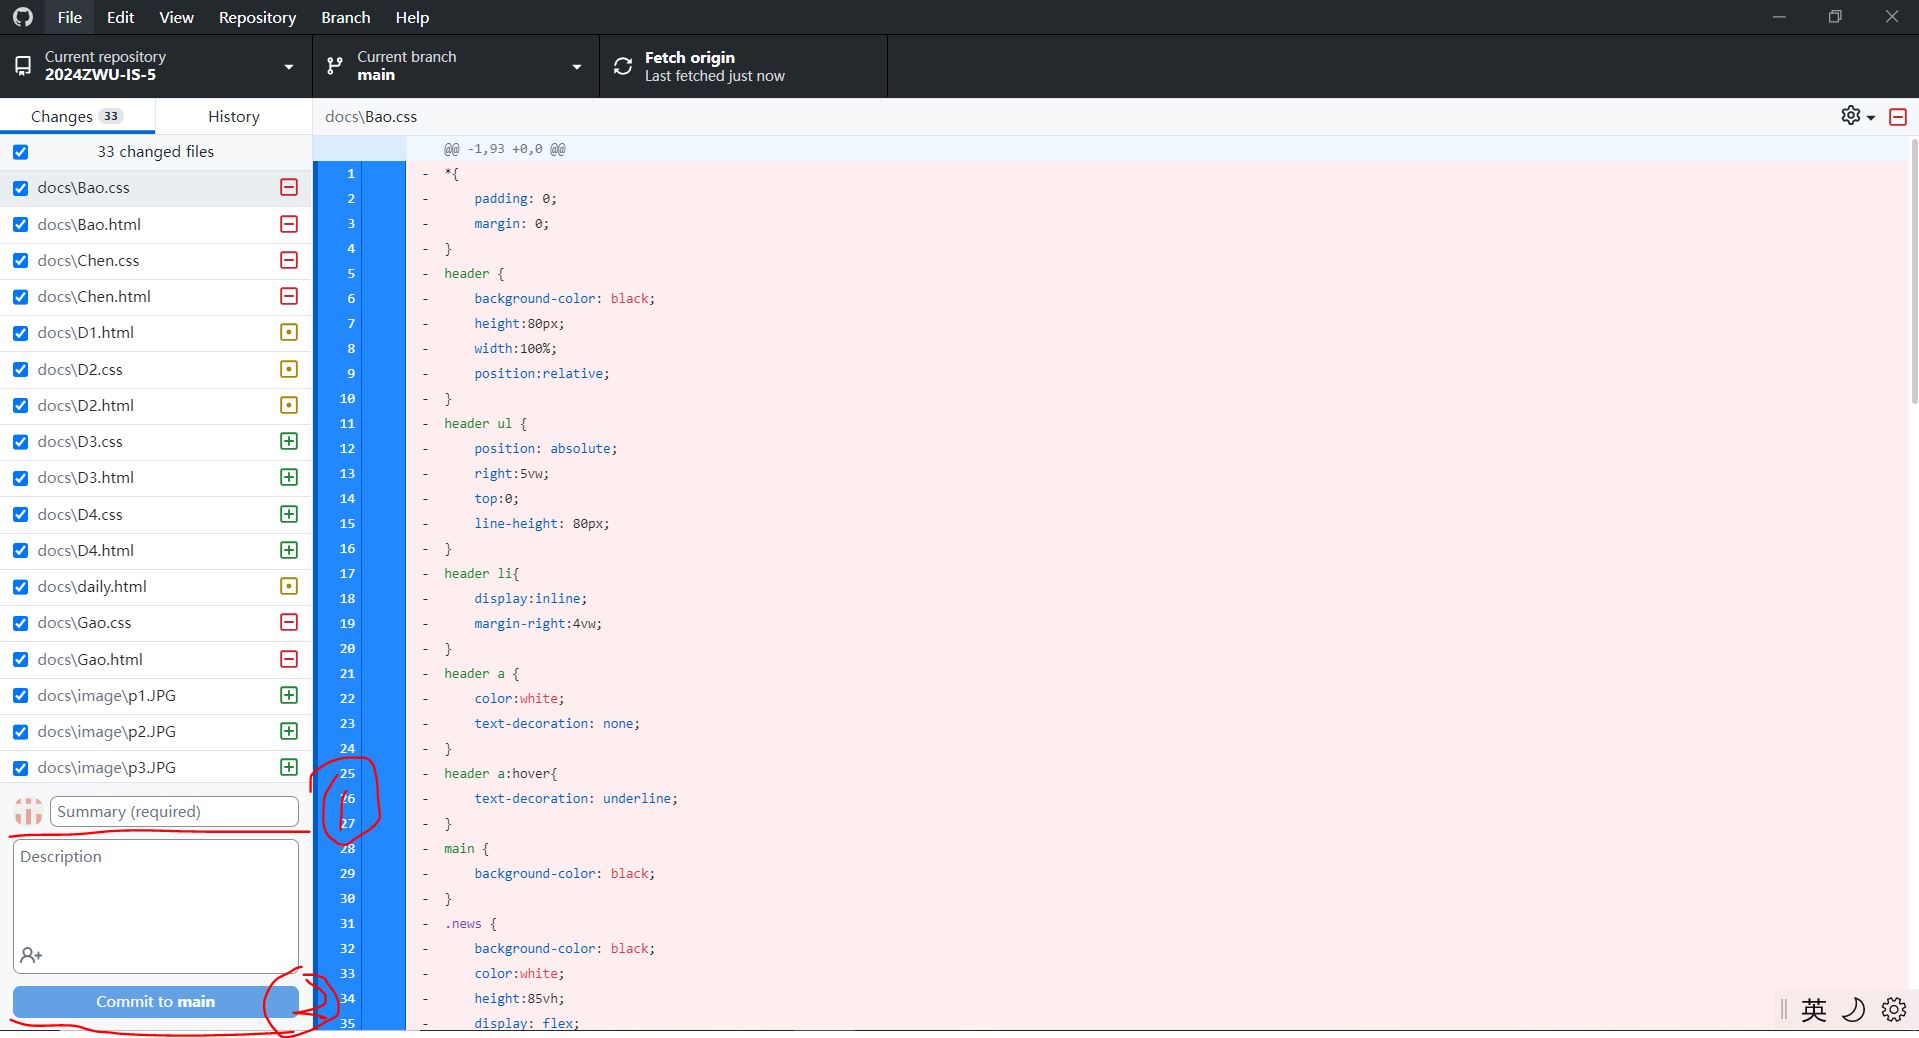
                Enter some text in 1, such as uploading all files, and then click on 2

                When you click on 1, you will upload everything you have done to the cloud;
                When you click on 2, you can open VS code again and immediately continue to modify your own code;
                When you click on 3, the folder containing your webpage content will be opened, and you can check for any missing errors;
                When you click on 4, it will open the web version of GitHub
 Set your warehouse name and click on the two buttons below
 Find your library and click on it
 Click on Settings, then click on the webpage and
set the location of your library in the order of 123. Okay, a basic library prototype is completed
Click on Settings, then click on the webpage and
set the location of your library in the order of 123. Okay, a basic library prototype is completed
 Do you remember the library you just created on the webpage? Find its way to clone it
 like it
 For this, you need to write two sided code in VS, which is the two sided code I will show next
 HTML is the core of a webpage, and key information needs to be input from it. CSS is mainly responsible for polishing web pages
 When you click on 1, you will upload everything you have done to the cloud;
When you click on 2, you can open VS code again and immediately continue to modify your own code;
When you click on 3, the folder containing your webpage content will be opened, and you can check for any missing errors;
When you click on 4, it will open the web version of GitHub
When you click on 1, you will upload everything you have done to the cloud;
When you click on 2, you can open VS code again and immediately continue to modify your own code;
When you click on 3, the folder containing your webpage content will be opened, and you can check for any missing errors;
When you click on 4, it will open the web version of GitHub