Step1: Dismantle
1-Look for sutures
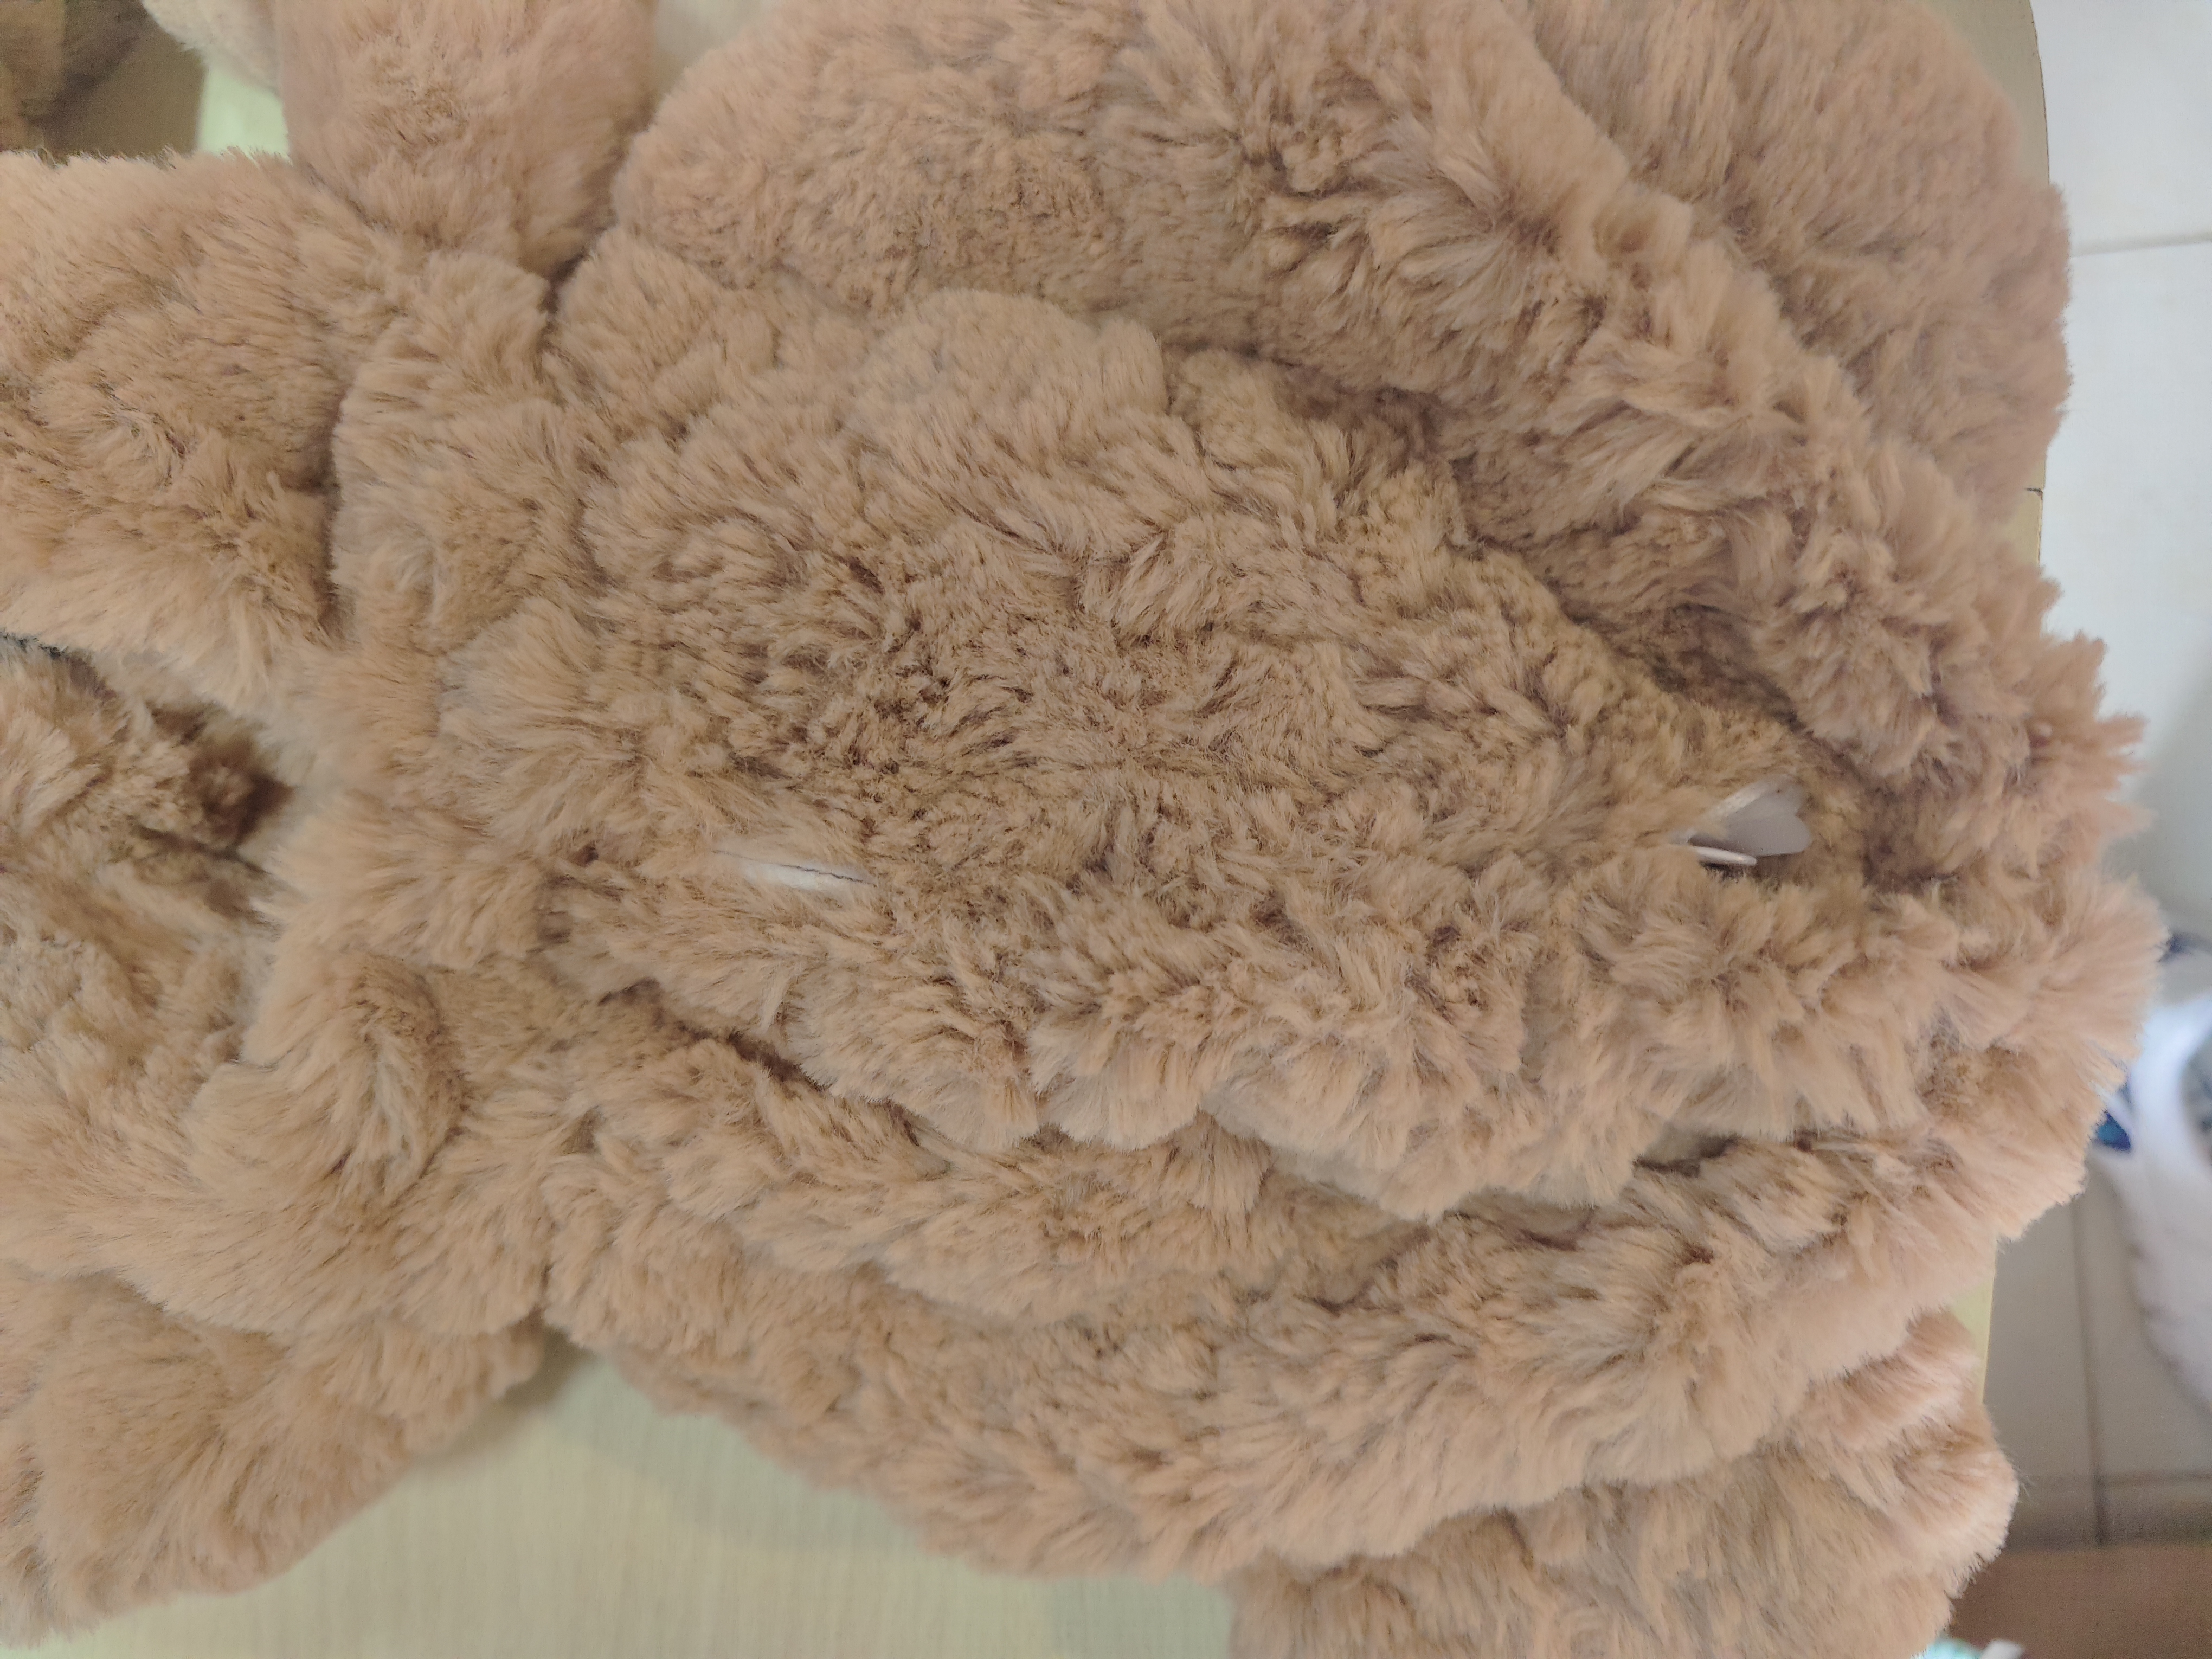
The suture line is found on the head of the stuffed toy bear, because the suture line is easy to
disassemble and sew the bear and the head space of the bear is large to accommodate various parts
of the circuit module.
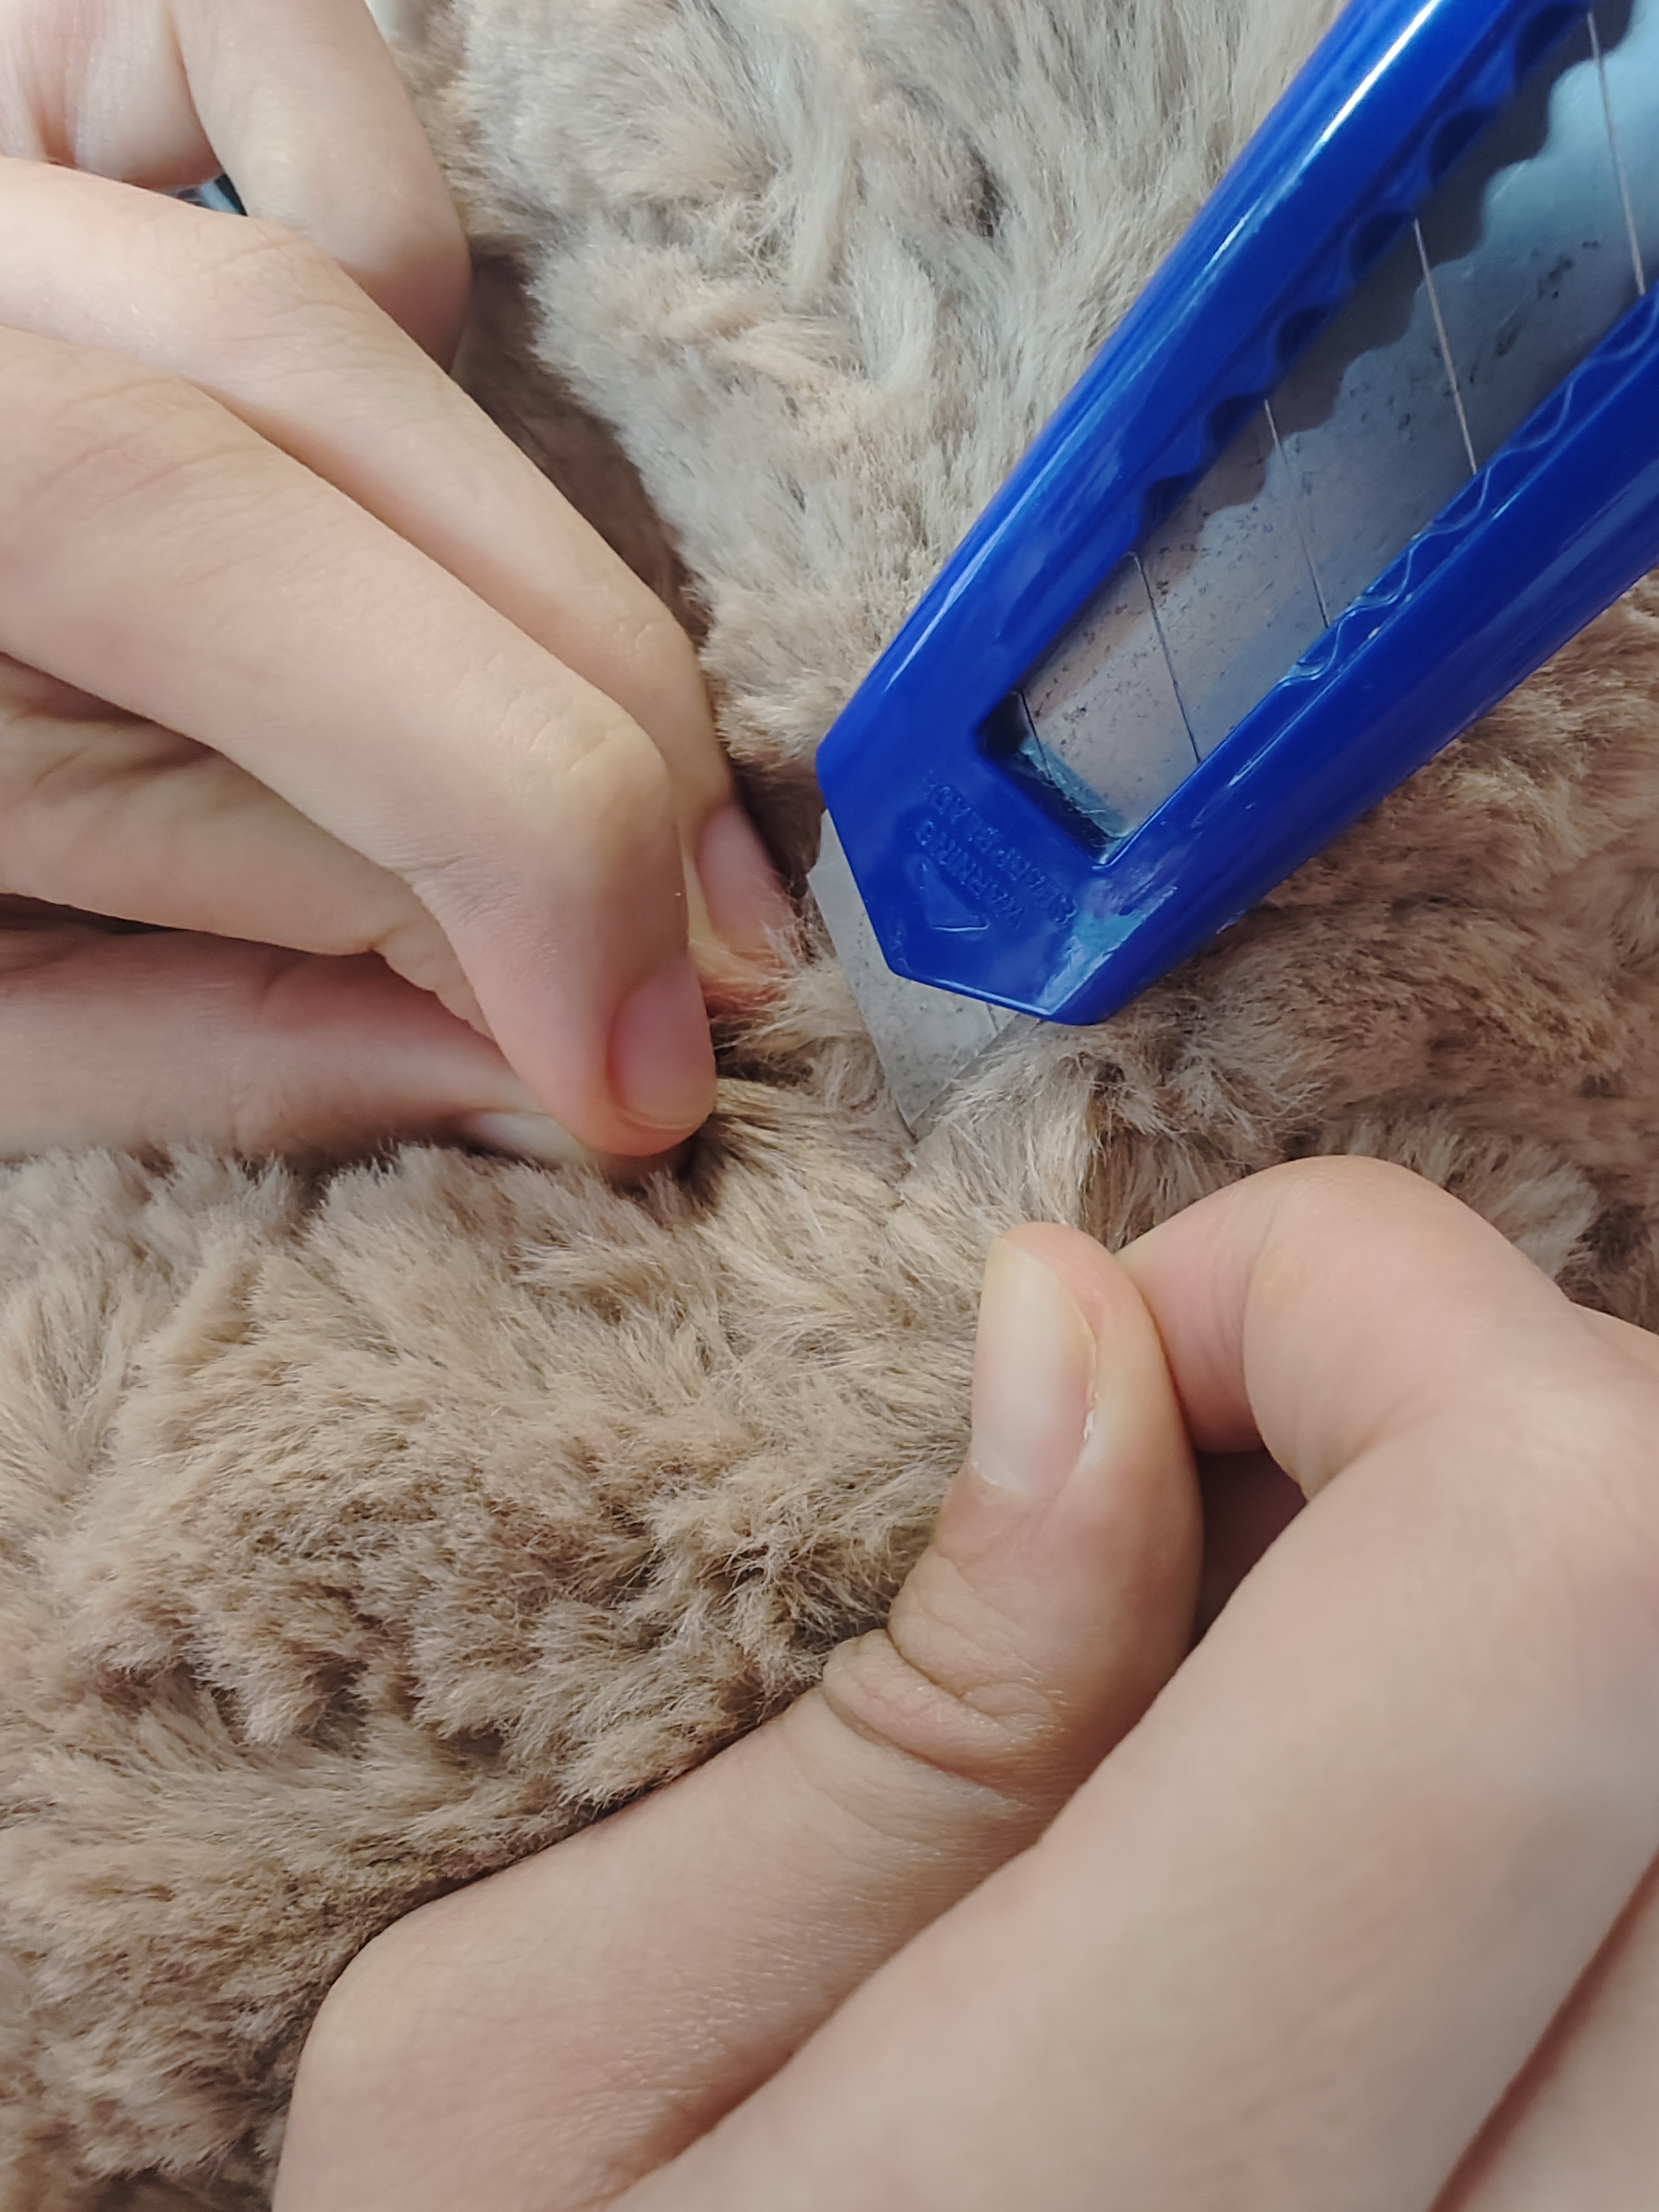
2-Remove the sutures
Pull back the pile near the suture to prevent further work from getting in the way. Use a knife
to carefully cut the yarn from the suture, pulling the fabric apart bit by bit.
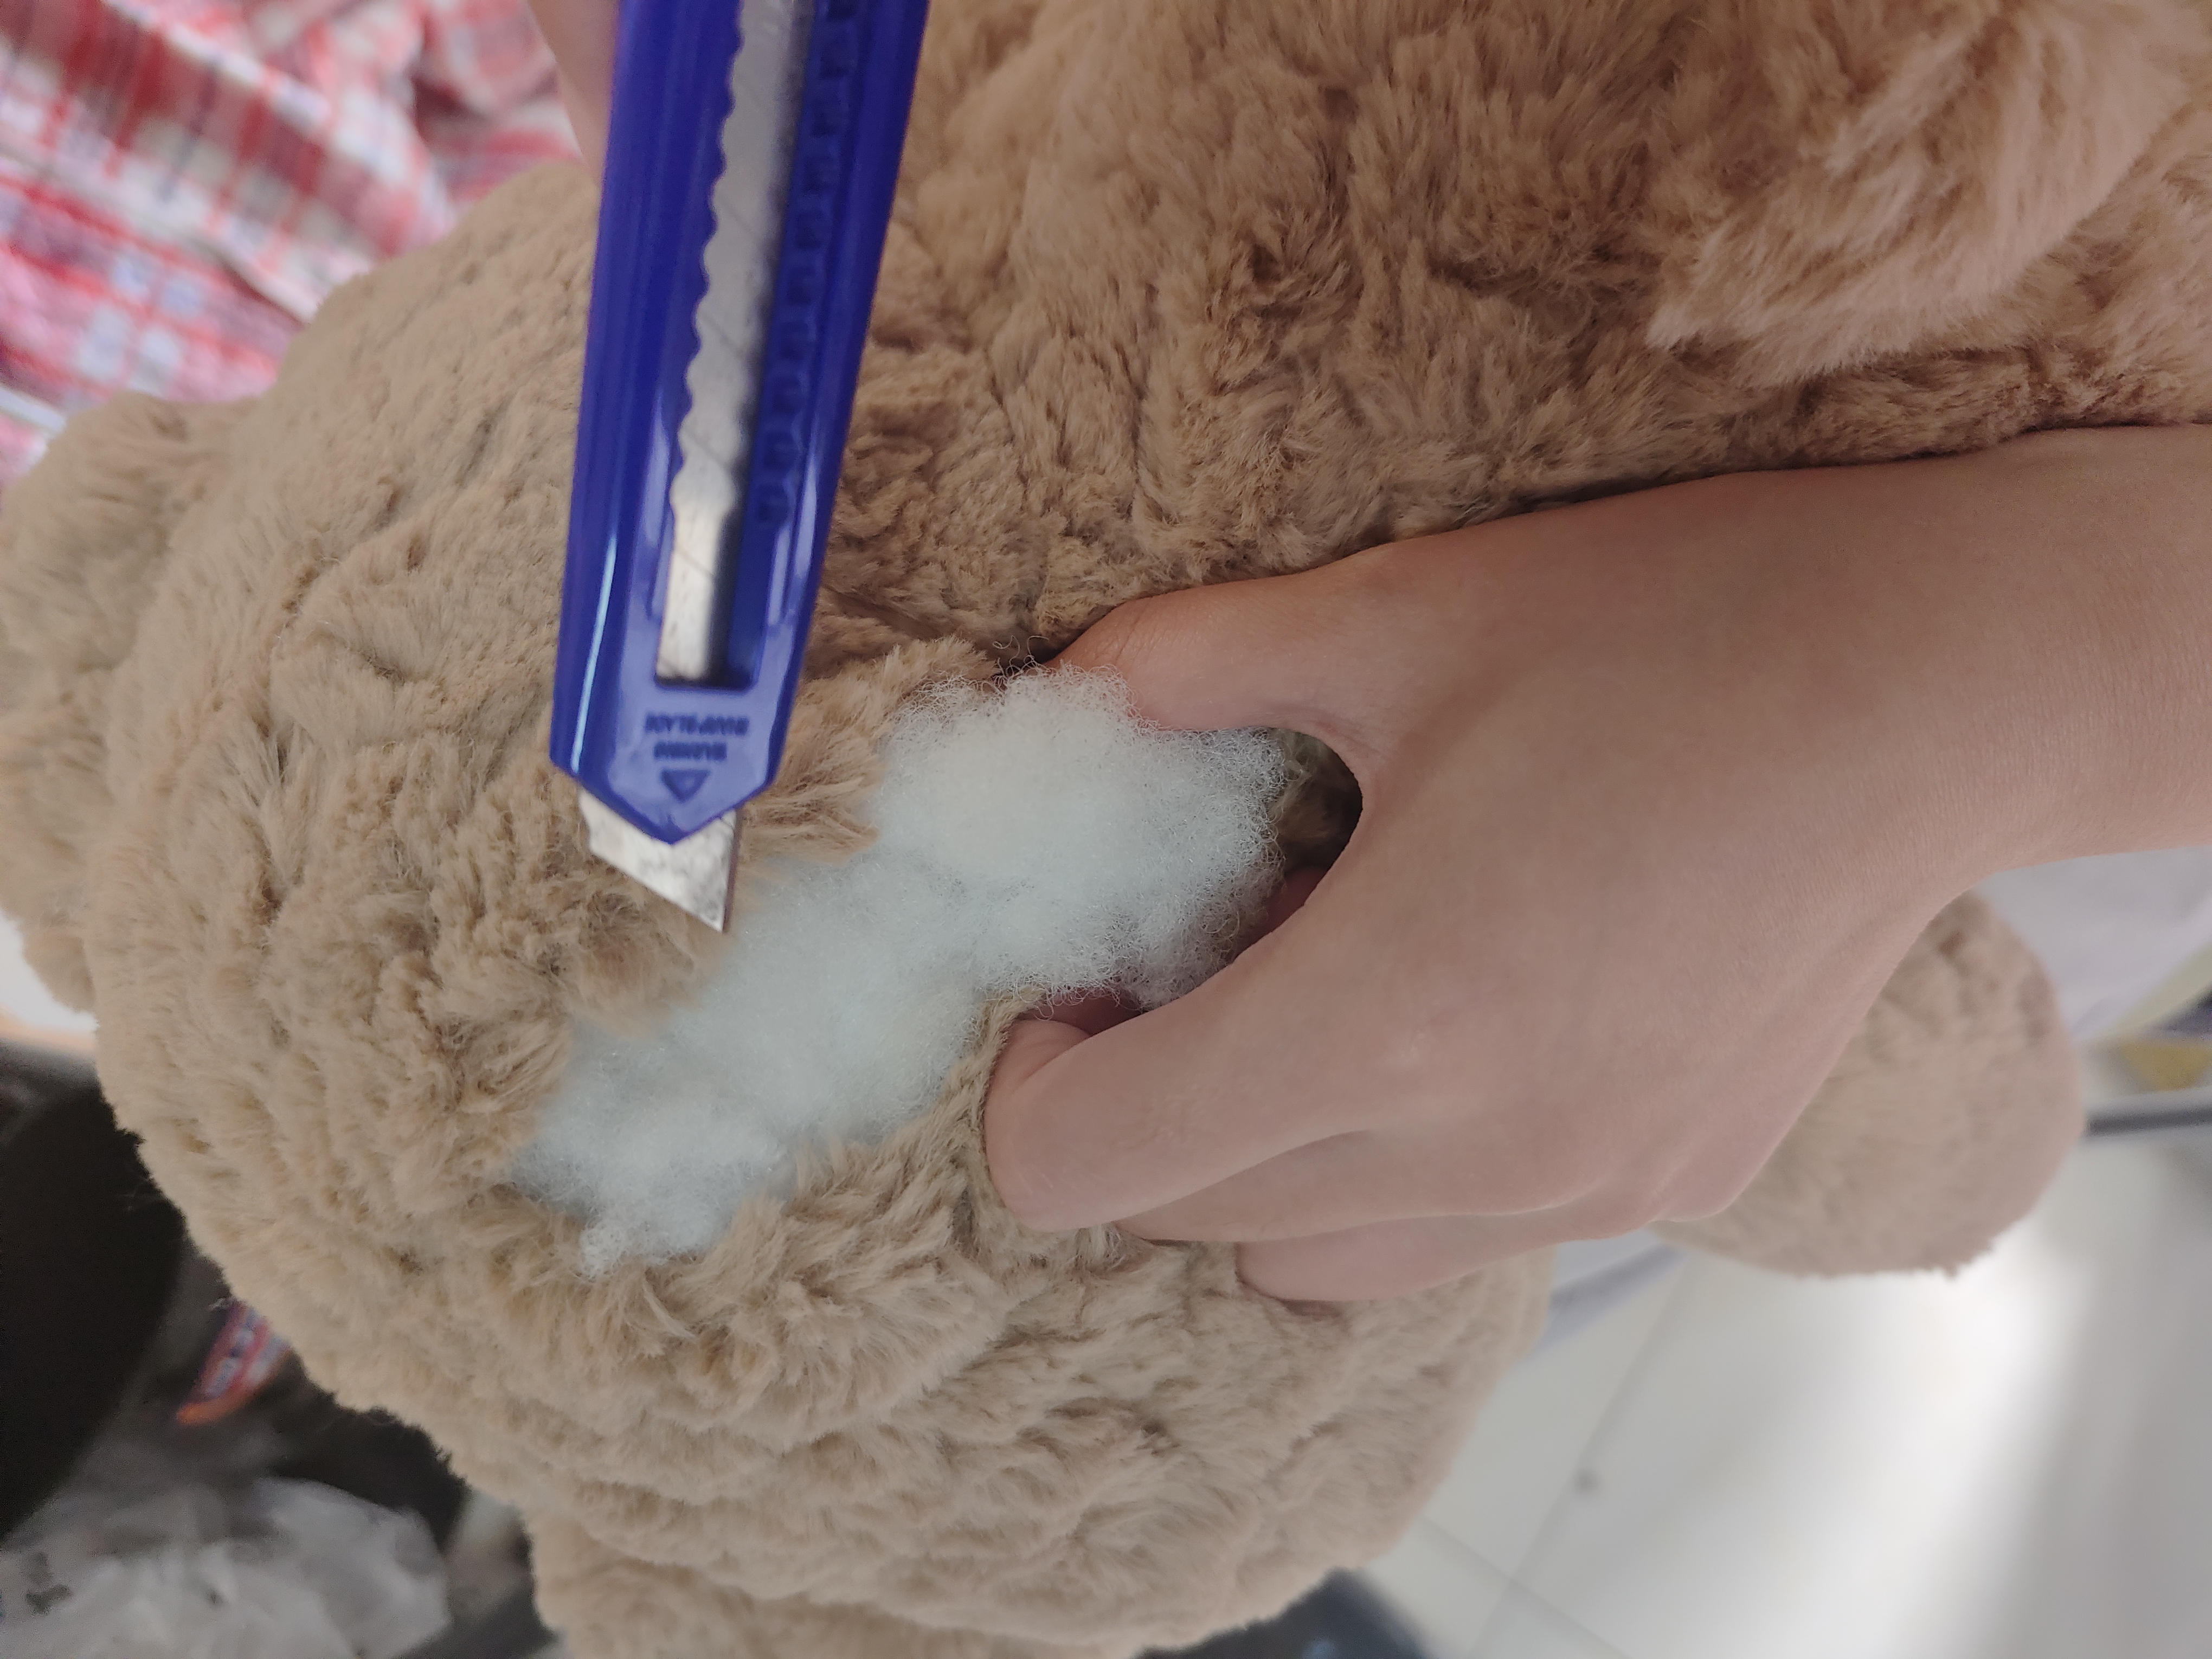
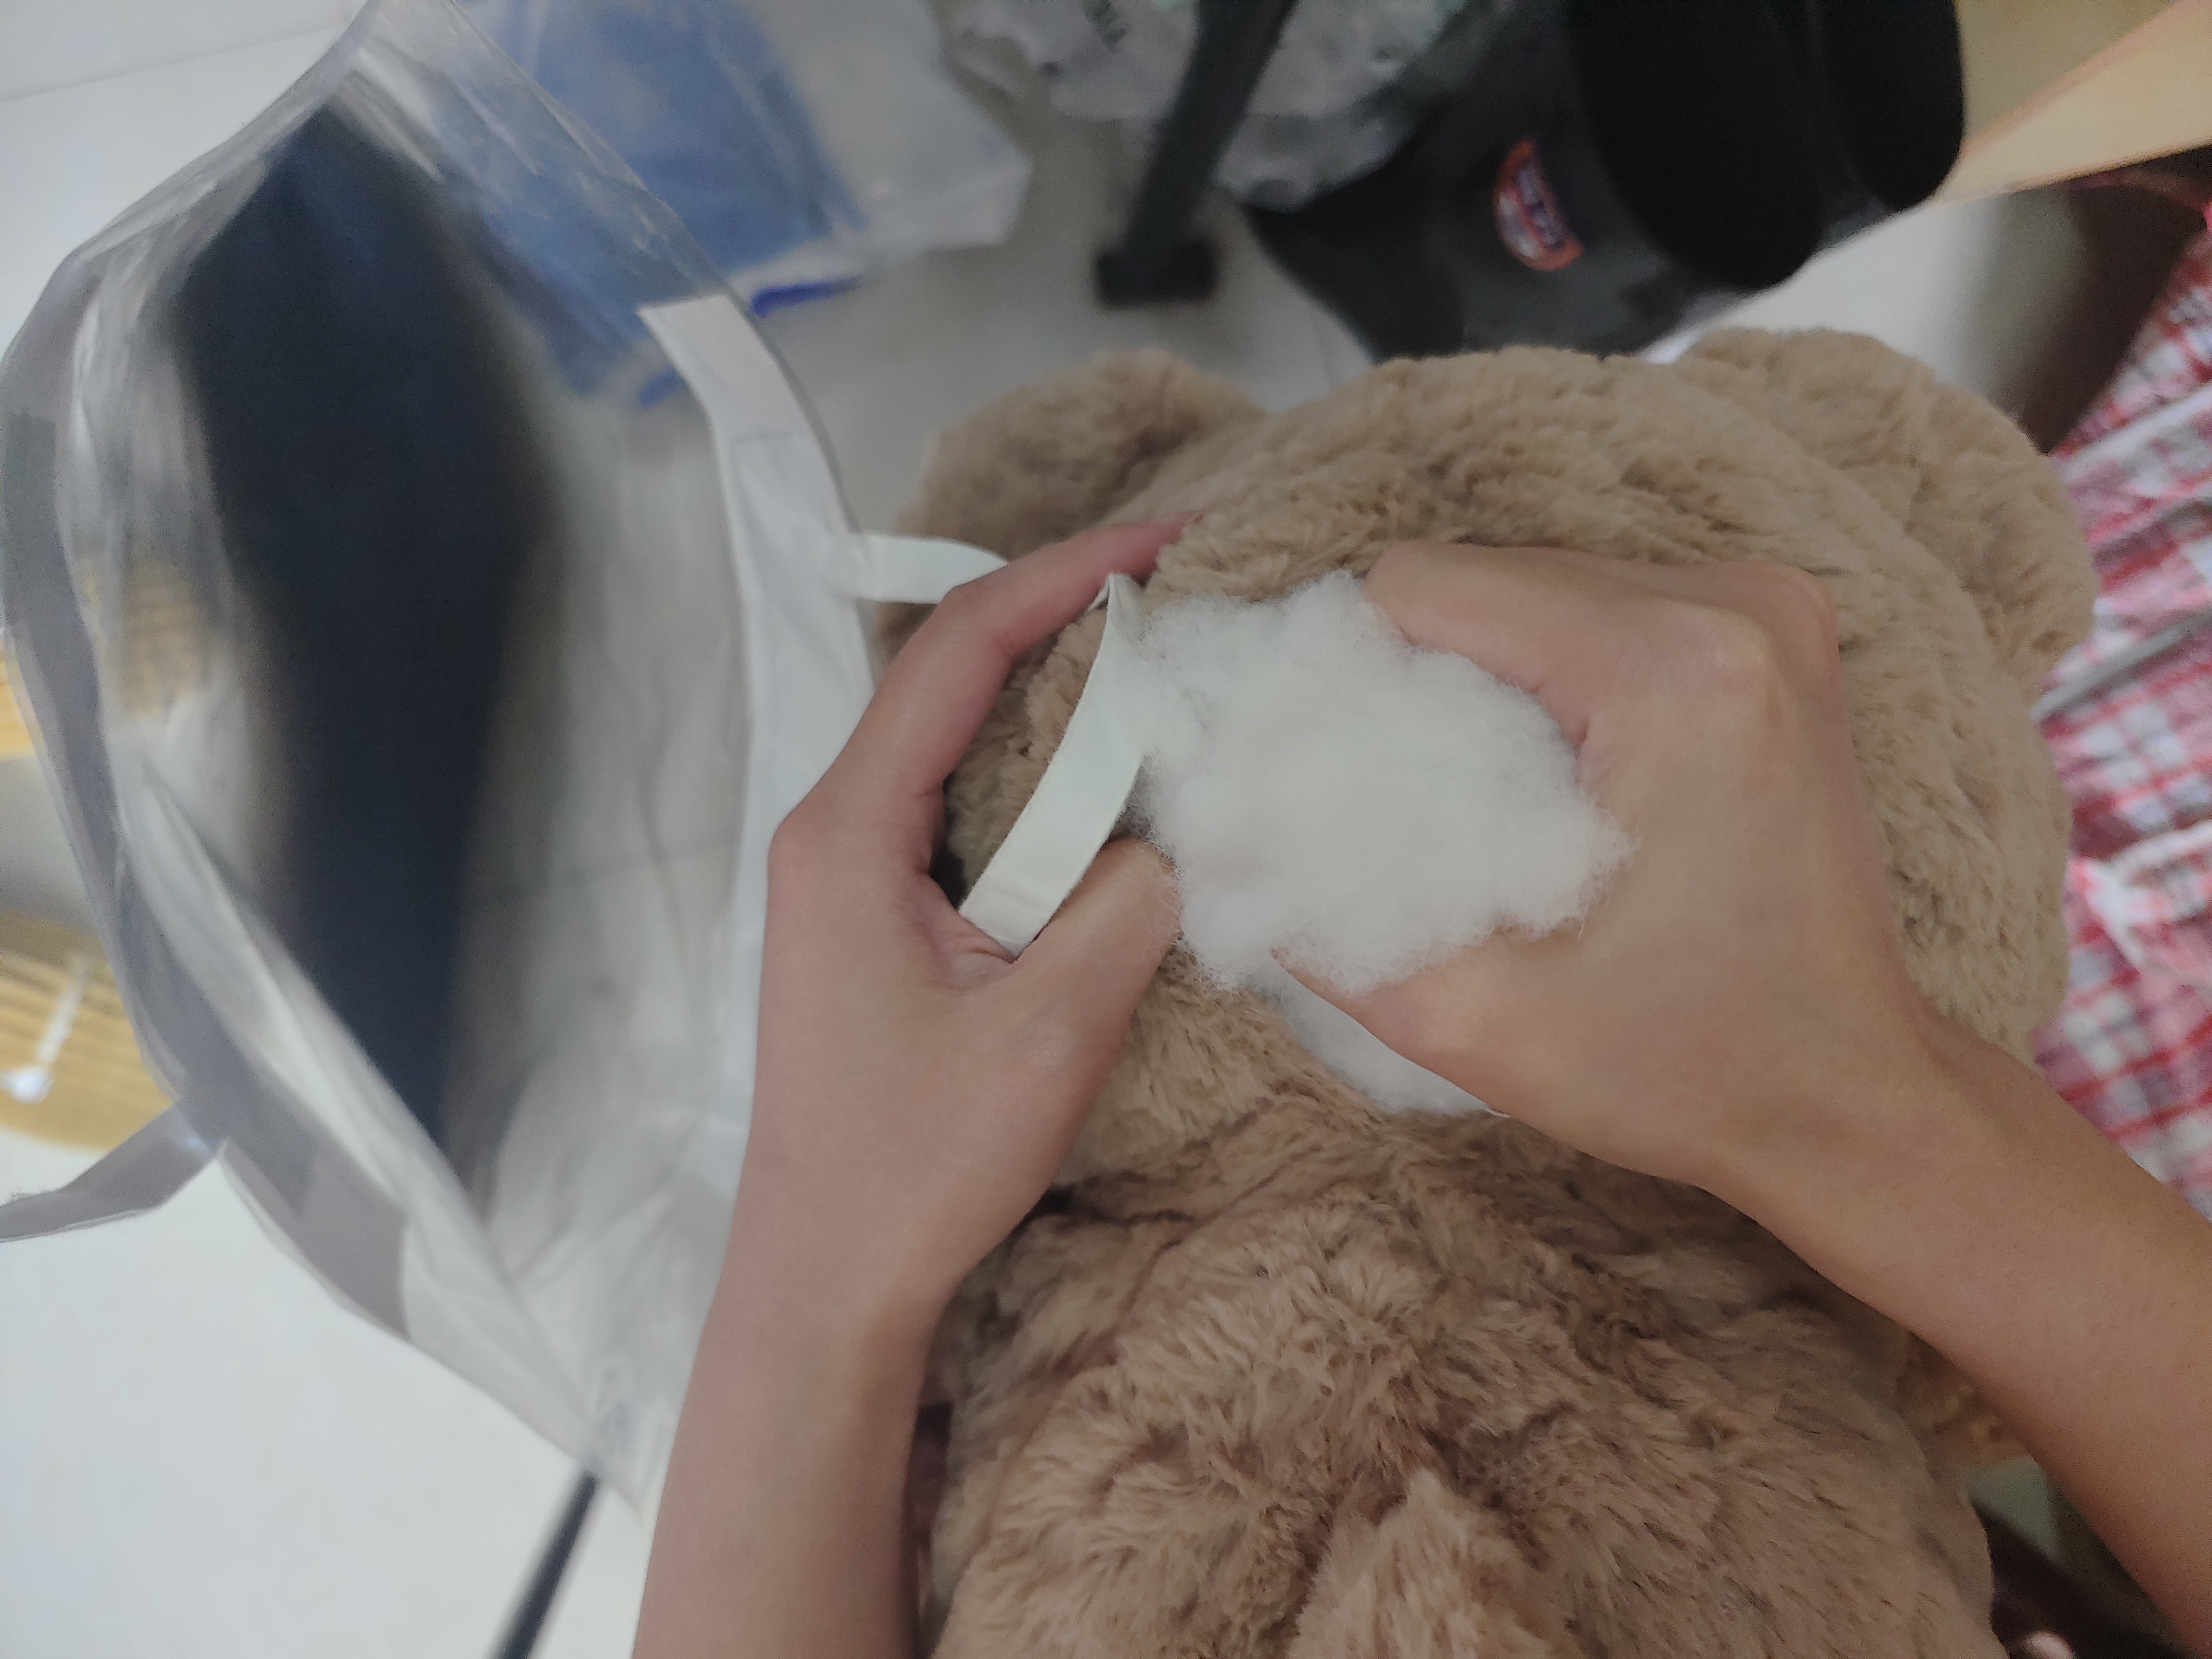
3-Take out the cotton
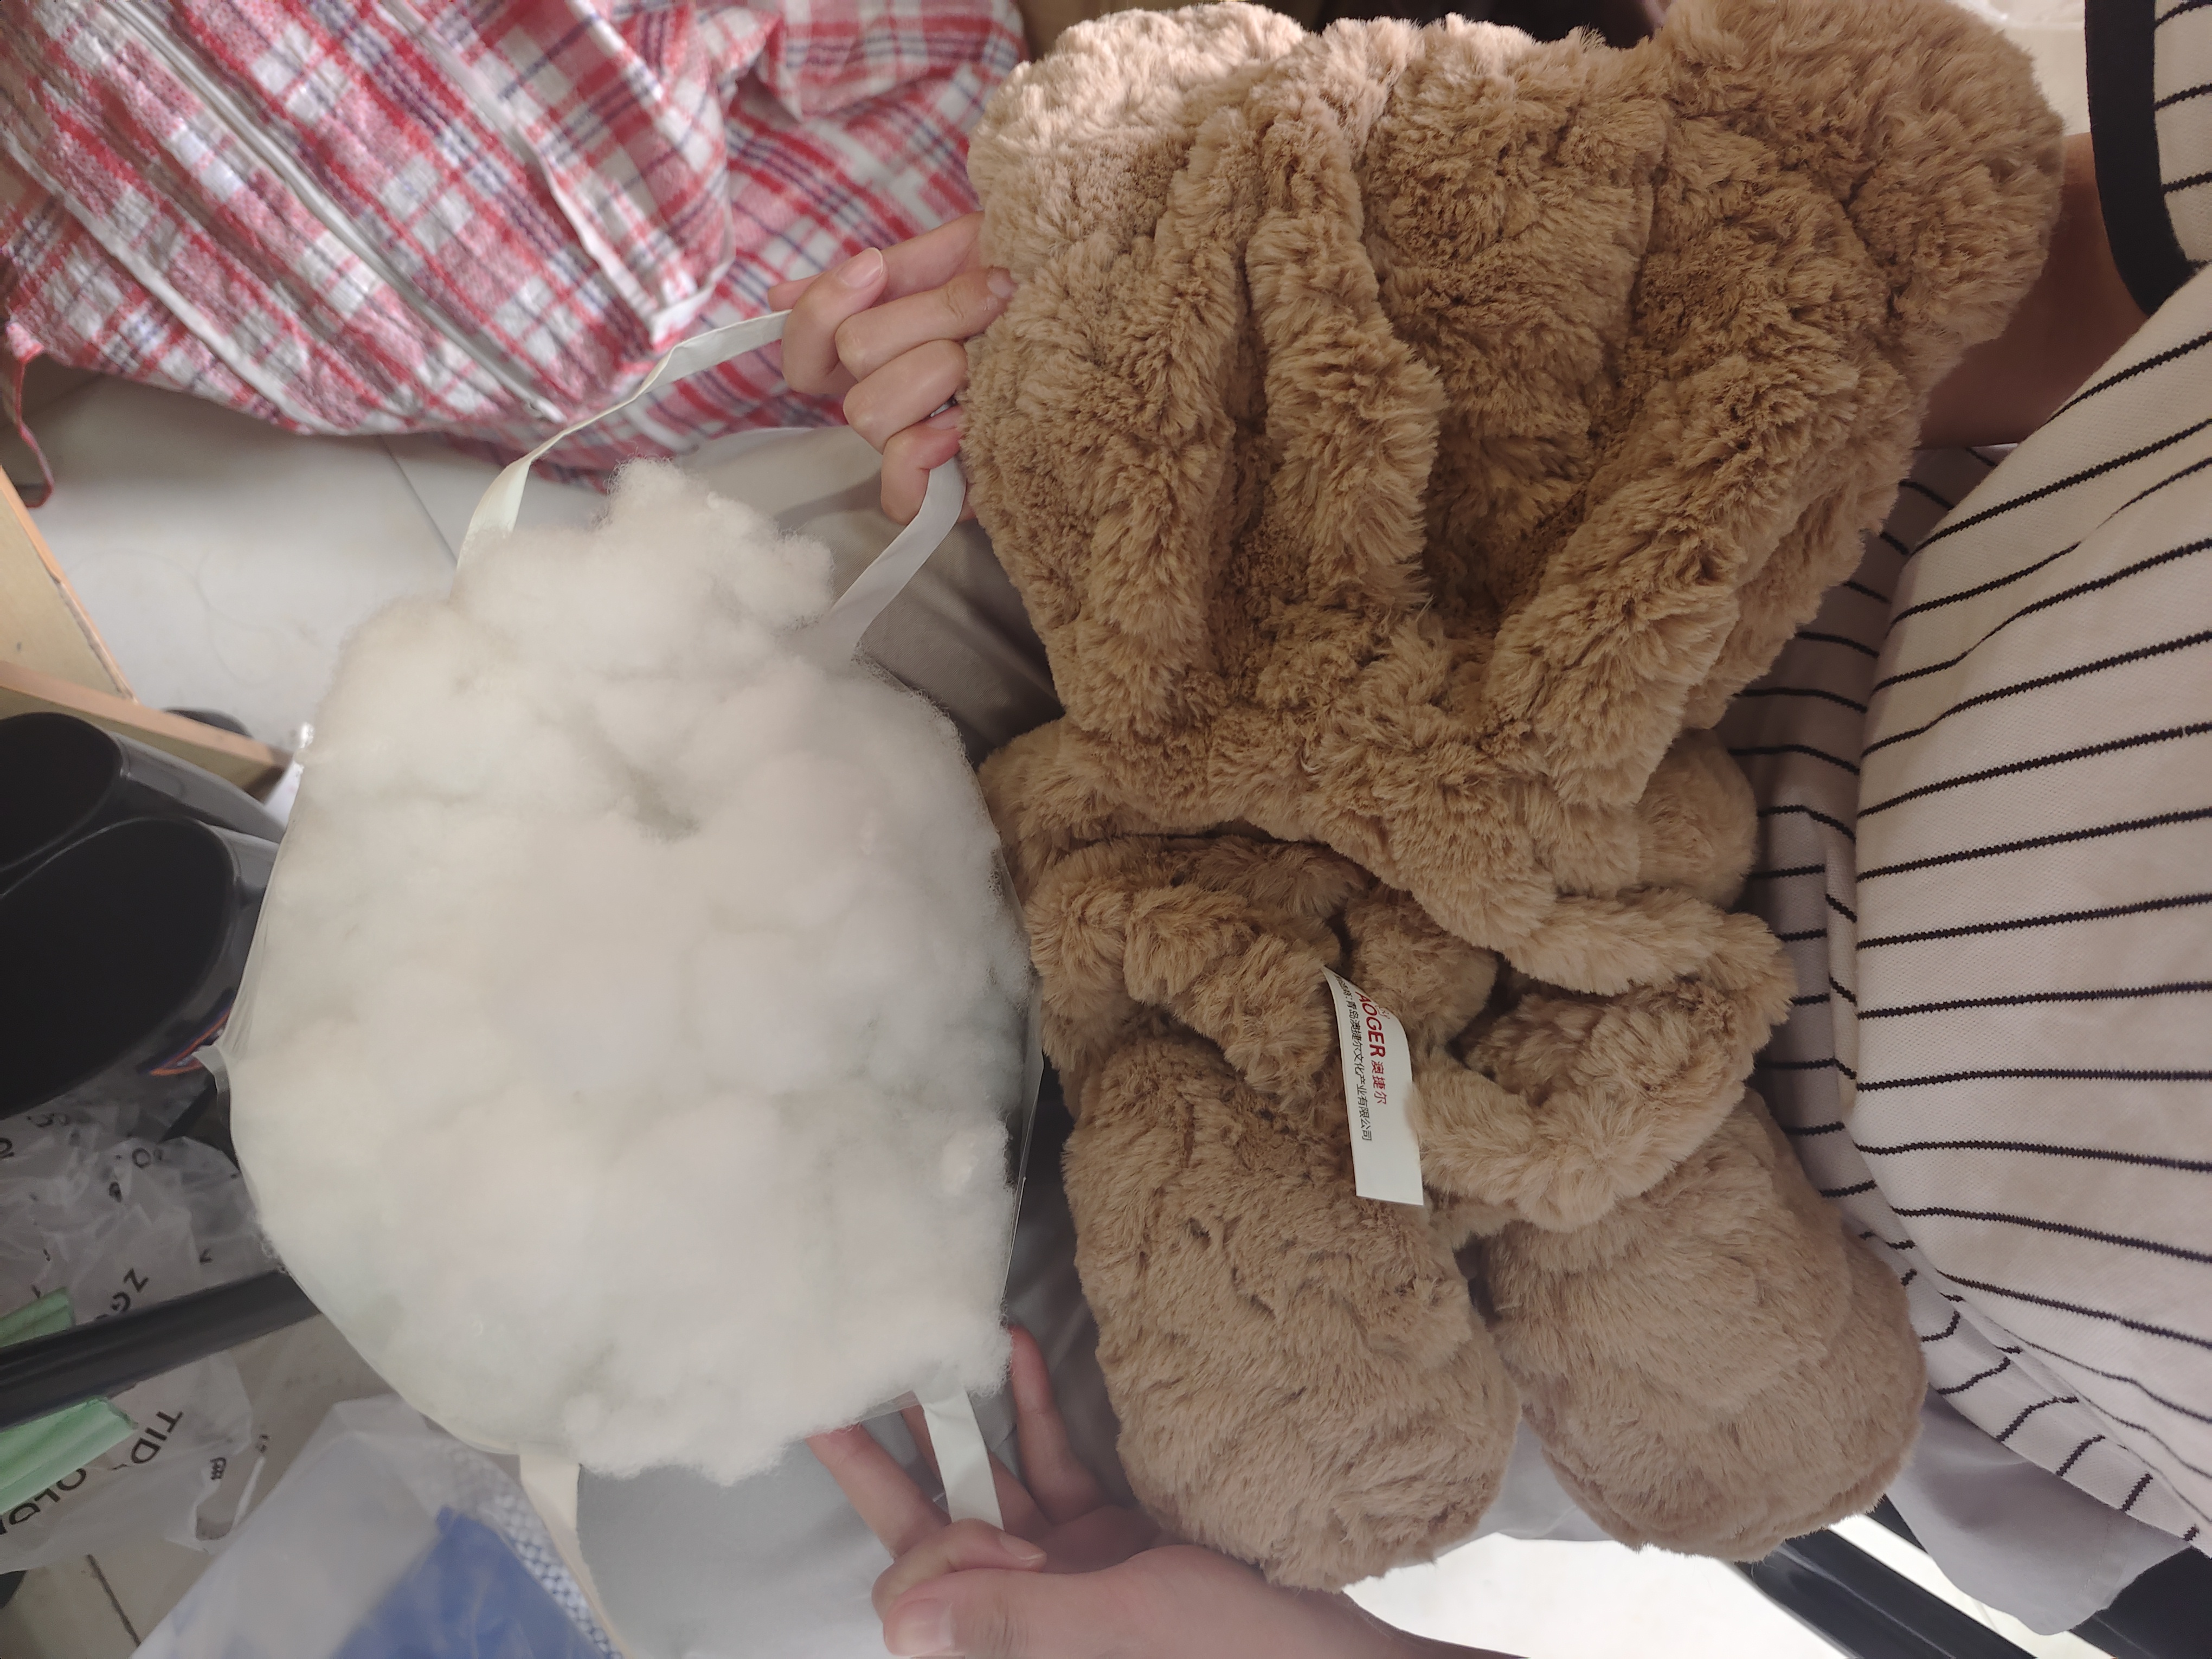
Separate the fabric from the head of the stuffed bear and remove all the cotton from the bear.
Final result
Step2: Stitching zipper
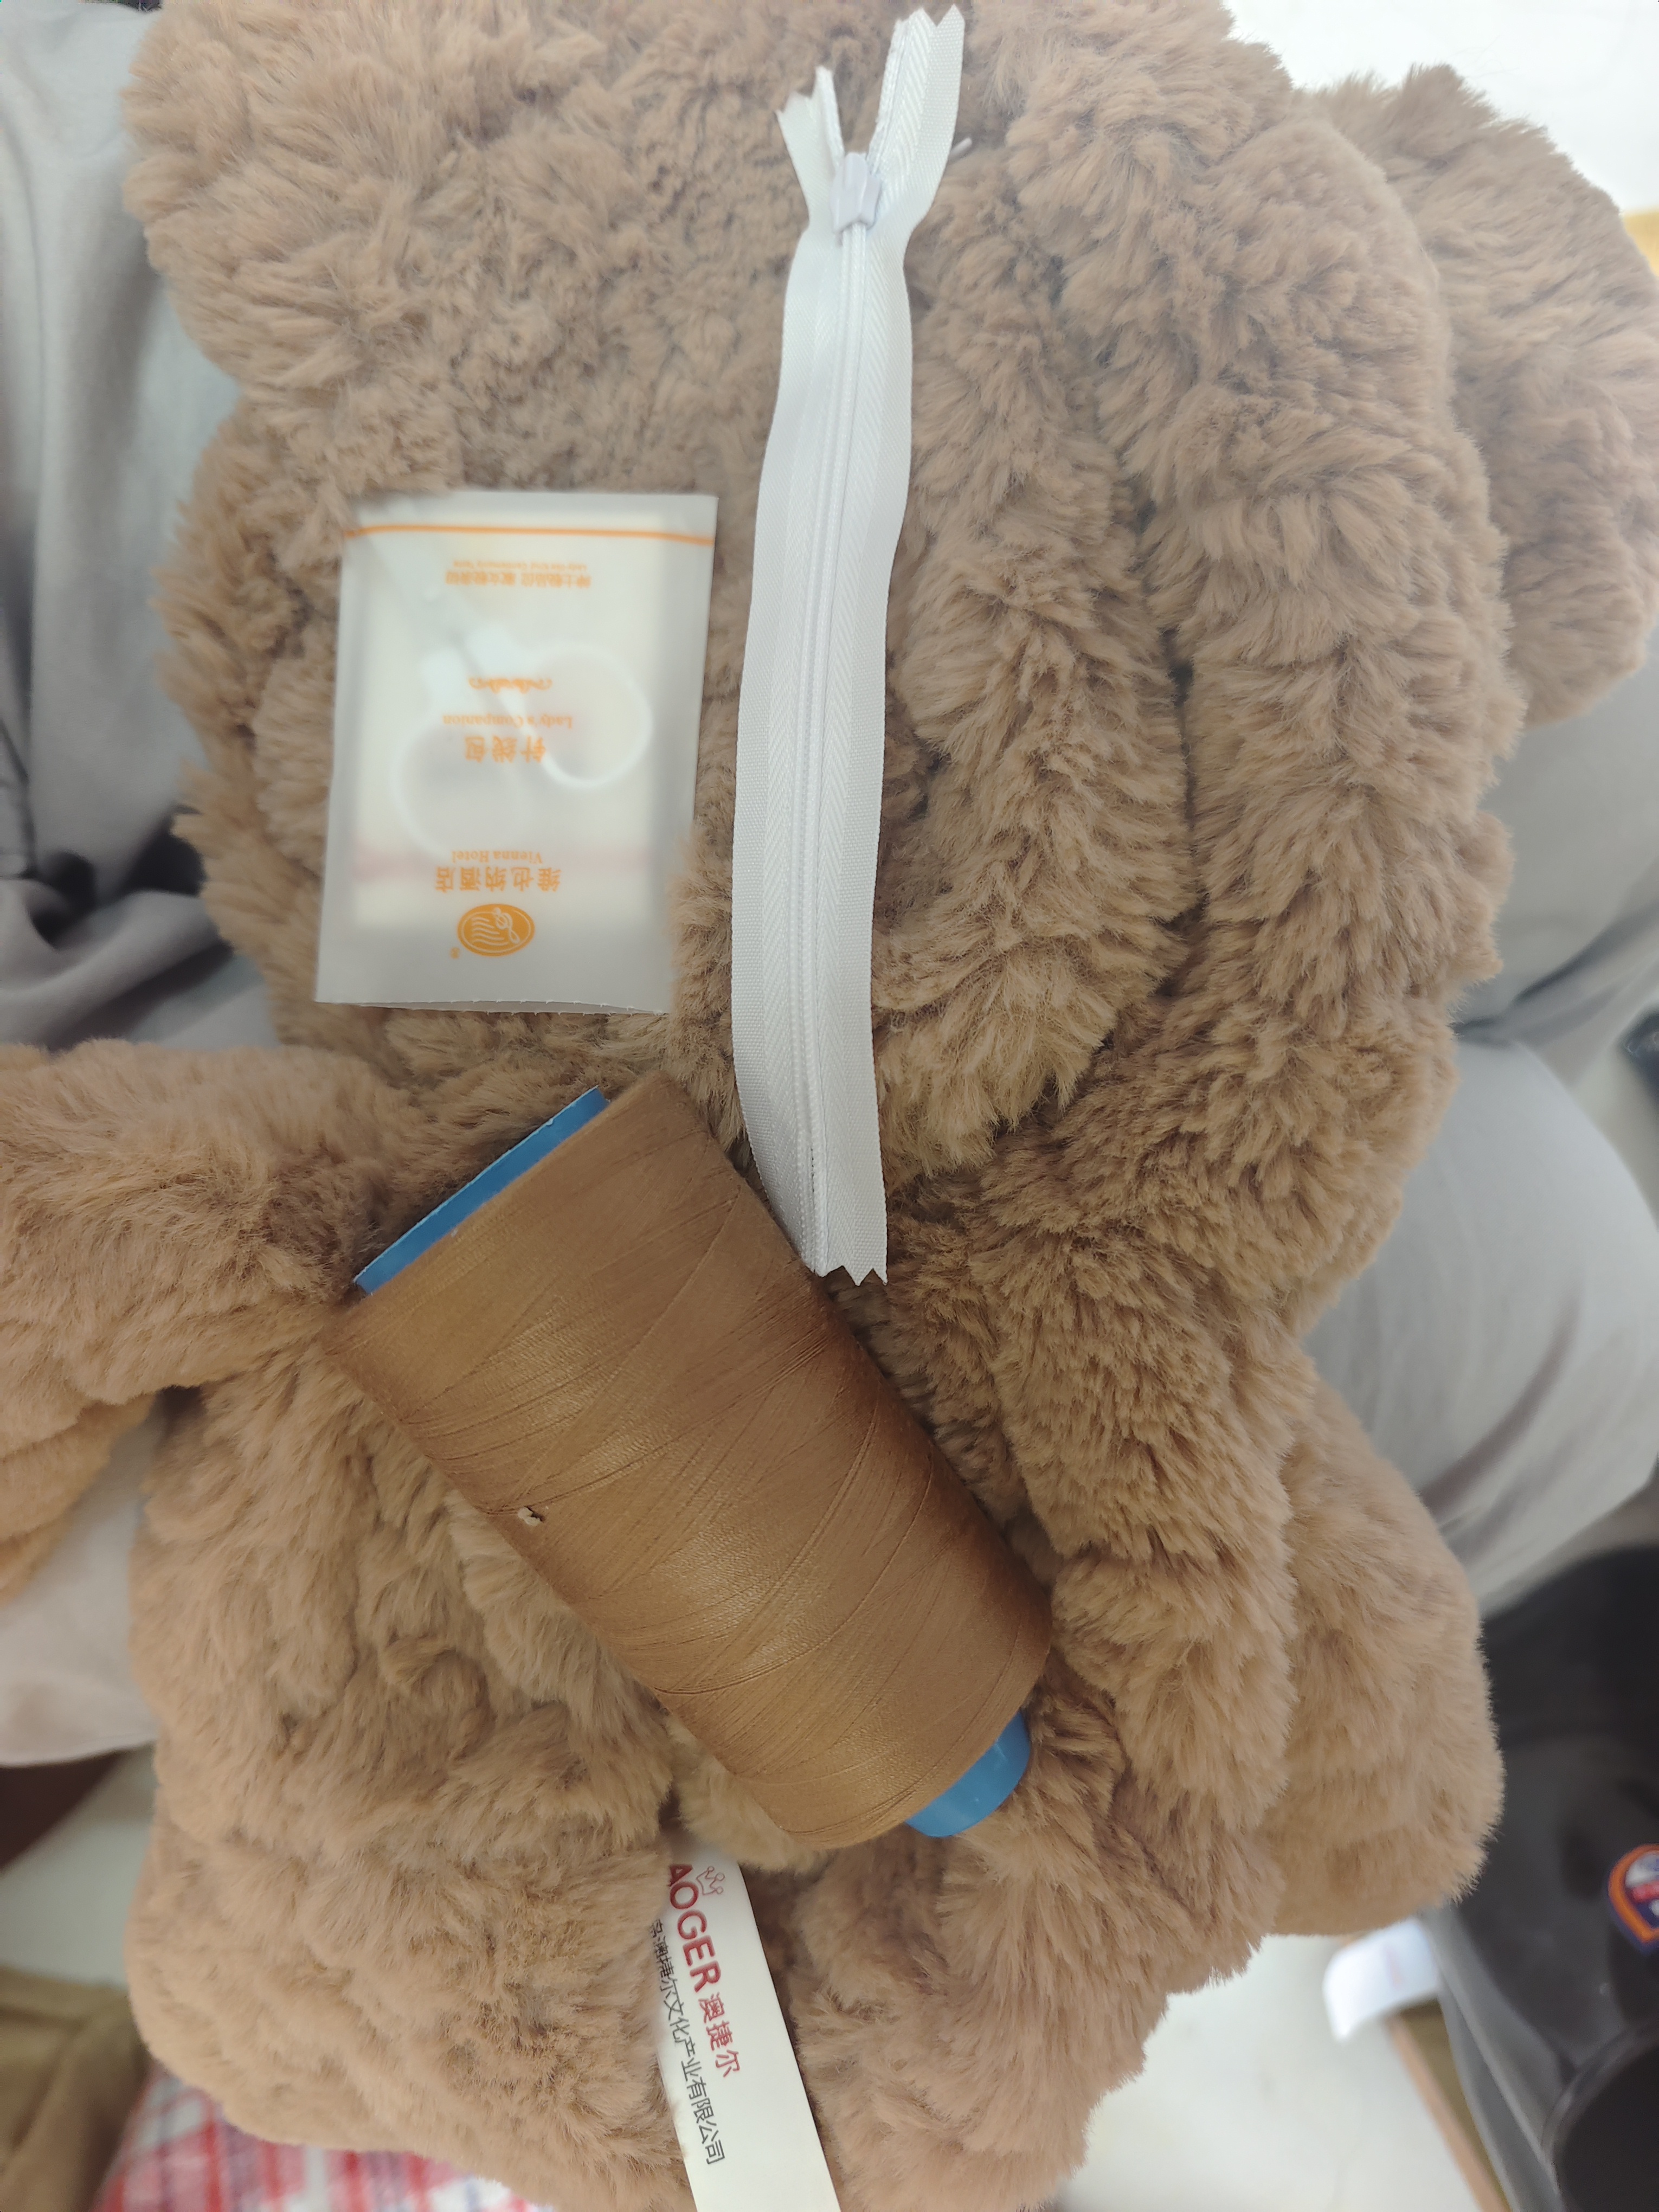
1-Stores reserve
Before we start working on the teddy bear, we need to prepare a series of tools and materials:
sewing kit, invisible zipper and thread.
sewing kit:First came the sewing kit, which contained two small needles of different sizes,
three white buttons, two small pins, and a small pair of scissors.In addition.
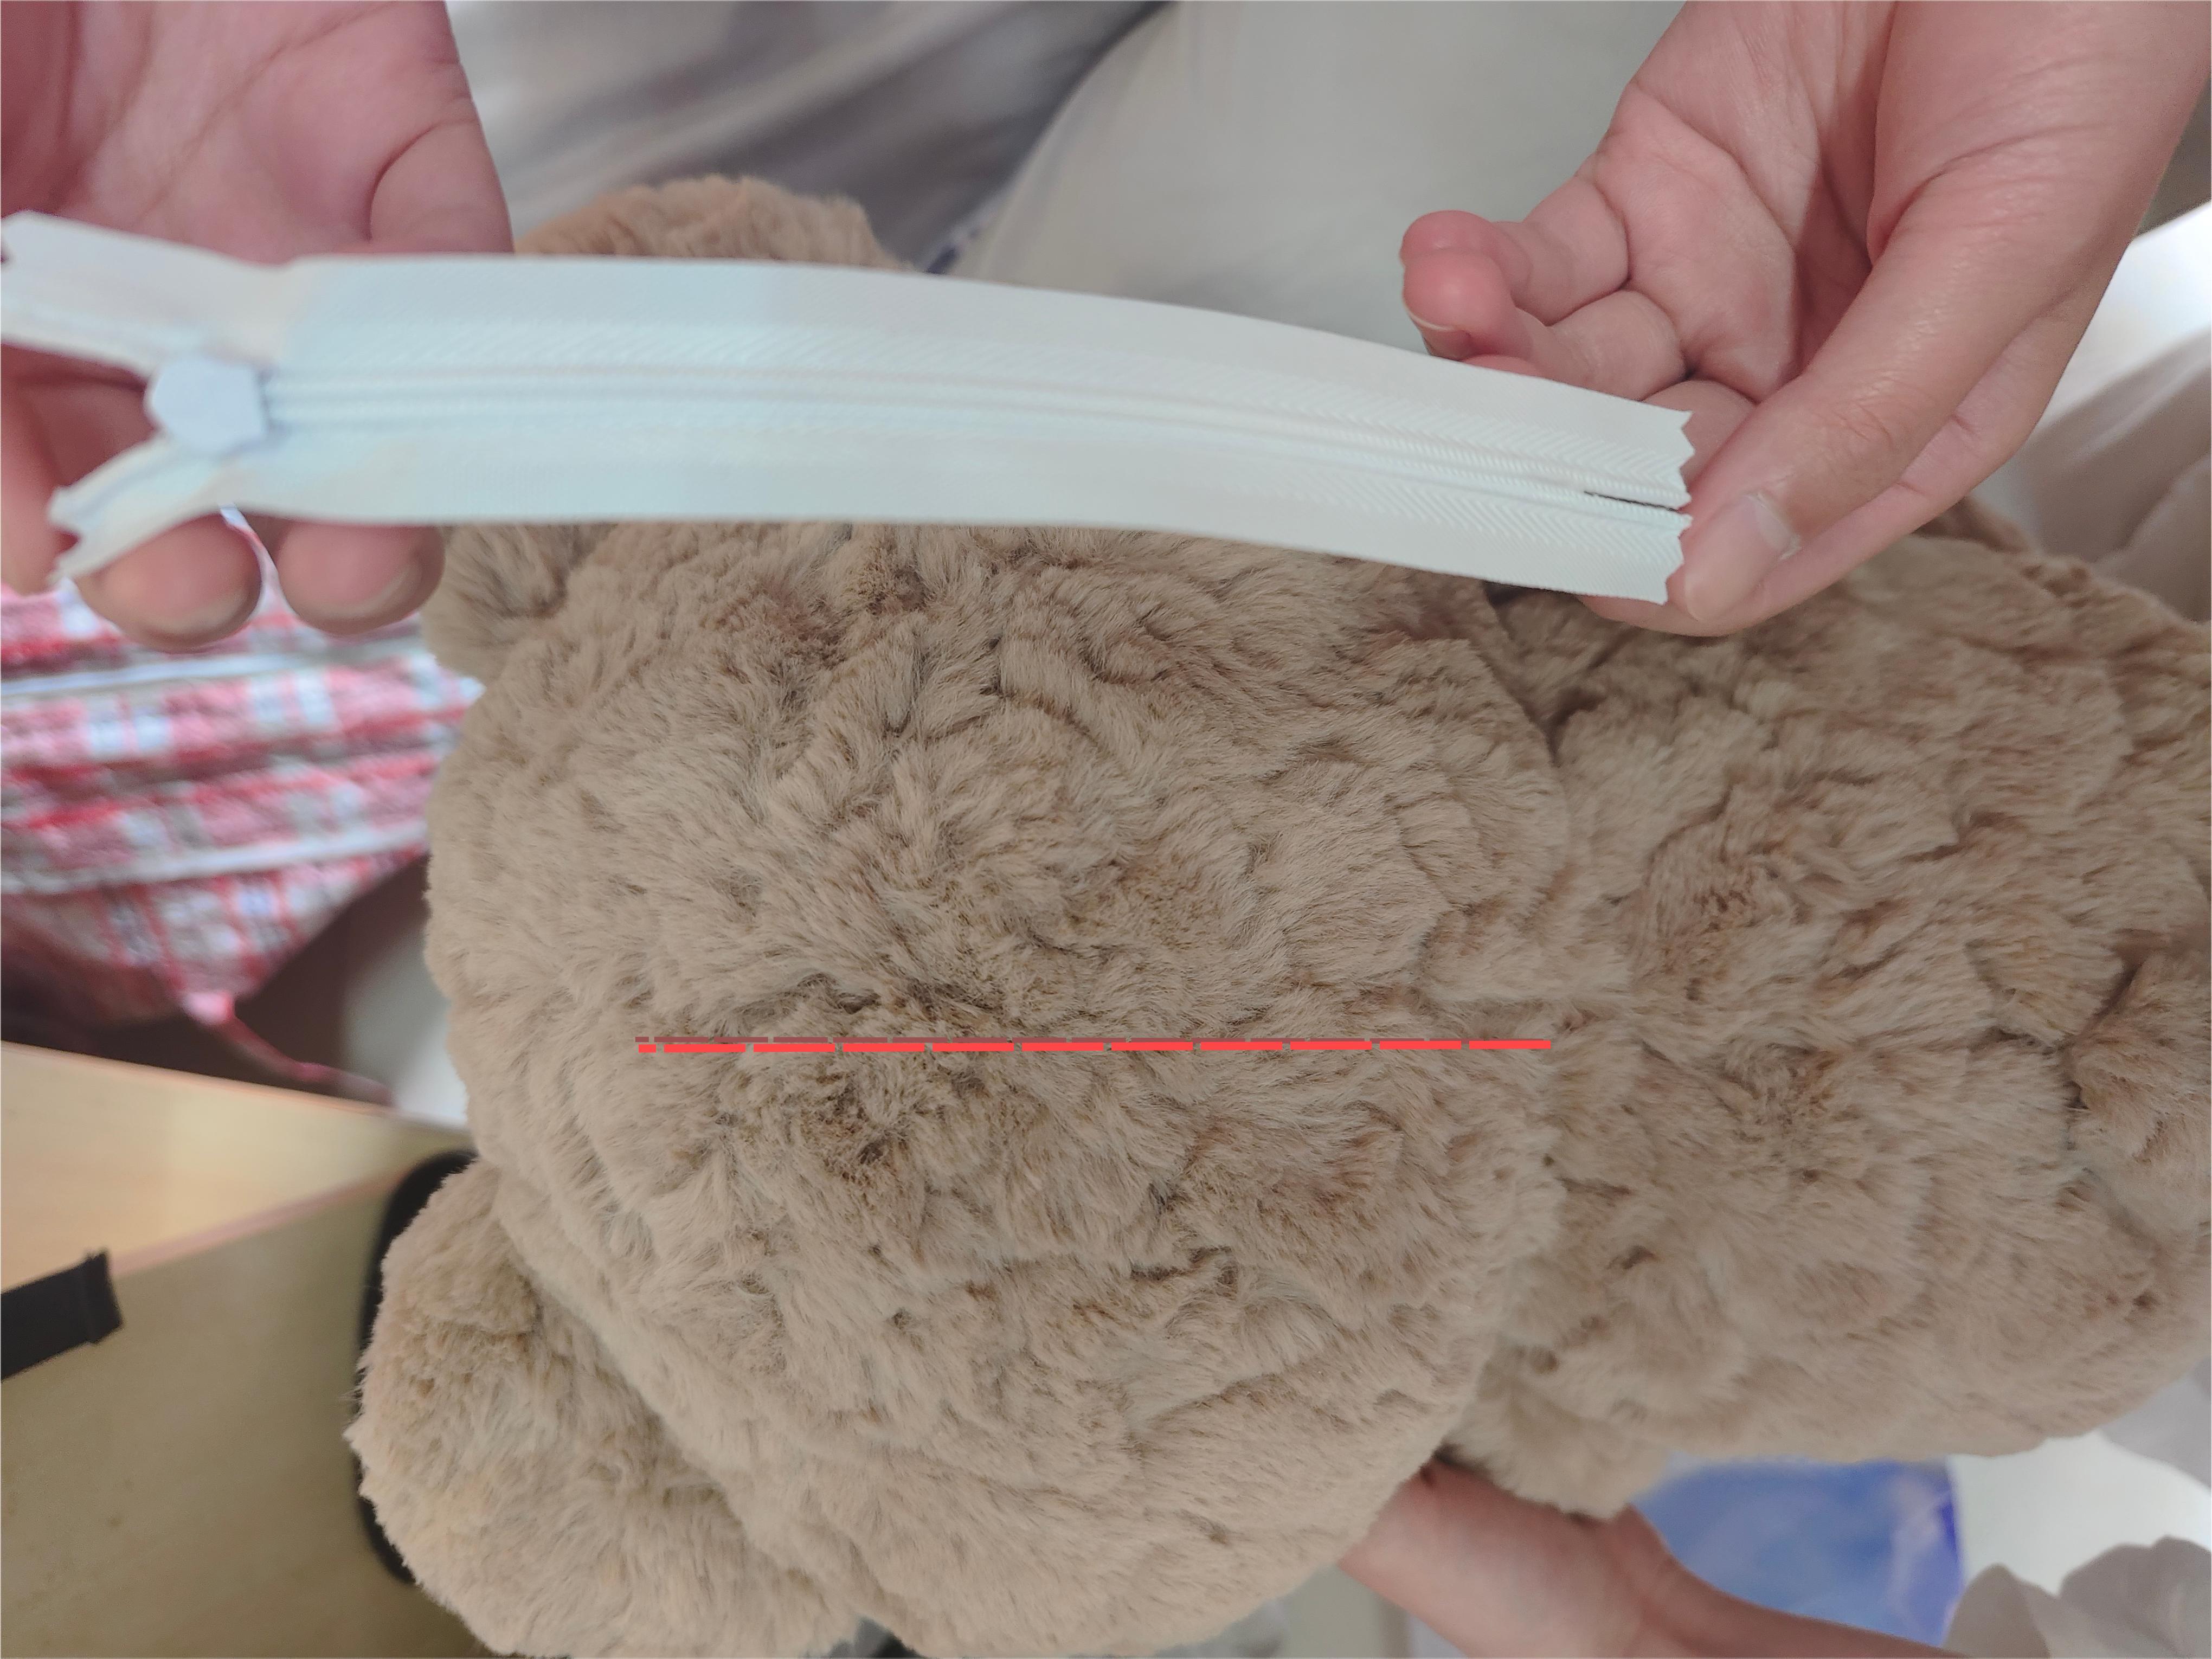
invisible zipper:Five 10cm invisible zippers, the length of the teddy bear's head suture line.
thread:A bundle of light brown thread, the same color as the teddy bear.
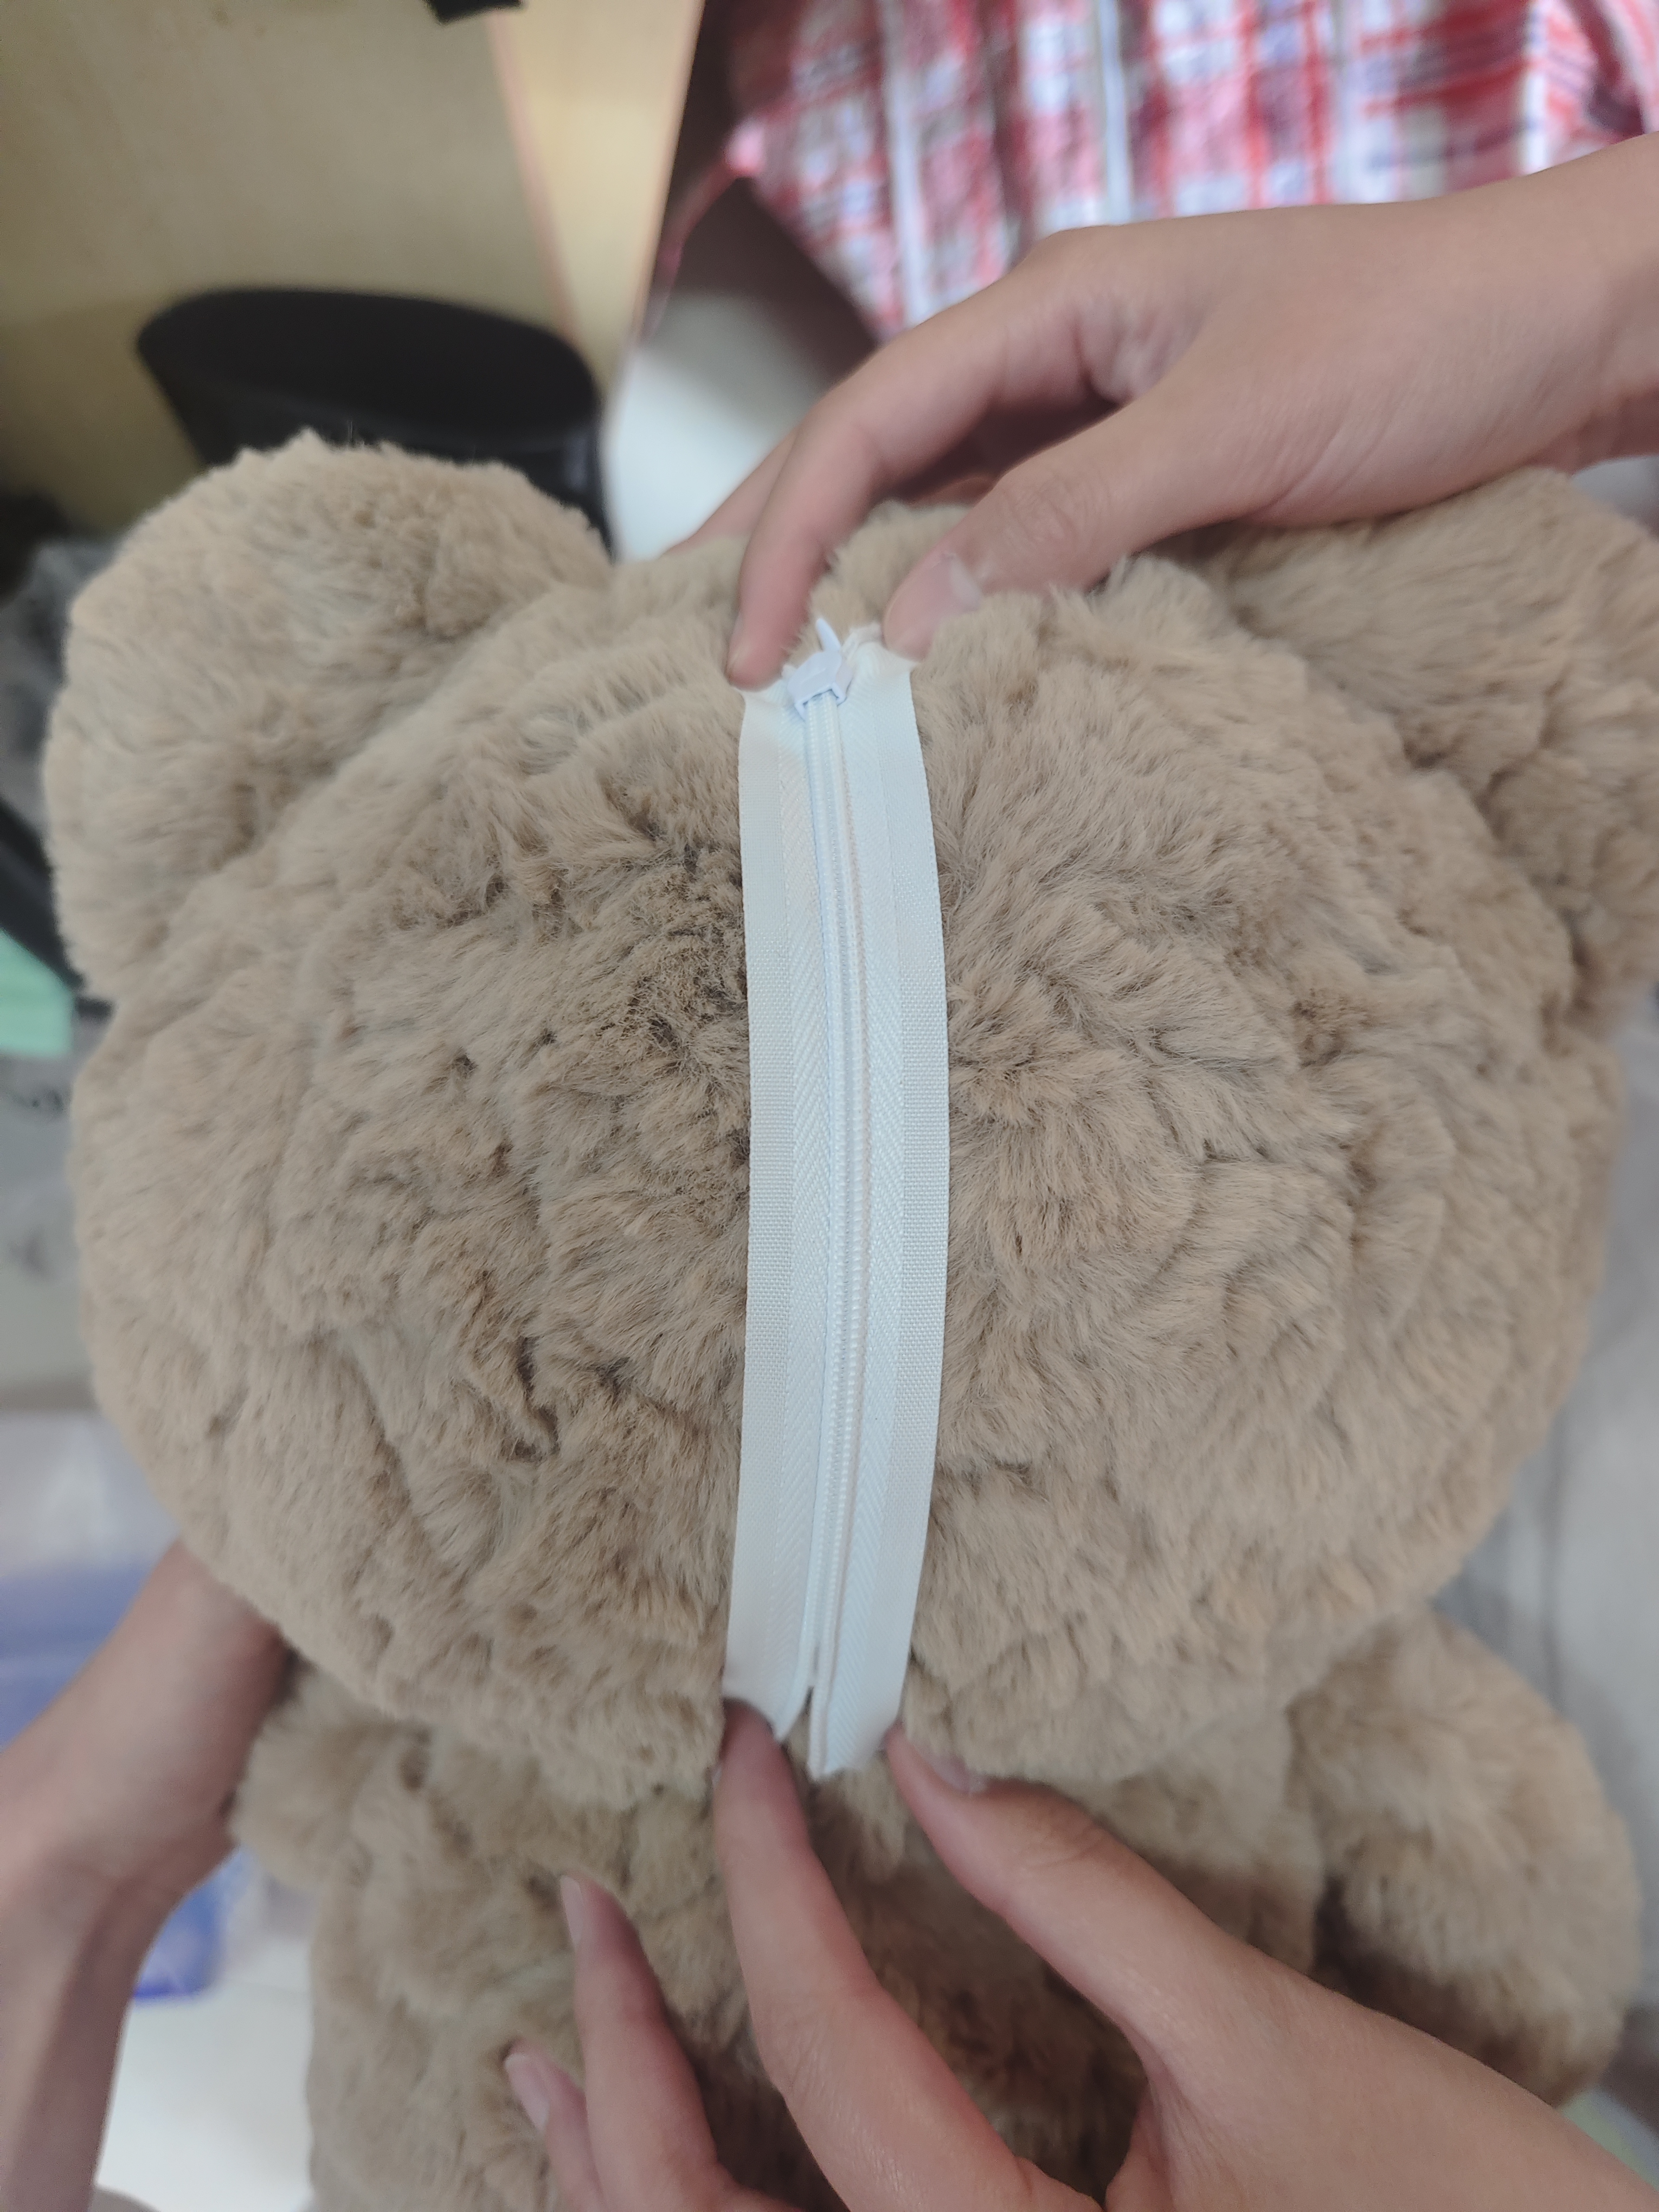
2-Locate zipper
Take out a zipper and place it at the stitching line of the teddy bear's head to determine the
stitching position corresponding to the zipper and the fabric to ensure that the subsequent
stitching and zipper use smoothly.
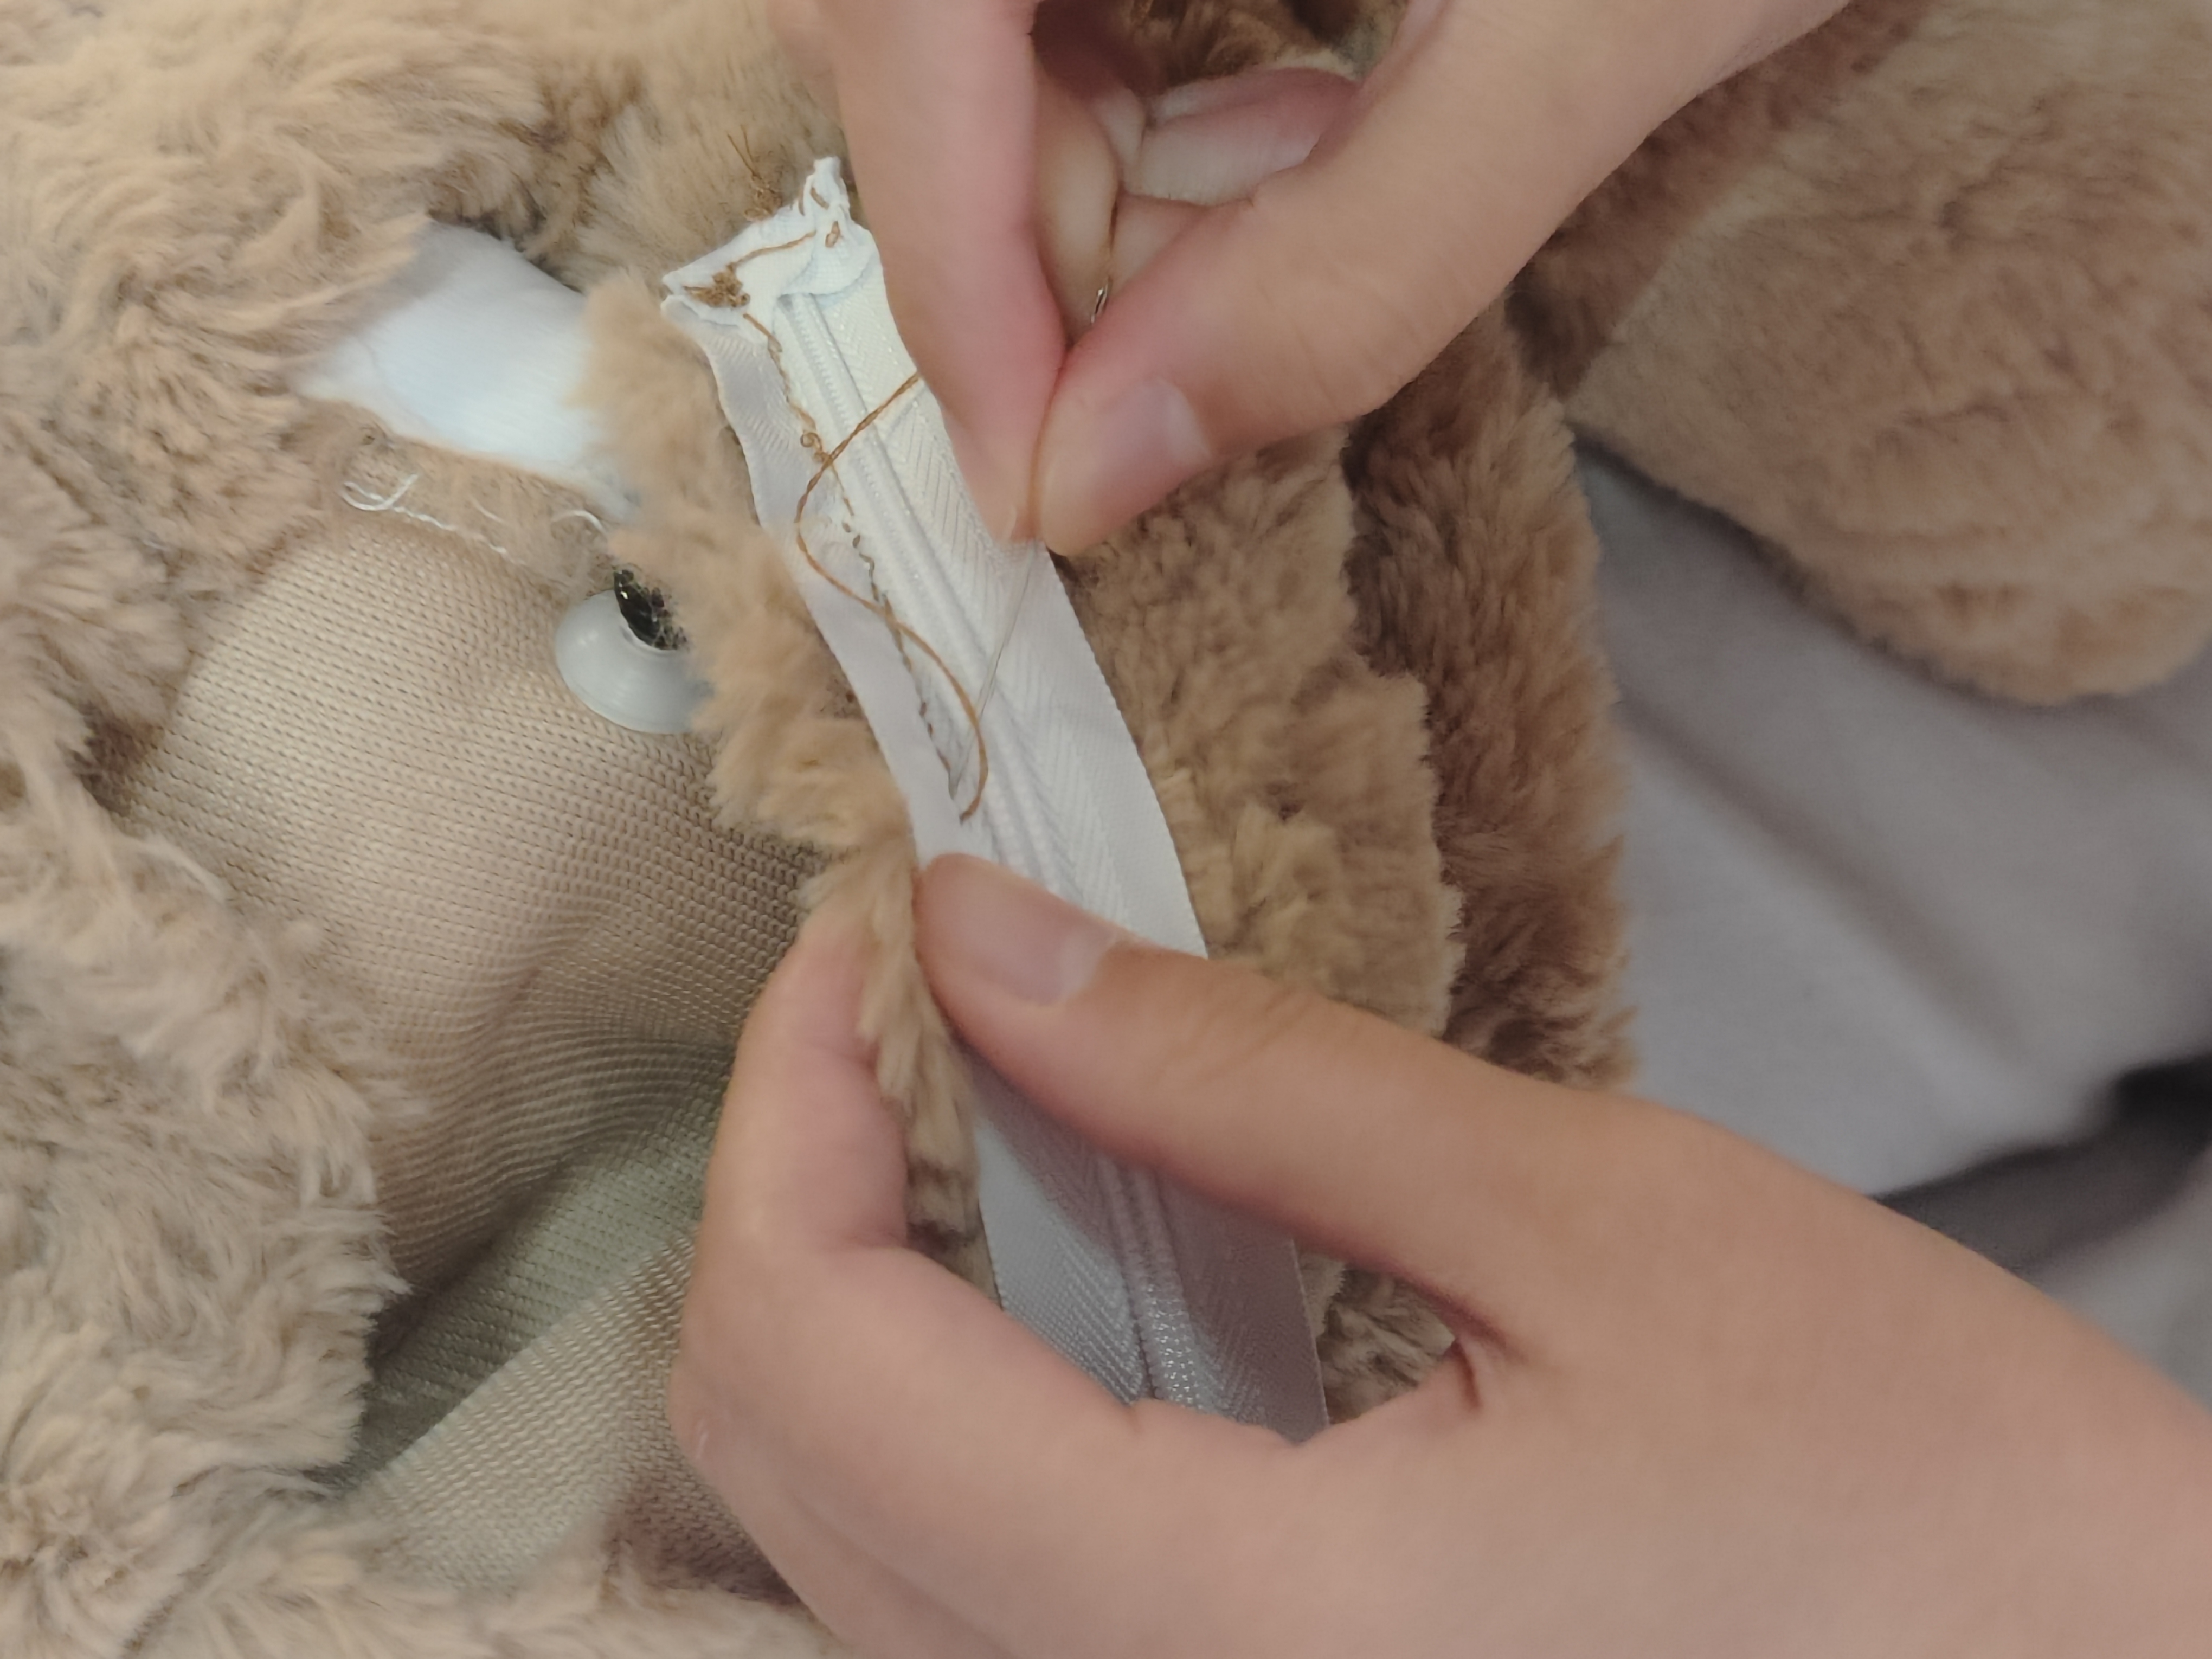
3-Zipper mounting
Take a light brown thread of a suitable length, thread it through the pinhole and tie it at the end
of the thread.Thread the needle through the zipper and the fabric at the point, and then use the
back stitch method to sew one side of the zipper to the fabric, and then sew the other side, and
finally tie the knot.
Final result
Opening effect
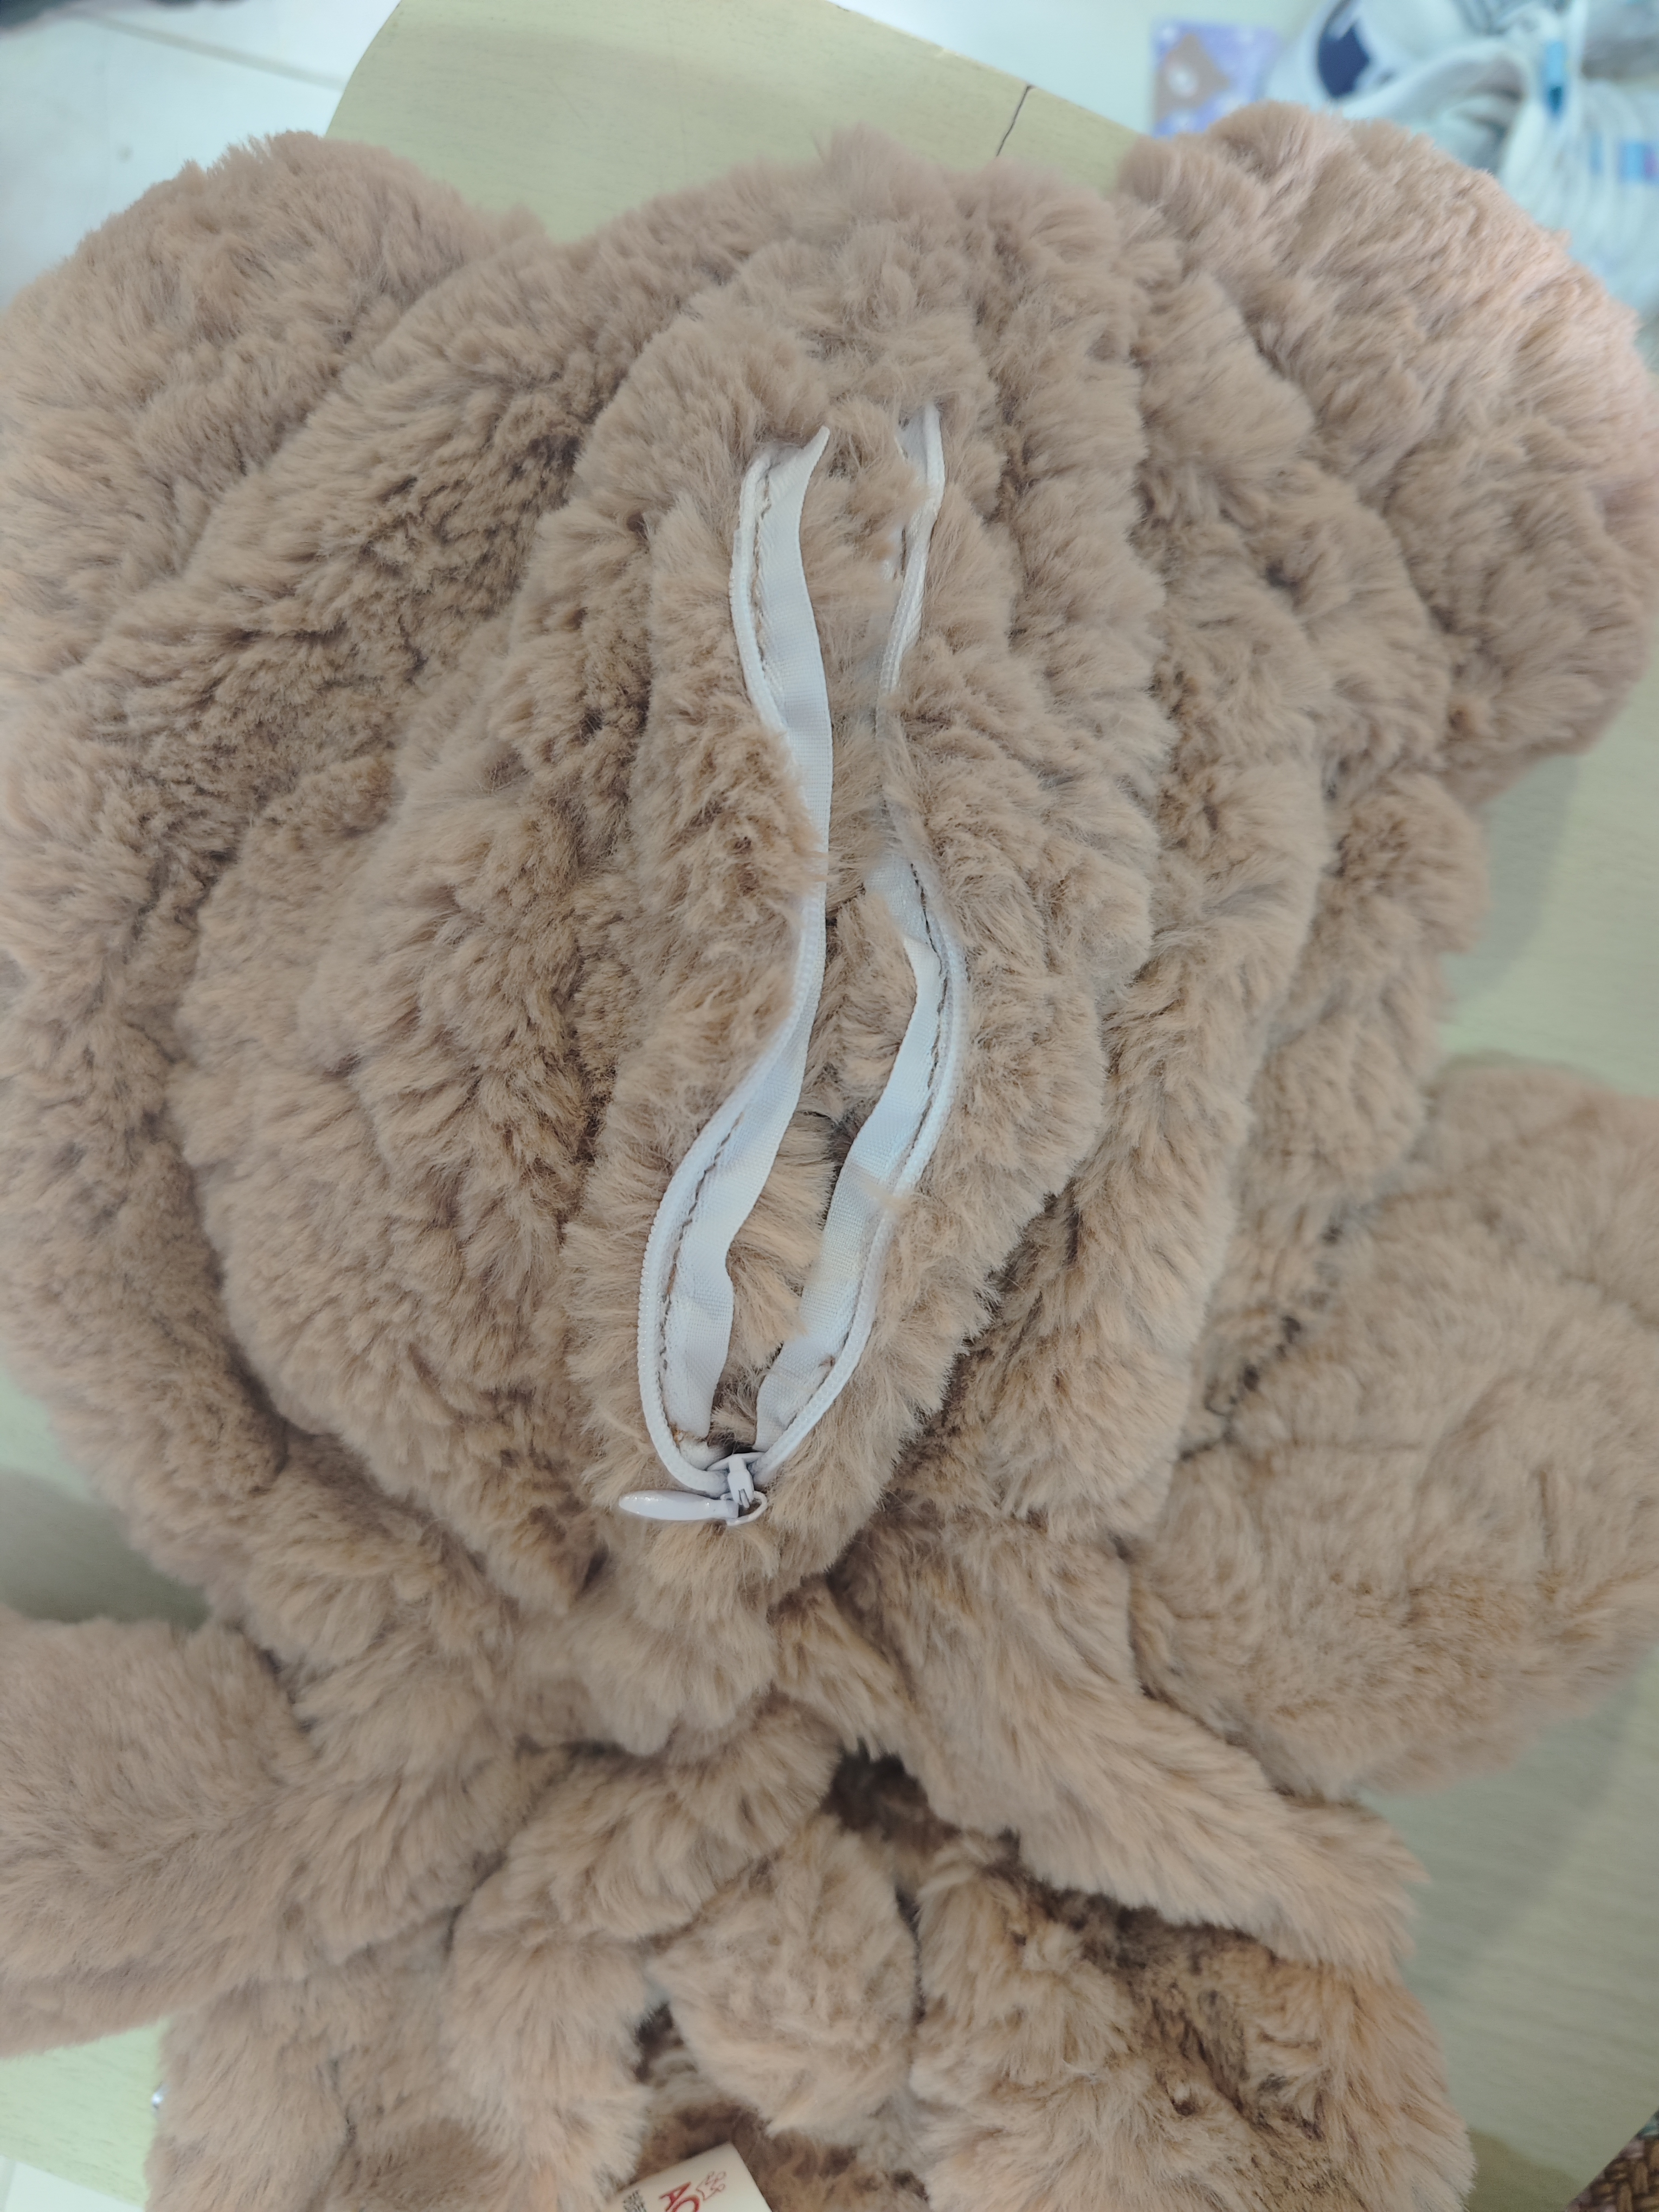
Pull up effect
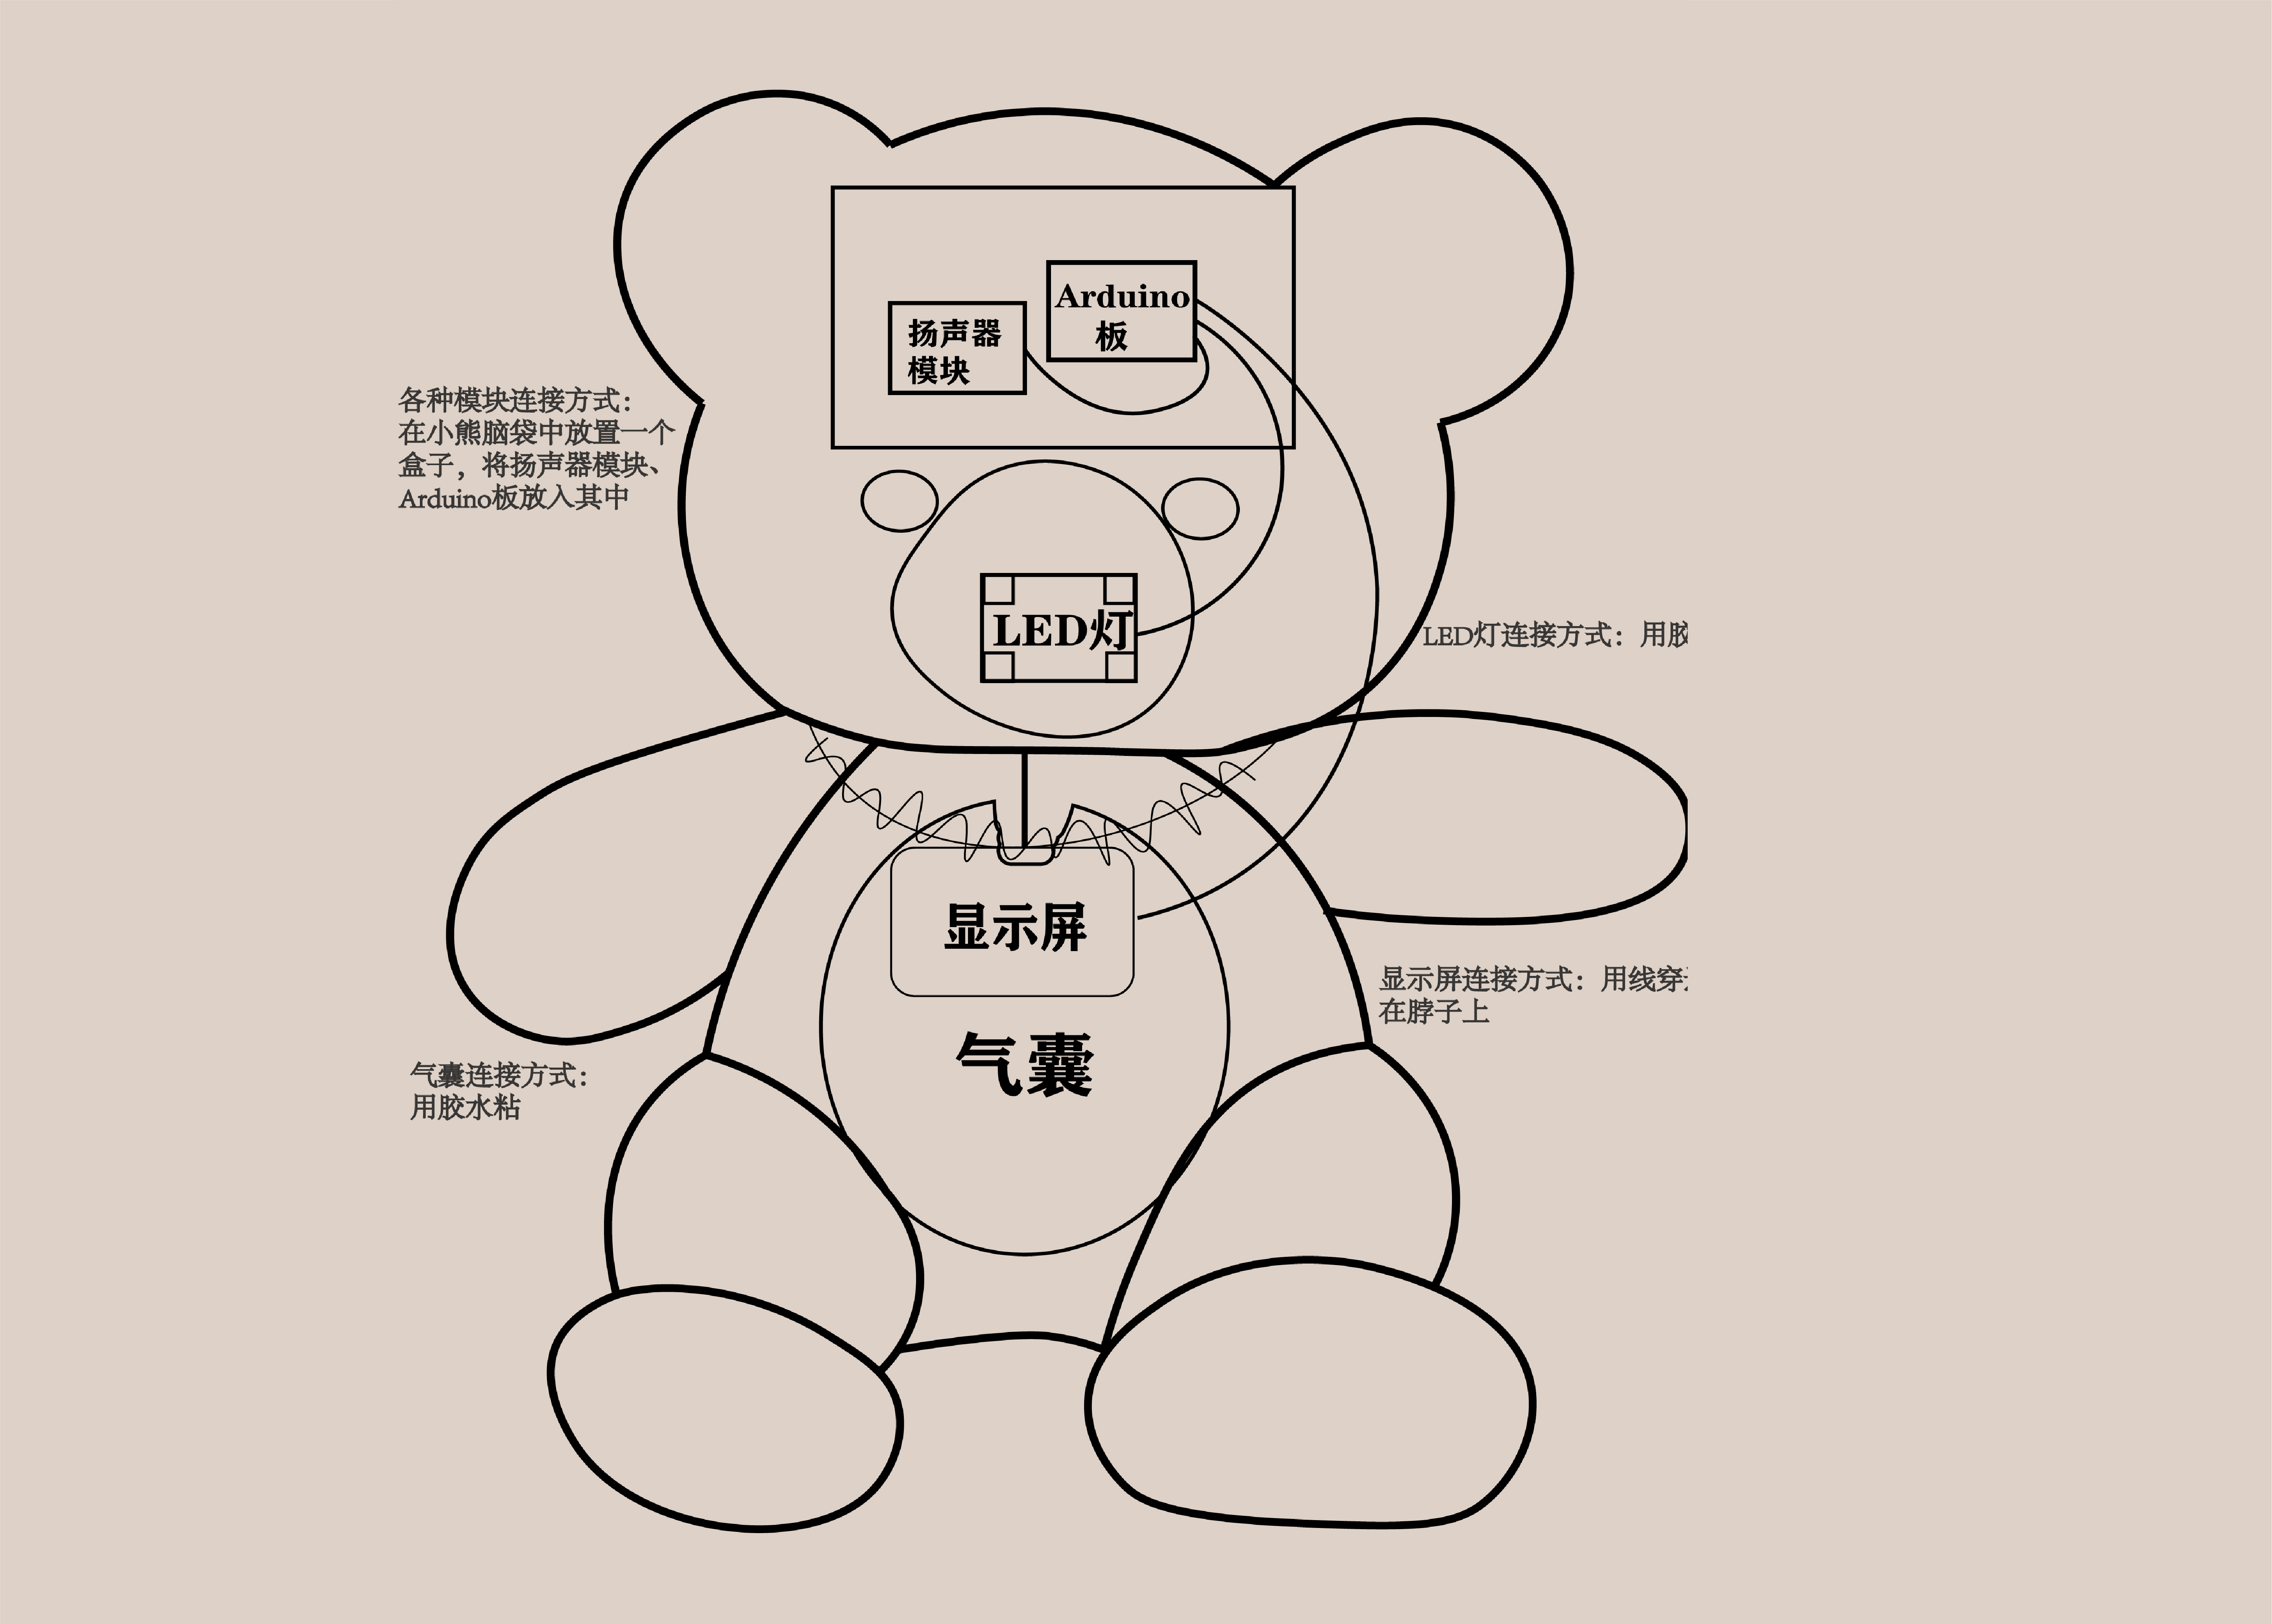
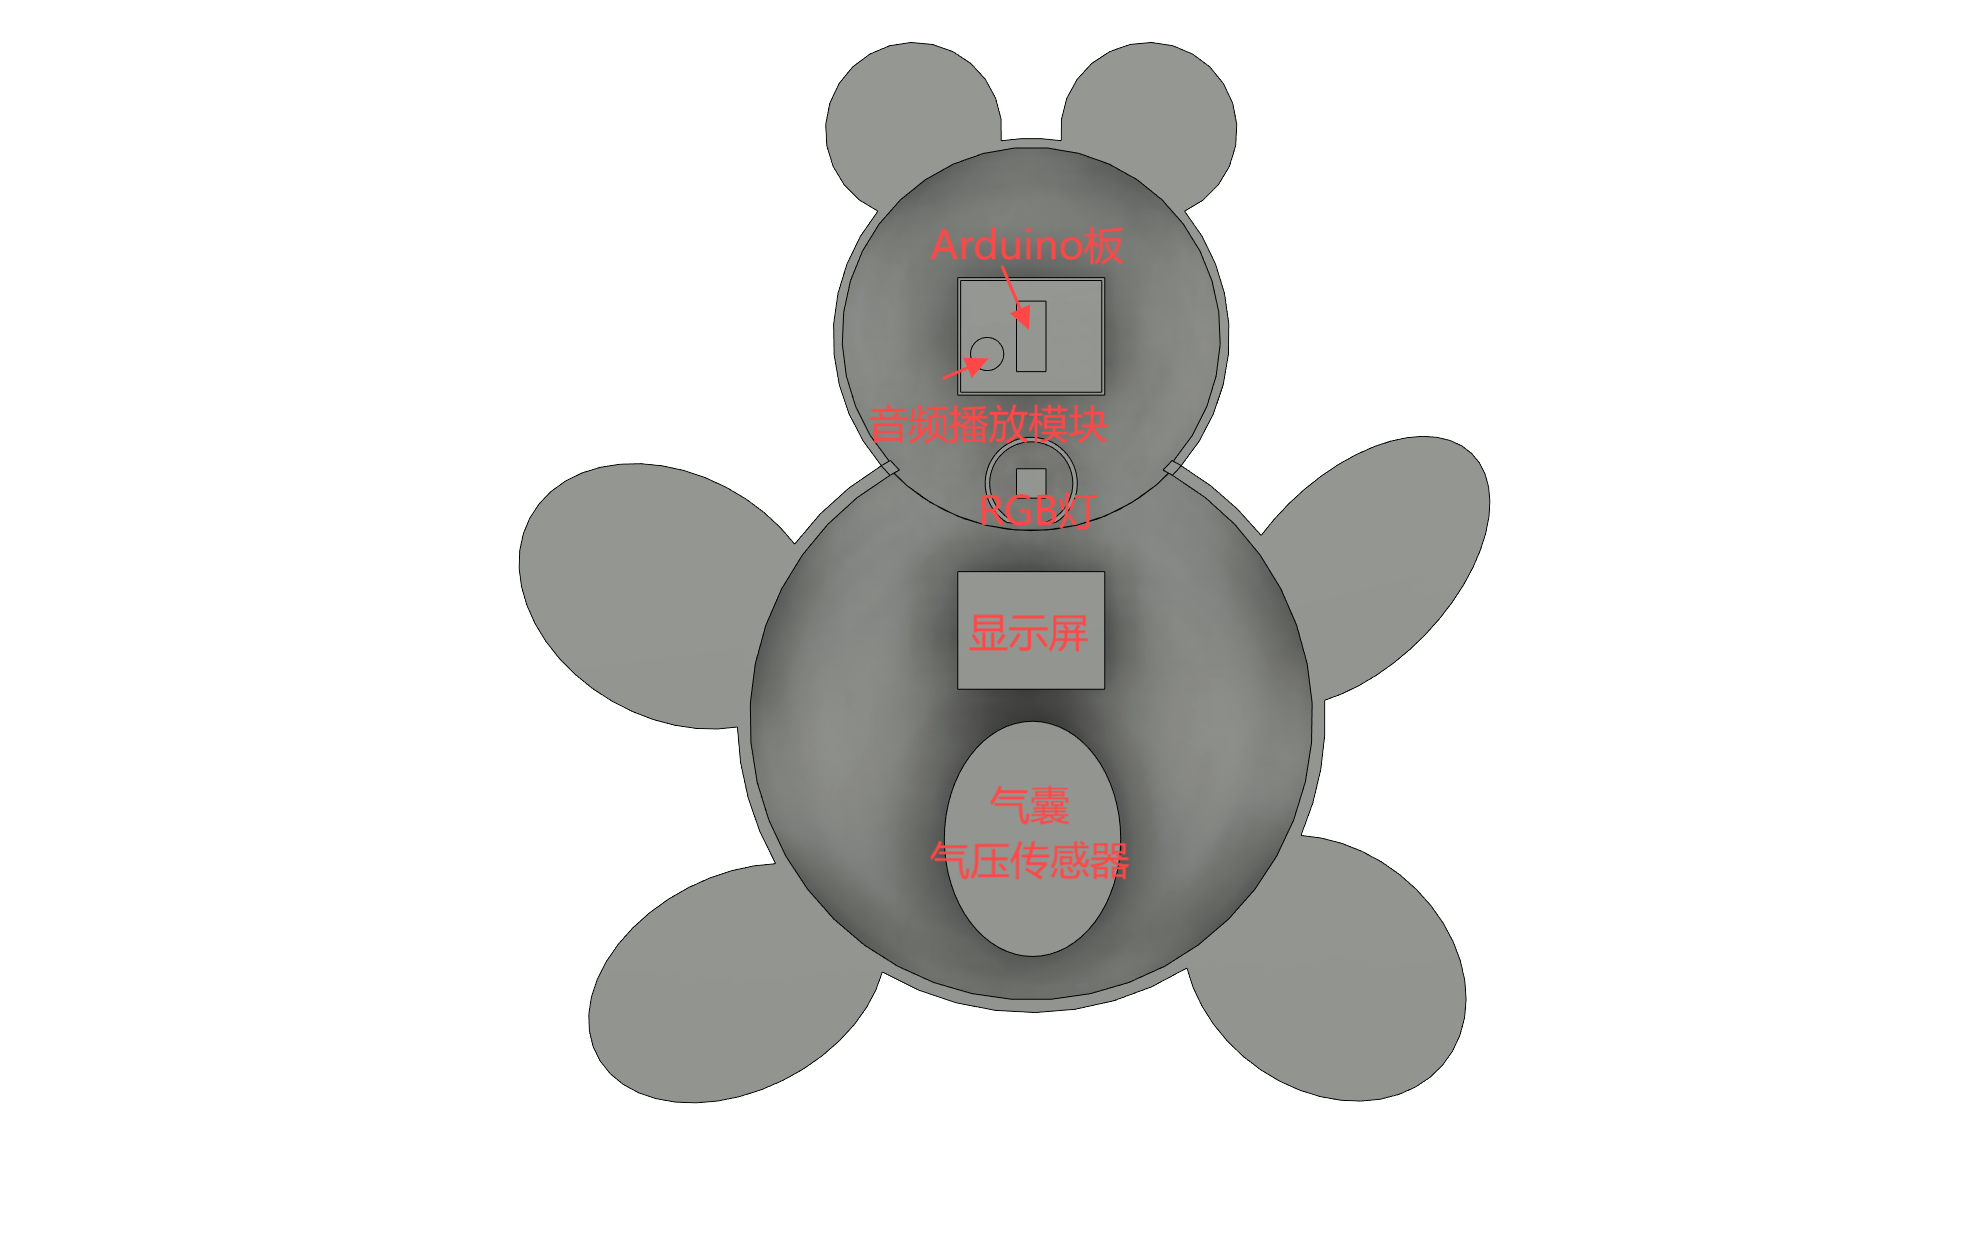
Step3: Module connection
1-The display and RGB lights need to be fixed to the bear,
so the two parts are connected separately.
1-1 The connection between the display and the teddy bear
Place the monitor on the bear's chest to determine its position and mark it.Using scissors to cut along
the mark made, you can see that there is a gap in the fabric of the teddy bear's chest to fit the
display screen.Apply a circle of nylon glue next to the notch and immediately install the display and
let it sit for a few seconds.
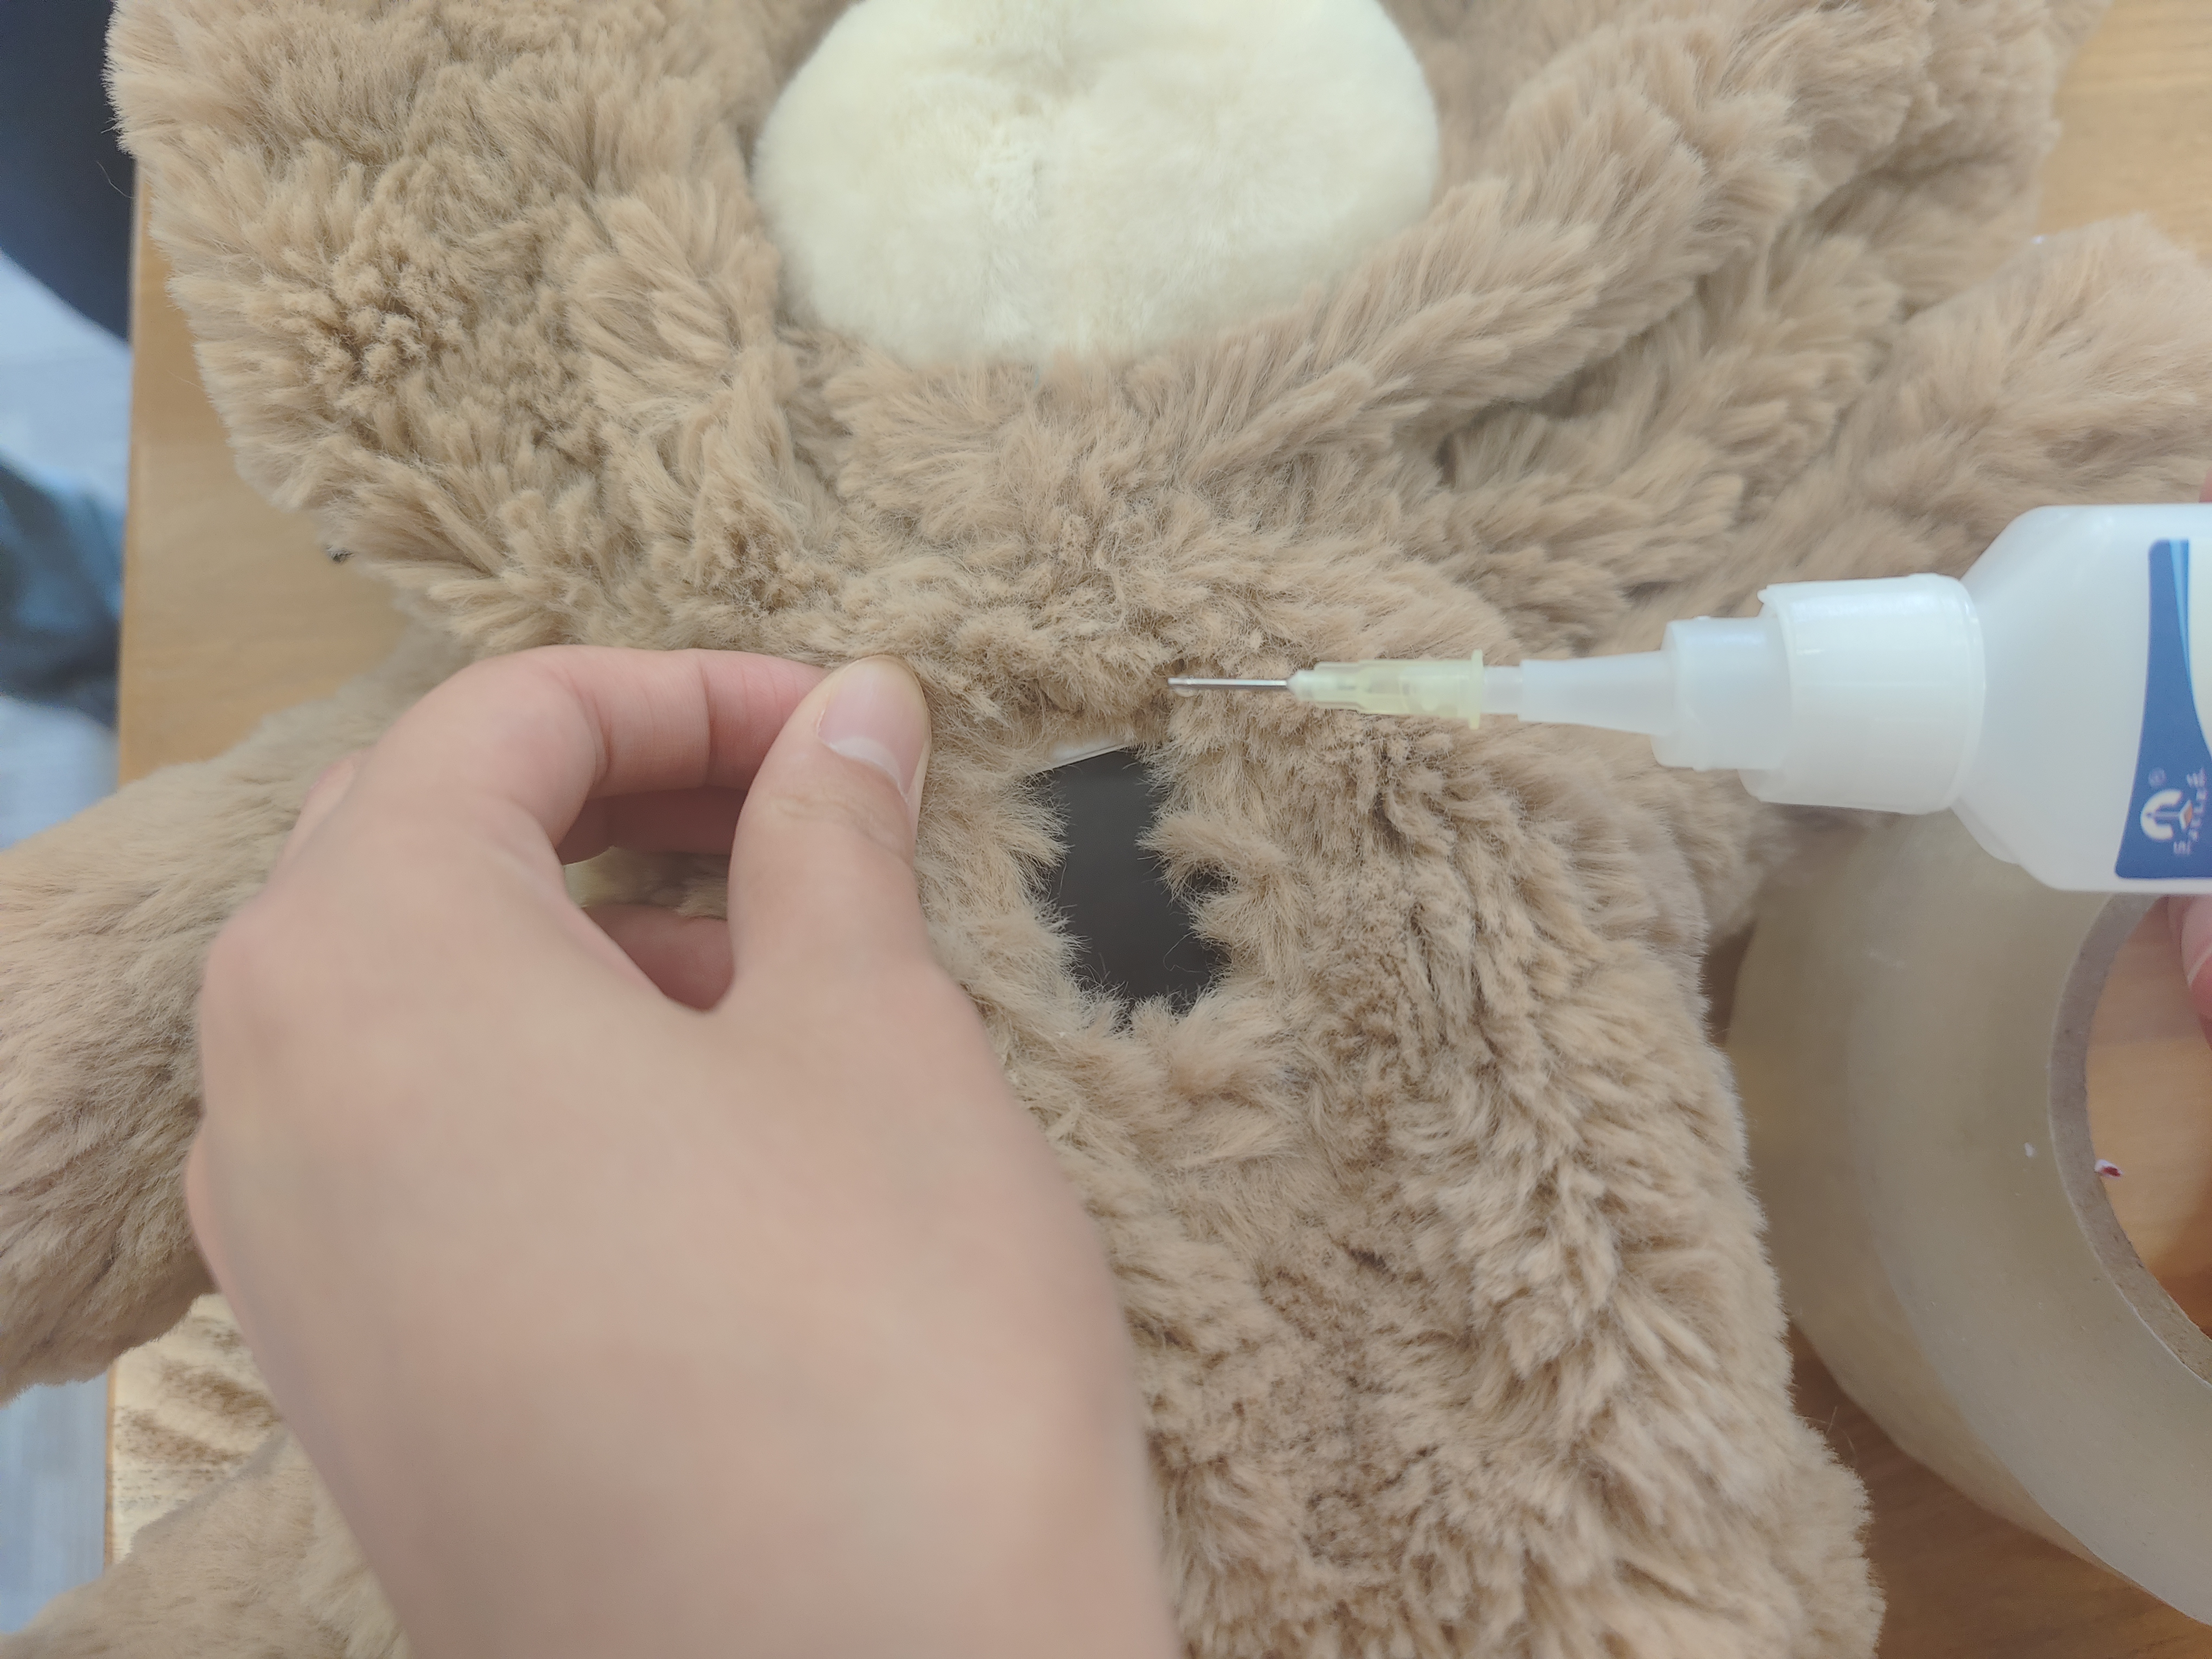
1-2 The connection between the RGB light and the teddy bear
Because the bear's nose fabric is thin and light in color, the installation of RGB light components is
convenient, so it is very suitable for placing lamp beads. Cut the inside of the bear to sew the nose,
insert the lamp bead, and sew the fabric only to leave a small gap to fit through the dupont thread.
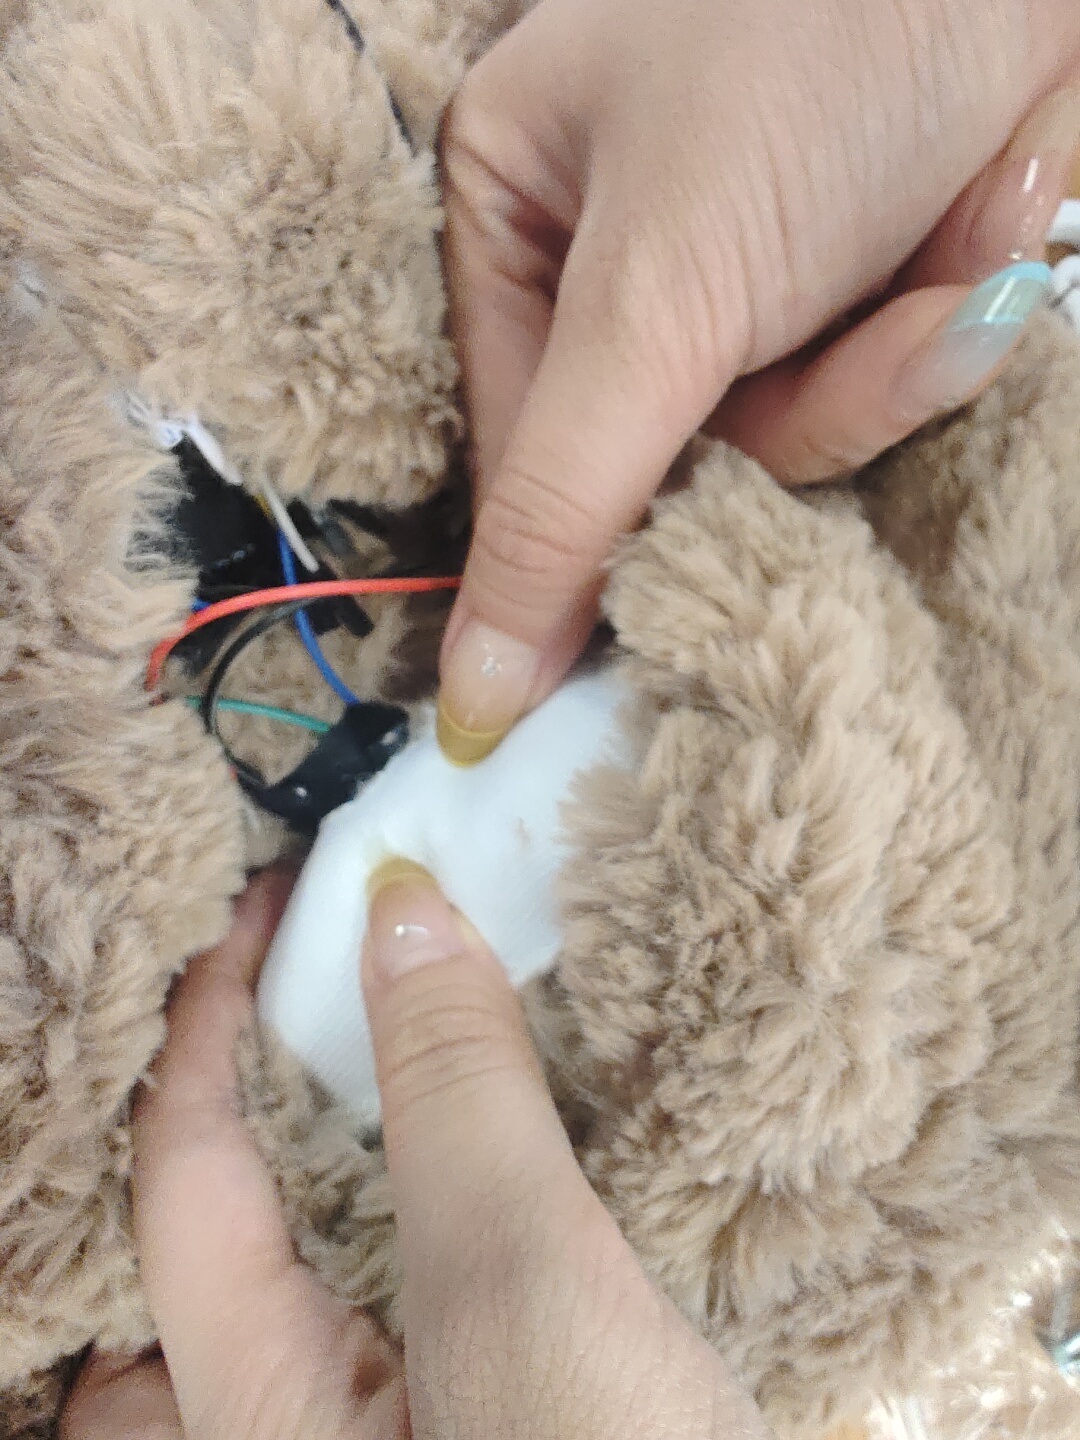
1-3 precautionary measure
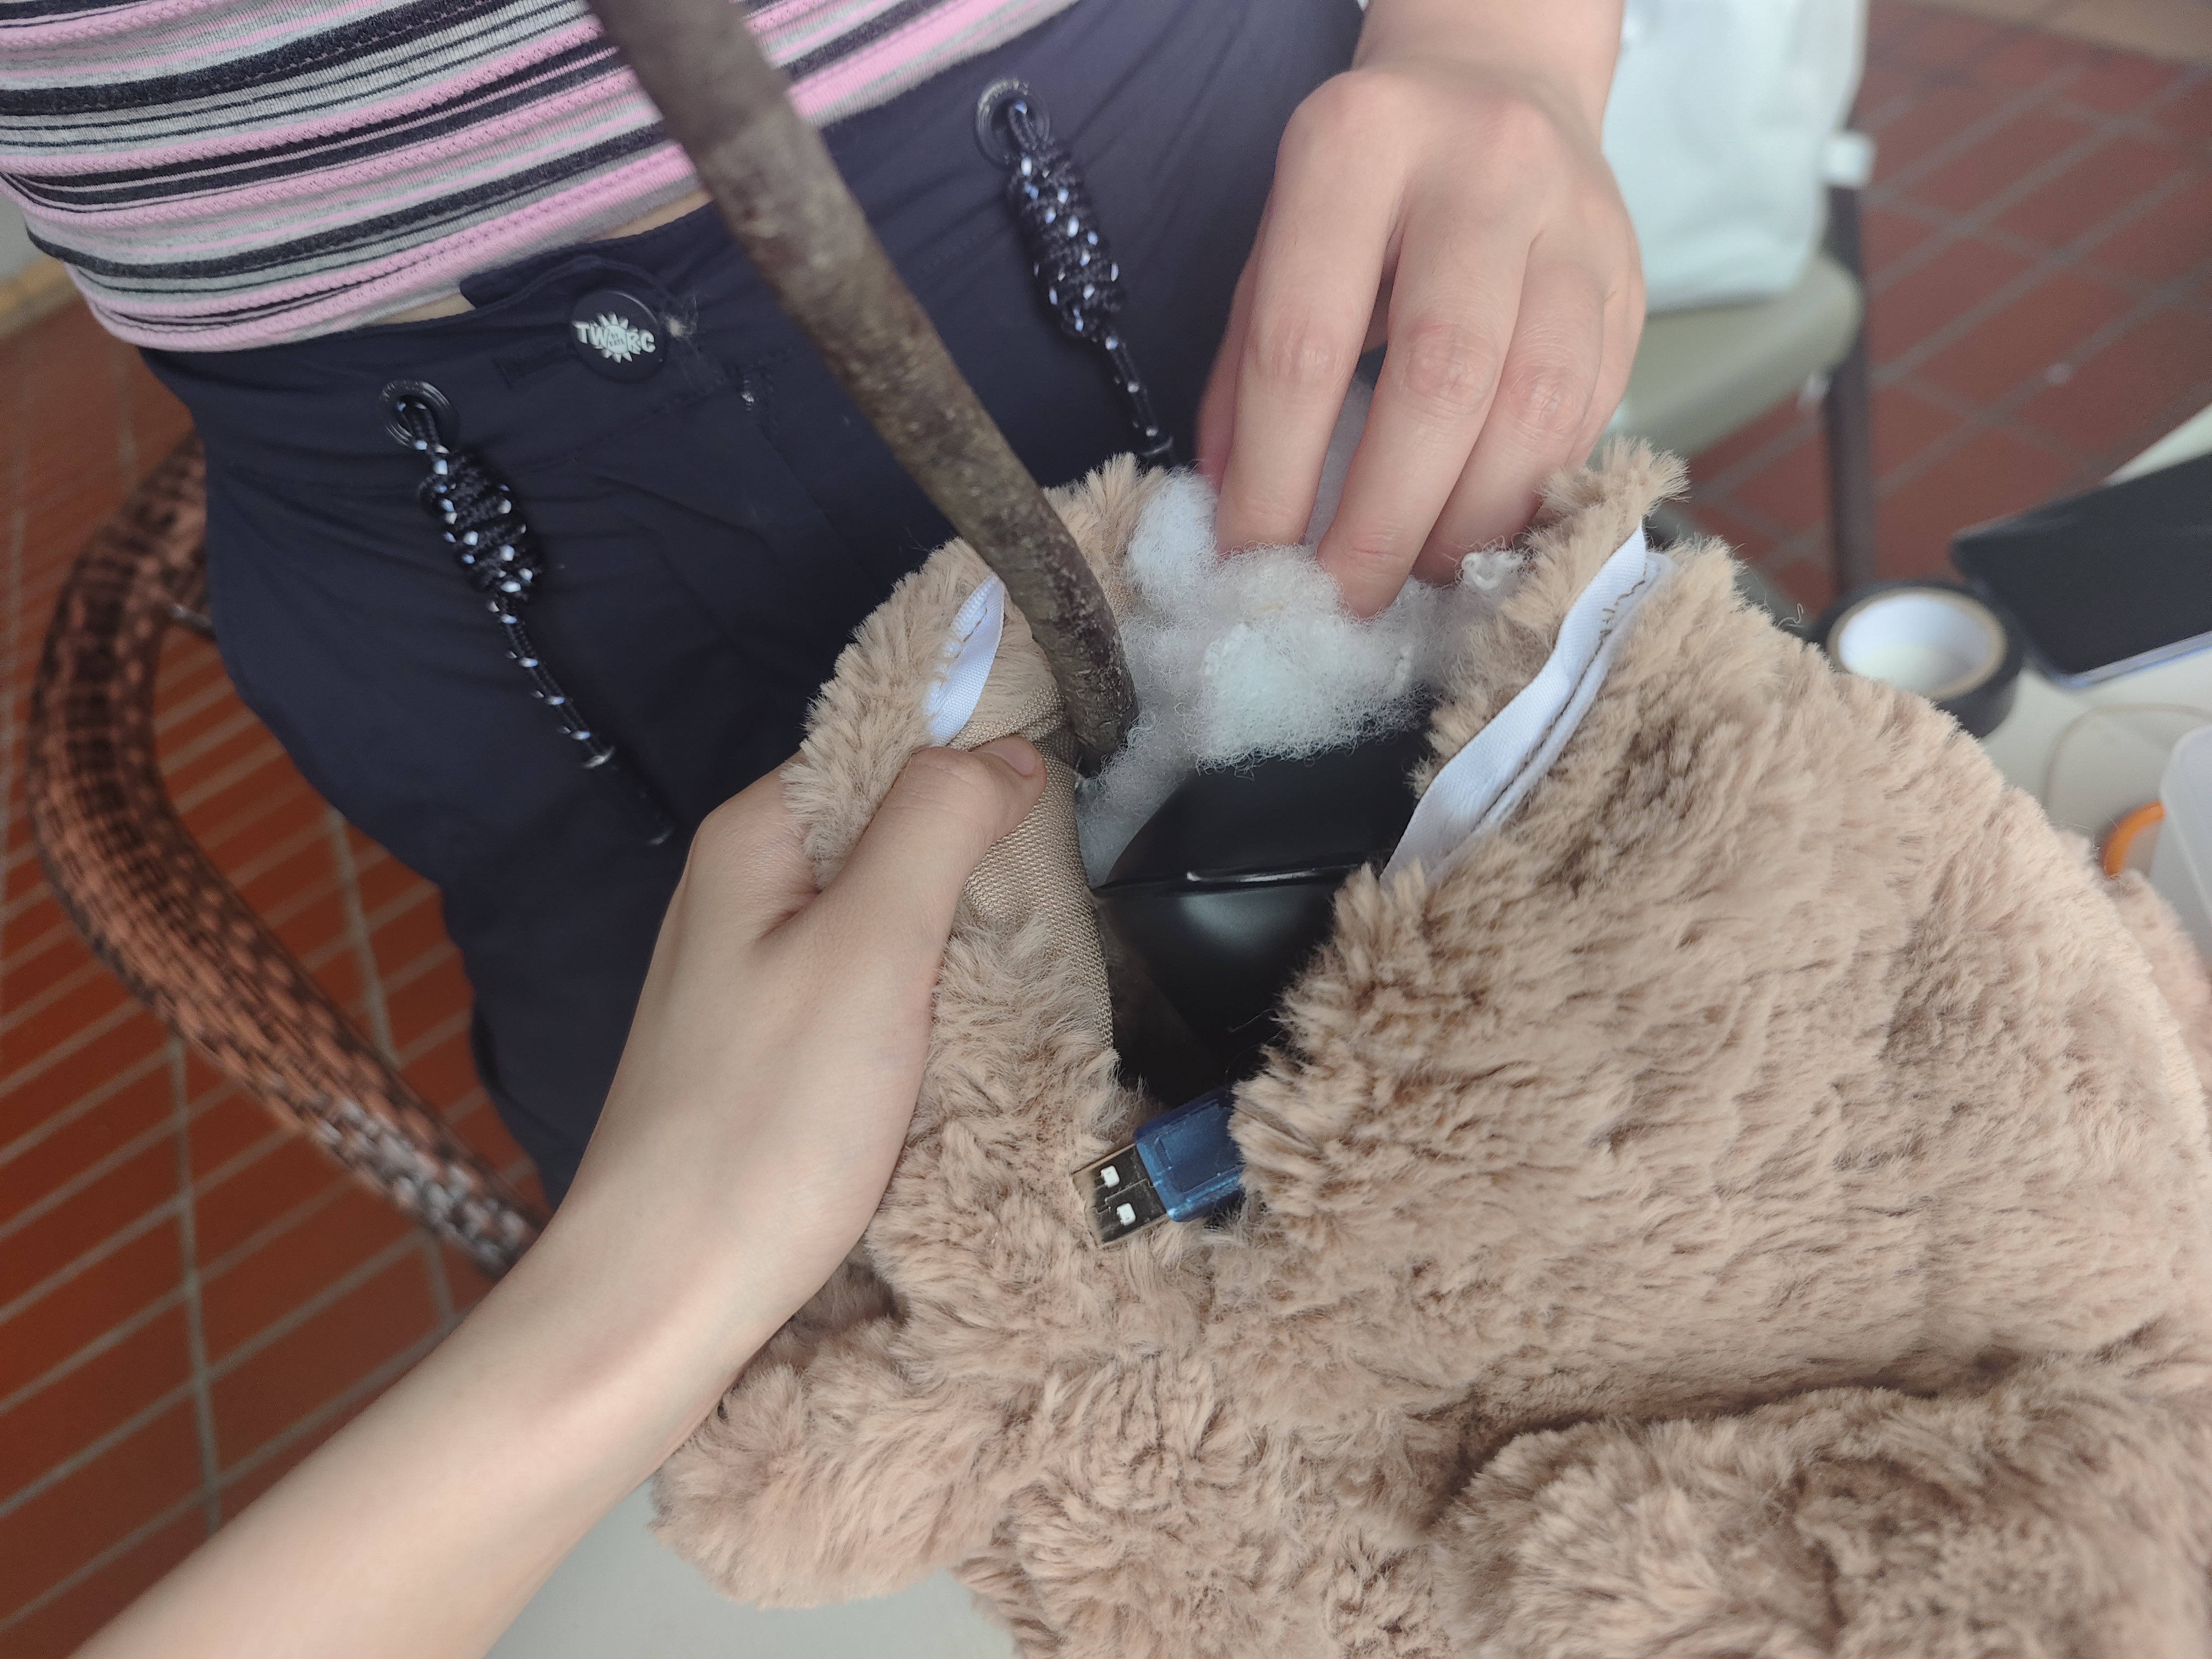
After placing each part of the electronic components in turn inside the bear, after our inspection and
analysis, there is a large area of exposure at the welding of the dupont wire and electronic components,
which is likely to short-circuit due to extrusion collision, and the subsequent filling of the cotton
wool will be conductive. In order to prevent such accidents, we use electrical tape to close the welding
place and the exposed part of the circuit, and tie the wires of the same module together.
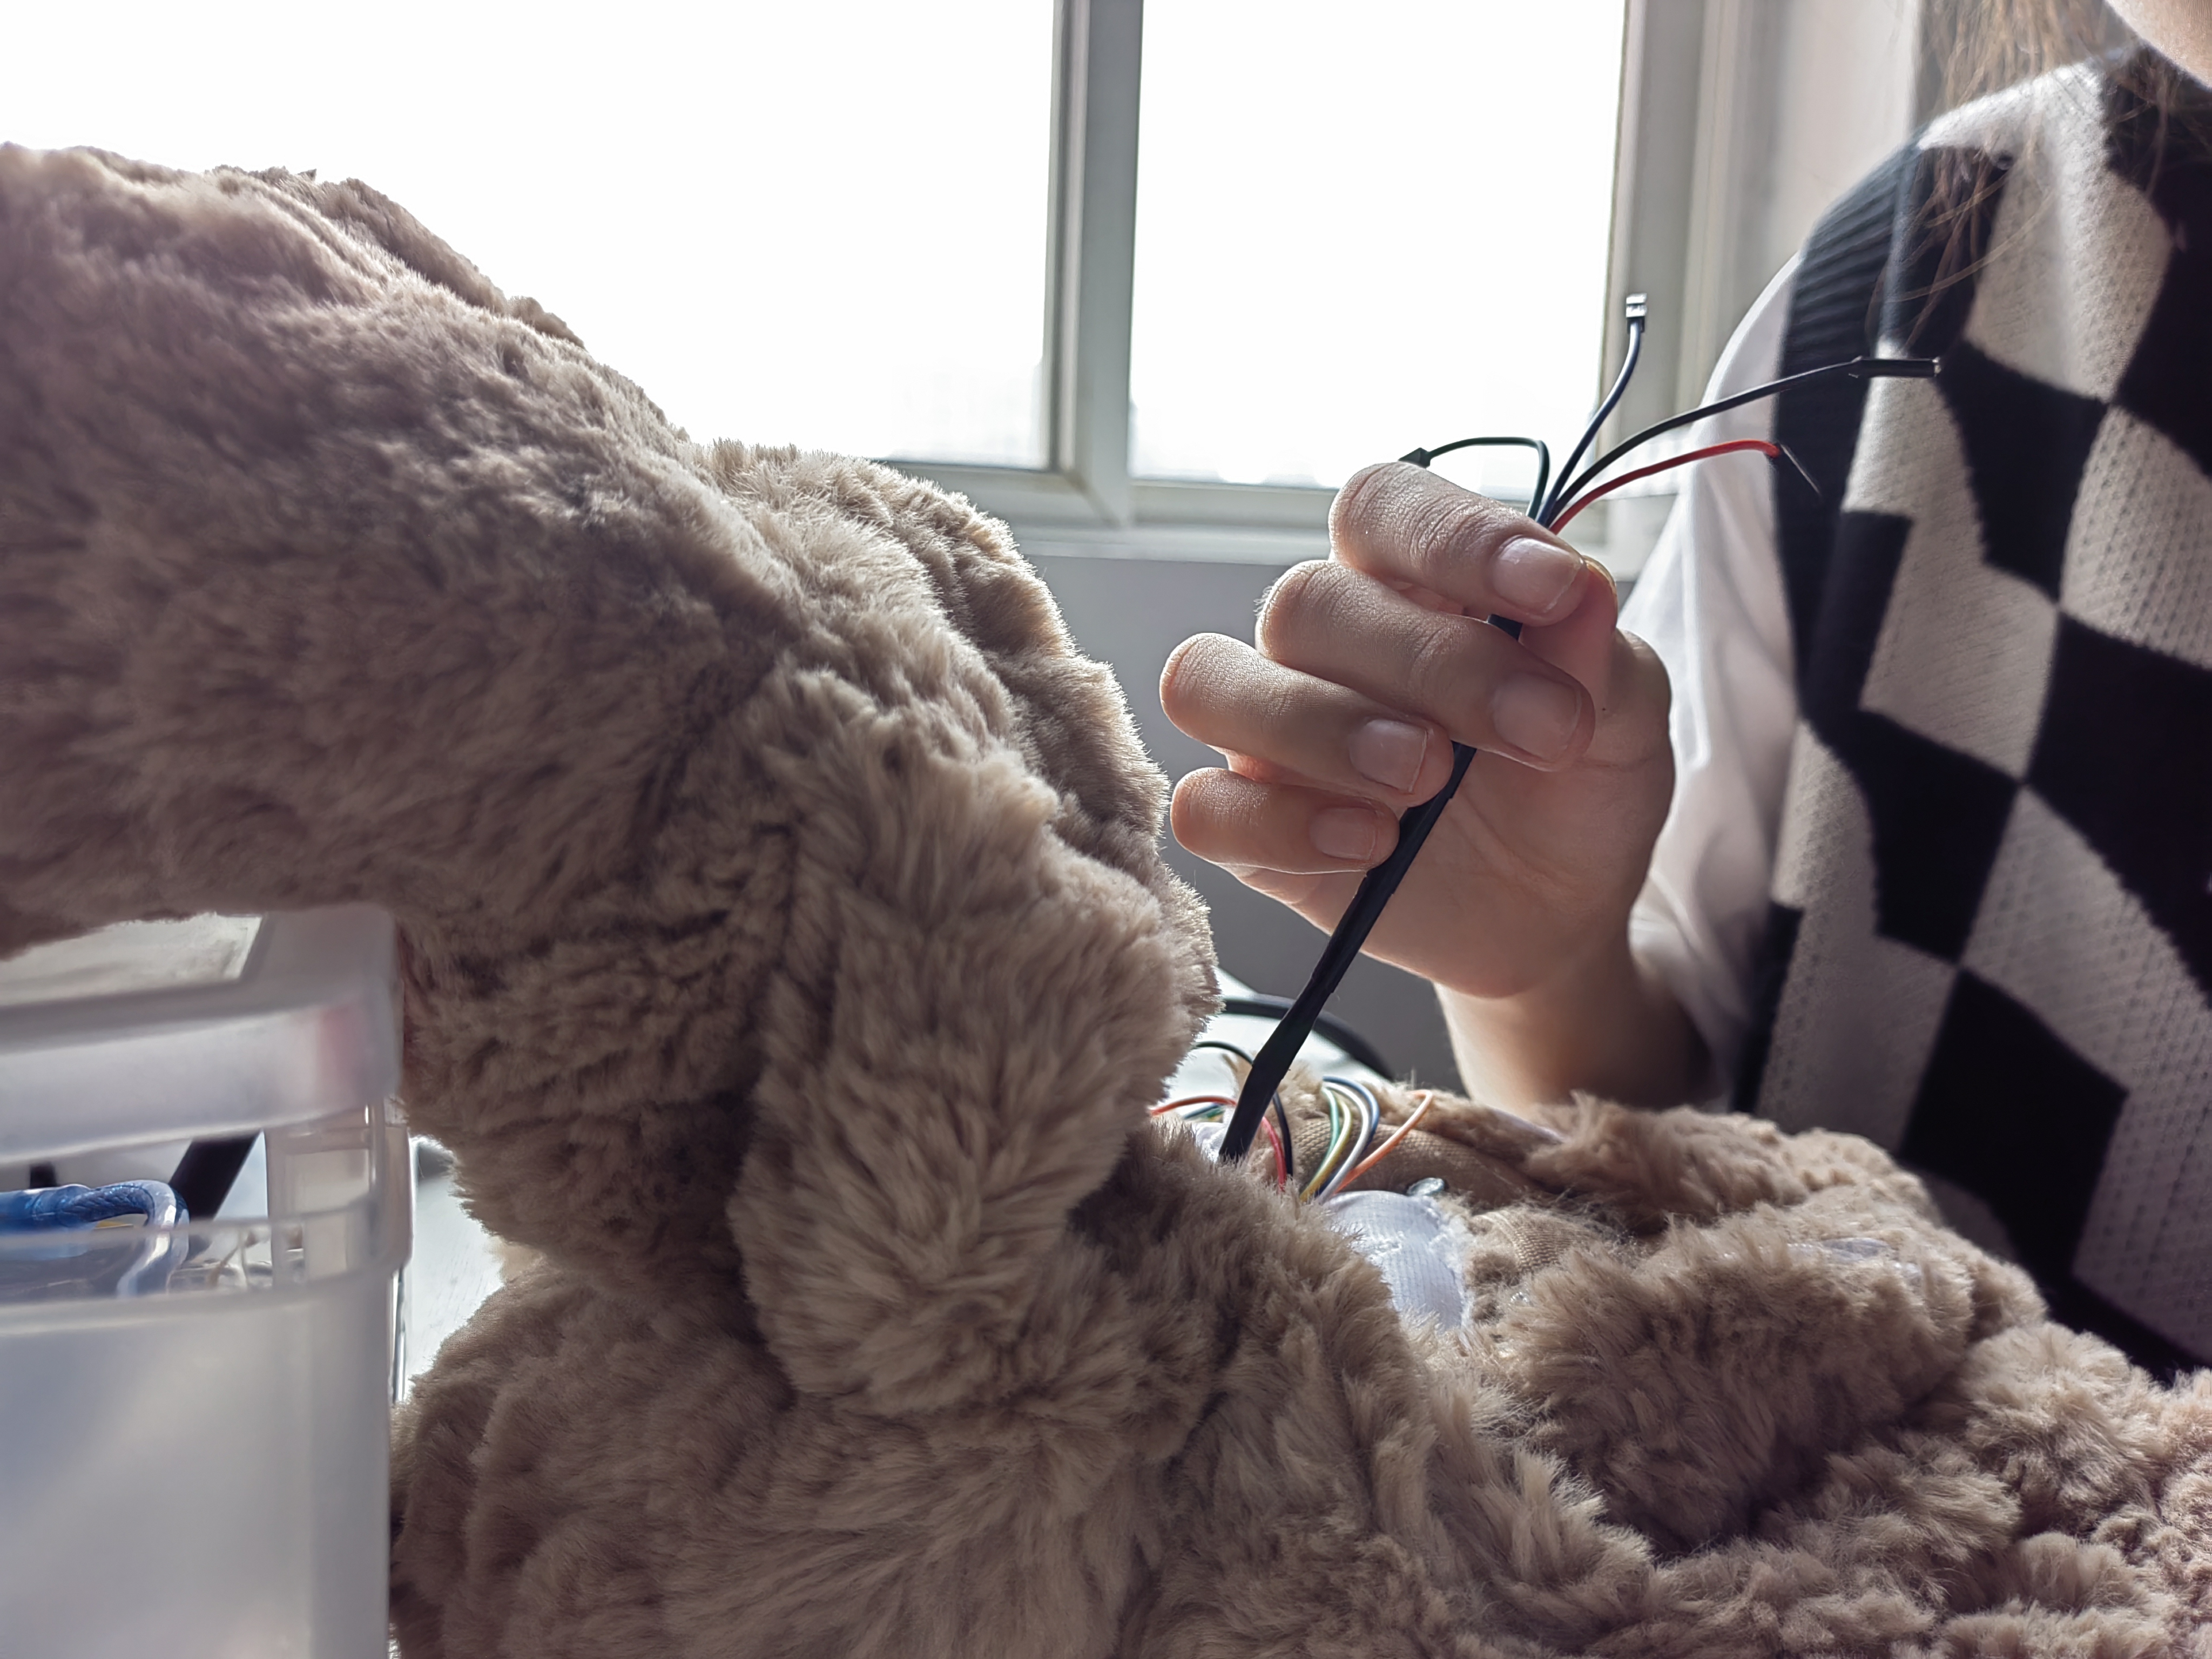
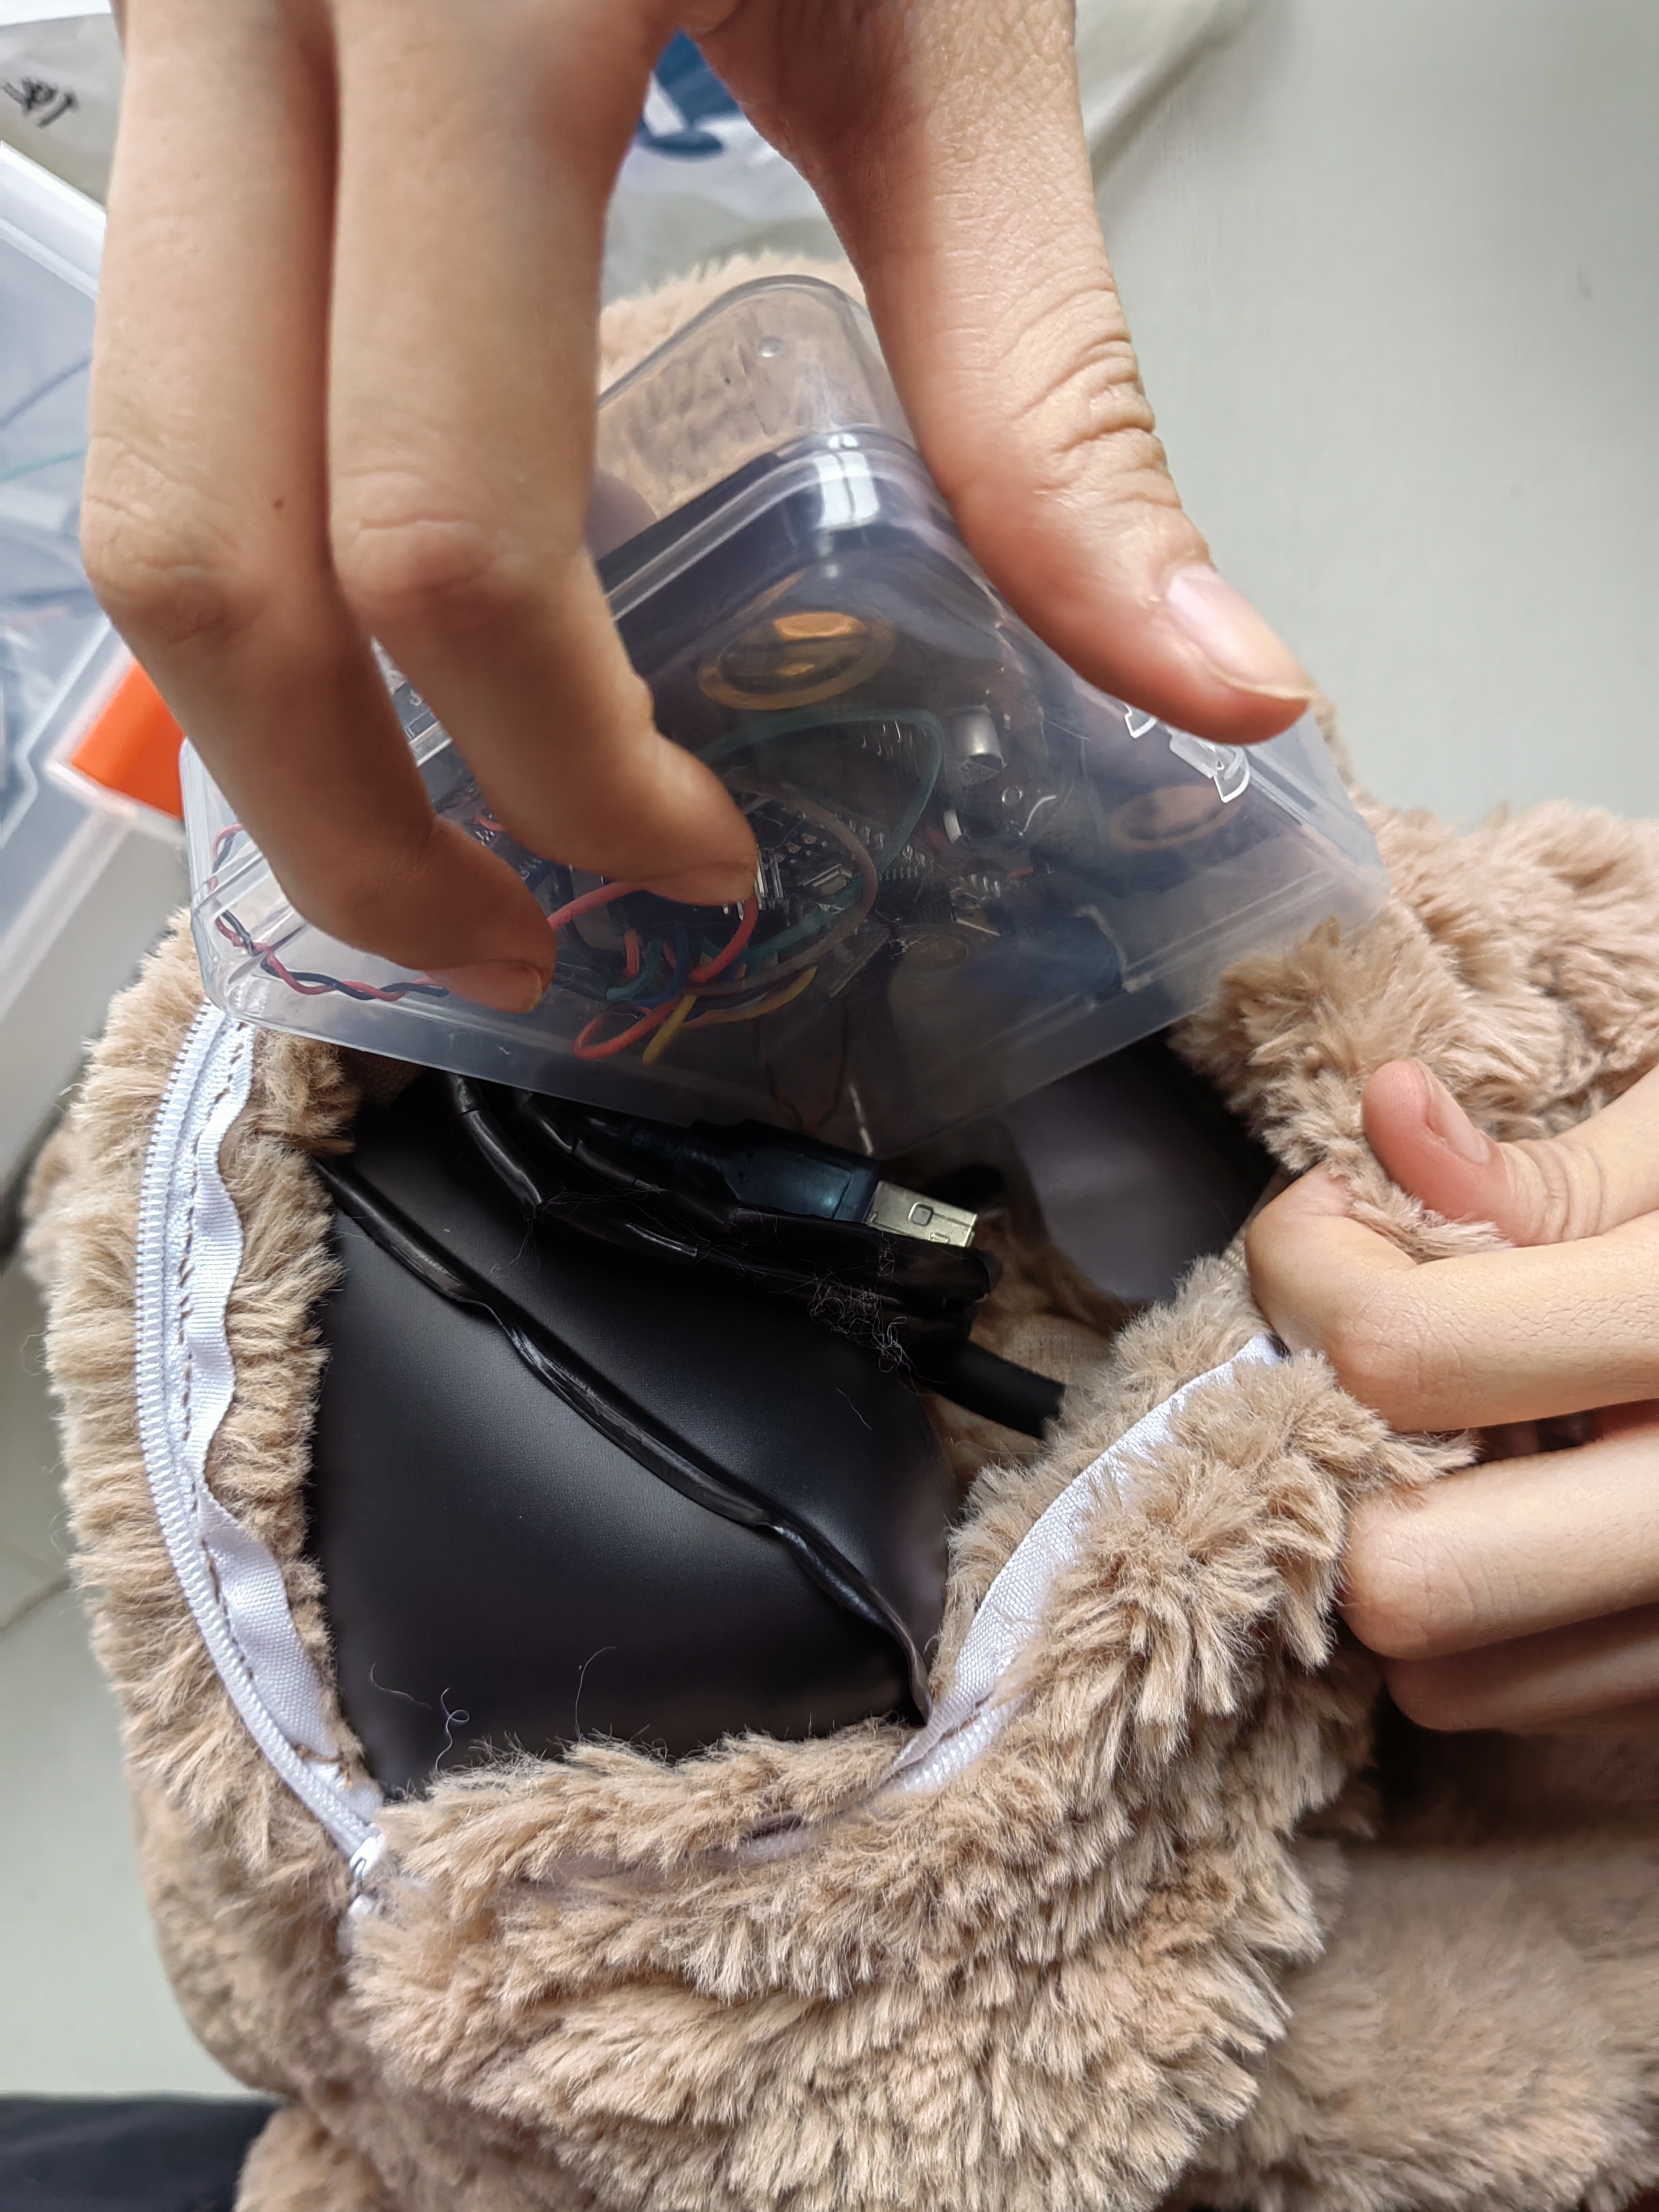
2-Some modules and Arduino boards are not directly connected
with the bear, and are placed in acrylic boxes to avoid direct
exposure of the line and contact with cotton.
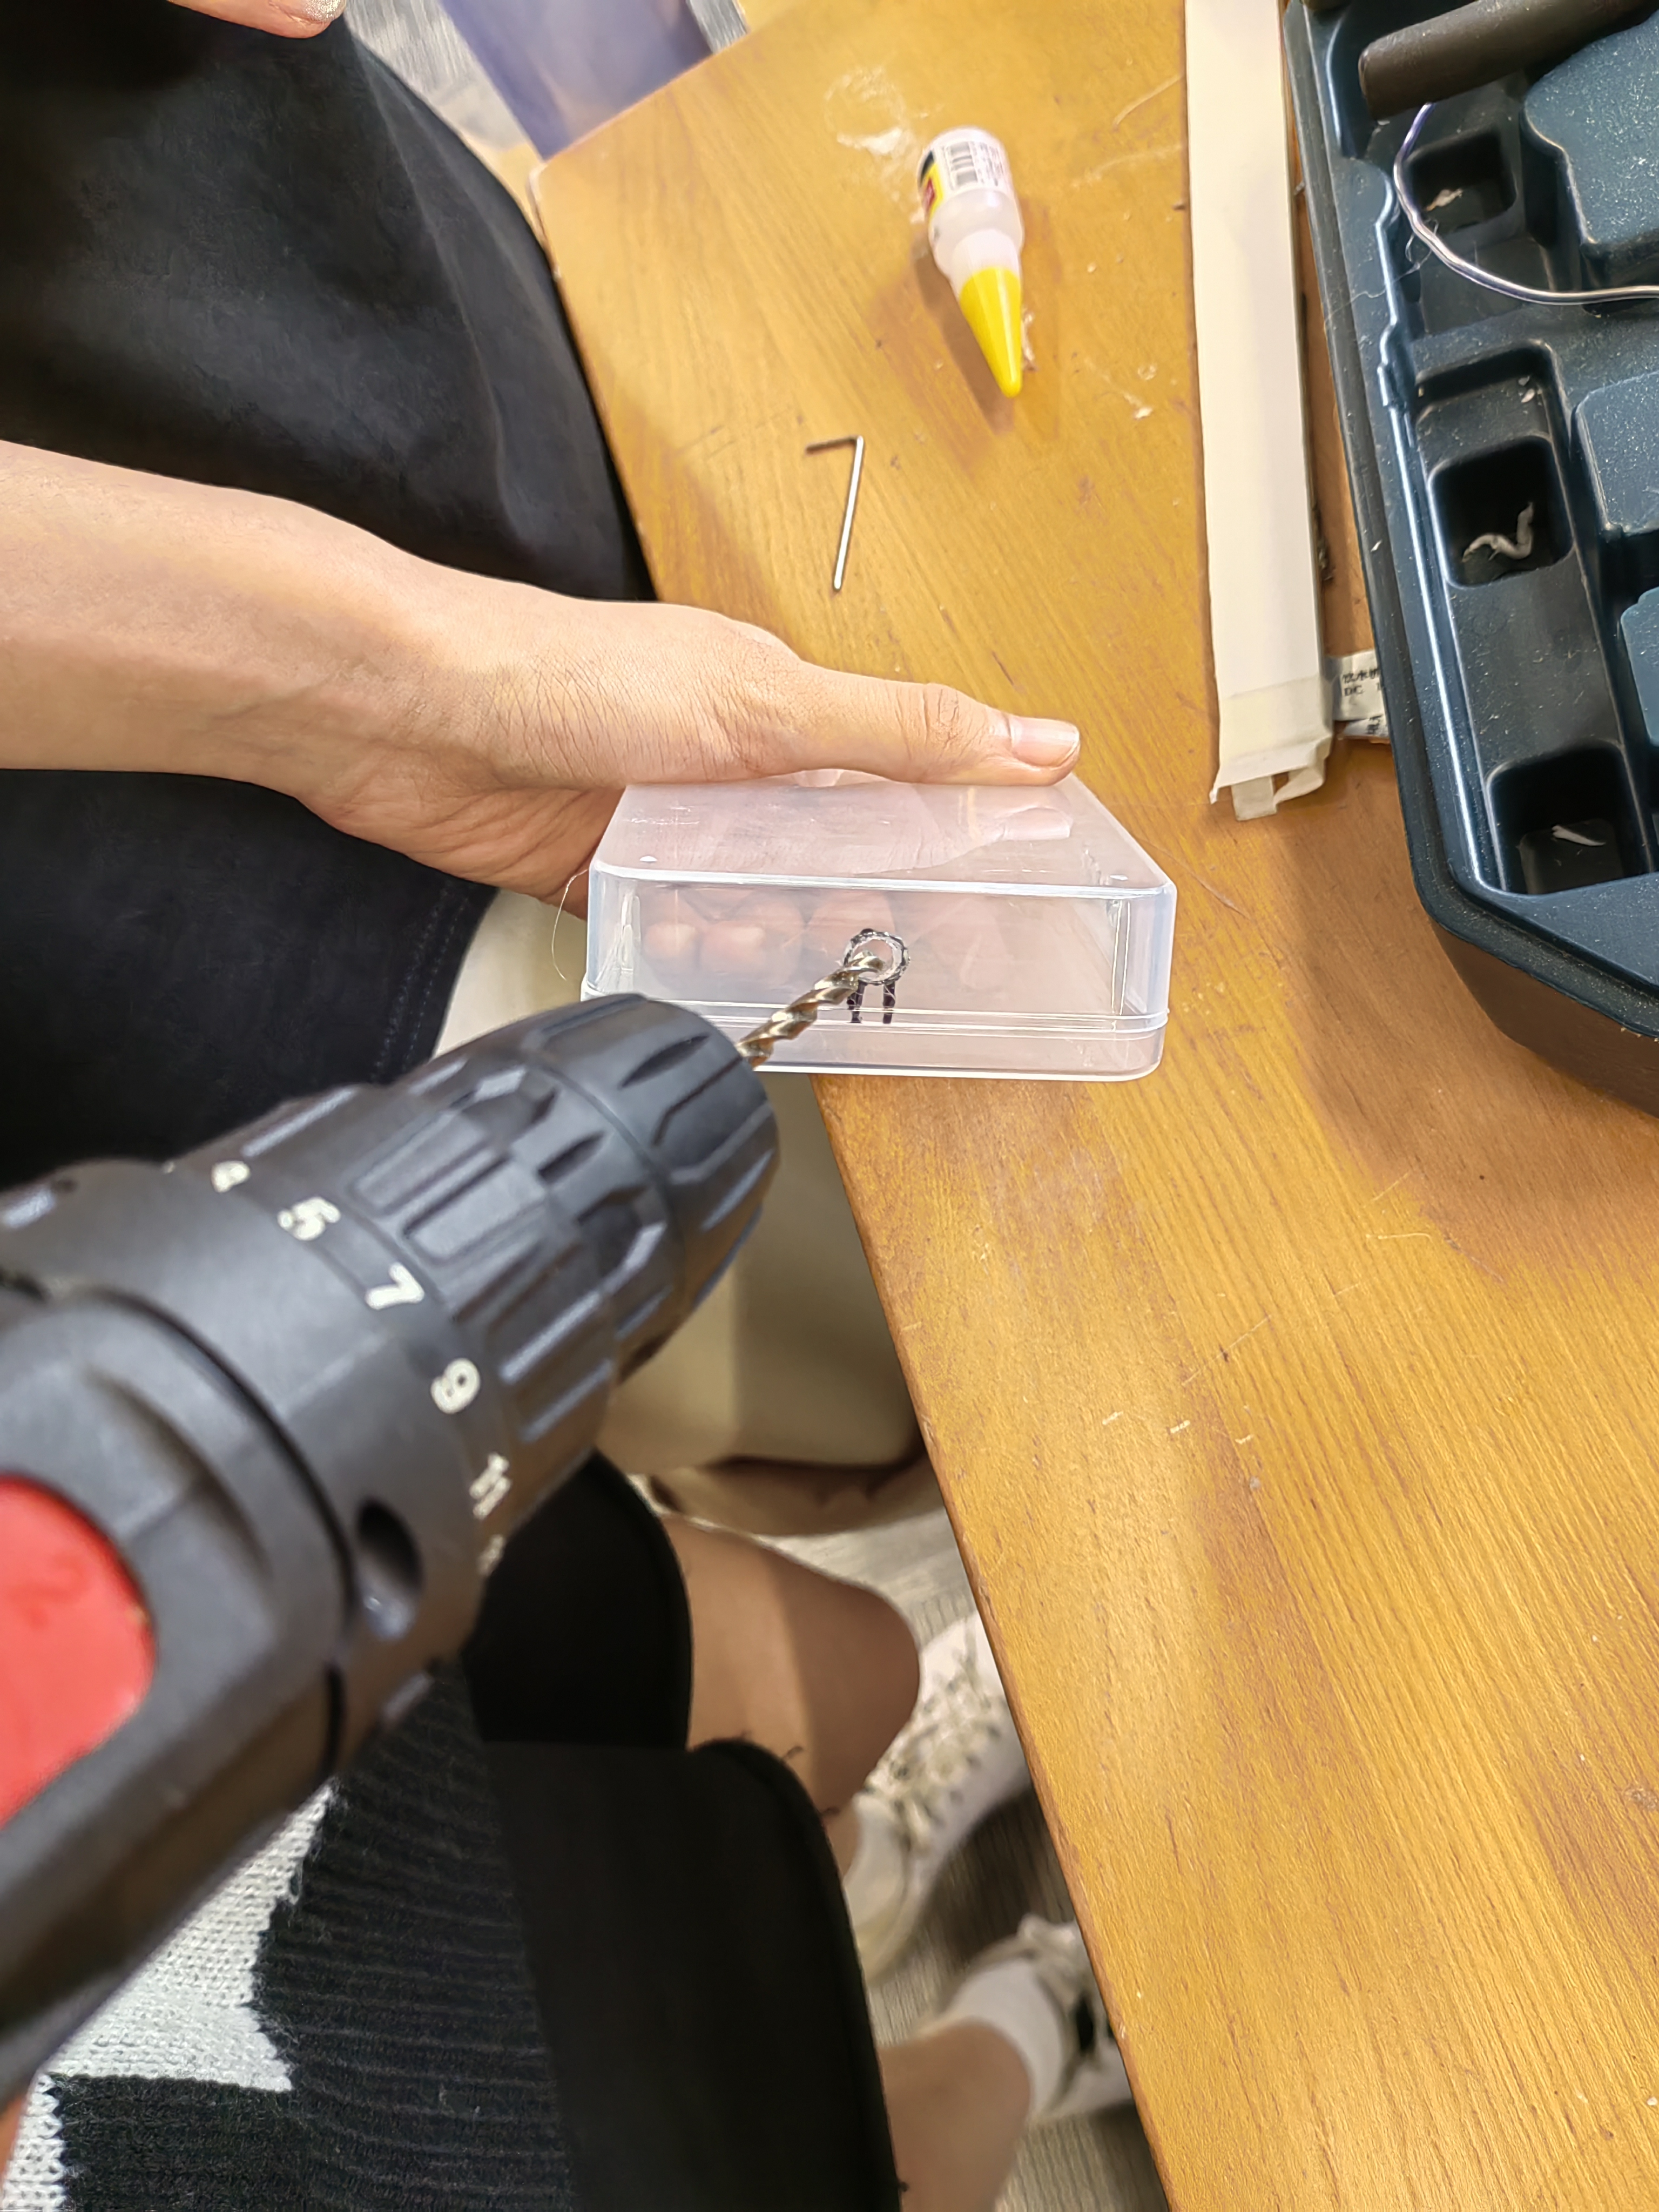
2-1 Drill hole
We choose a small plastic box to place the arduino board, determine the position of the wire through the
box, and drill the position of these marks with an electric drill.
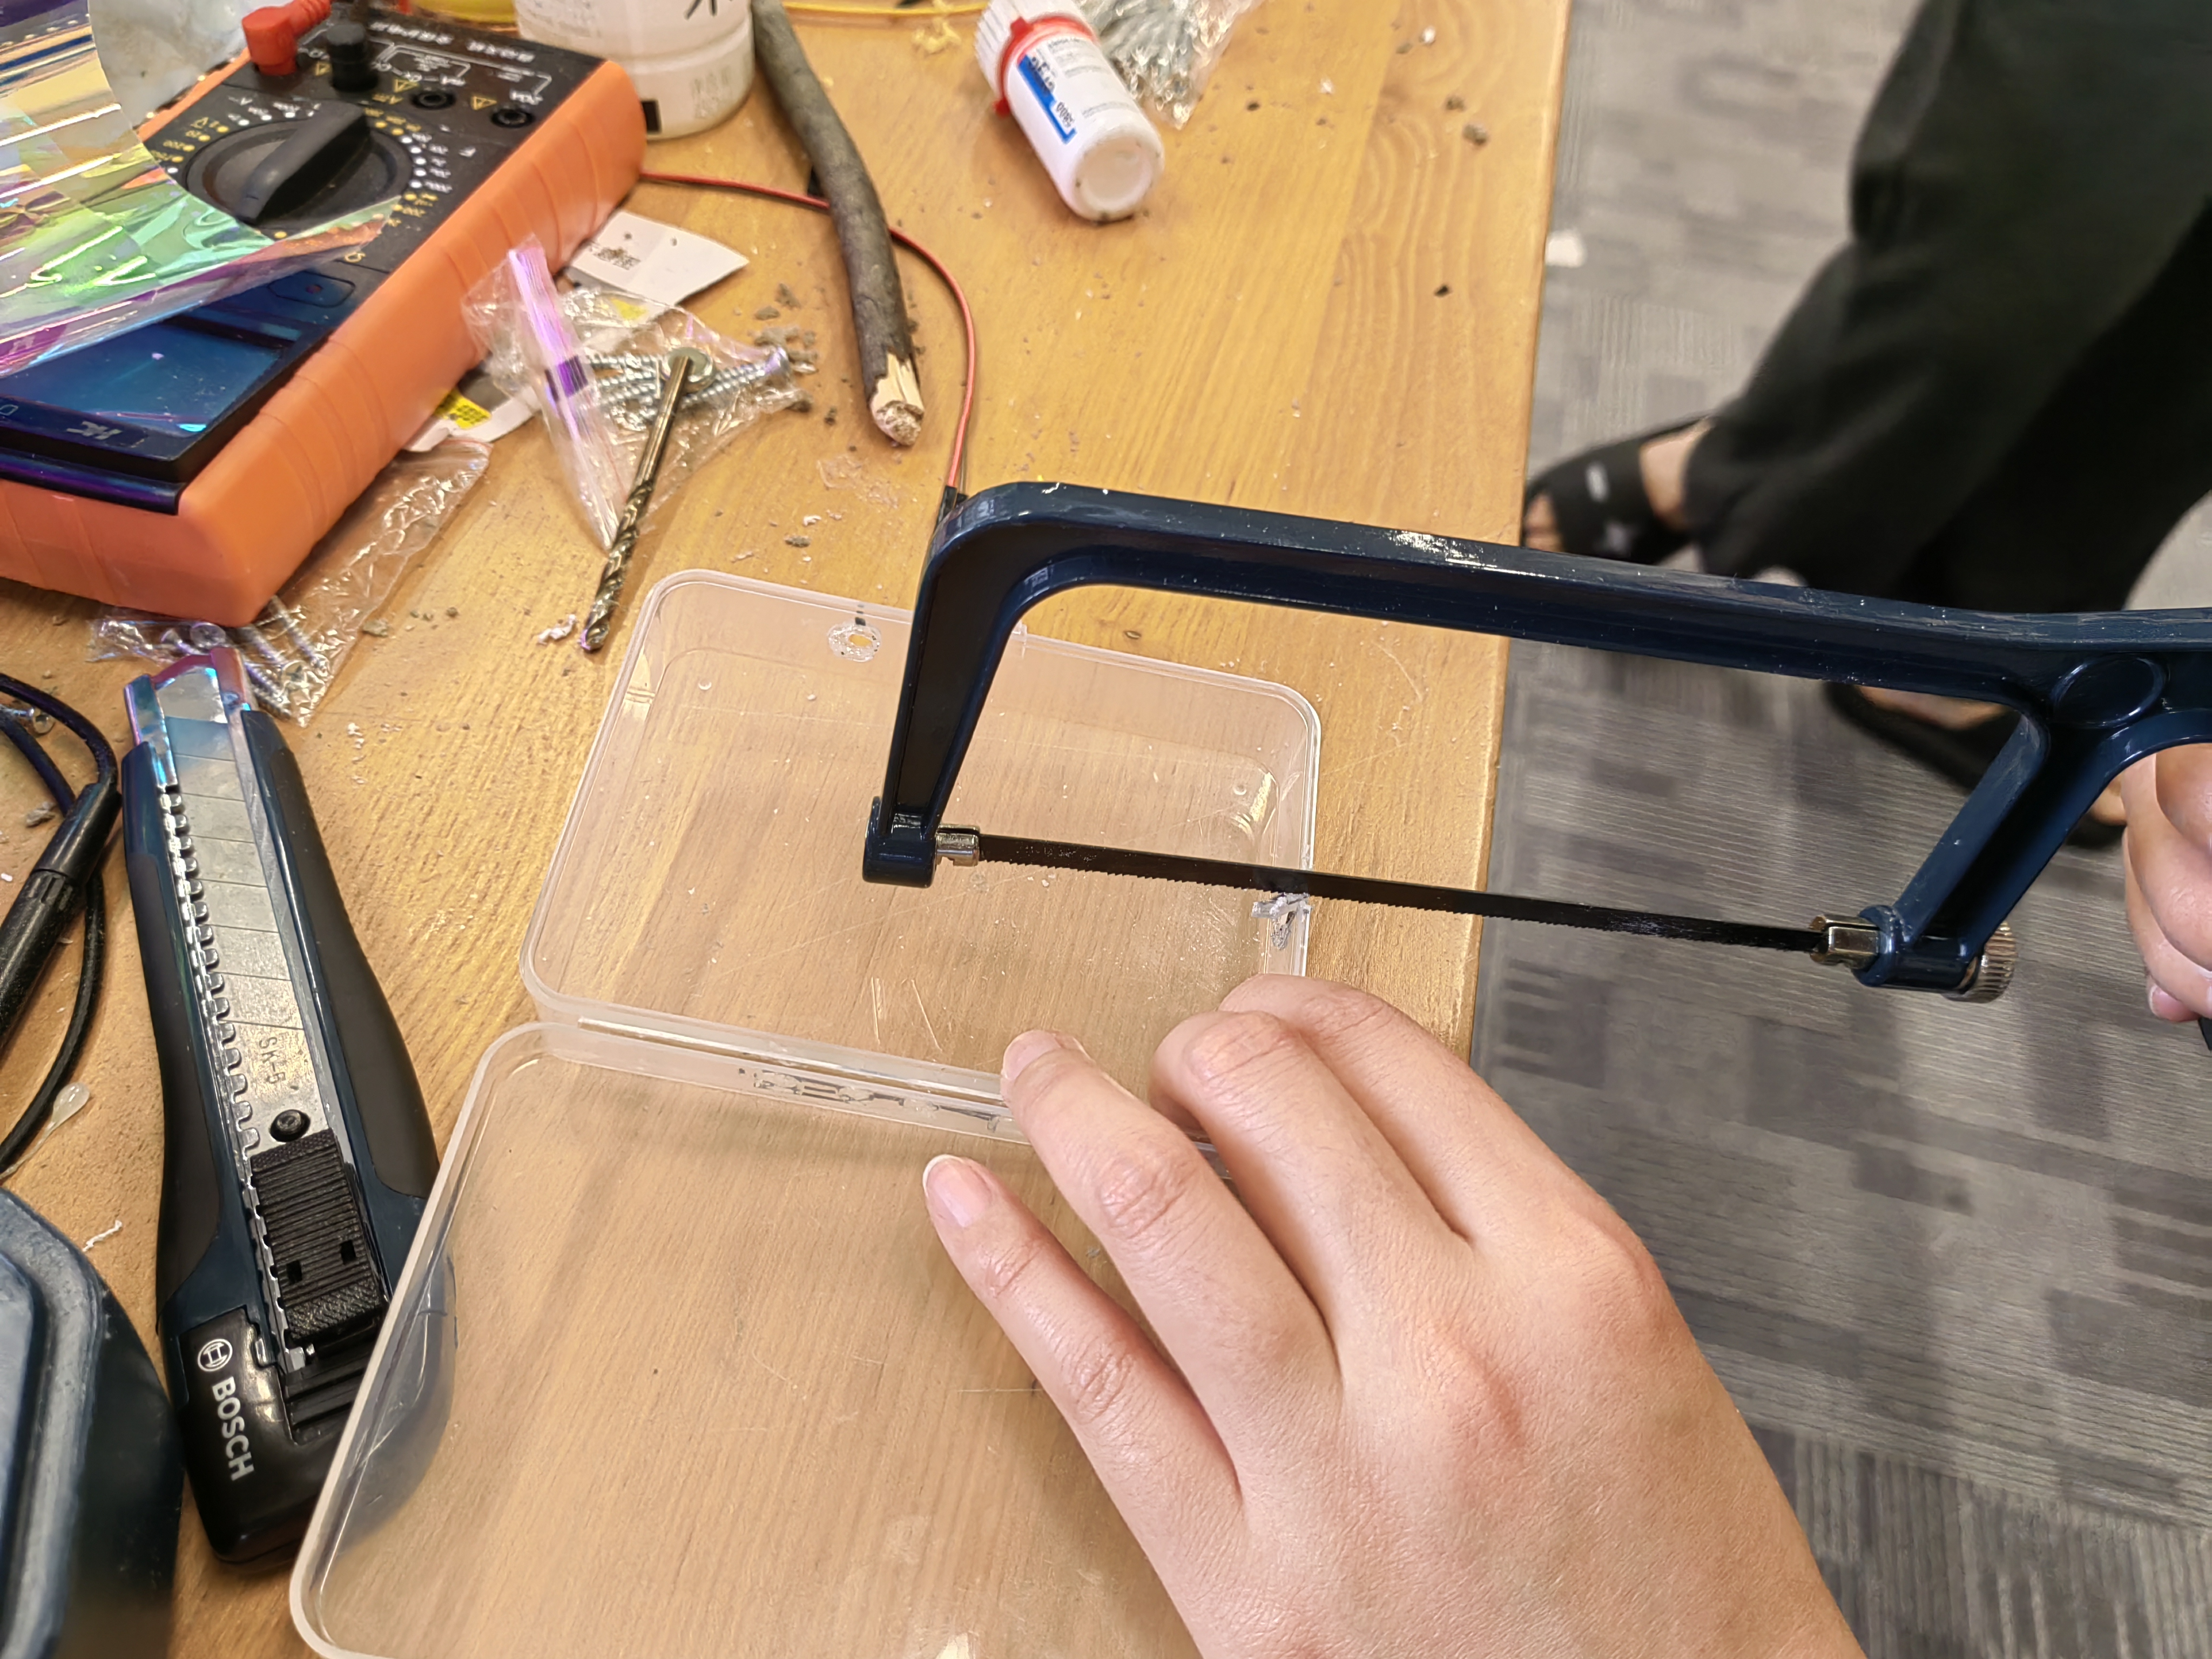
2-2 Sawing
Use a saw to cut away the excess above the drill hole.
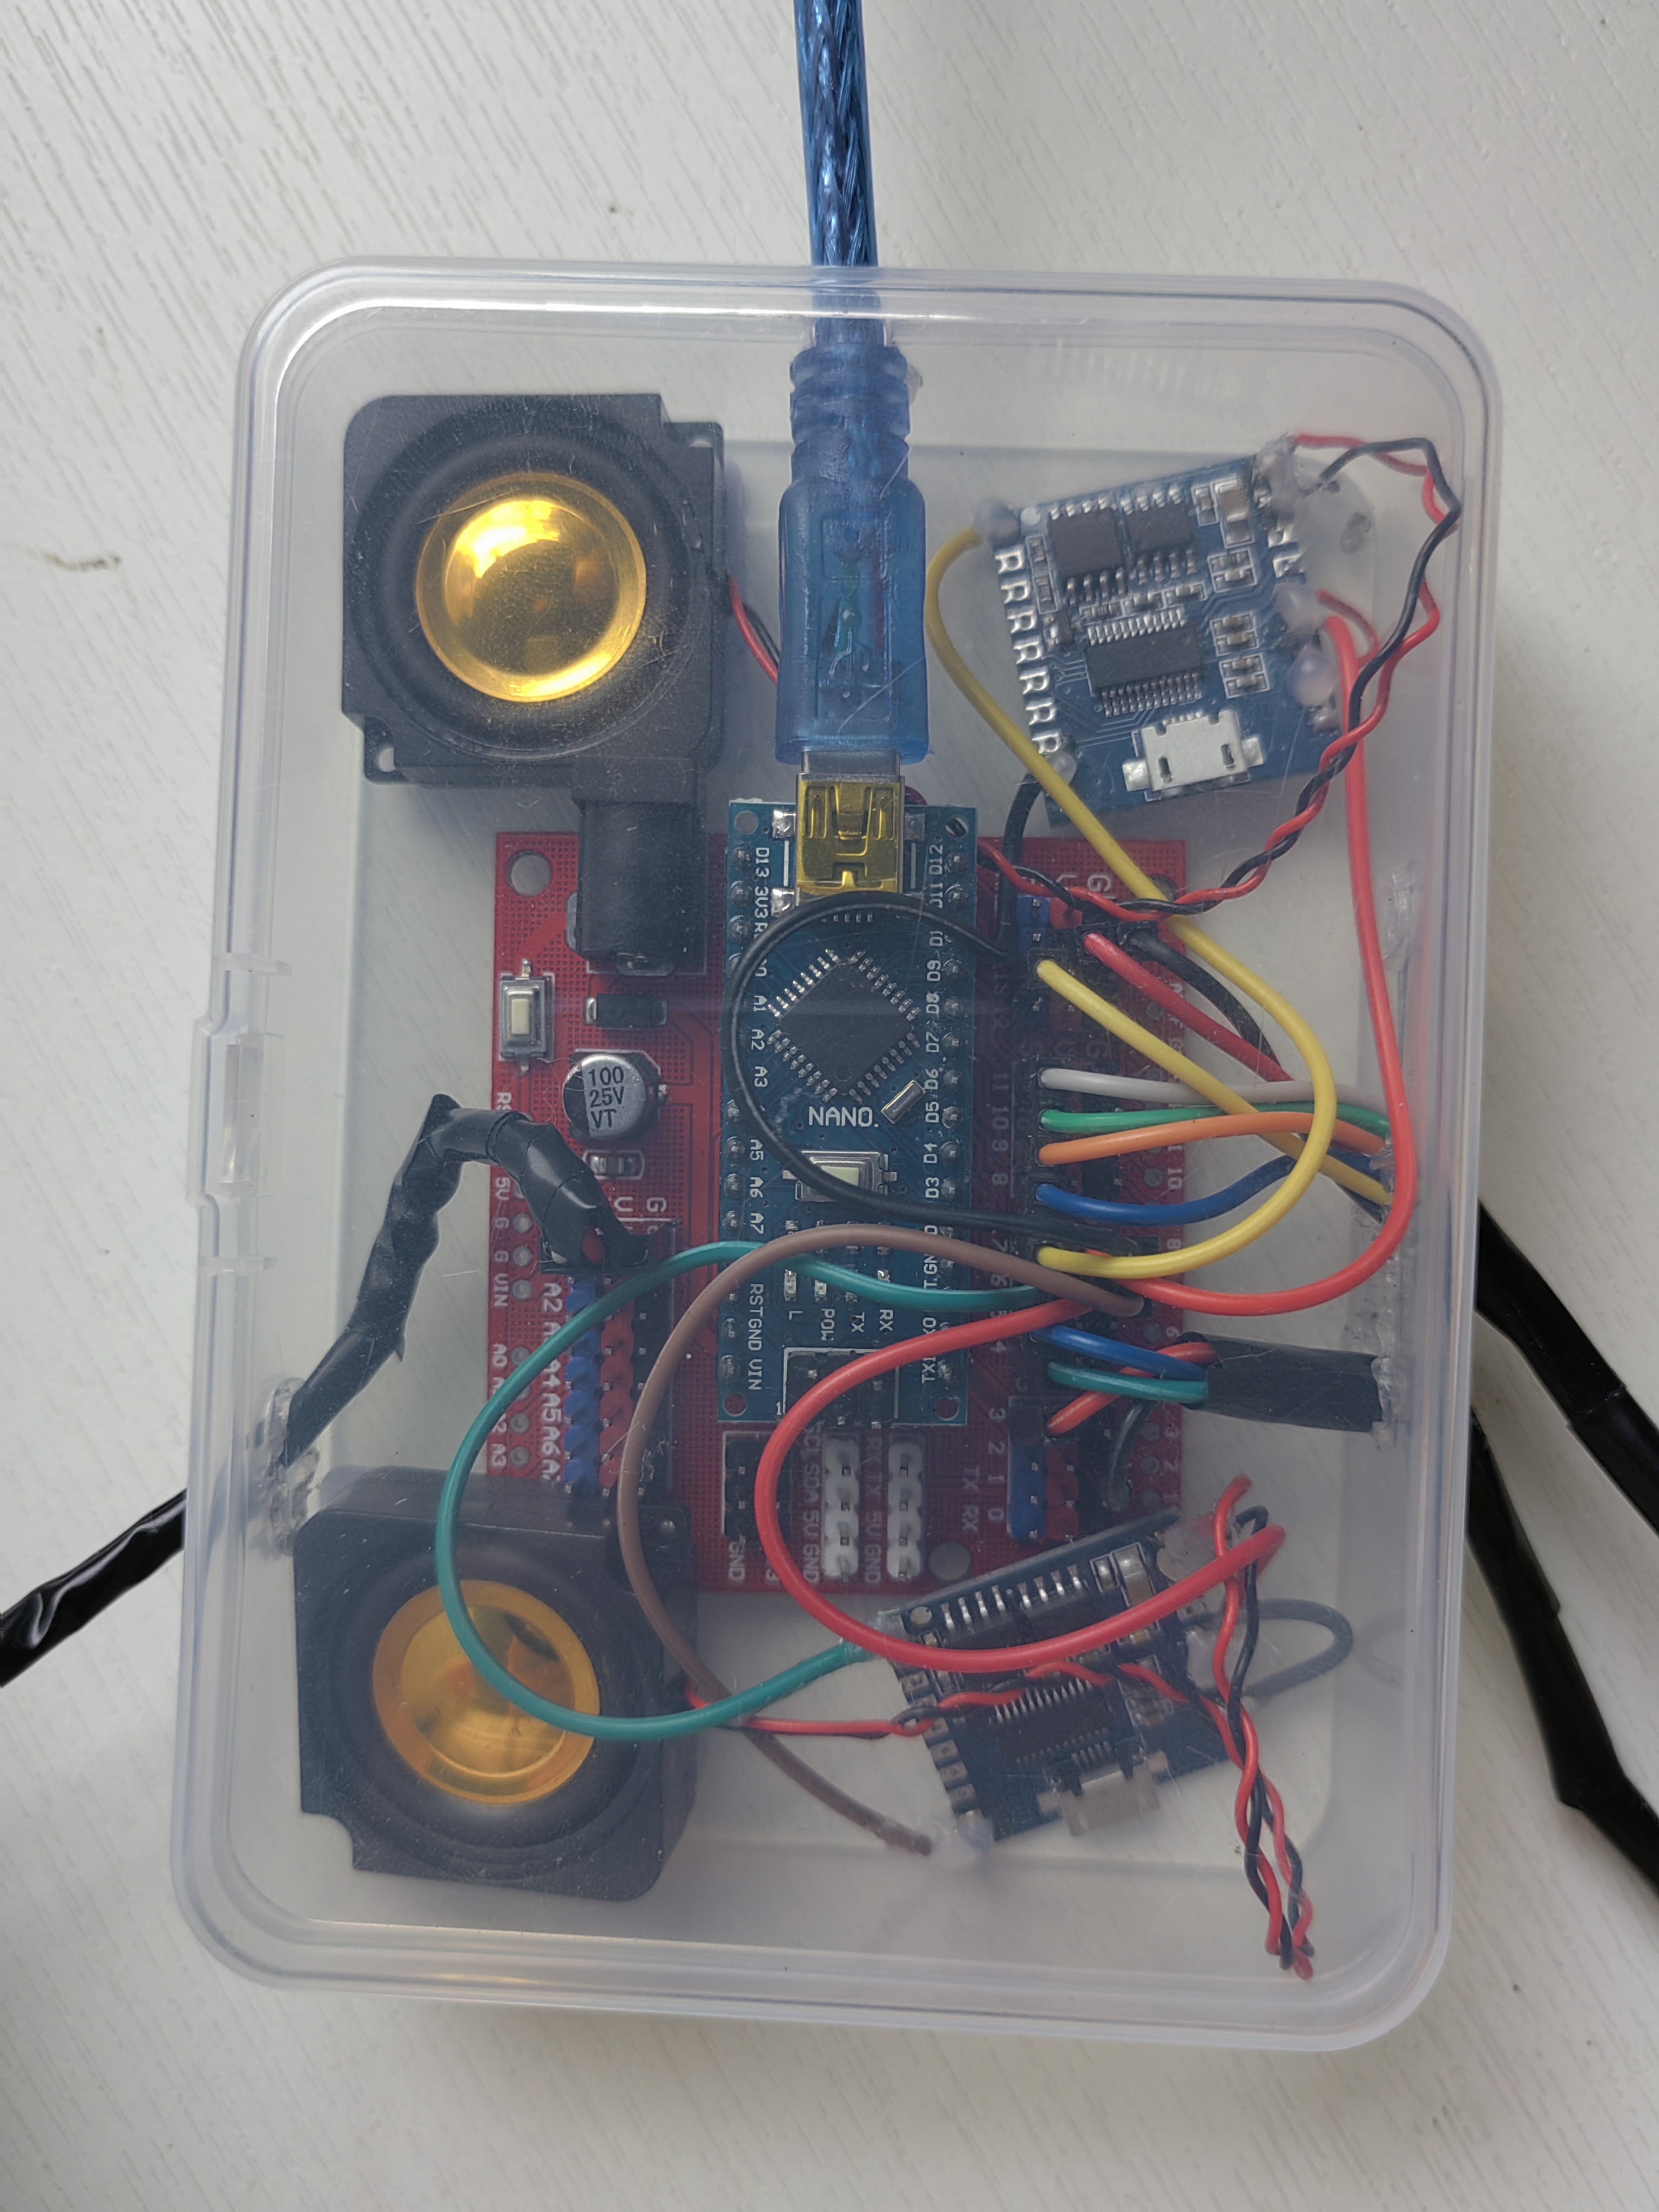
2-3 After finishing the box
Put the arduino components into the processed box, pass the lines through the holes on the side of the box,
and sort out the components inside the box. After completion, the figure is shown.
Step4: Integral assembly
1-Component box and air bag placement
First place the airbag into the lower part of the bear, and then put the component box in.
2-Put the cotton back inside the bear
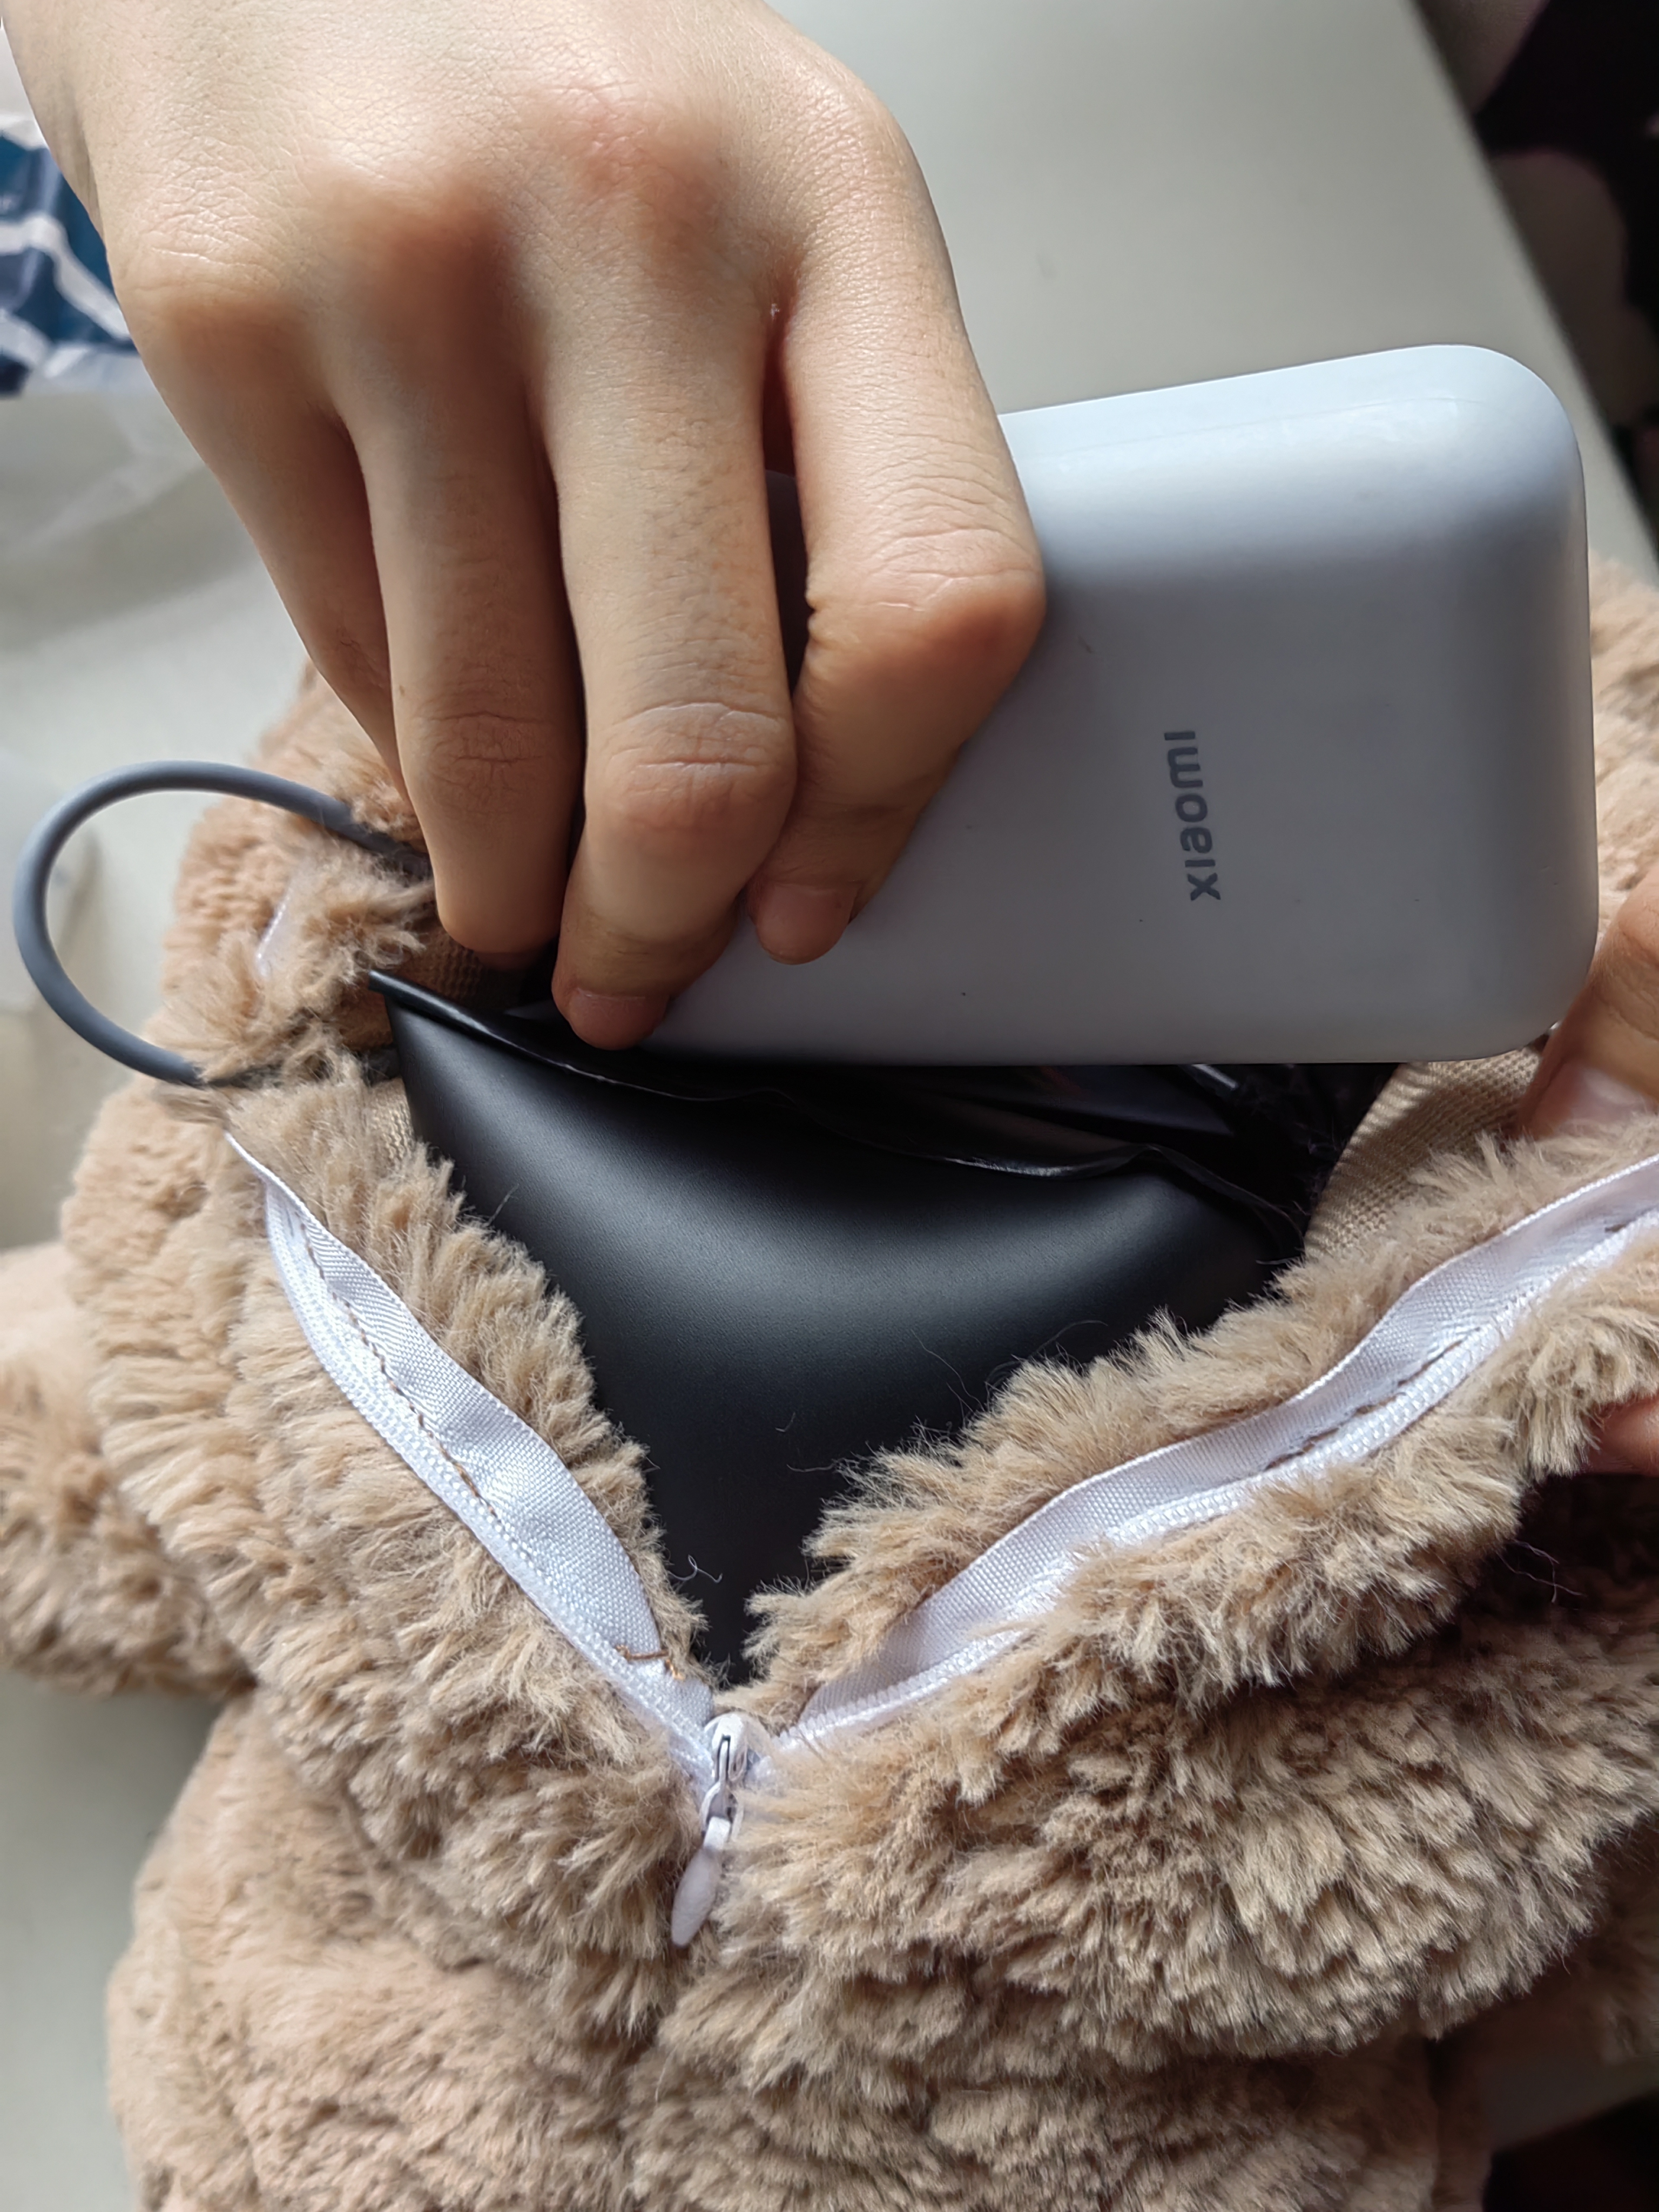
3-Power supply placement