Introduction & Exploration
Introduction of Processing
Processing is a flexible software sketchbook and a language for learning how to code. Since 2001, Processing has promoted software literacy within the visual arts and visual literacy within technology.
One of Processing’s shortcomings is its lack of web compatibility, but this is well addressed by its twin brother, p5.js. All of the drawing functions you use in Processing can be executed in p5.js, which means that when you want to implement your ideas on the web, it’s an easy transition without a lot of learning curve.
With p5.js, you can use the entire browser as your “canvas”. With the plugin library, you can easily interact with other html5 elements such as text, input boxes, video, camera and audio, and you can even create games with P5.js. All in all, Processing offers a new option for all creative people to bring their interesting ideas to life.
1. The Origins of Processing
Processing was born out of the Aesthetics and Computing Research Group at the MIT Media Lab, where Casey Reas and Benjamin Fry initiated the program.
Processing itself is a blend of art and science: it is programmed in the context of digital art, through visualization, with a simplified syntax based on the java language, and with cross-platform features.
2. People who use Processing
Processing was initially created specifically for visual interaction and media art design, and it is a language developed for artists and designers. the emergence of processing makes everyone realize again: programming is not just a job for engineers; programming can provide an effective way for a wide range of artists and designers, as well as for all those who want to programmatically realize drawing, animation and interaction. programming for artists and designers, and anyone who wants to draw, animate, and interact programmatically.
But not only designers and artists, everyone can realize their design ideas with the help of processing.
3.Features of Processing
- Open source and simple
- Rich in resources
- Wide range of applications
Exploration similar tool
After our study and exploration, we found that TouchDesigner is a similar software tool to Processing.
TD is more suitable for creative, interface for beginners is also more friendly, TD does not do complex work without writing code, the functions are packaged into components more convenient, the project readability is also very high. Mainly in support of the use of hardware than processing convenient. processing no complex functions, but IDE voice based on Java qua platform high, the functional requirements of third-party libraries or quite good, the design of the flexibility is very strong (not only can it be used to do creativity), but the need for some code skills, and when you debug the BUG time ……
A more intuitive statement is: TouchDeesigner itself is an interactive software intuitive synthesis output, processing is more like a development tool to support the development and compilation.
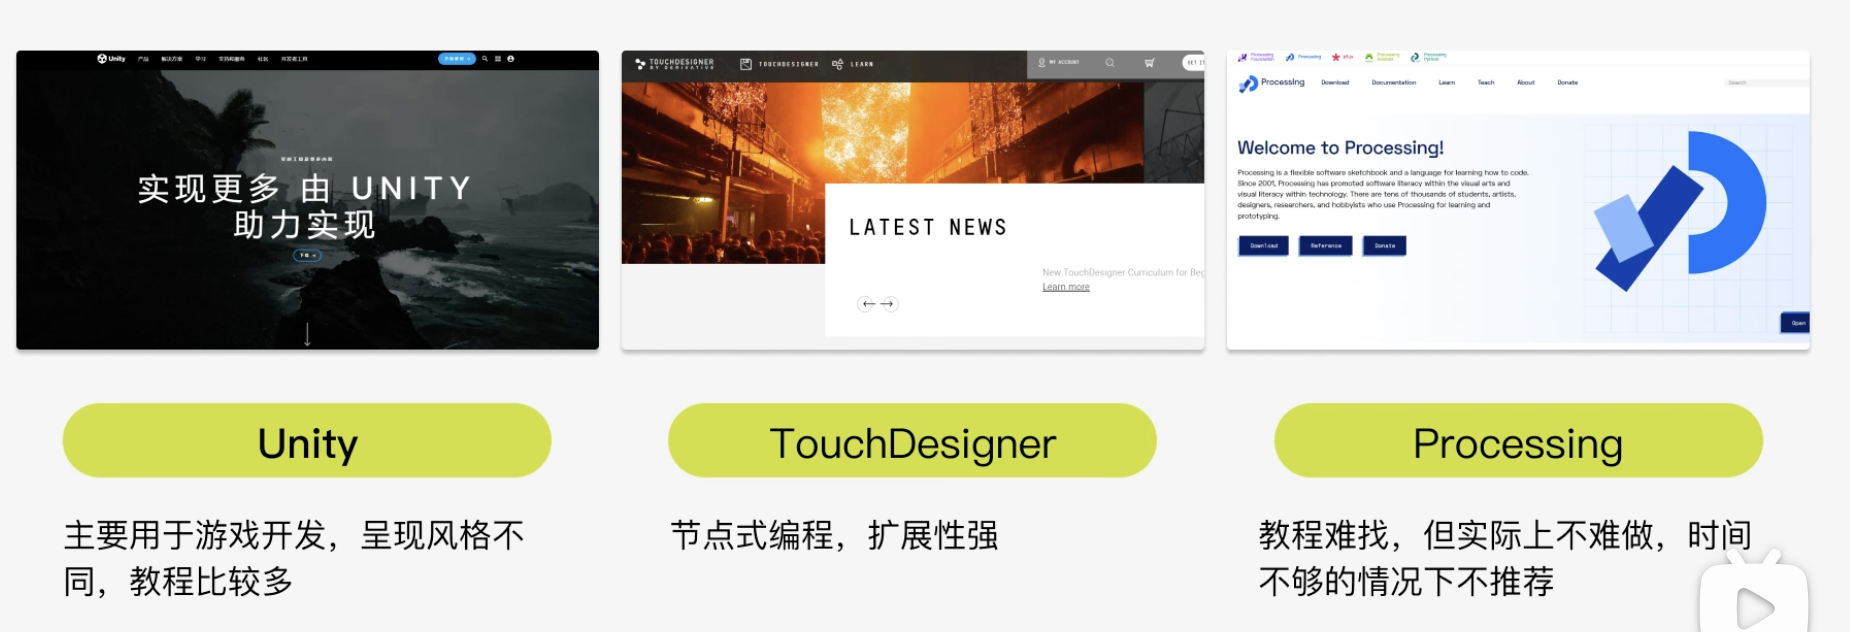
The following are some of the results of the application of touch designer shared on the Internet.
https://youtu.be/SbYtIiZdrew?si=lu0sGlyOIFuOUp2u
Kinect & Leapmotion & IOT platform
In order to better learn the function of processing, we have found an open source case on the Internet about Leapmotion, to analyze, learn, show.
Kinect side trembling sensitive heavy recognition of human cigar mill branch body whole body swim resistant skeleton, but can also recognize the face and hand (currently can only recognize two fingers), Leap Motion can only recognize the hand, but the accuracy is higher than the kinect recognition of the hand.
There is no leap motion.
There are related tutorials: https://blog.csdn.net/m0_67426211/article/details/131226332
Our Work
one demo to interact
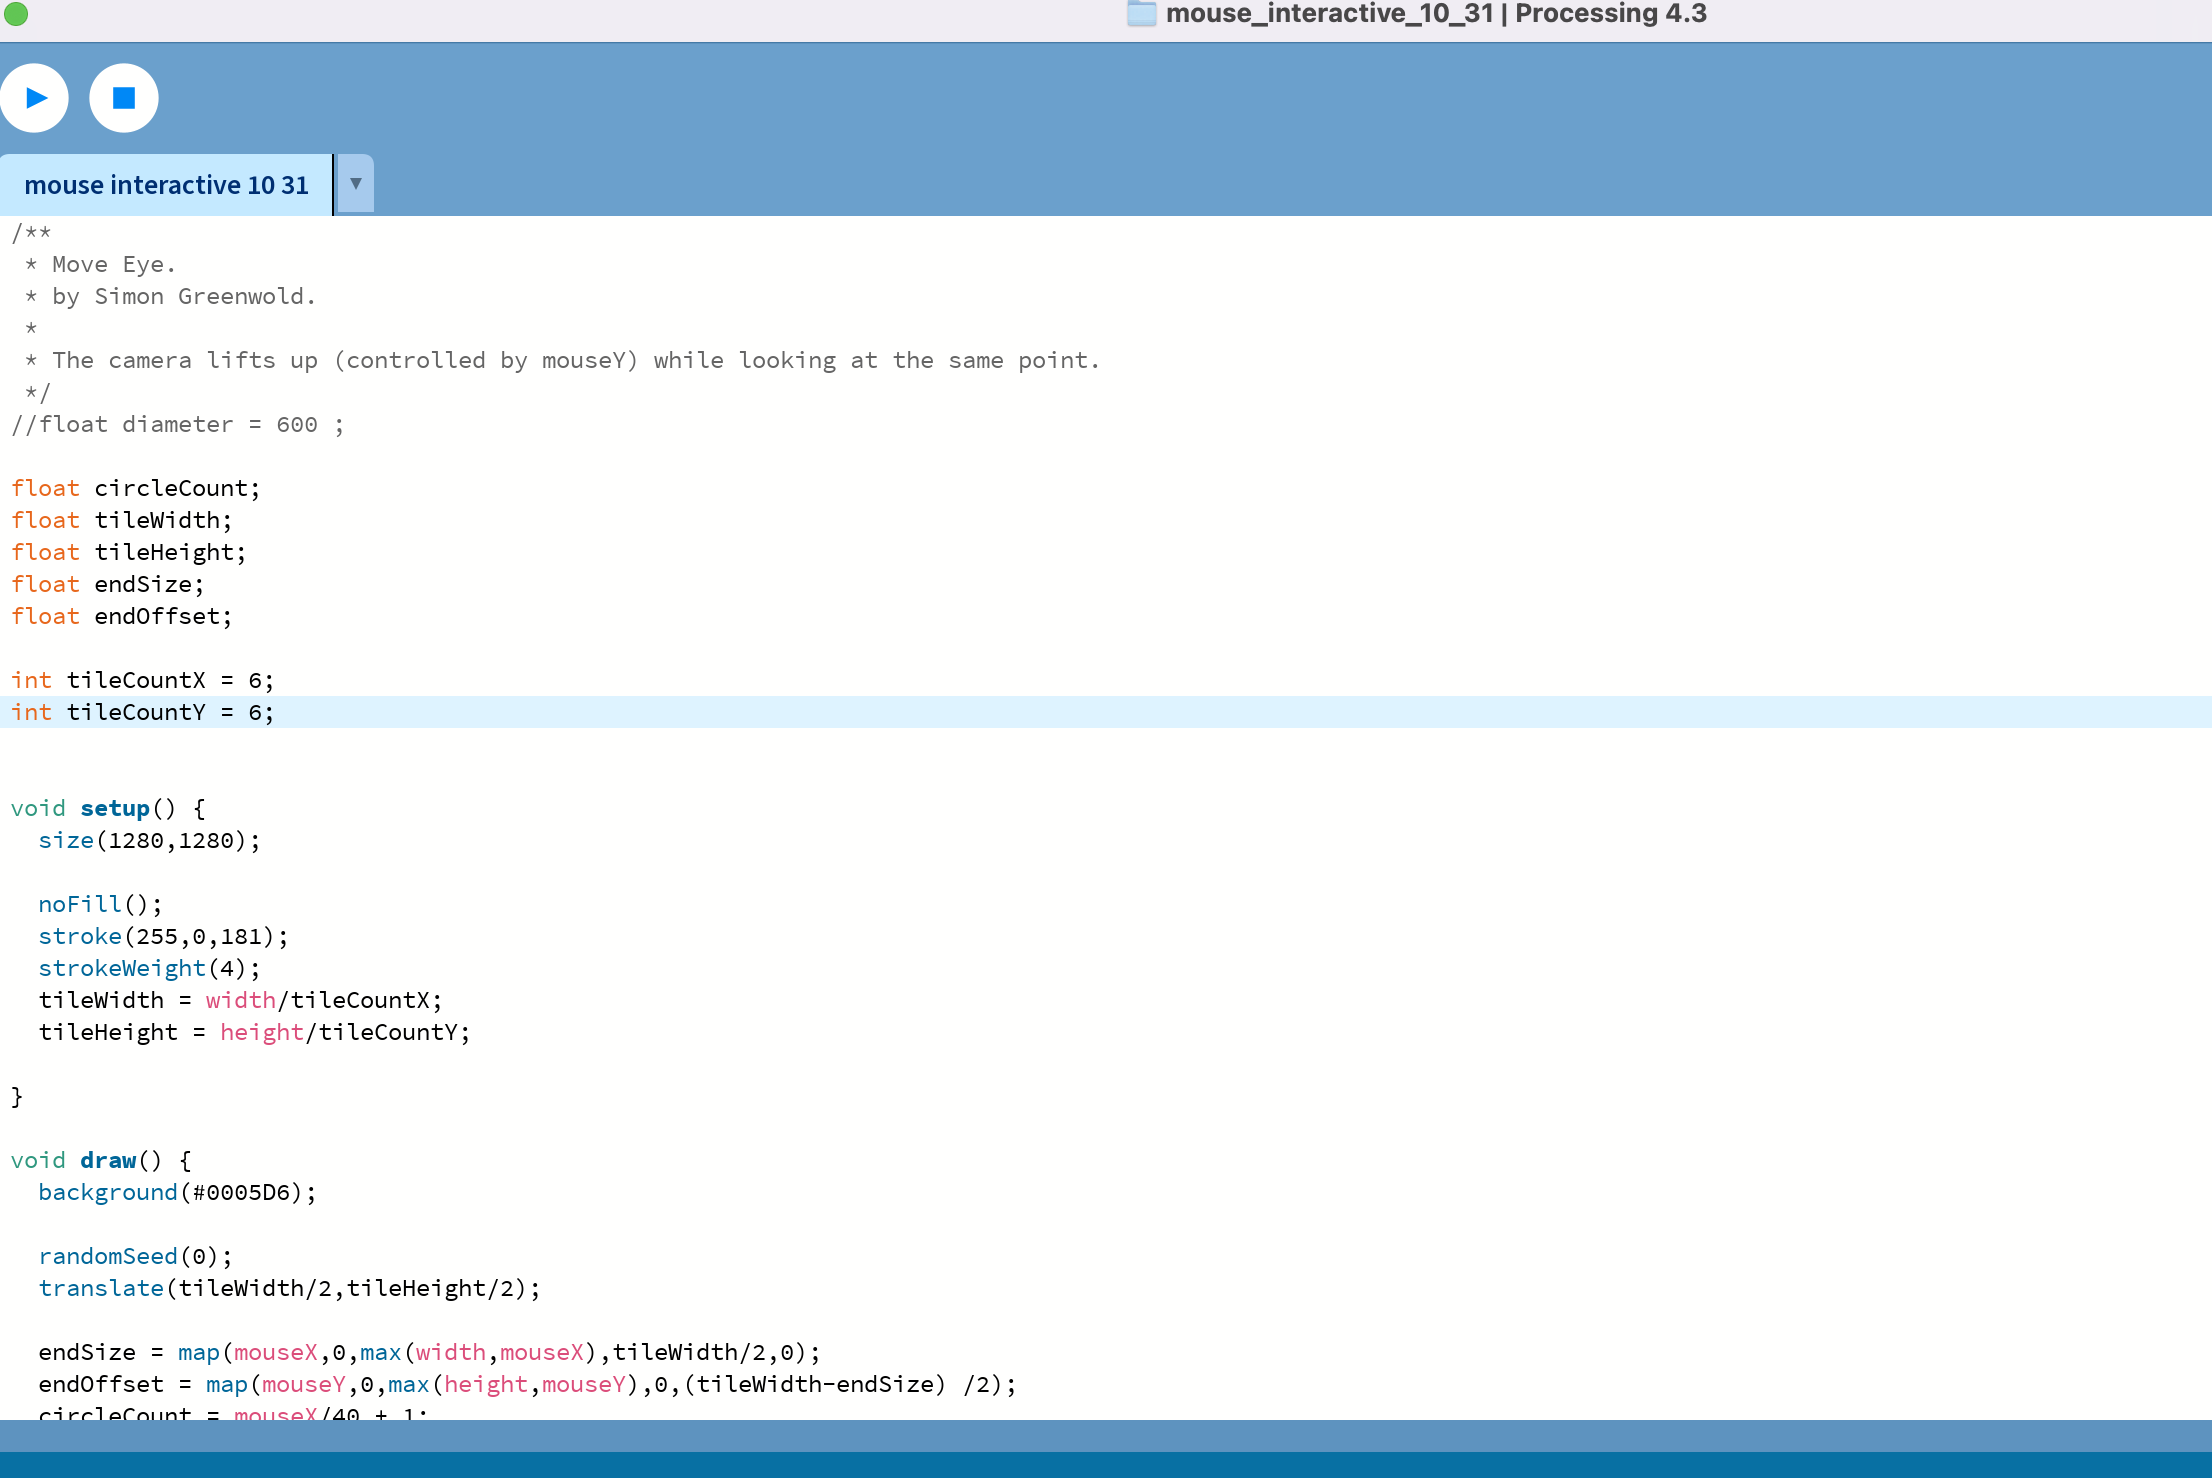
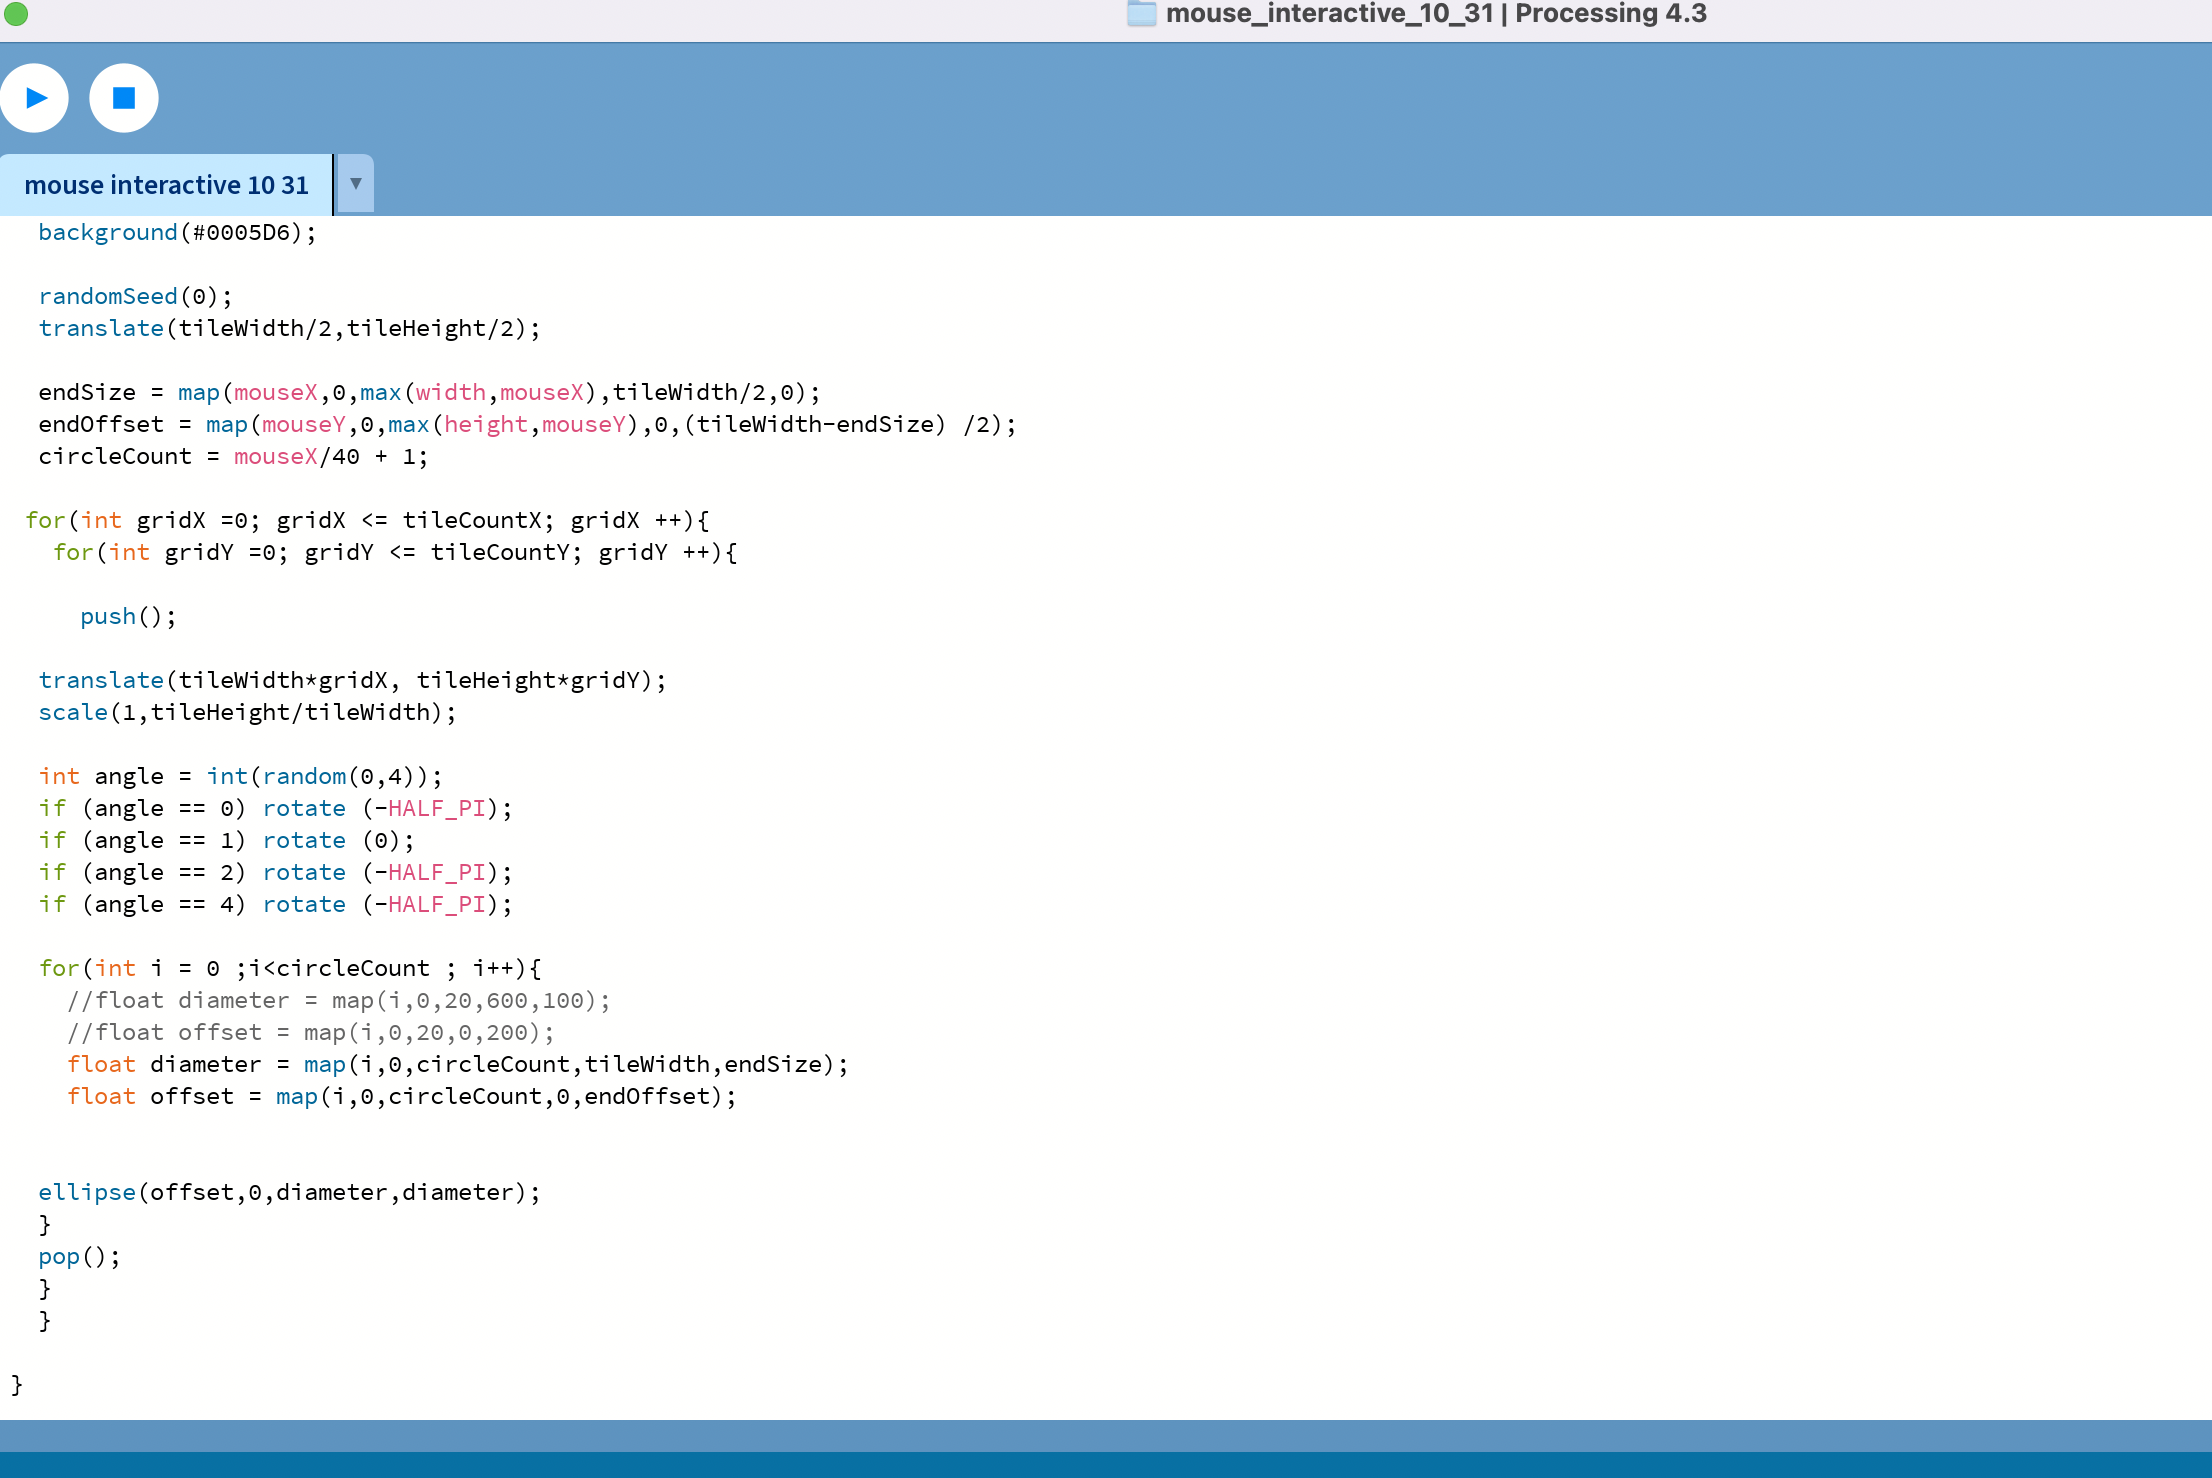
We made one that can be interacted with using the mouse.
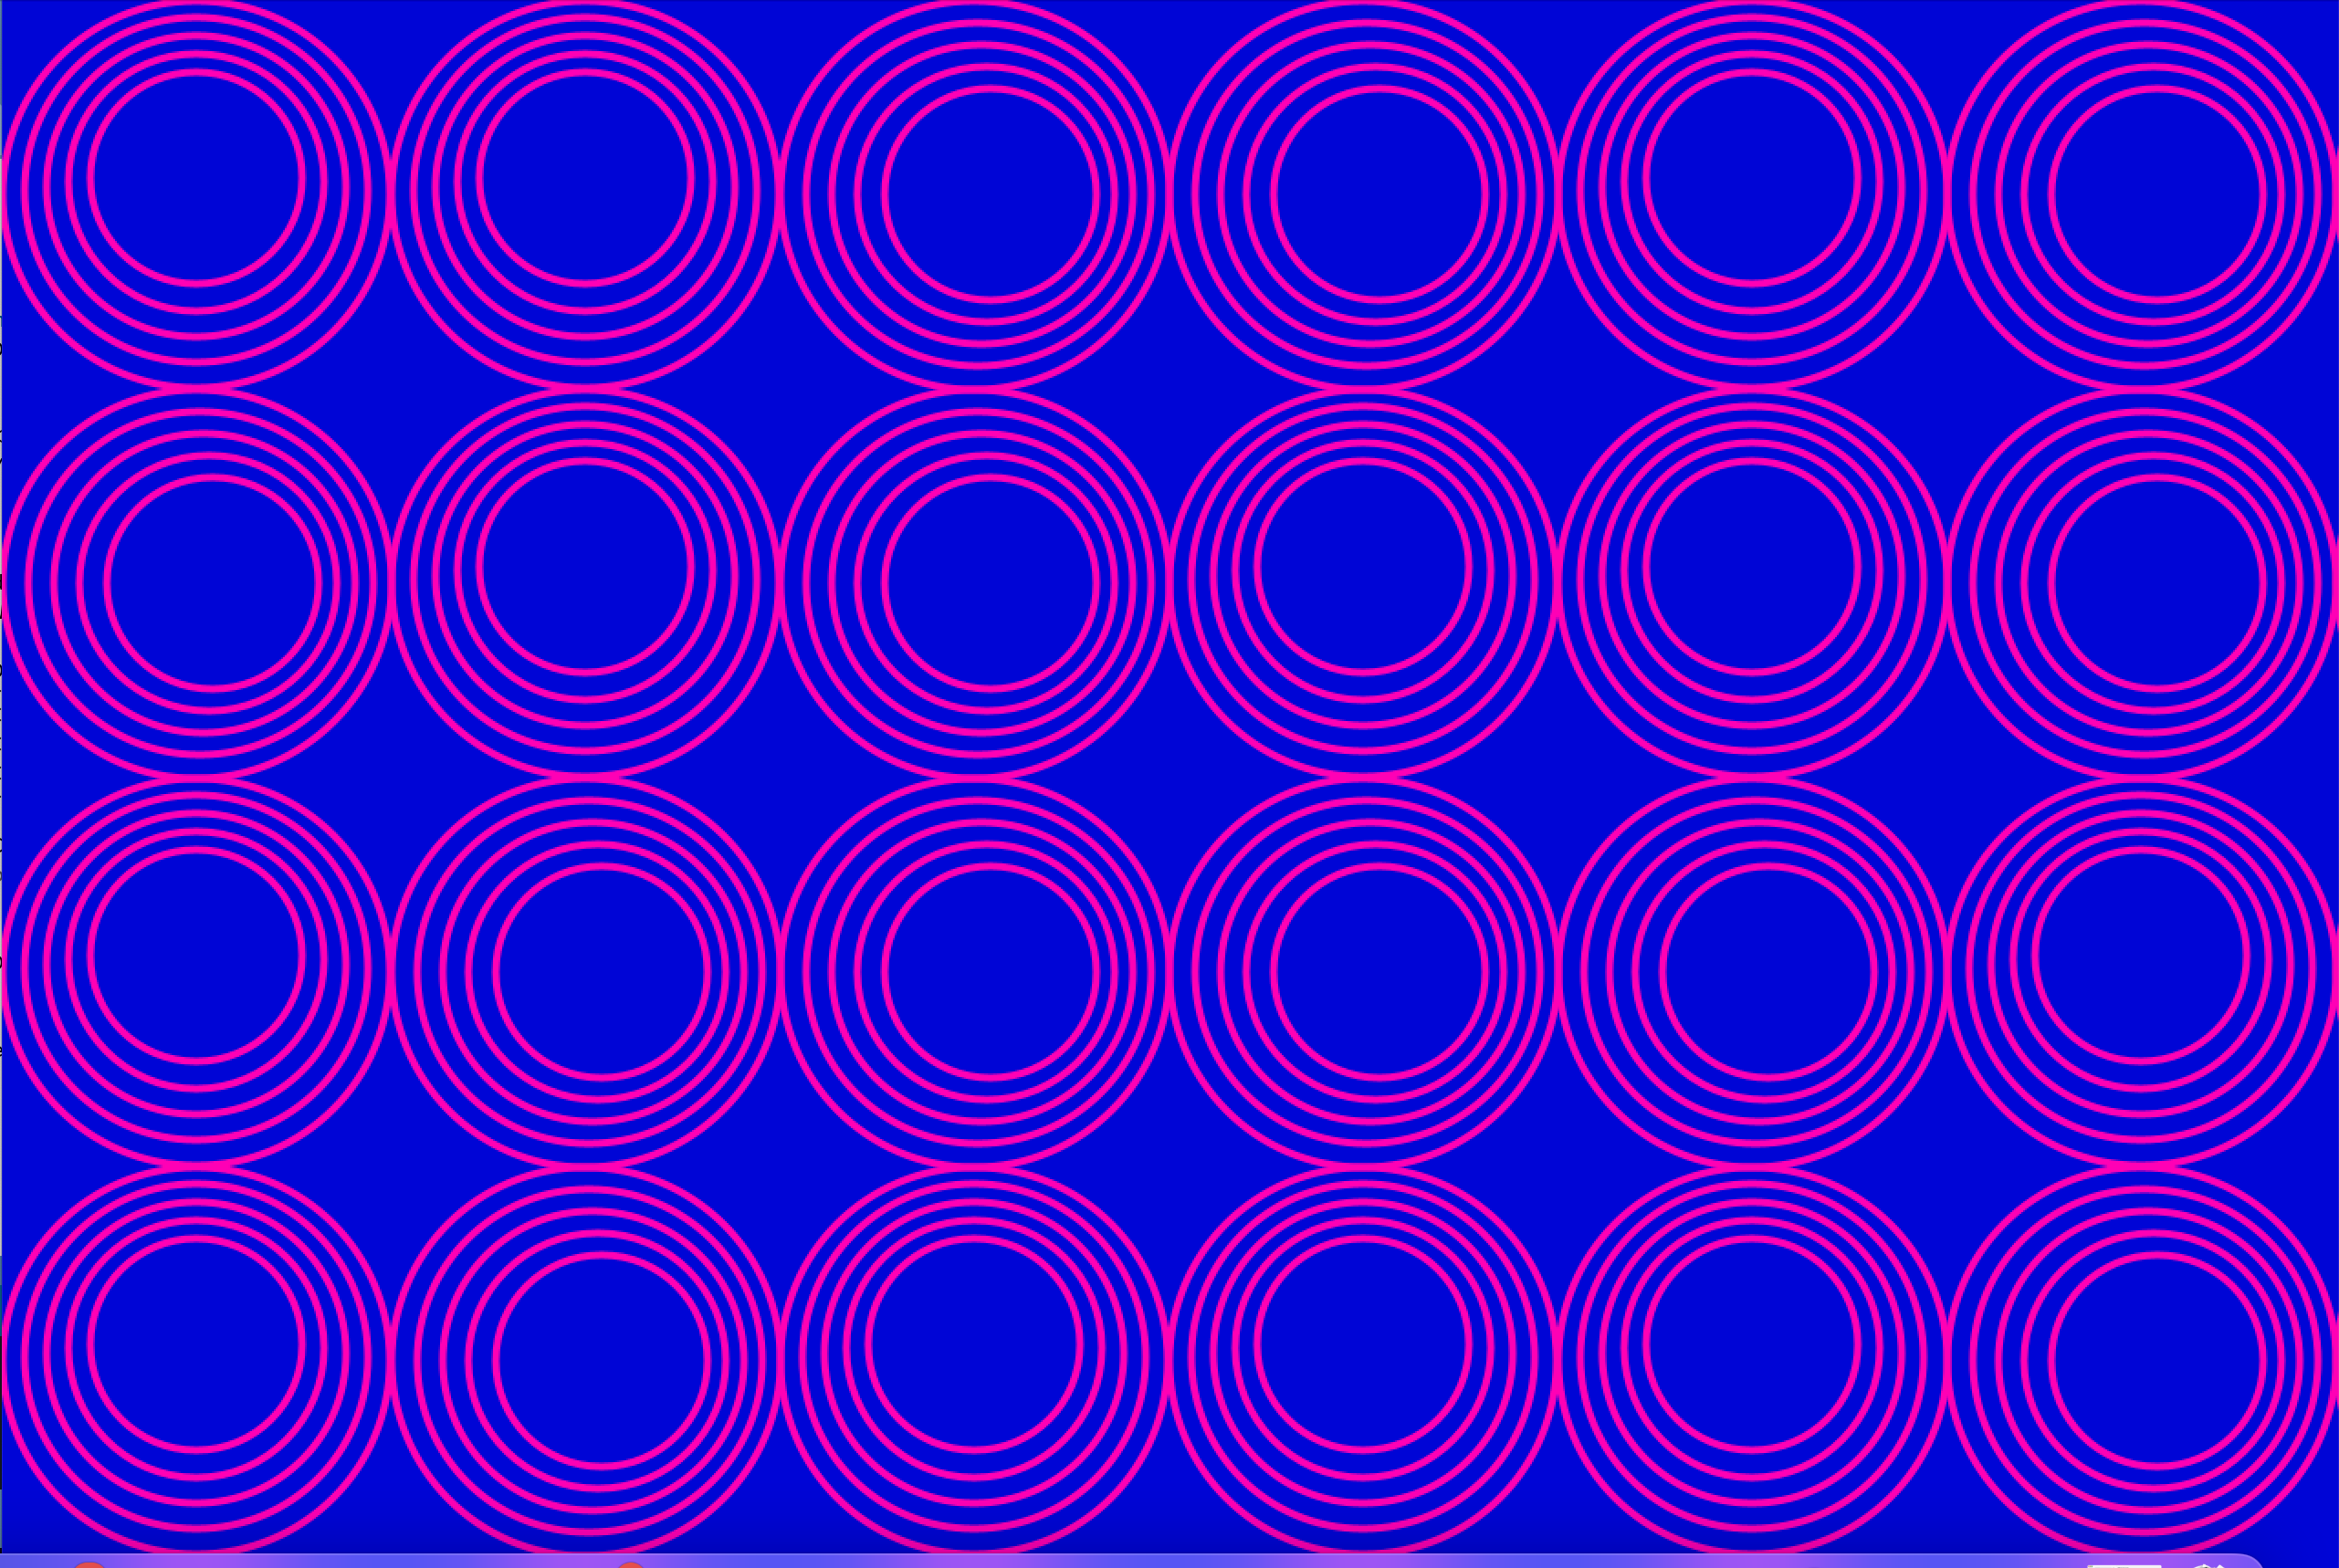
Basic Module: Download Processing, open it, and then in the sketch text editor, for the canvas size and background color to define, and then for the diameter of the circle, the color, fill, margins and position (using translate to determine the position of the circle) to define. Next, use the loop and the newly defined function to change the center of the circle and draw the basic module to complete the circle. The result will be as follows:
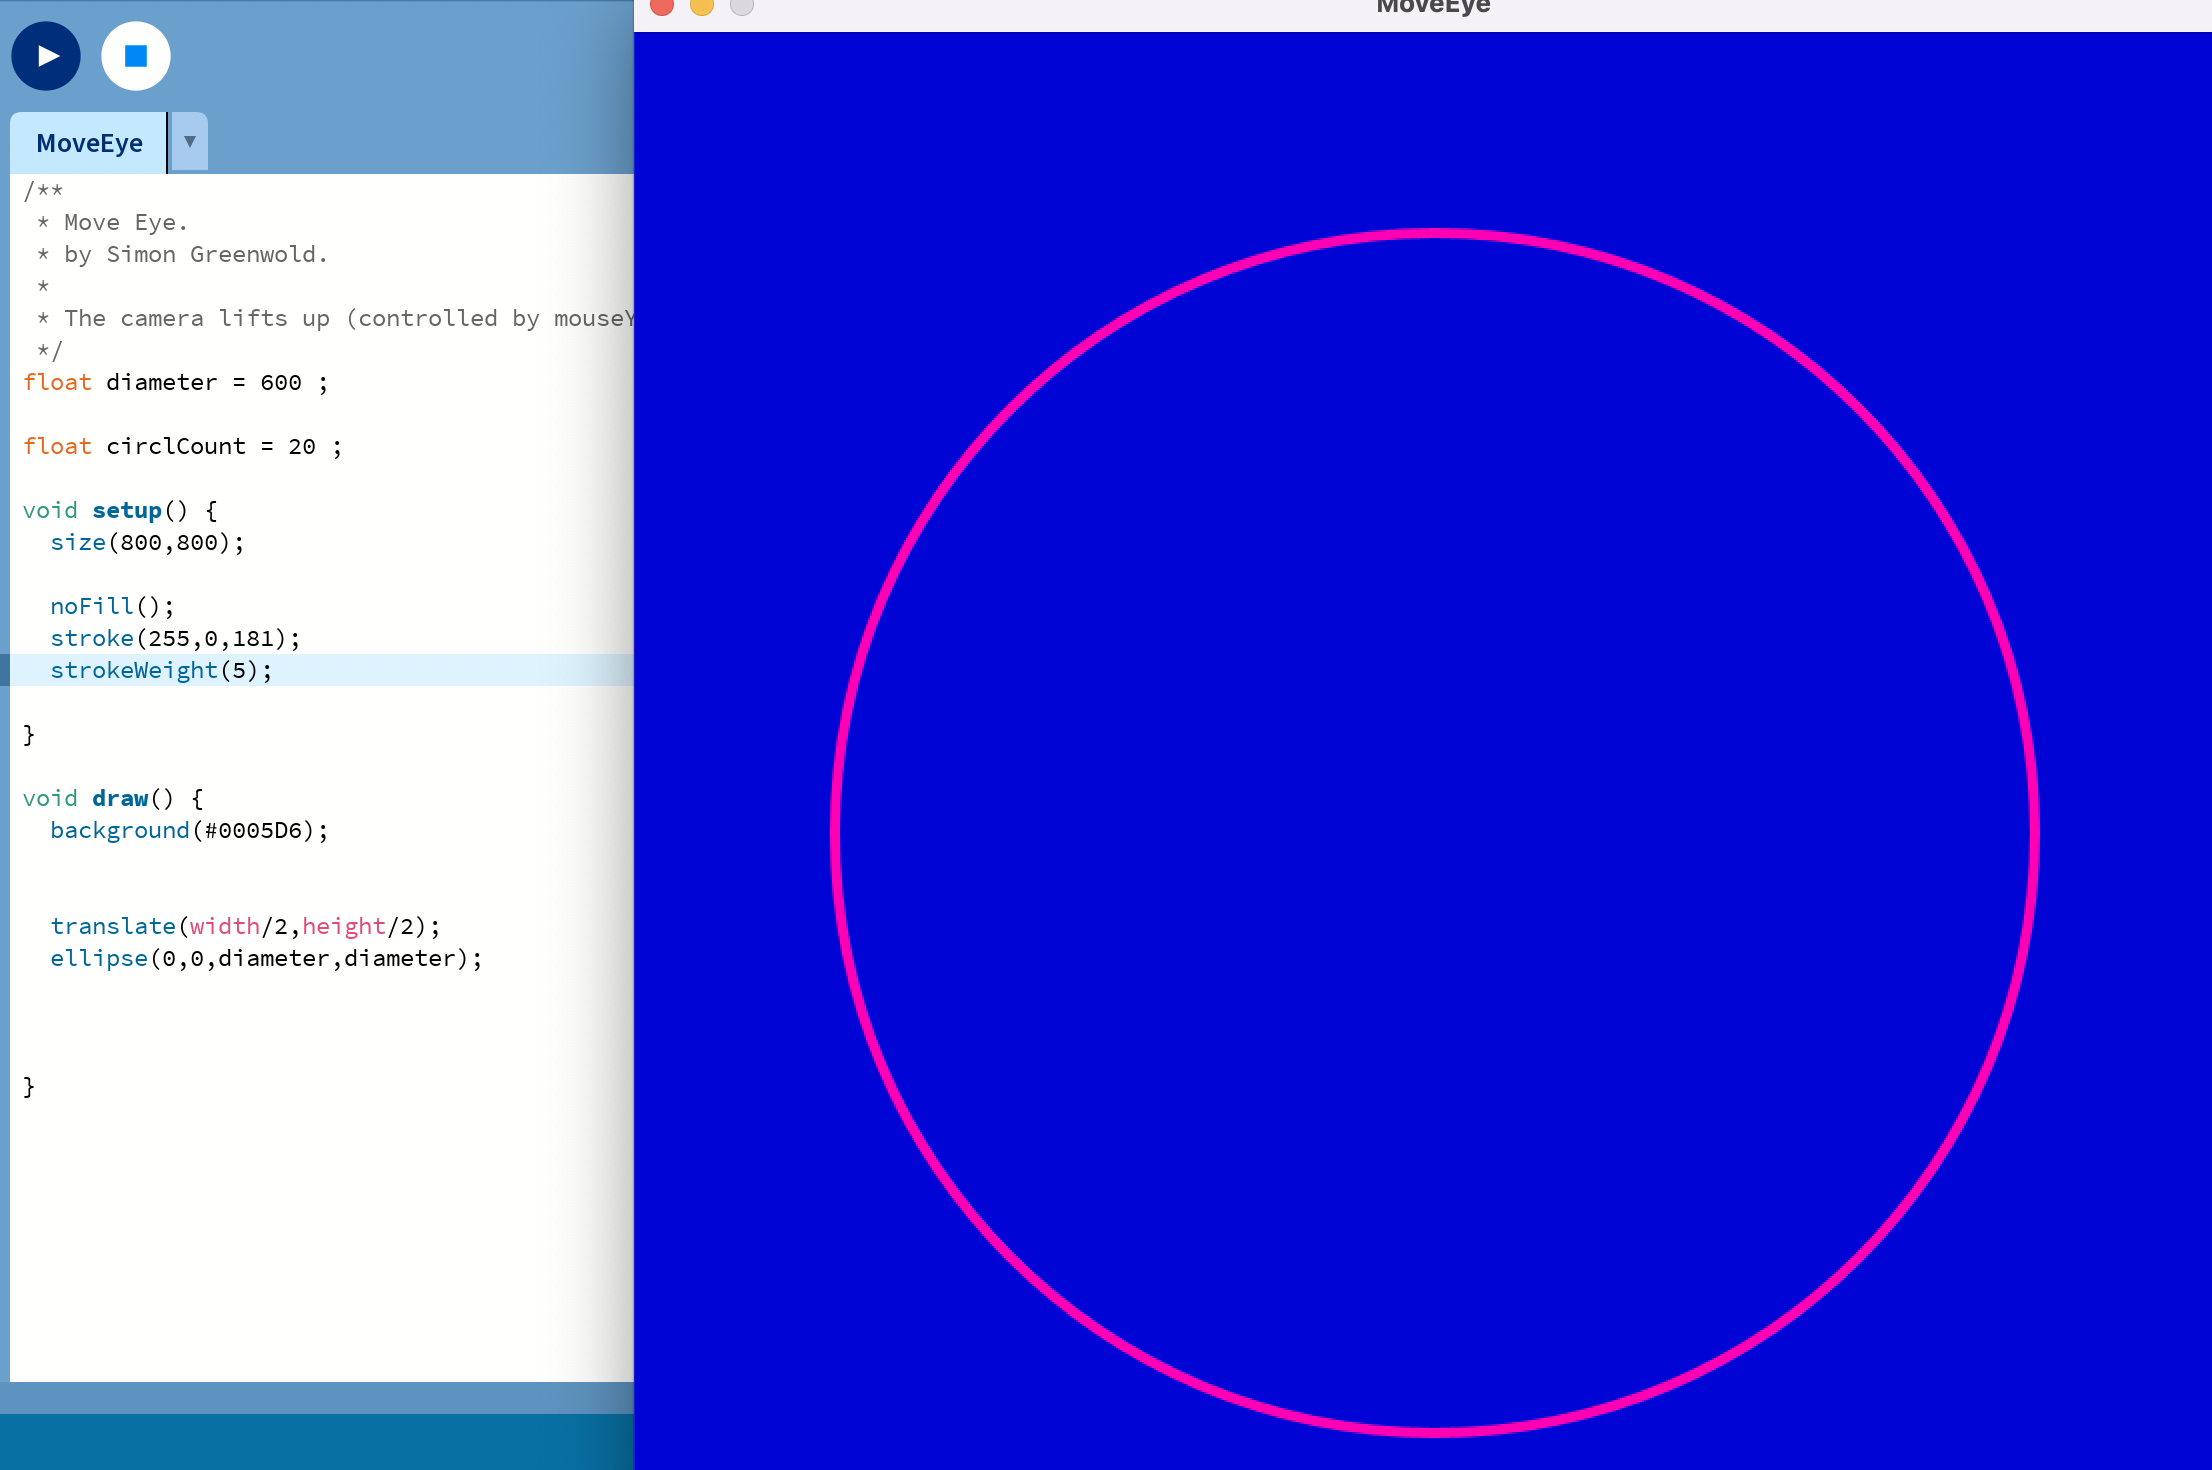
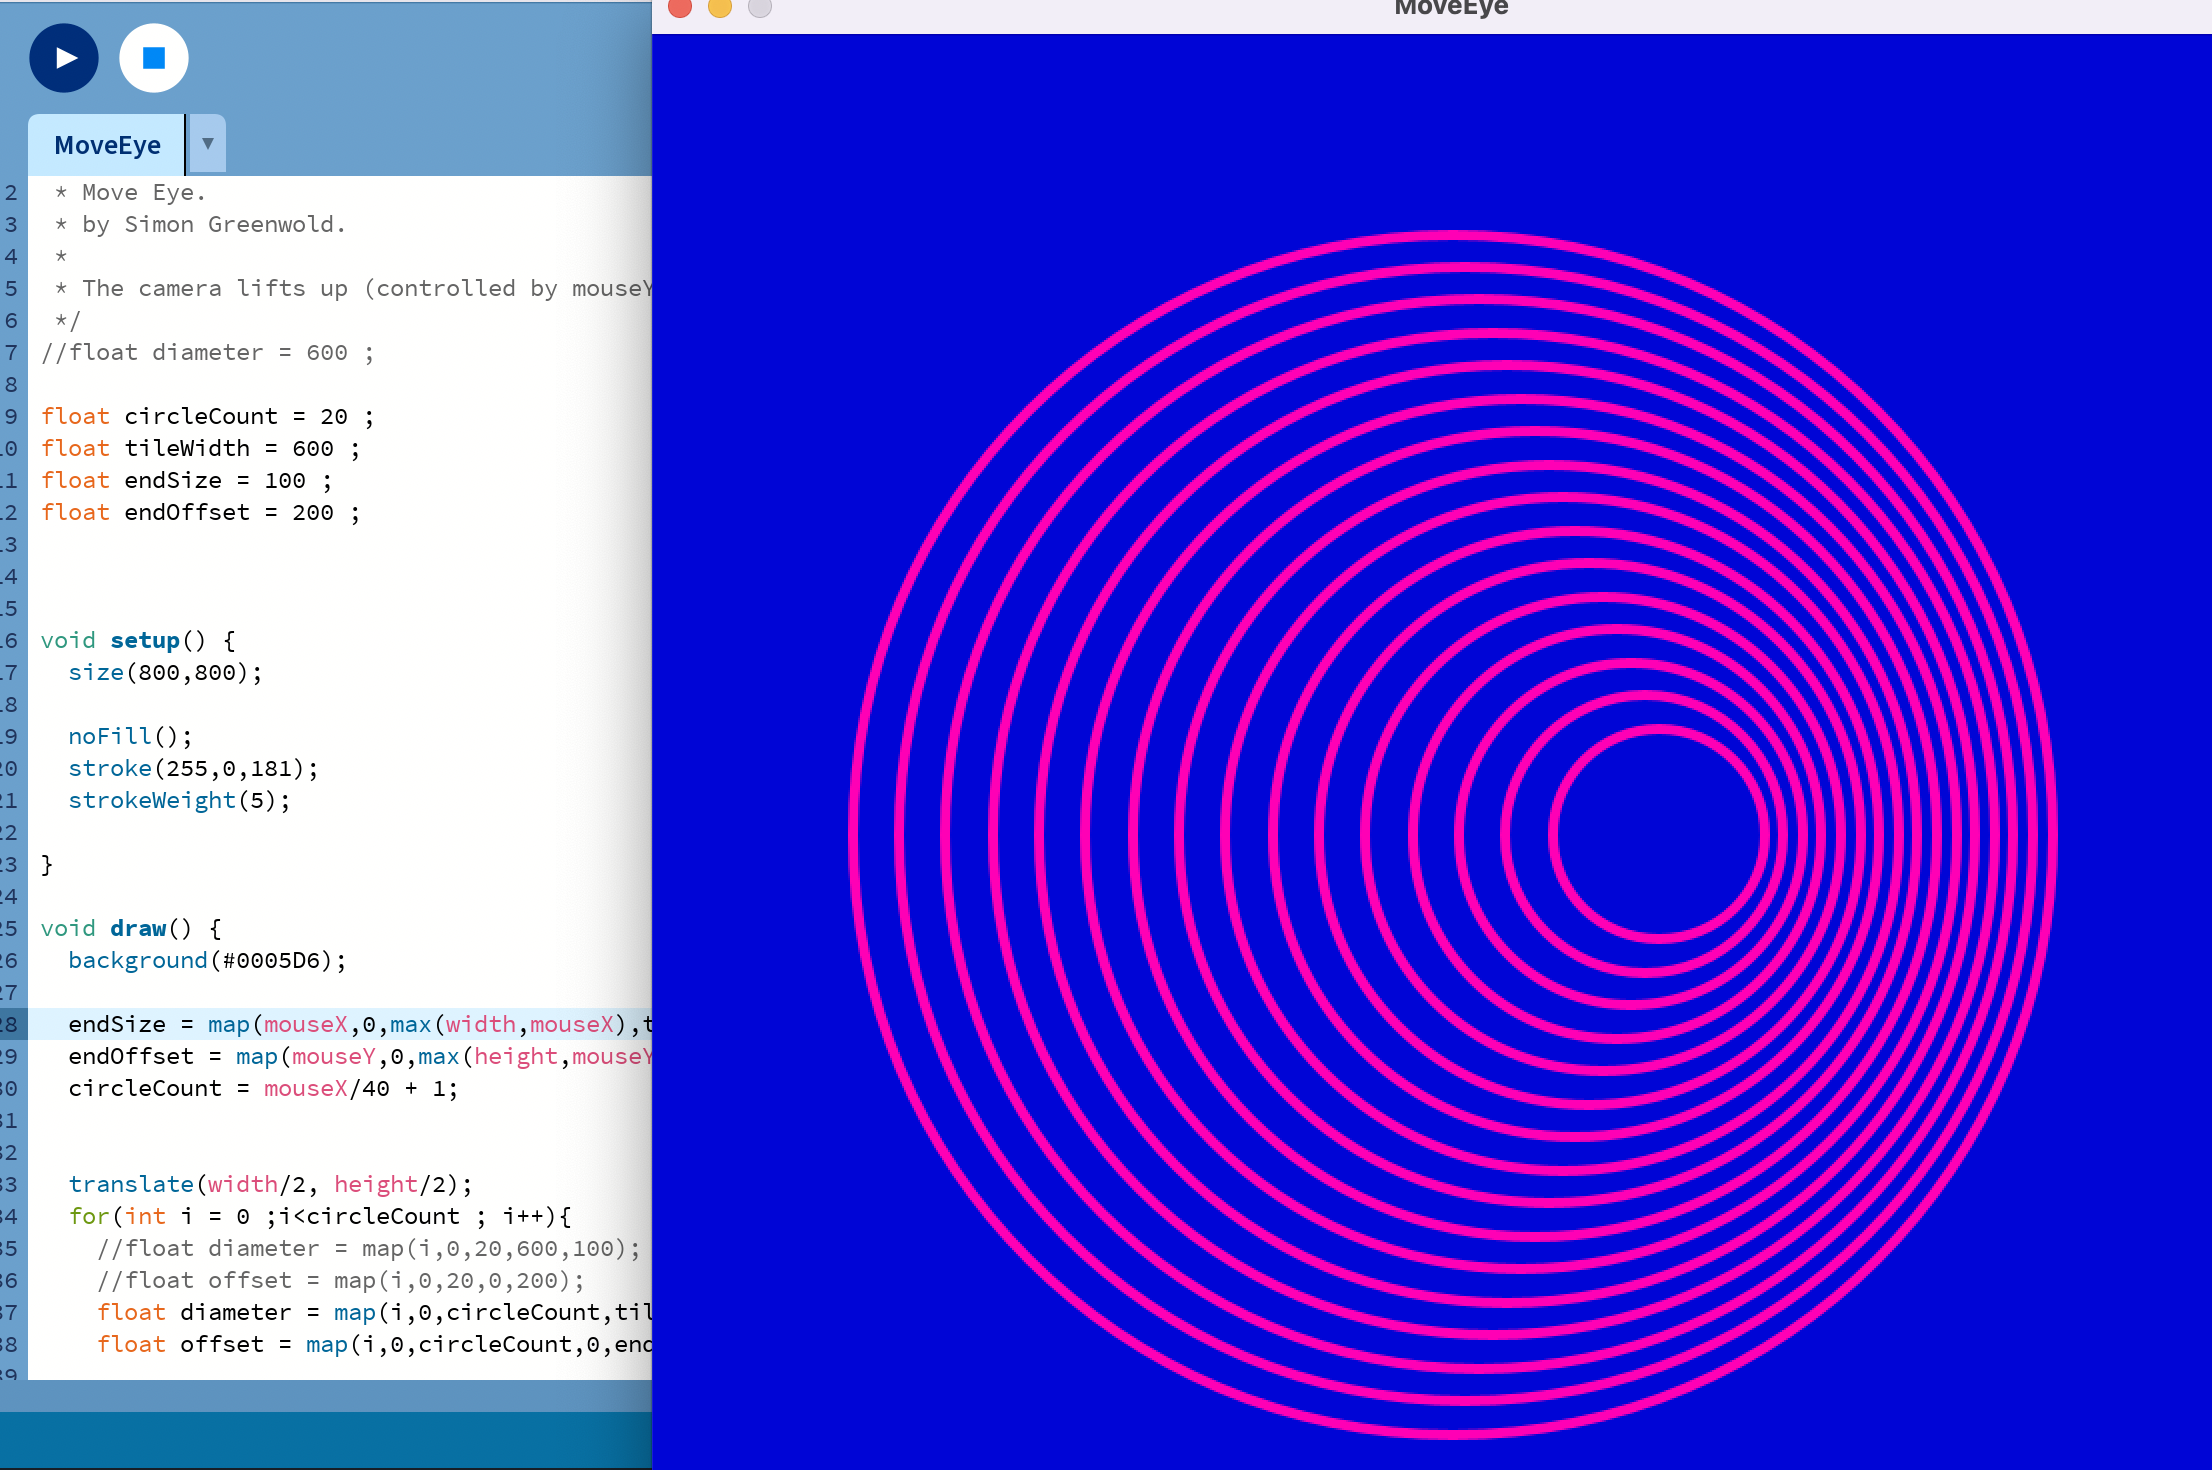
Increase interactivity: Allow visual elements to achieve different interactive effects when associated with different mouse values. Using mouseX and mouse Y to allow the mouse to move the actual movement value, and using the console to control the offset of the small circle in the ellipse module on the screen makes the whole more interactive. The subsequent grid-like distribution of the circles is controlled to make the whole more silky smooth.
Final result:
code:
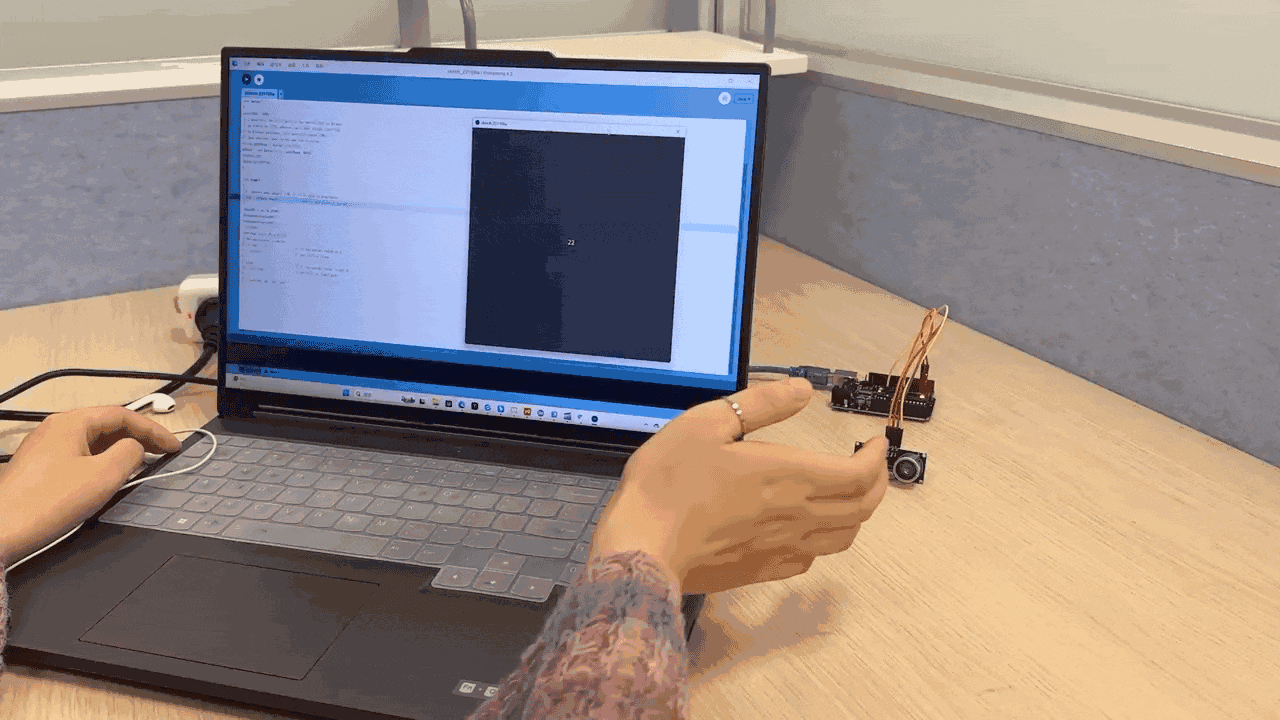
second demo in processing and arduino
We did one demo in Processing and Arduino, which can communicate with each other.
Ultrasonic sensor controls the color of the small square in Processing. This case is based on ultrasonic sensor, through the arduino output signal to control the color change of the small square in Processing, so as to realize the interaction between the software.
First make out the circuit diagram in the simulation software: Thinkercard.
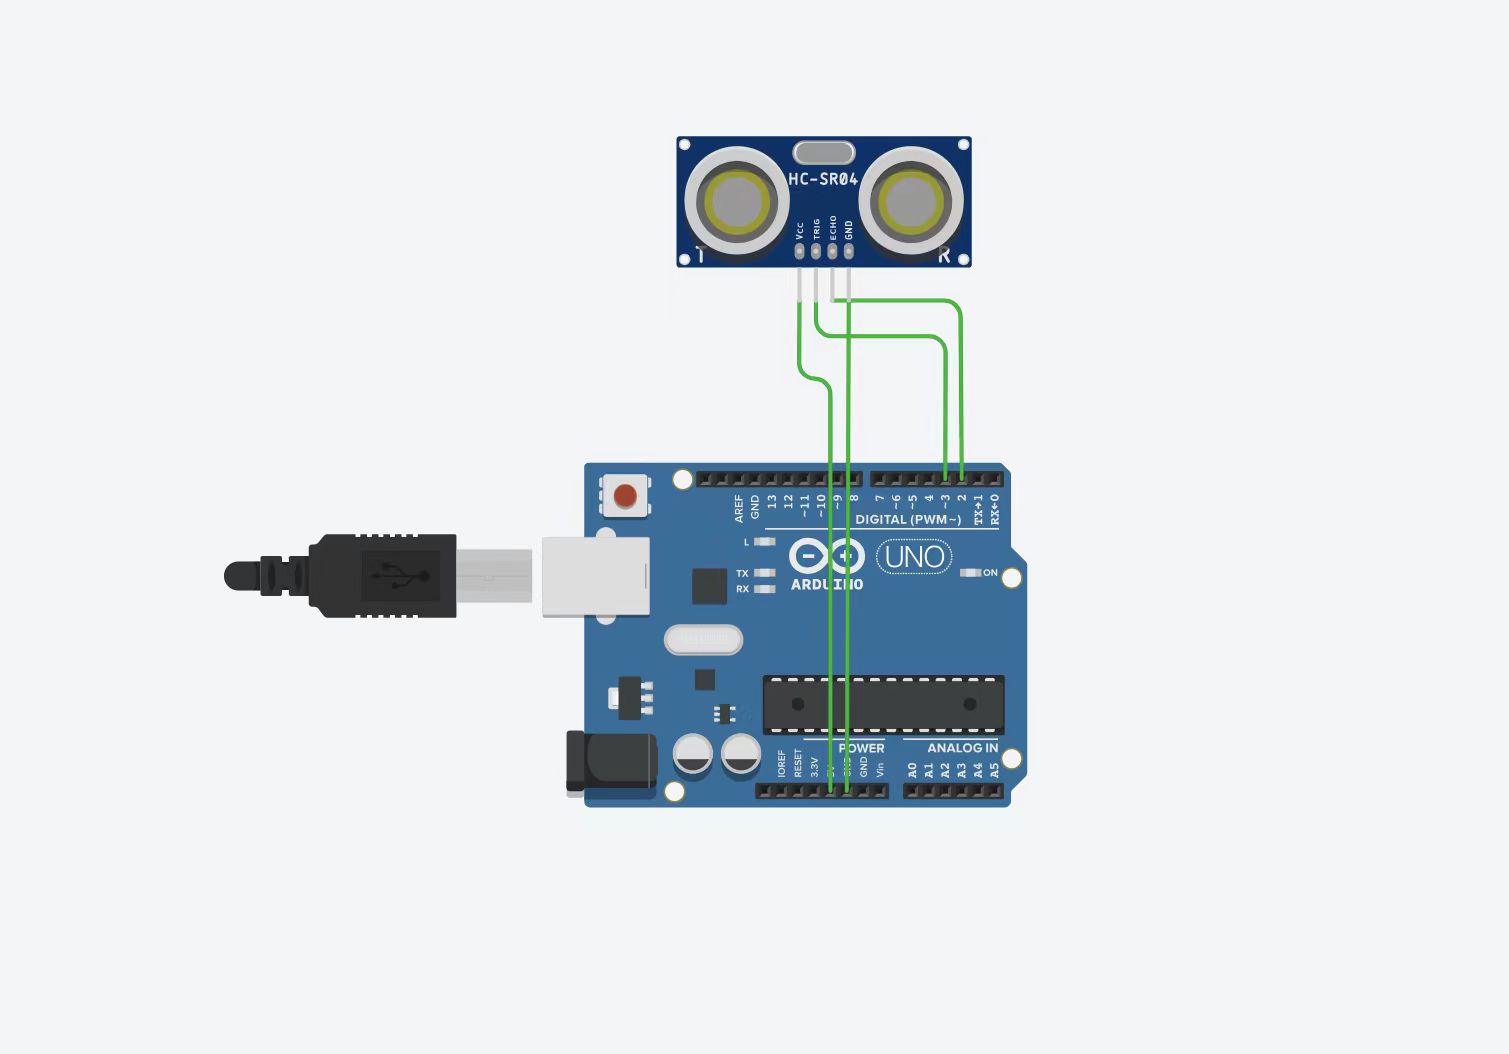
In arduino, the Gao Diping signal in ultrasonic sensor is transmitted through serial port.
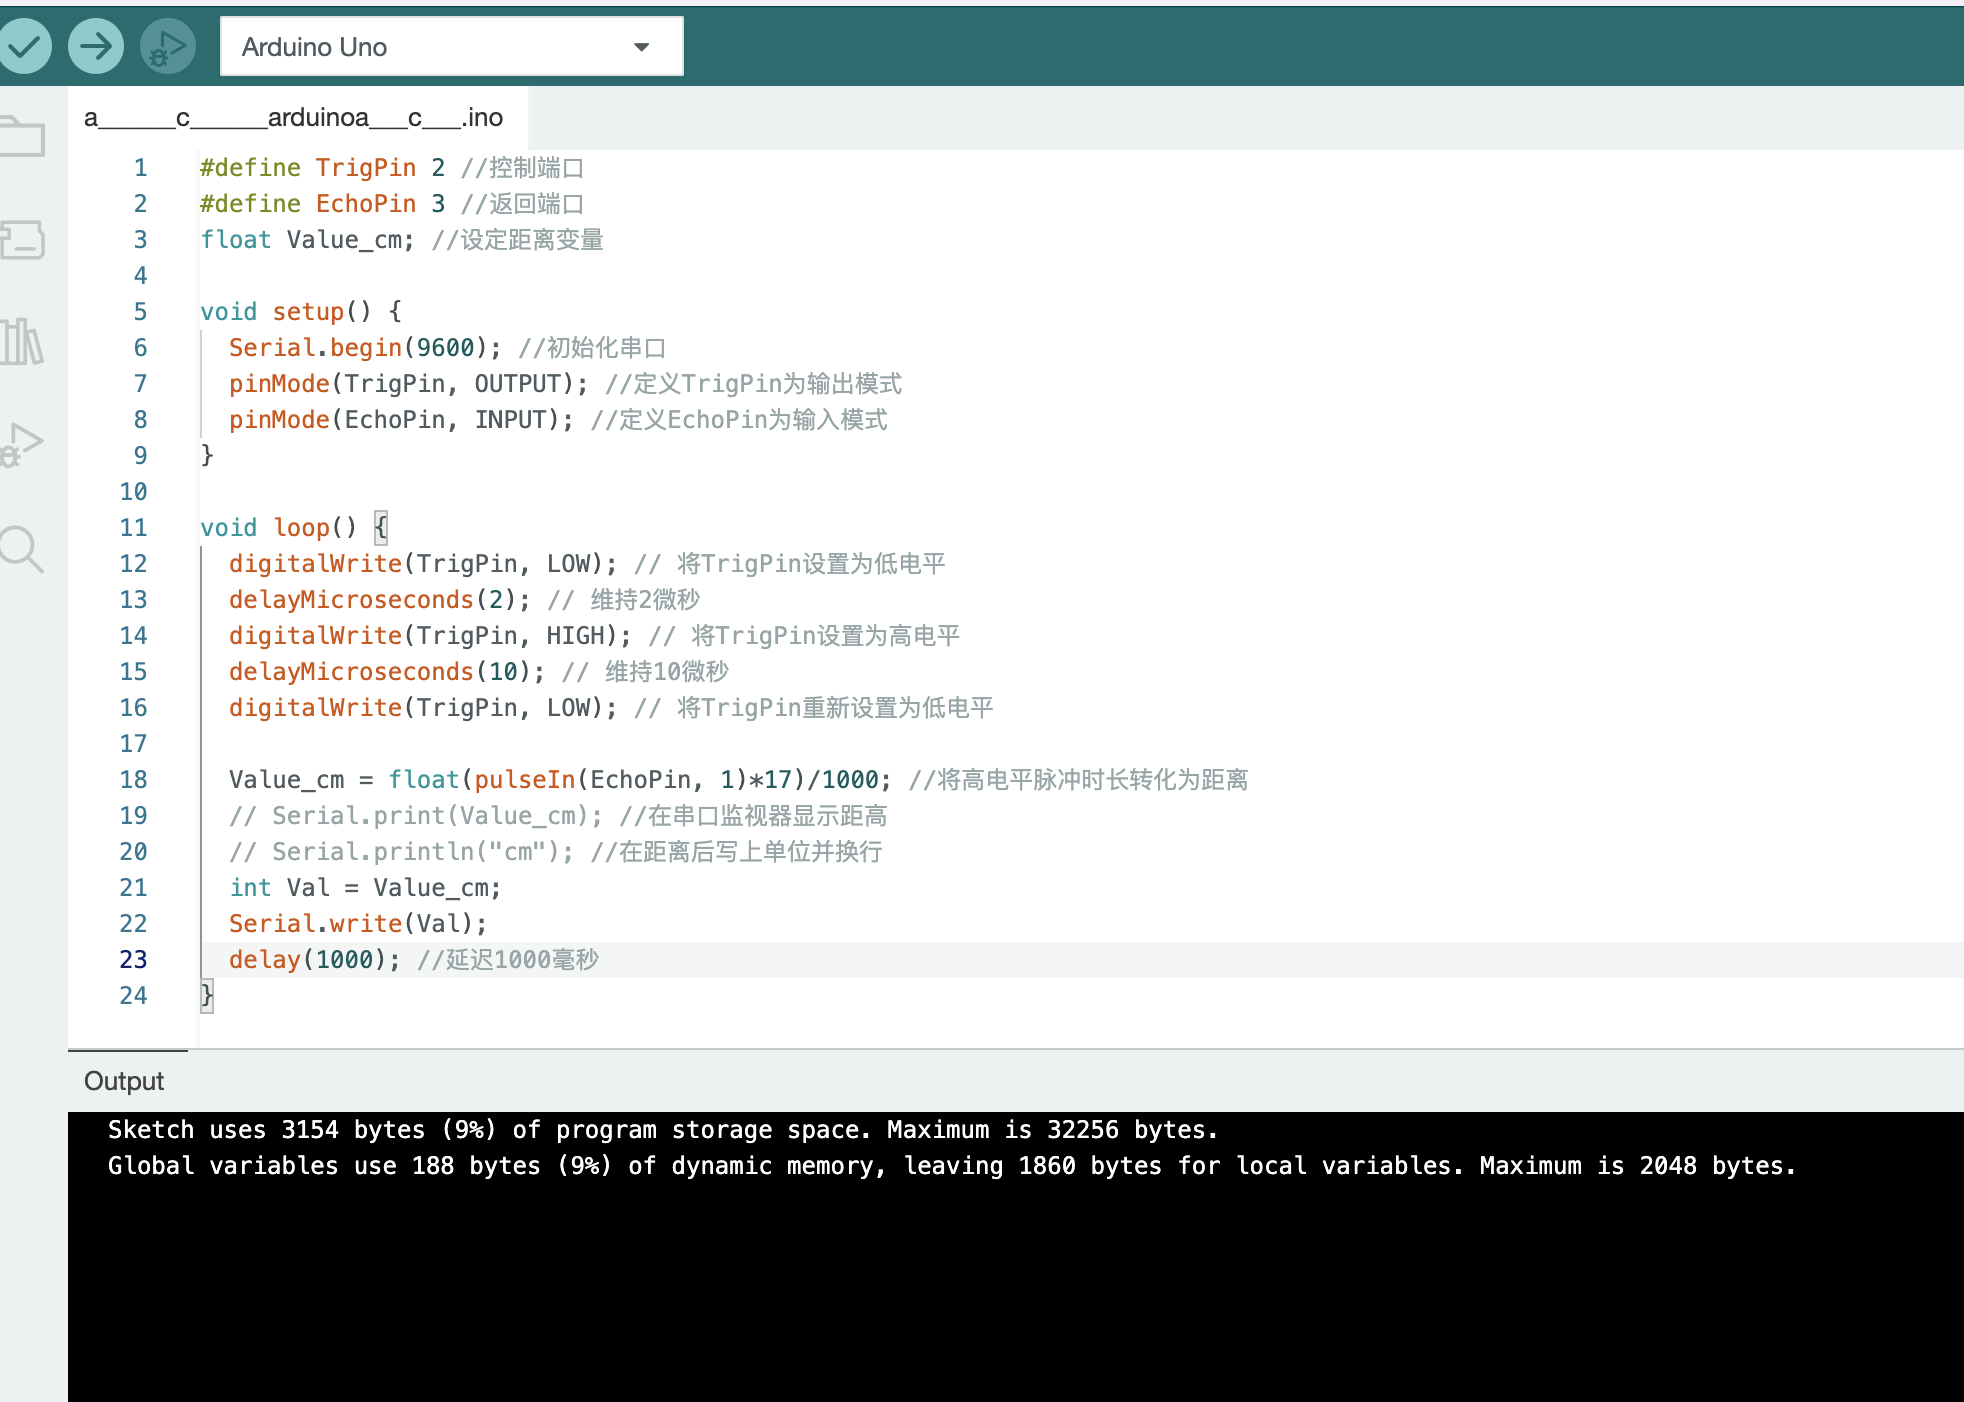
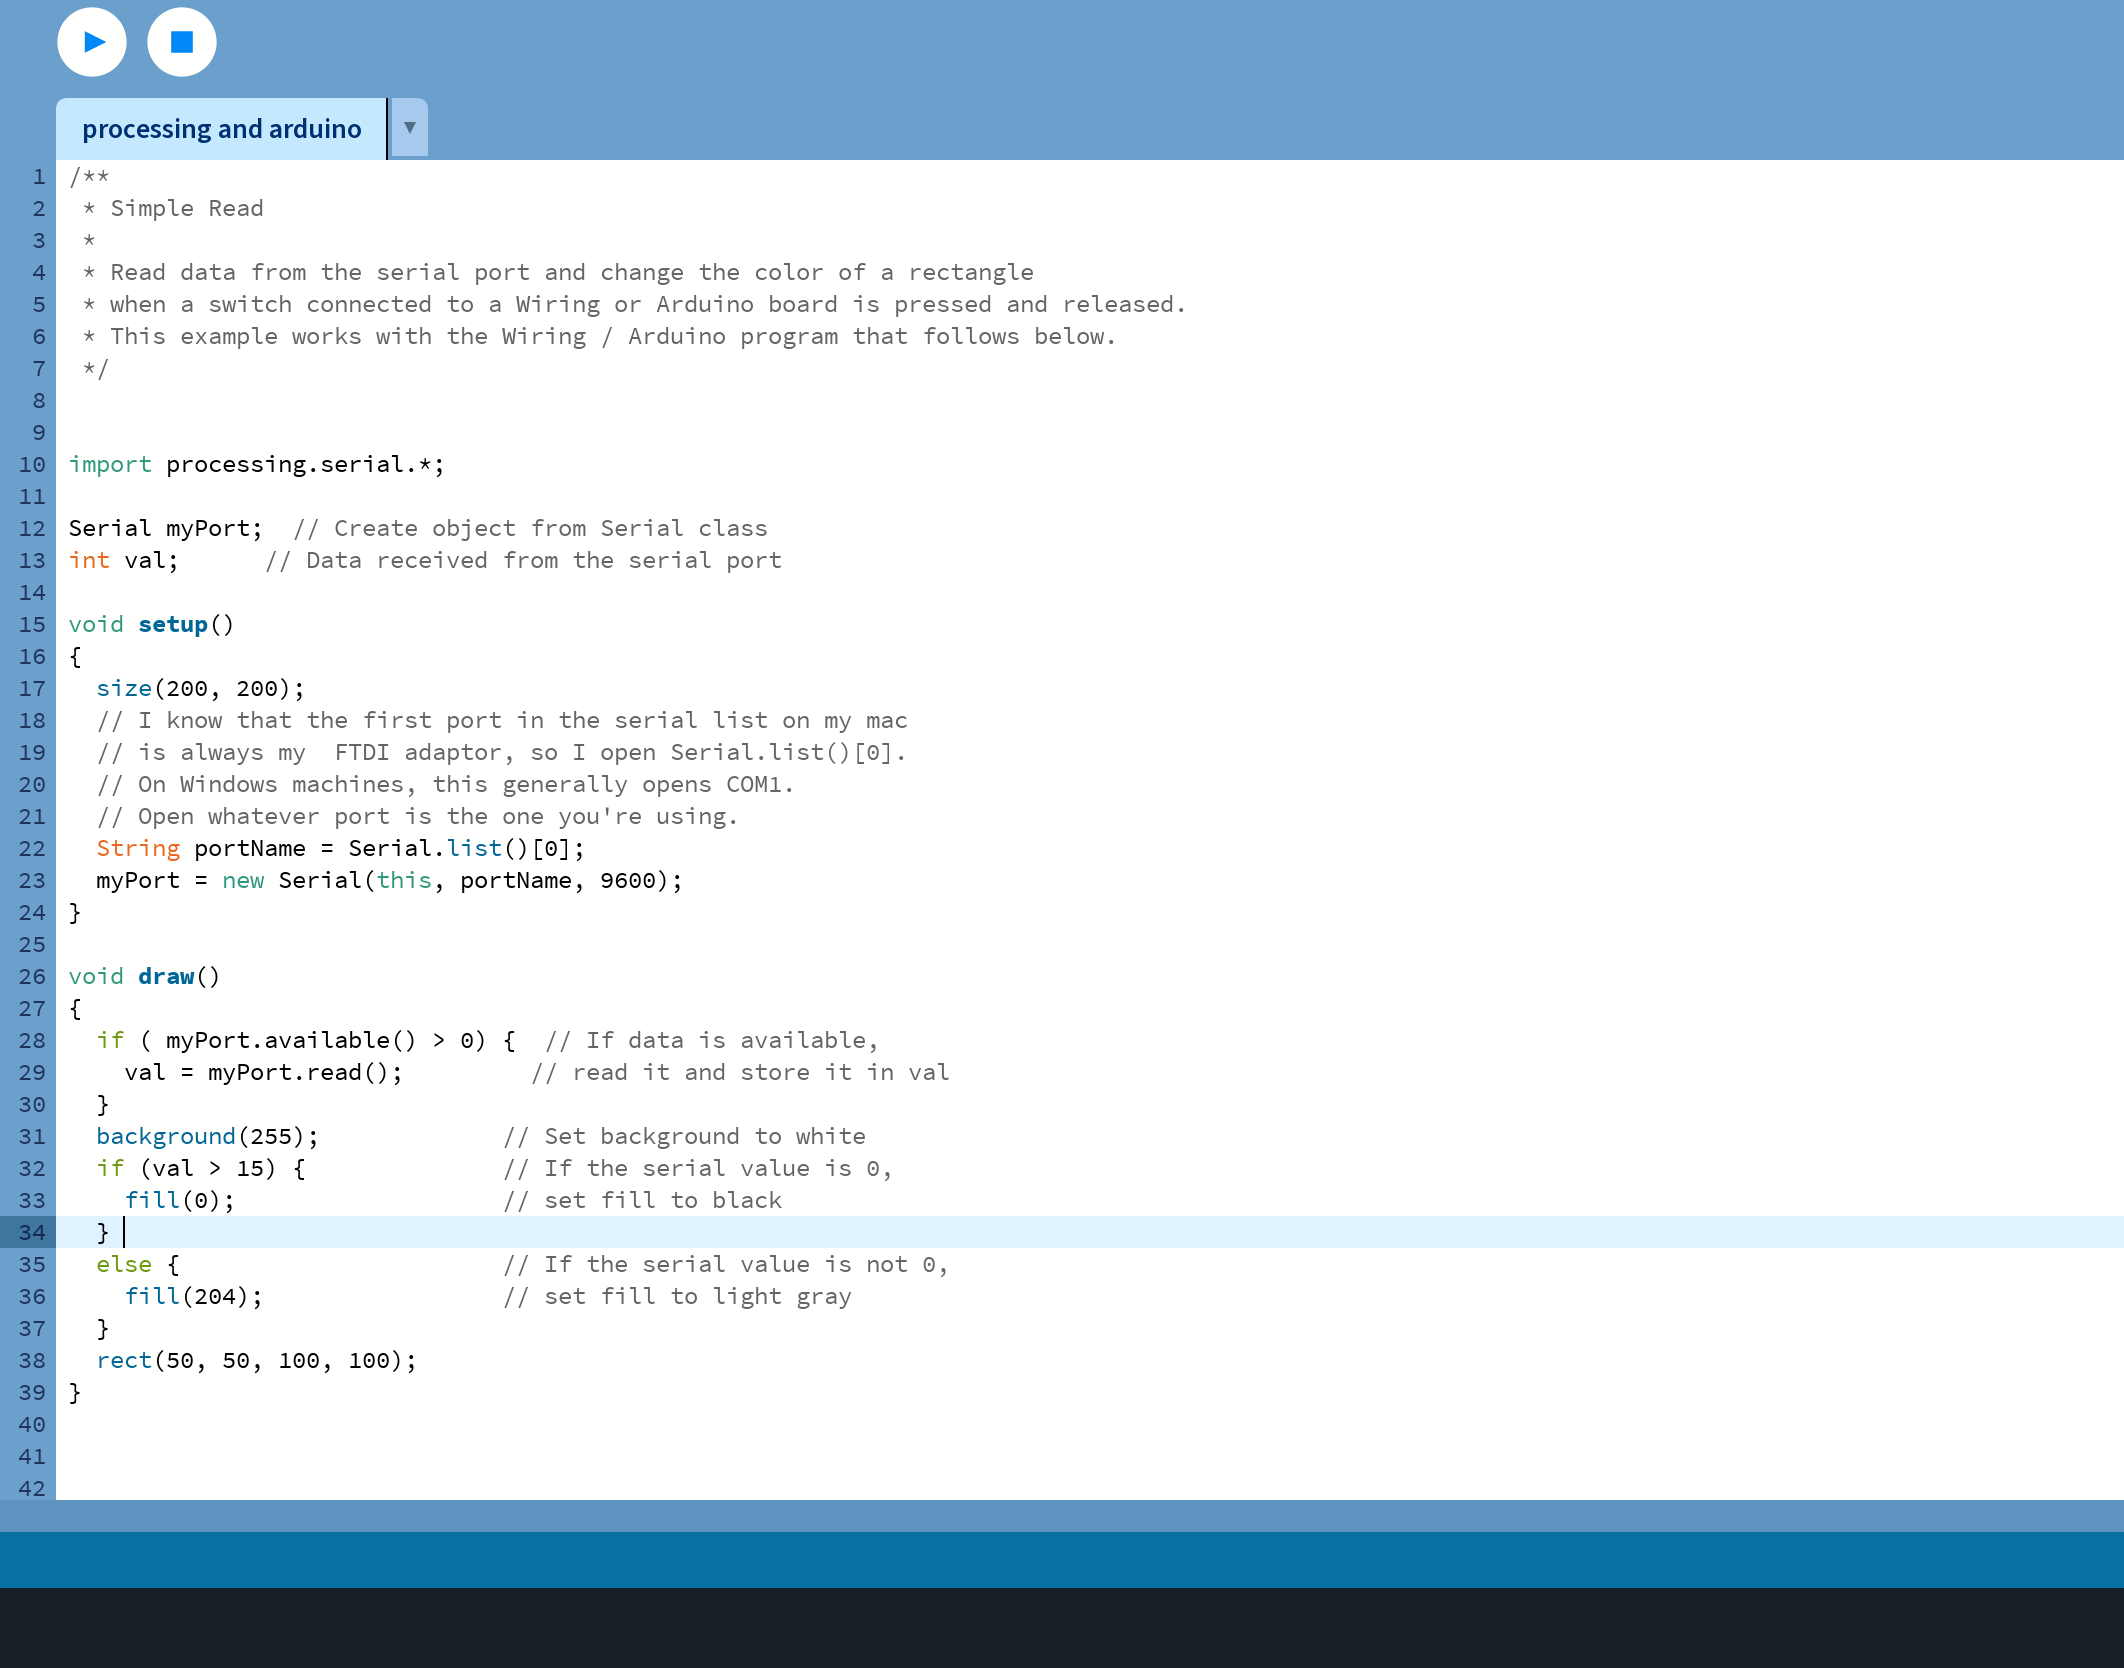
Import the serial library in Processing to accept serial signals from the arduino. Set the screen size and serial port information in Settings. Then set the position of the square and draw the square according to the signal. Enter a distance to select, and in the actual picture, there will be an animation that the color will change depending on the distance.
Coding on Arduino
1 |
|
Code writing on Processing
1 | import processing.serial.*; |
Final result: