STEP1: Prepare
Setting up all essential tools for constructing the webpage:
STEP 2: Pointers
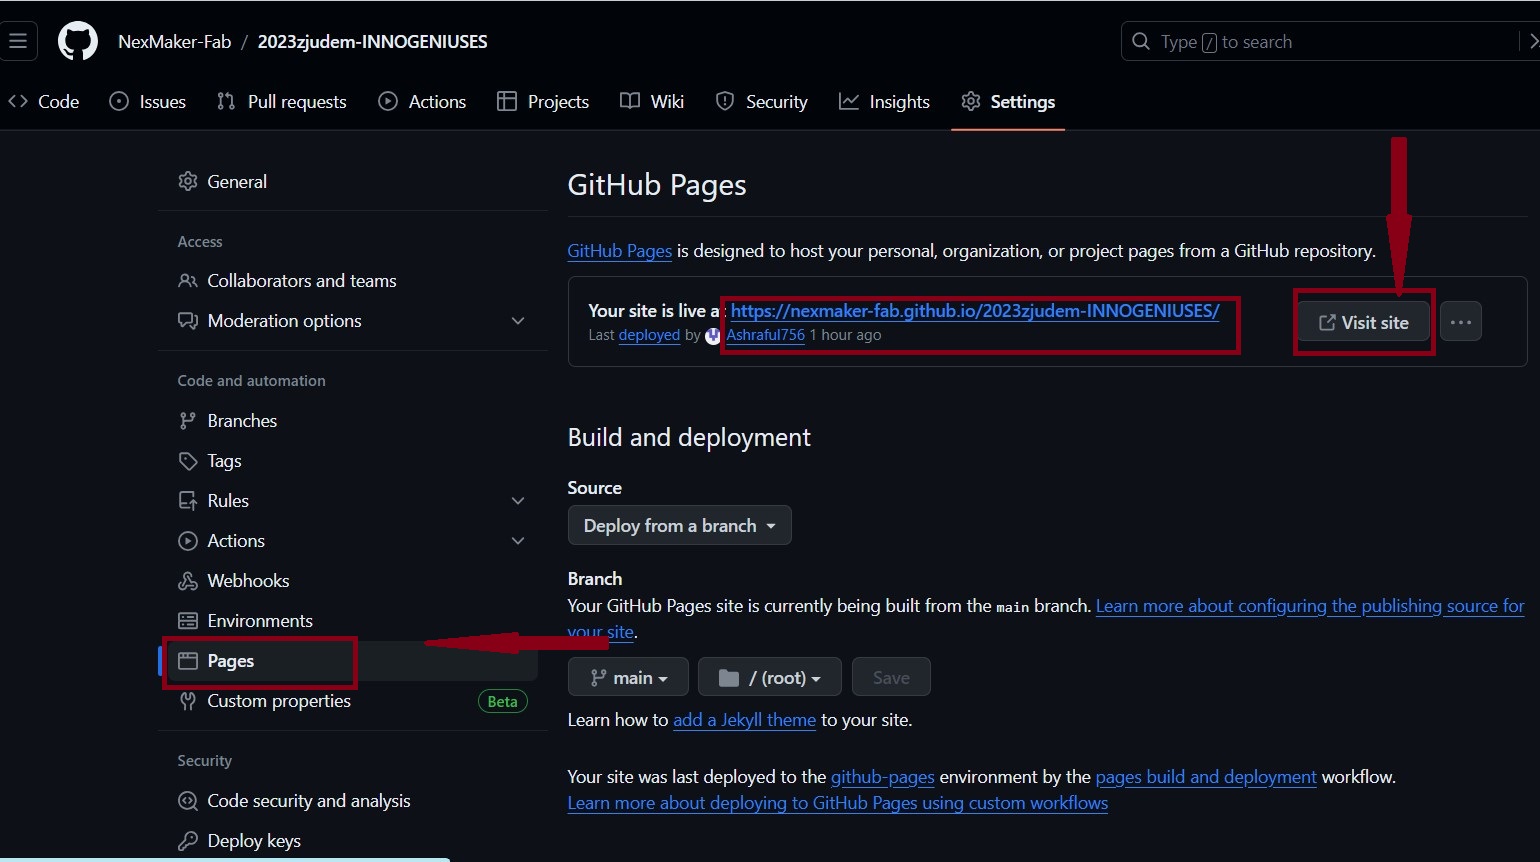
Visit Github to create a repository; if needed, sign up. Once there, make your repository and set it Public so it's accessible to online users. Remember to add a README file—it's the place for a detailed project description.
Note:In this image repository, the owner is identified as Ashraful756. However, when working within an organization, the organization's name should be displayed instead.
STEP 3: Local Settings
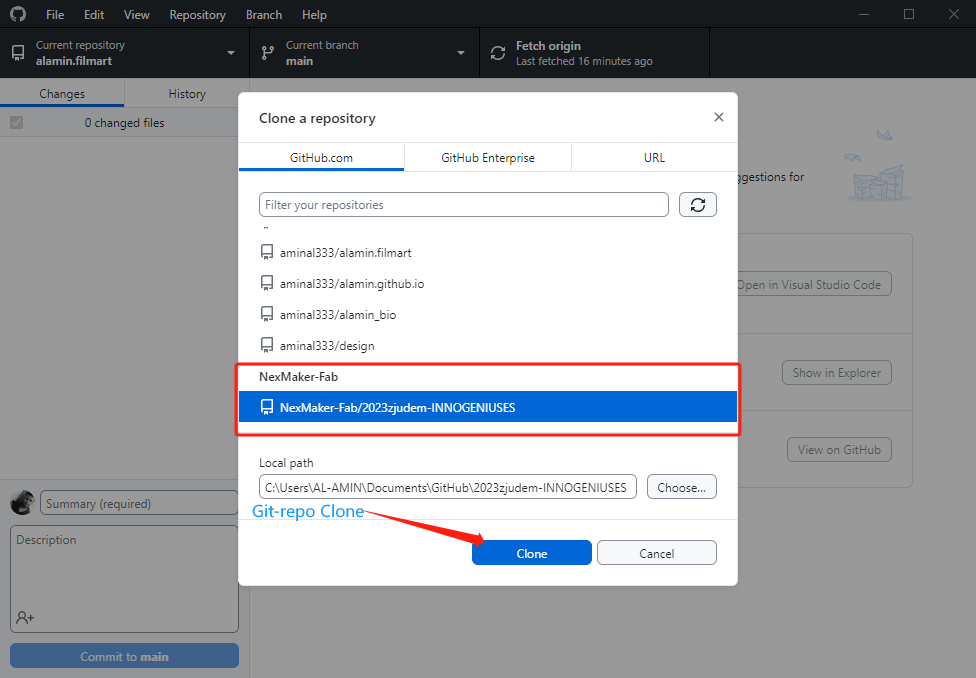
Open GitHub Desktop, clone the repository you've created before, and then proceed to open it in Visual Studio Code.
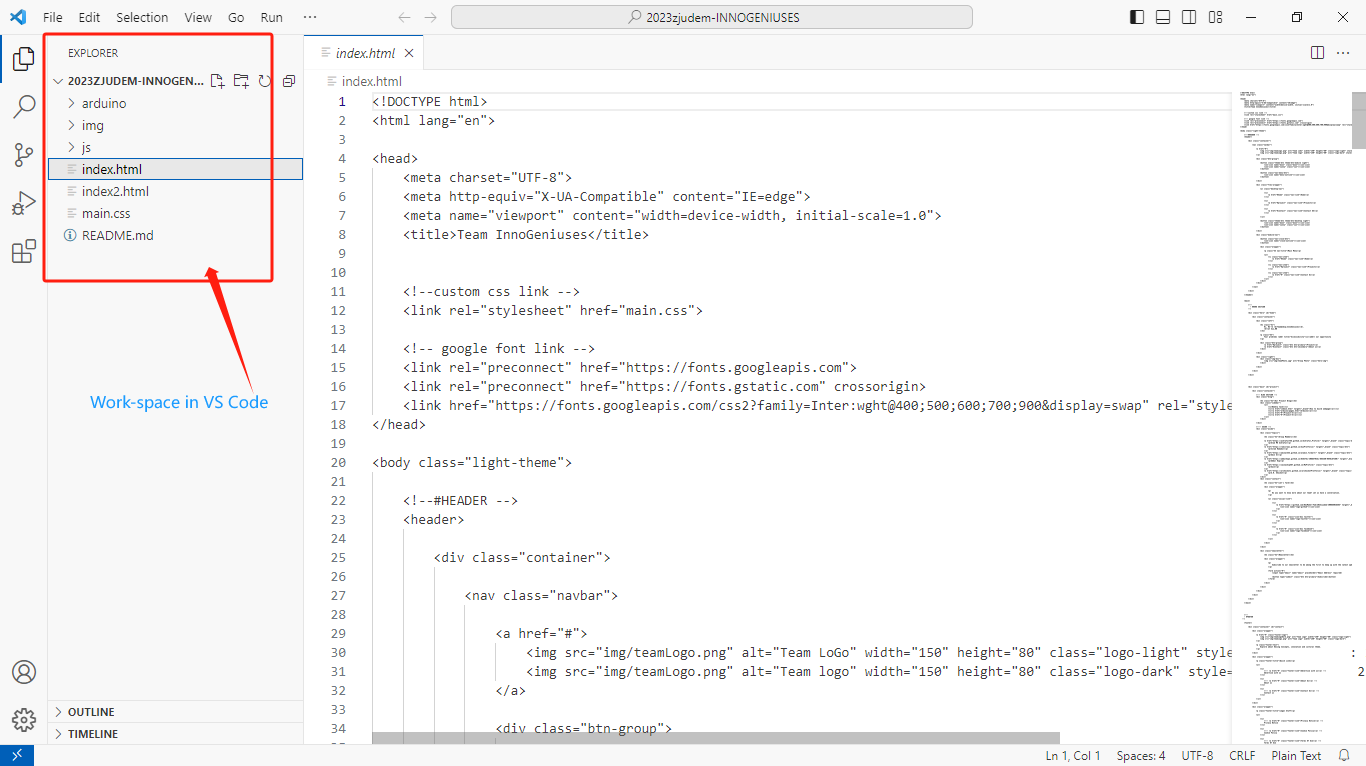
Access the cloned repository from your local storage system using Visual Studio Code
STEP 4: Live Server Extension
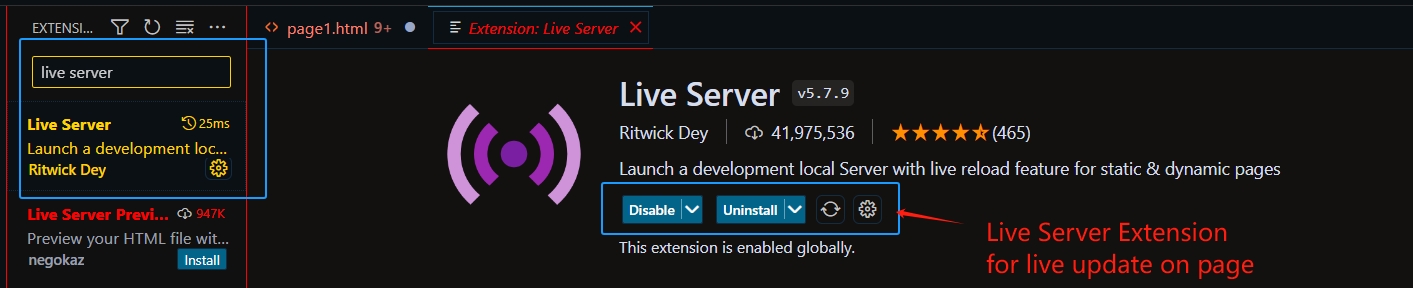
Go to visual studio extention secsion, search live server and click install it. This extesion help to observe new change on your webpage when you change something in your code. You can see the exension installation image below:
How to write the website document
STEP 5: Make folder and file for writing code to build a website
Open VS Code and open clone repository folder. Create a html file, a css file & a JS file. Create a folder for image resources. After that go to the html file which is named index.html and write some basic html documents. You can see all the step in snapshot below:
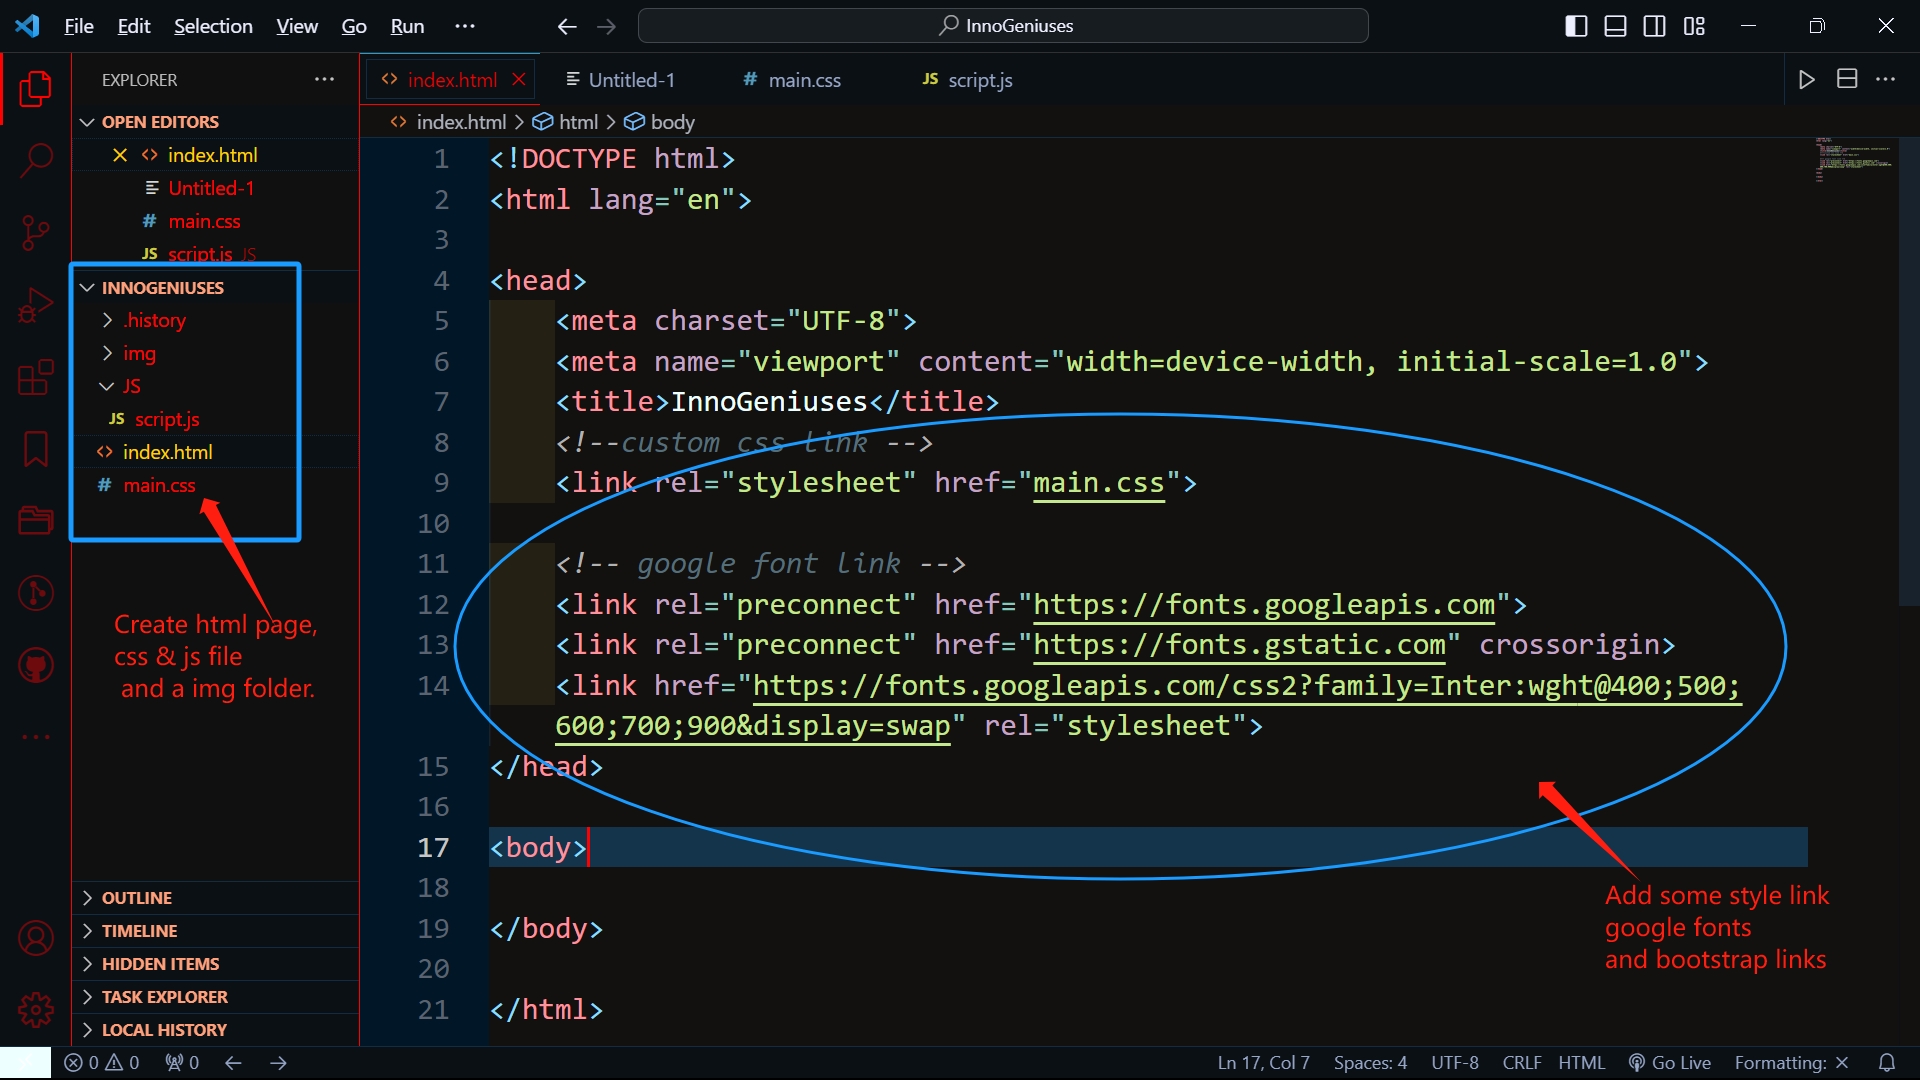
Here, I've included links to my external CSS file, a few fonts link, and bootstrap. That will assist me in designing and improving the appearance of my webpage.
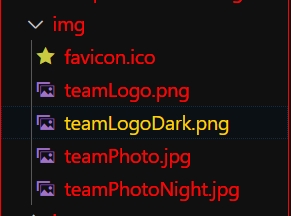
STEP 6: Store Resources in img folder
To build a website we need some basic resources, such as logo, favicon, bg-picture, banner, etc. I have to gather all the resources in that folder as You can see all the step in snapshot below:
STEP 7: Title and Title logo
An HTML document consists of two primary sections. Head and Body. The title of my website, some meta data, and the title logo—also referred to as a favicon by programmers—can all be written in the Head section. I demonstrate how to write a title and put a title logo underneath this image.

favicon is a format that can help us put logo in title bar as you can see in the photo. Below of this page you can get how to make a Logo free.

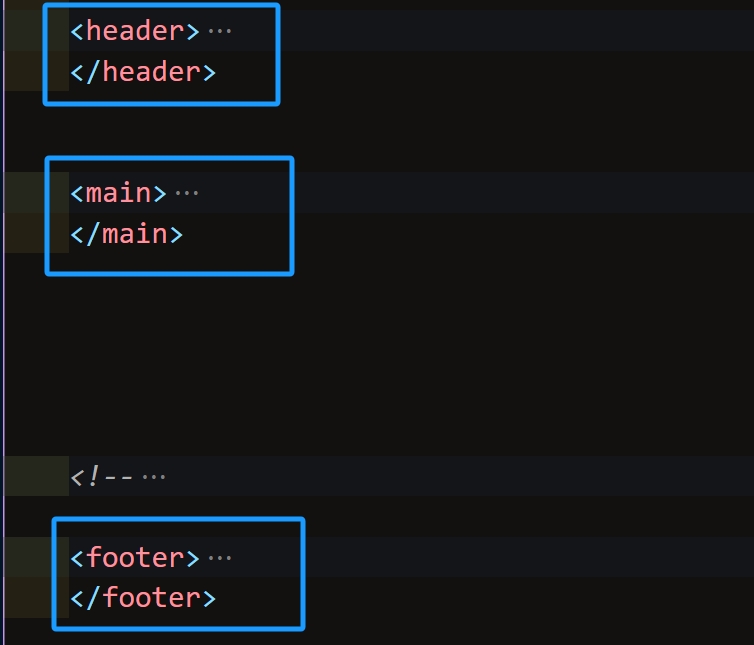
STEP 8: Divided and write document for webpage
In a Body of the HTML document consists of three primary sections. Header-Main-Footer. I wrote 3 tag and make workspaces for build my webpage step by step. I demonstrate about this tag underneath this image.
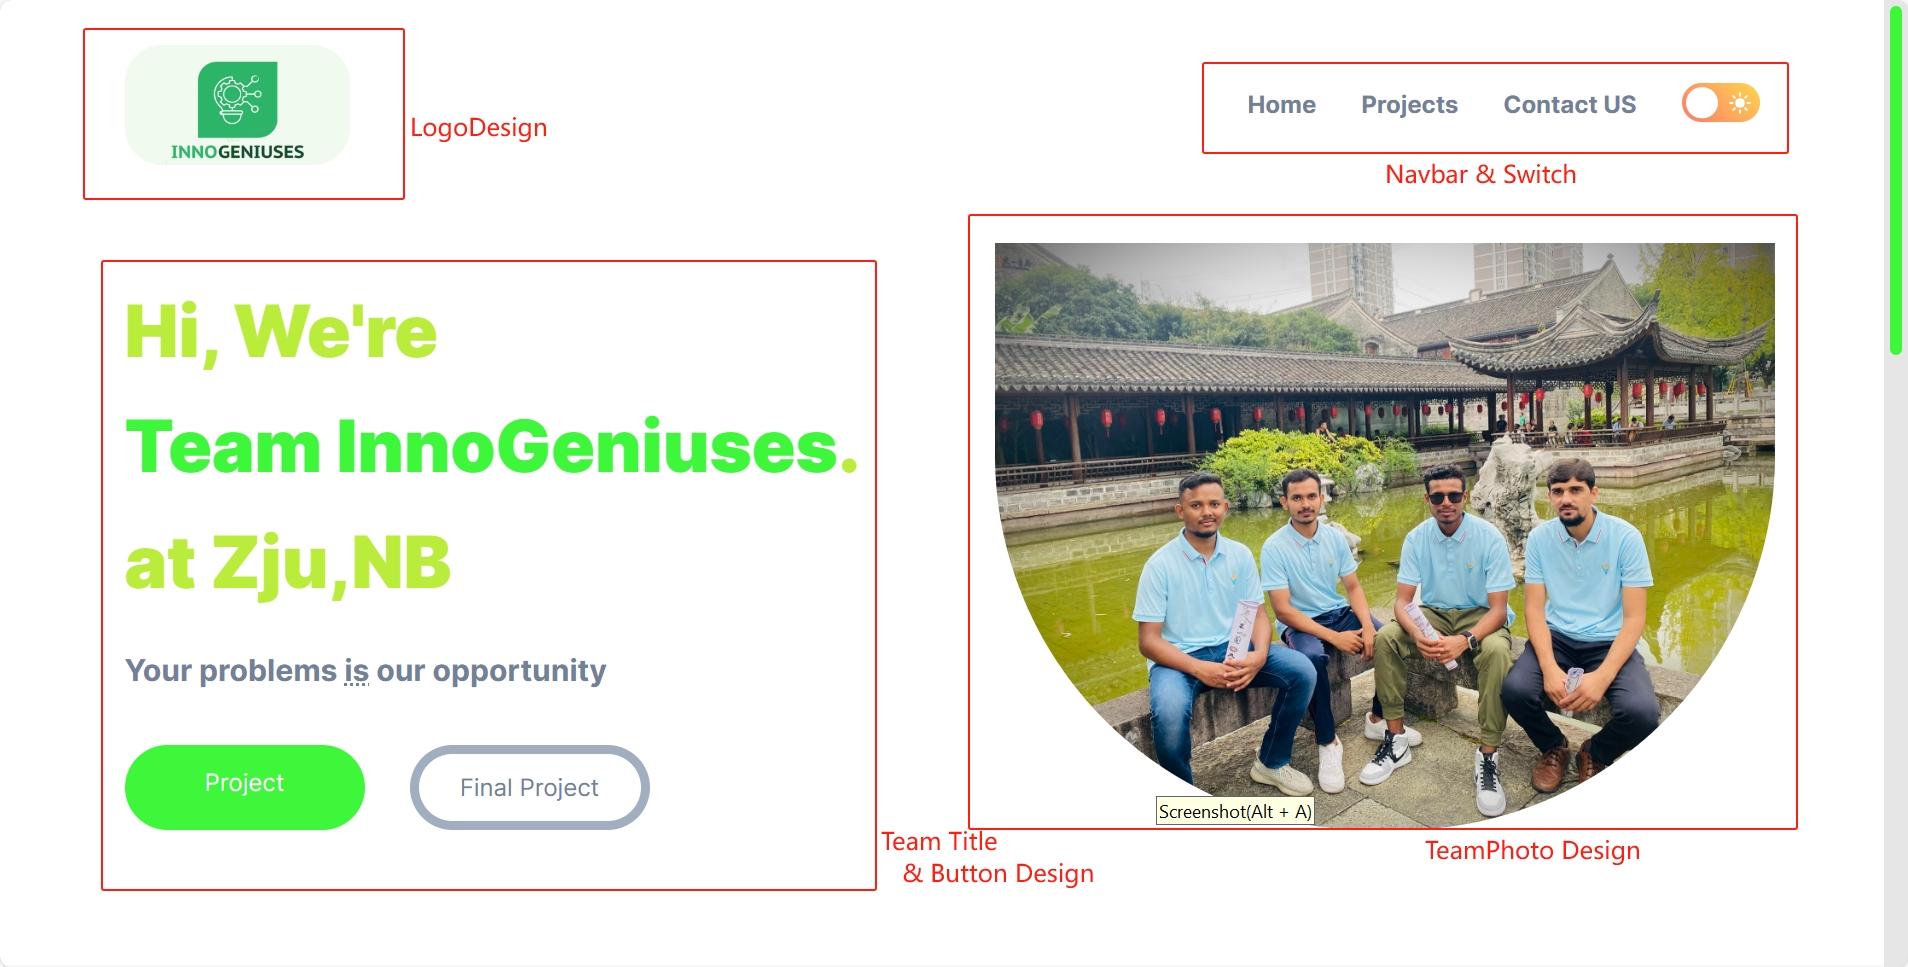
STEP 9: Logo & navbar Design
A logo might represent a company, a group, or anything else. Therefore, the logo is given top priority on any website. Therefore, we construct a navbar in the Heading section and write some code for that when we add a logo to a website. The code and explanation are available in the picture below.
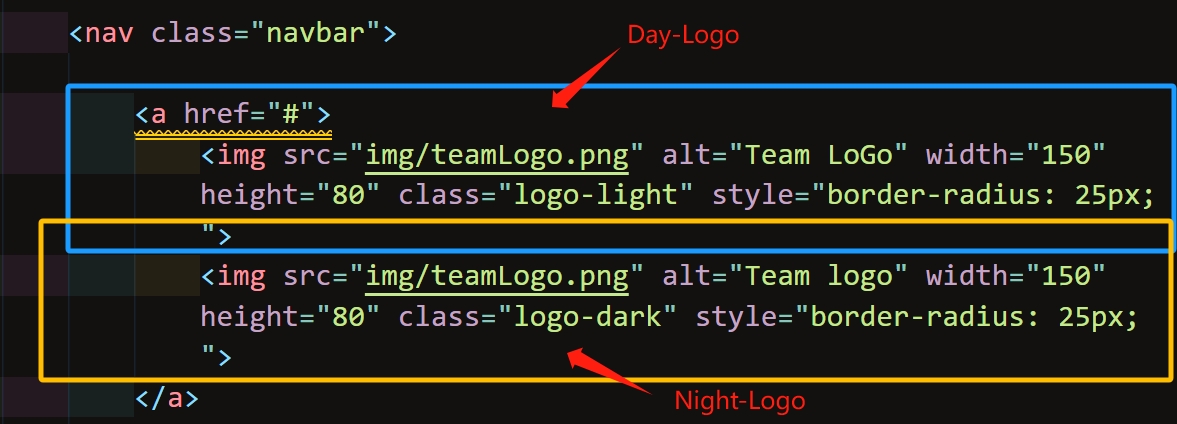
I wrote several lines of code for the button, link, navbar, and logo in the header section. All of the HTML & CSS code is shown in the Code Area below.

STEP 10: Switch Day/Night Button
These days, day-night mode is a well-known feature of a web.To alter the website's theme and vibe from day to night, I created a switch button within the navigation bar. I've included proof of the code I built to create this day/night switch below.

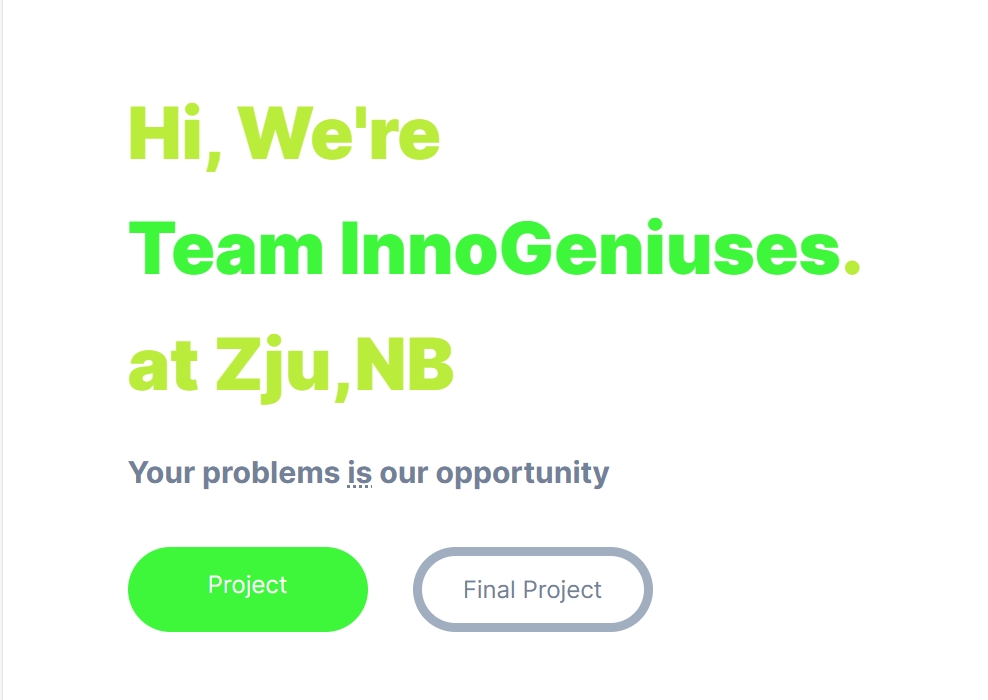
STEP 11: How to build HomePage Title and Button
I separated the "Home Page" area into two sections: "Documents" and "Team Image." I left-aligned the documents section and wrote our team's name and motto there. Additionally, I created two buttons that can be used to access both our final project and ordinary project.I have included some HTML and CSS code below to help you grasp the concepts.
STEP 12: How to design team photo
As I've already indicated, the team title and button are on the left side of my home page. In a similar manner, I have space for a team photo on the right side. In essence, a div is divided into two parts, and the display is flexed row-wise.

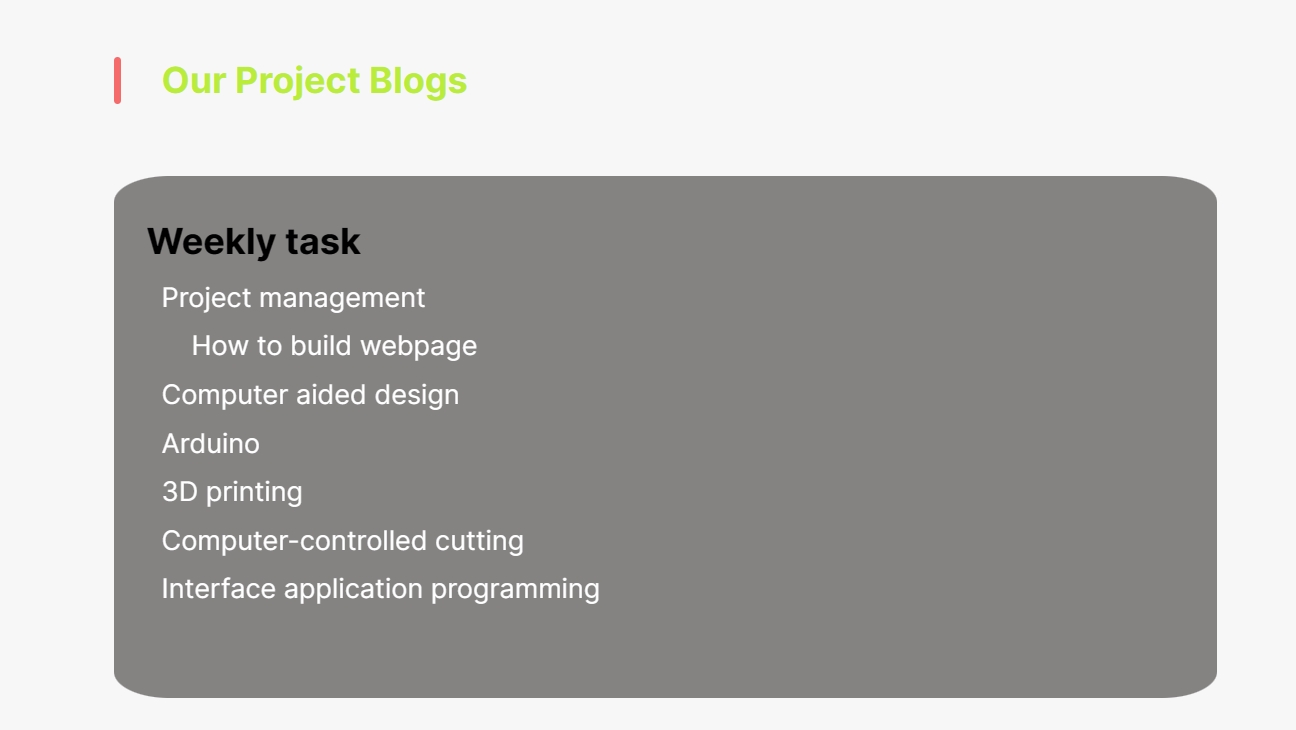
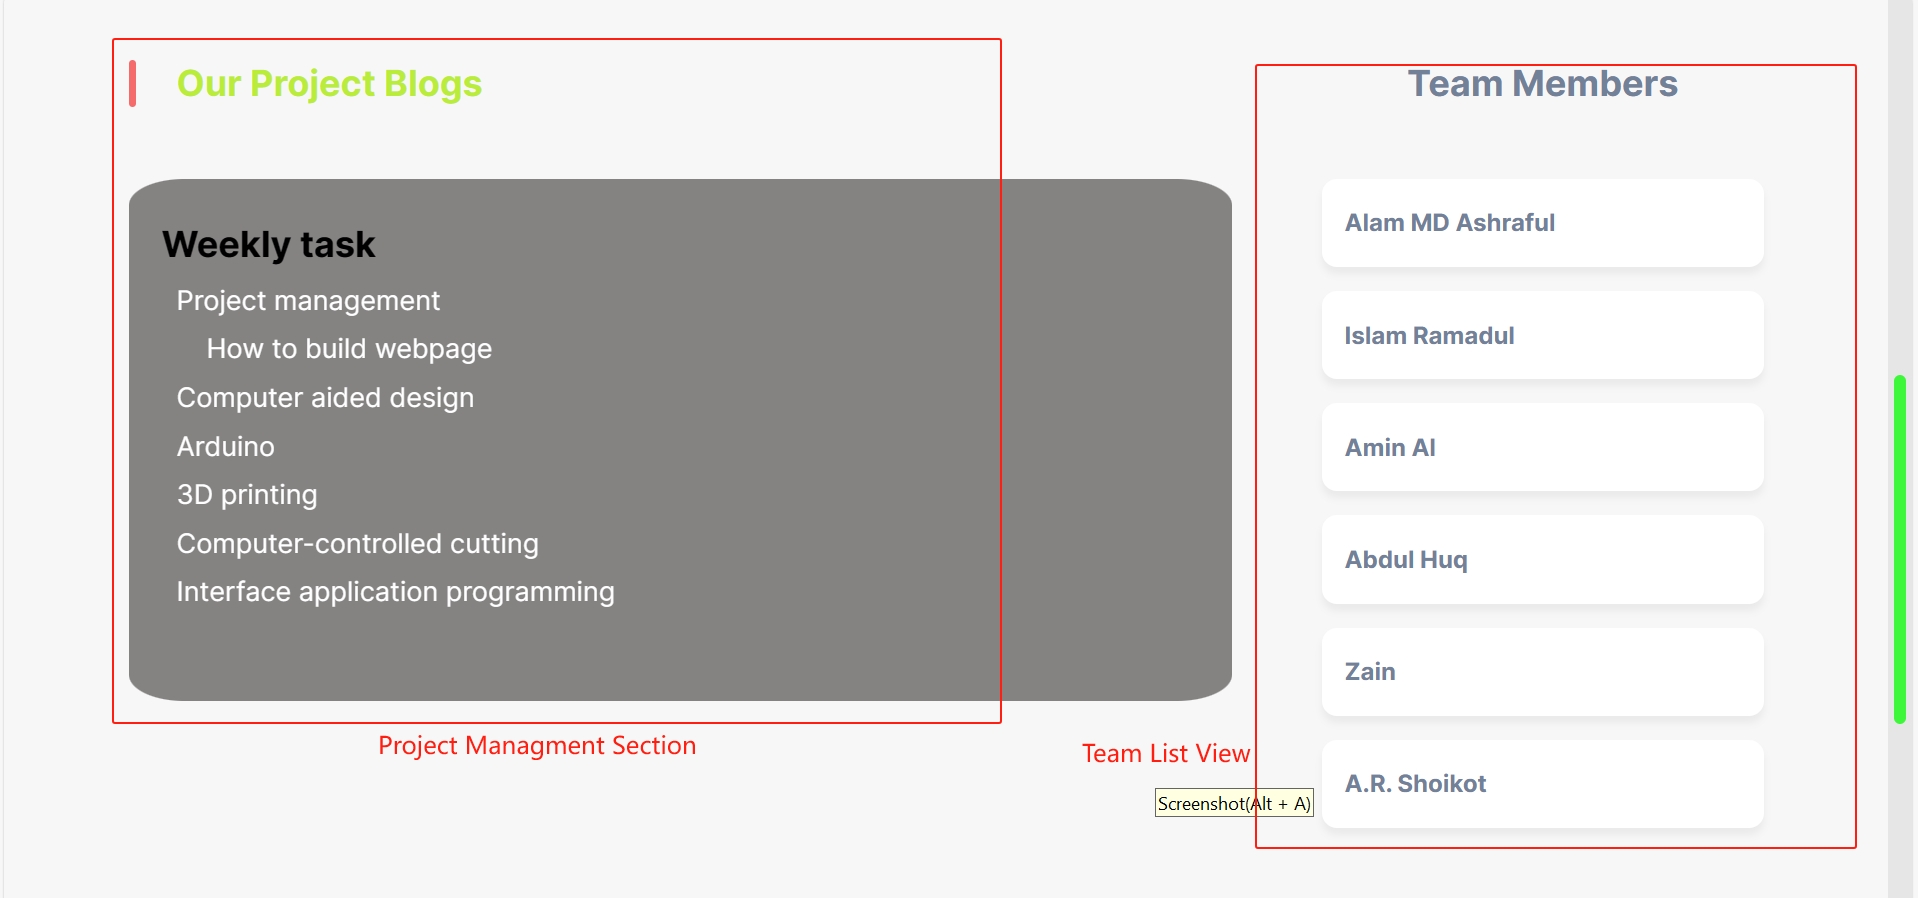
STEP 13: How to build Project Board & Team list
I created a second section of my page after building the hero area of my homepage. I arranged this section into two halves, much like a hero section. A separate panel with a list of team members' homepages is located on the right side, while the team project list is located on the left.
Project List
If you look at the code below, you will see that I sorted the project list using a list tag.
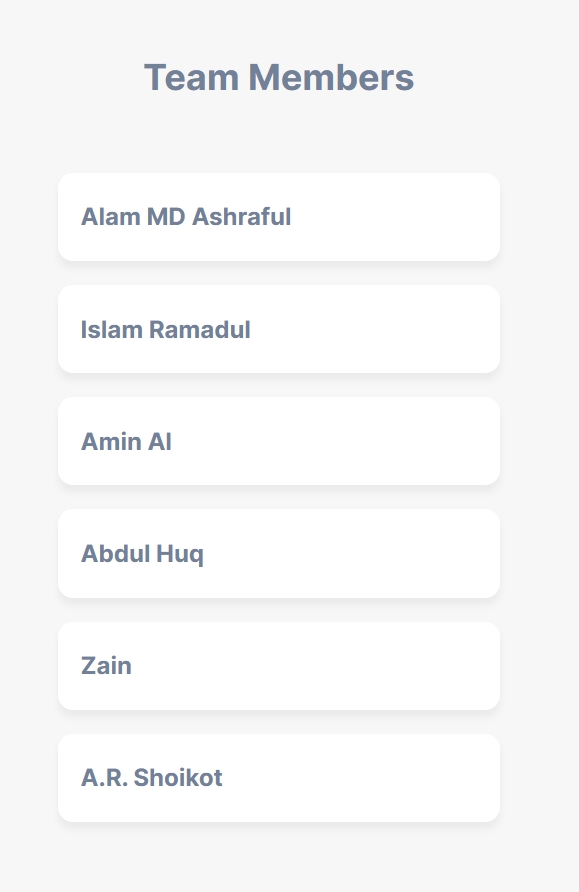
Team List
To make the team members list look nice and ordered like an asdie bar, I took some links, arranged them, and added some CSS code.
STEP 14: Footer
The final and most crucial section of every website is this one. Because this section allows us to add a site map, copyright restrictions, or important notes and contracts. Let's examine the HTML and CSS code to understand its functionality.

Final Step: All the source code of our Homepage
I'm hoping you already see why I use these codes. Everything above was already explained. All of the HTML, CSS, and JS source code for my primary homepage is provided here. All of the resources, including image gifs, are available for download from our main page or git repository. I'm hoping it may assist you with copying and editing a homepage similar to ours.
Tips: How to make a free logo
In most cases, we are not skilled in Photoshop or design; this also applies to me. I thus used some online assistance to create a fantastic and free logo for my website. I'll list every resource below, along with a case study:
- Step 1: Logo Design-1
- Logo Design-2
- Step 2:Remove Background
- Step 3:Control Image resulation
- Step 4: Go to photoshop and resize image as you like.Online Photoshop
STEP 16:how to make the taskbar

The elements are structured to create a header section that includes a title, a responsive menu icon, and a navigation menu with links to different web page sections. The 'div' acts as a container to hold these elements and manage their layout or styling.'' ul id=" top nav": This is an unordered list (ul) with an ID "top nav" used to create a navigation menu. List Items 'li' These are individual list items within the navigation menu, each containing an anchor element 'a' representing a link to different website sections.
STEP 17:Project Directory Structure
This is a directory structure for the "2023zjudem-INNOGENIUSES" project, organizing files into folders such as "js" for JavaScript files, "img" for images, and specific folders for different project aspects like "arduino," "Build-web," and "Computer-aided-design," each containing relevant files for their respective purposes. The project includes HTML, CSS, and JavaScript files along with image assets, facilitating various components of the project development
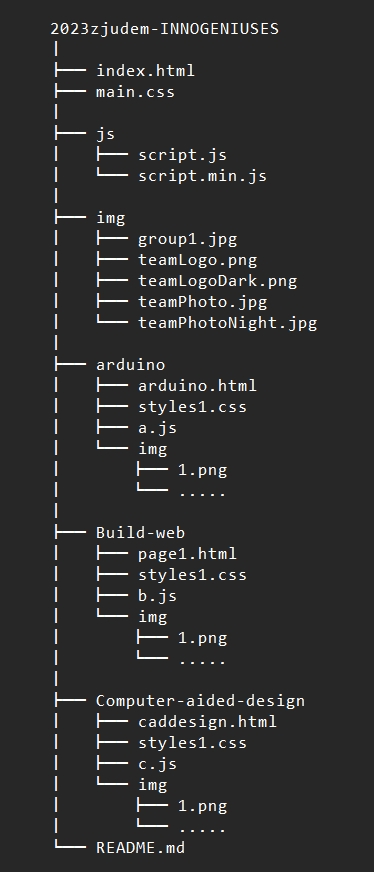
Note:NexMaker-Fab/2023zjudem-INNOGENIUSES: Under this GitHub repository, we upload our full website, and We use a simple link tag to connect all HTML files.
-
Root Files:
index.html: Presumably the main entry point or landing page for the project.
main.css: A stylesheet likely used for styling the HTML content. -
JavaScript Files:
Located within the js directory, comprising script.js and script.min.js, possibly handling interactive elements or functionalities on the website. -
Image Assets:
Stored in the img directory, containing various images such as group1.jpg, teamLogo.png, teamLogoDark.png, teamPhoto.jpg, and teamPhotoNight.jpg, likely used for visuals across the project. -
Subdirectories:
Three main subdirectories (arduino, Build-web, Computer-aided-design) seem to hold similar structures:
Each subdirectory contains an HTML file named arduino.html, along with respective CSS (styles1.css) and JavaScript (a.js, b.js, c.js) files, possibly indicating different sections or aspects of the project.
These directories also have nested img folders holding image assets (1.png and others), potentially specific to each section's content or functionalities. -
Documentation:
README.md likely serves as documentation or a guide for the project.
STEP 18: How to collaborate with team
1.Inviting a team or person
Phase 1: Request the username of the individual you're inviting to collaborate.
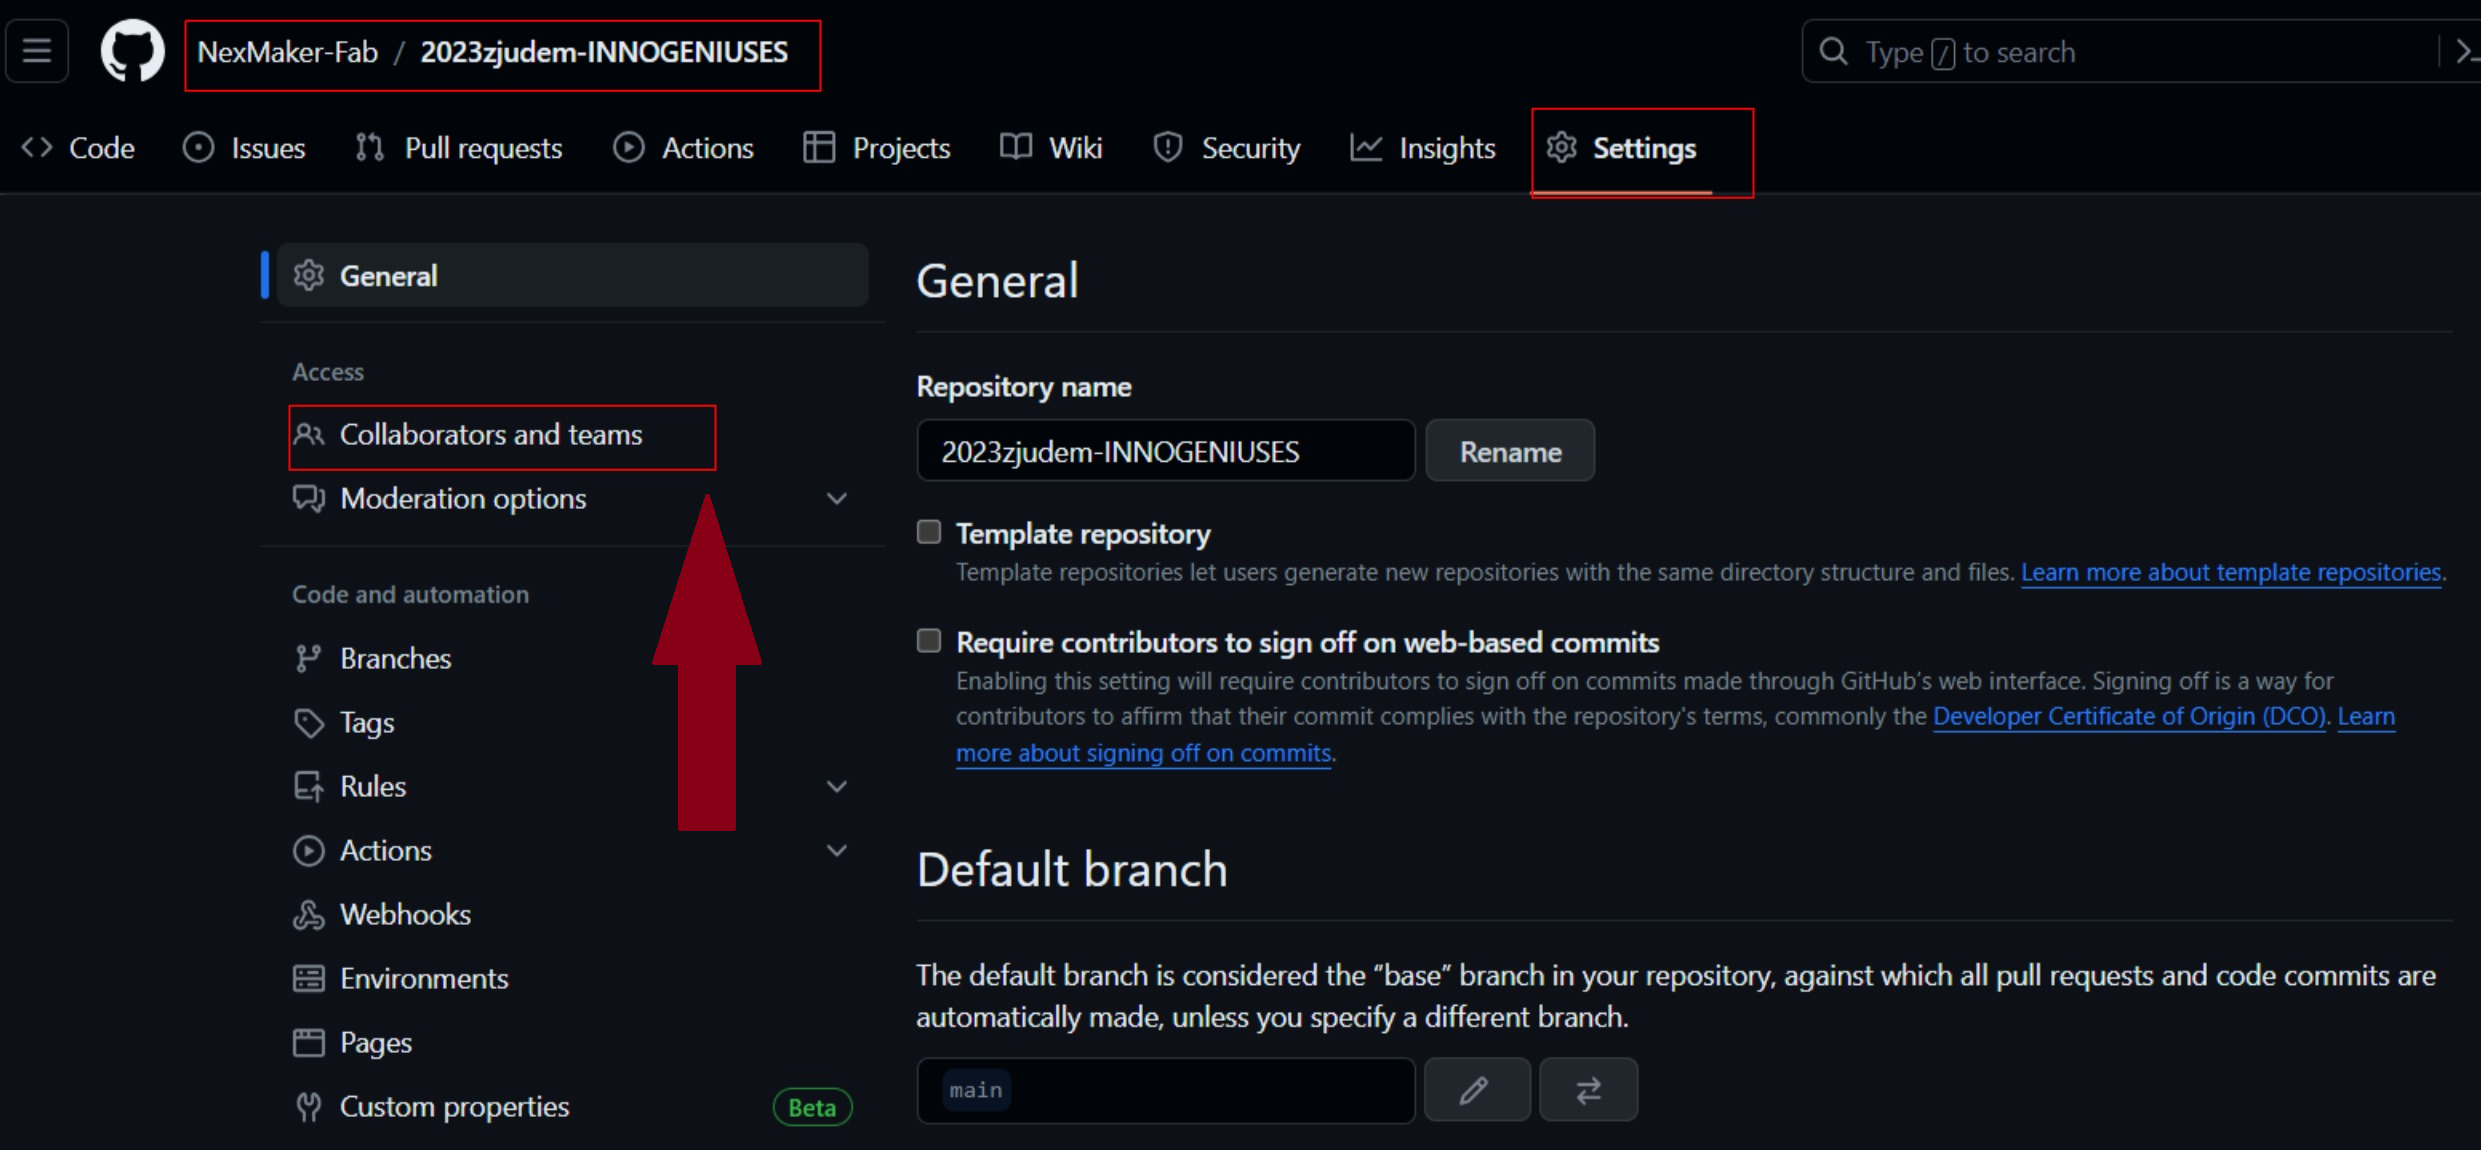
Under your repository name, click Settings, If you cannot see the "Settings" tab, select the dropdown menu, then click Settings.
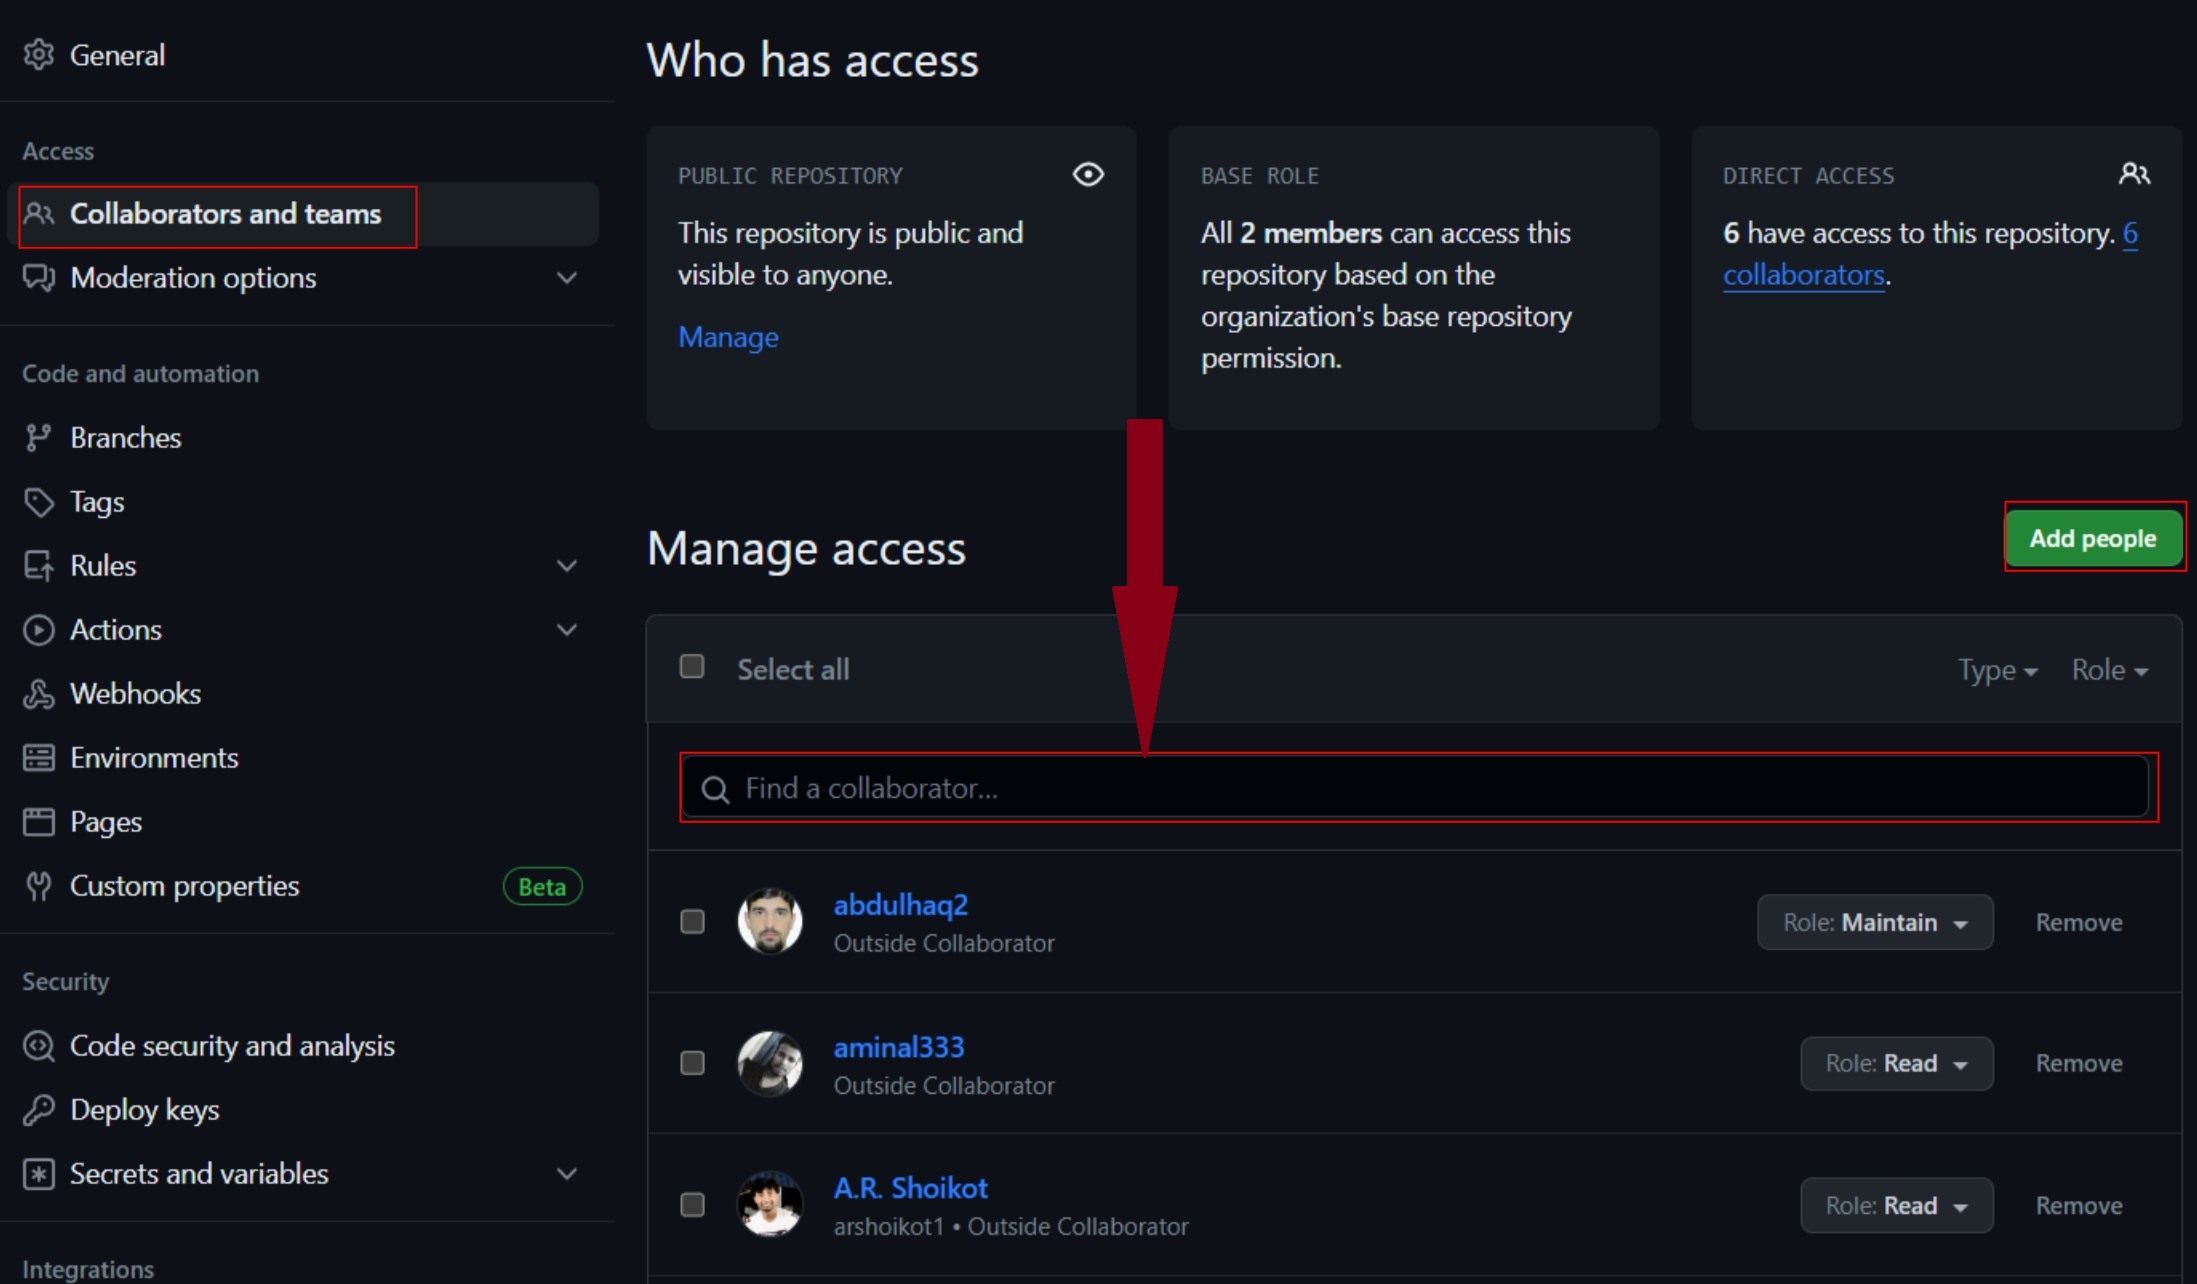
In the "Access" section of the sidebar, click Collaborators and teams as displayed
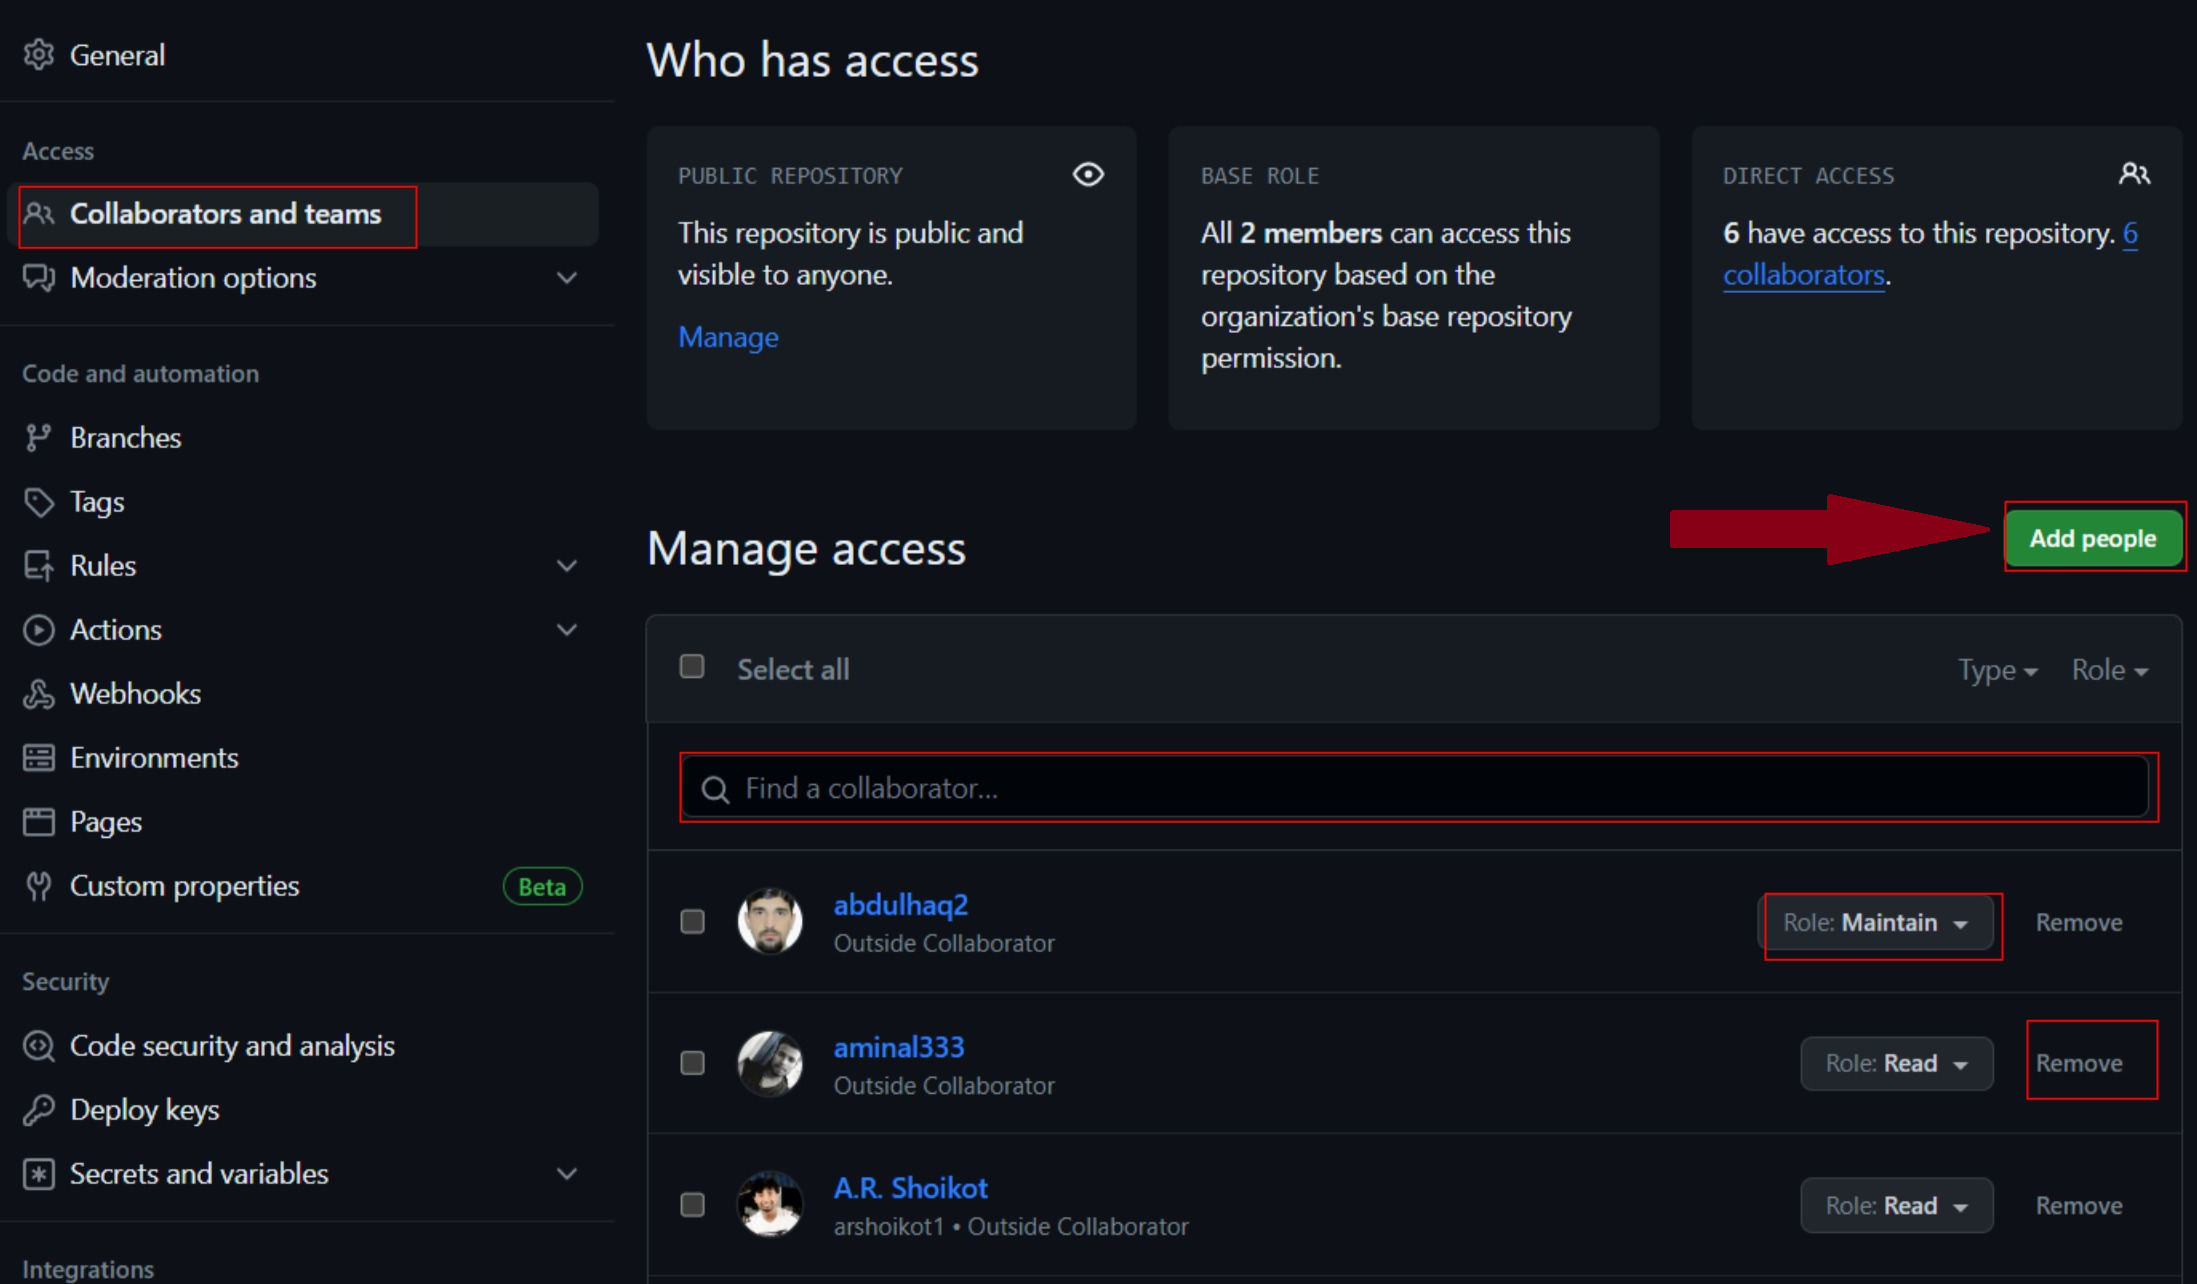
To the right of "Manage access", click Add people or Add teams and In the search field, start typing the name of the team or person to invite, then click a name in the list of matches.
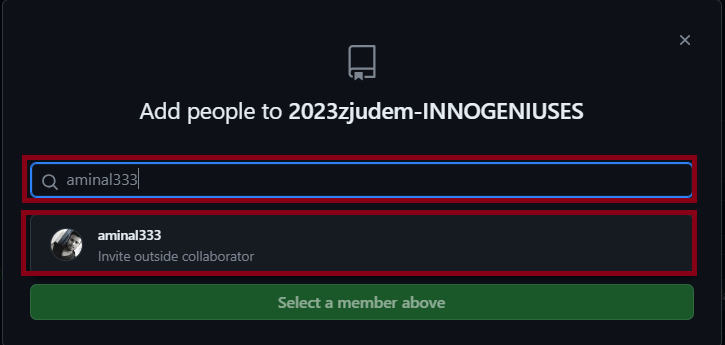
In the search field, start typing the name of the team or person to invite, then click a name in the list of matches.
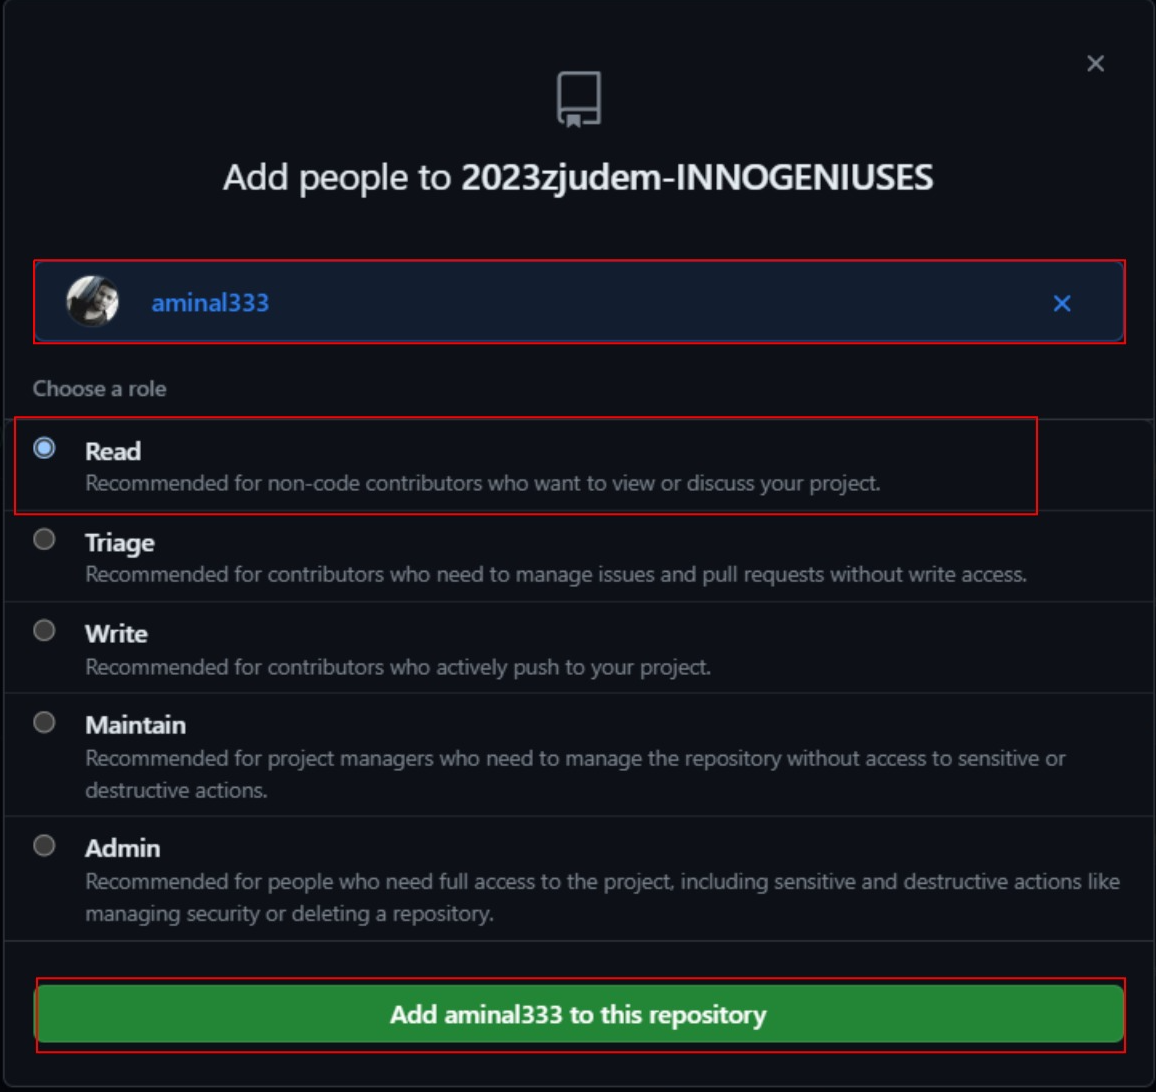
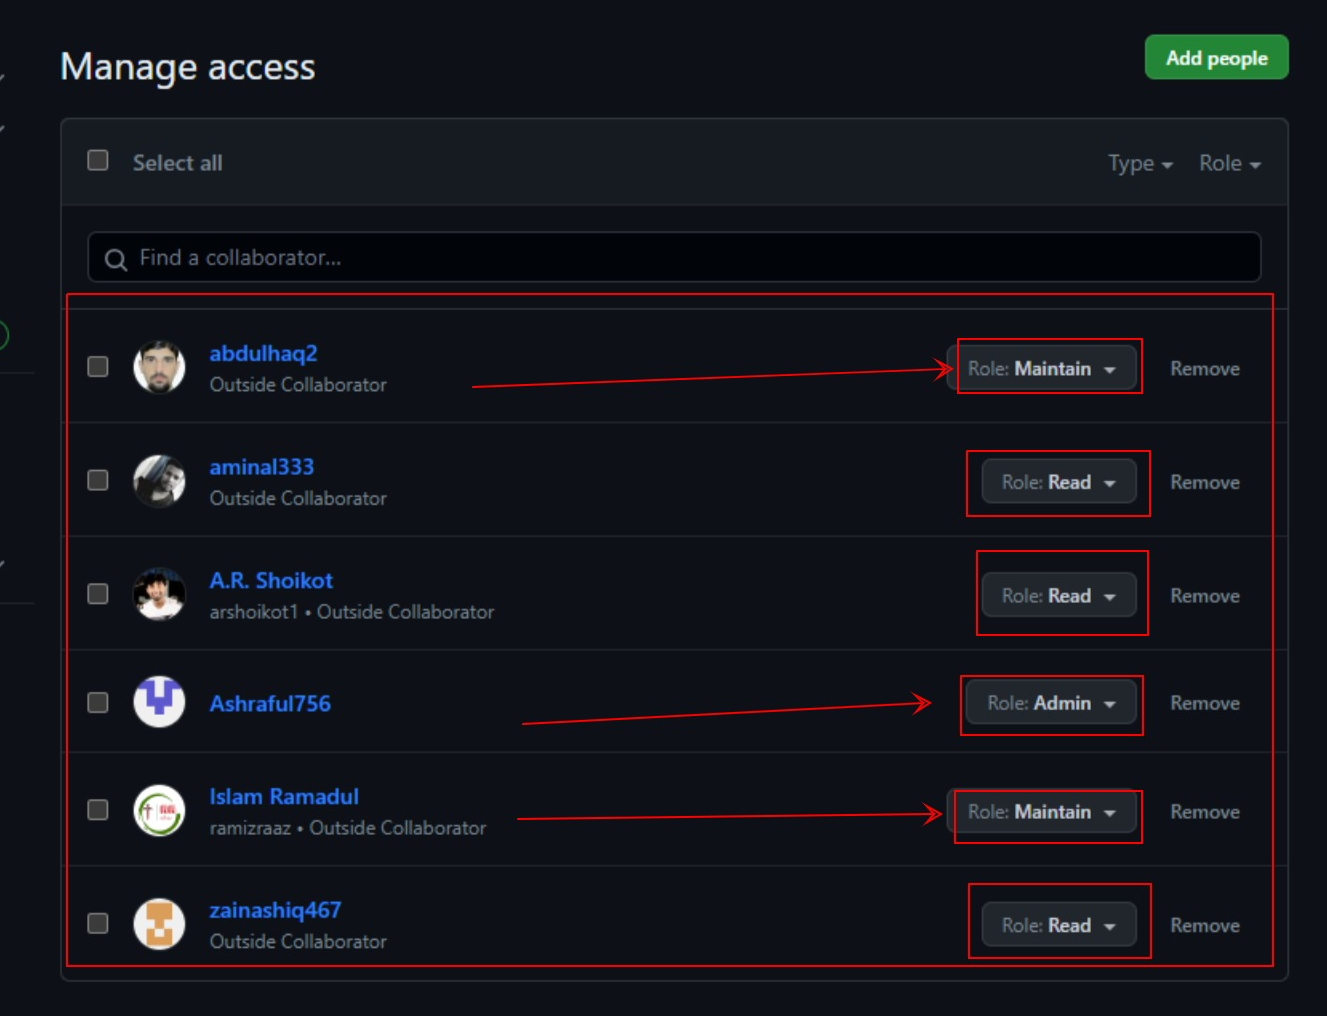
Under "Choose a role", select the repository role to grant to the team or person
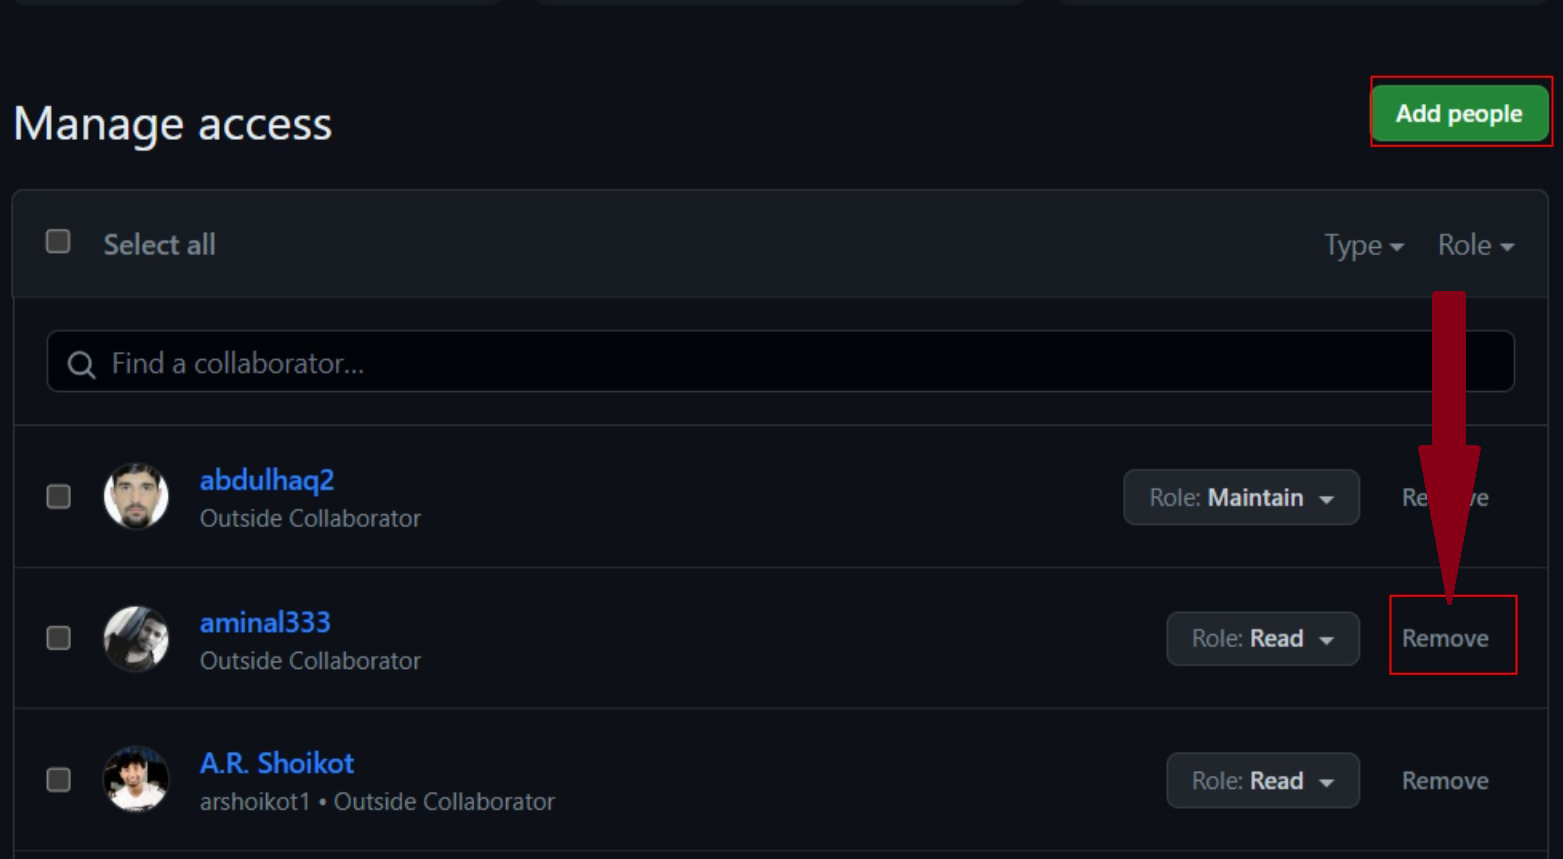
Under "Manage access", next to the team or person whose access you'd like to remove, click Remove
Using this search box, you can easily find your team member
Team members
STEP 18:Teammember's template
We followed some videos and free templates to design our team member template. Each team member makes their template for themself.
Throughout this journey, we've seamlessly uploaded our website to GitHub, employing the same method for our members' web pages. Here's a glimpse of one of our team member's splendidly crafted web pages.

Crafted this template with a blend of HTML, CSS, and a touch of straightforward JavaScript coding.
Note: The reference video to make this template is in the reference section