Article Catalog
- Download and Installation
- Interface Functions
- Programming Language
- Hardware Connection
01 Download and Installation
Arduino IDE Download
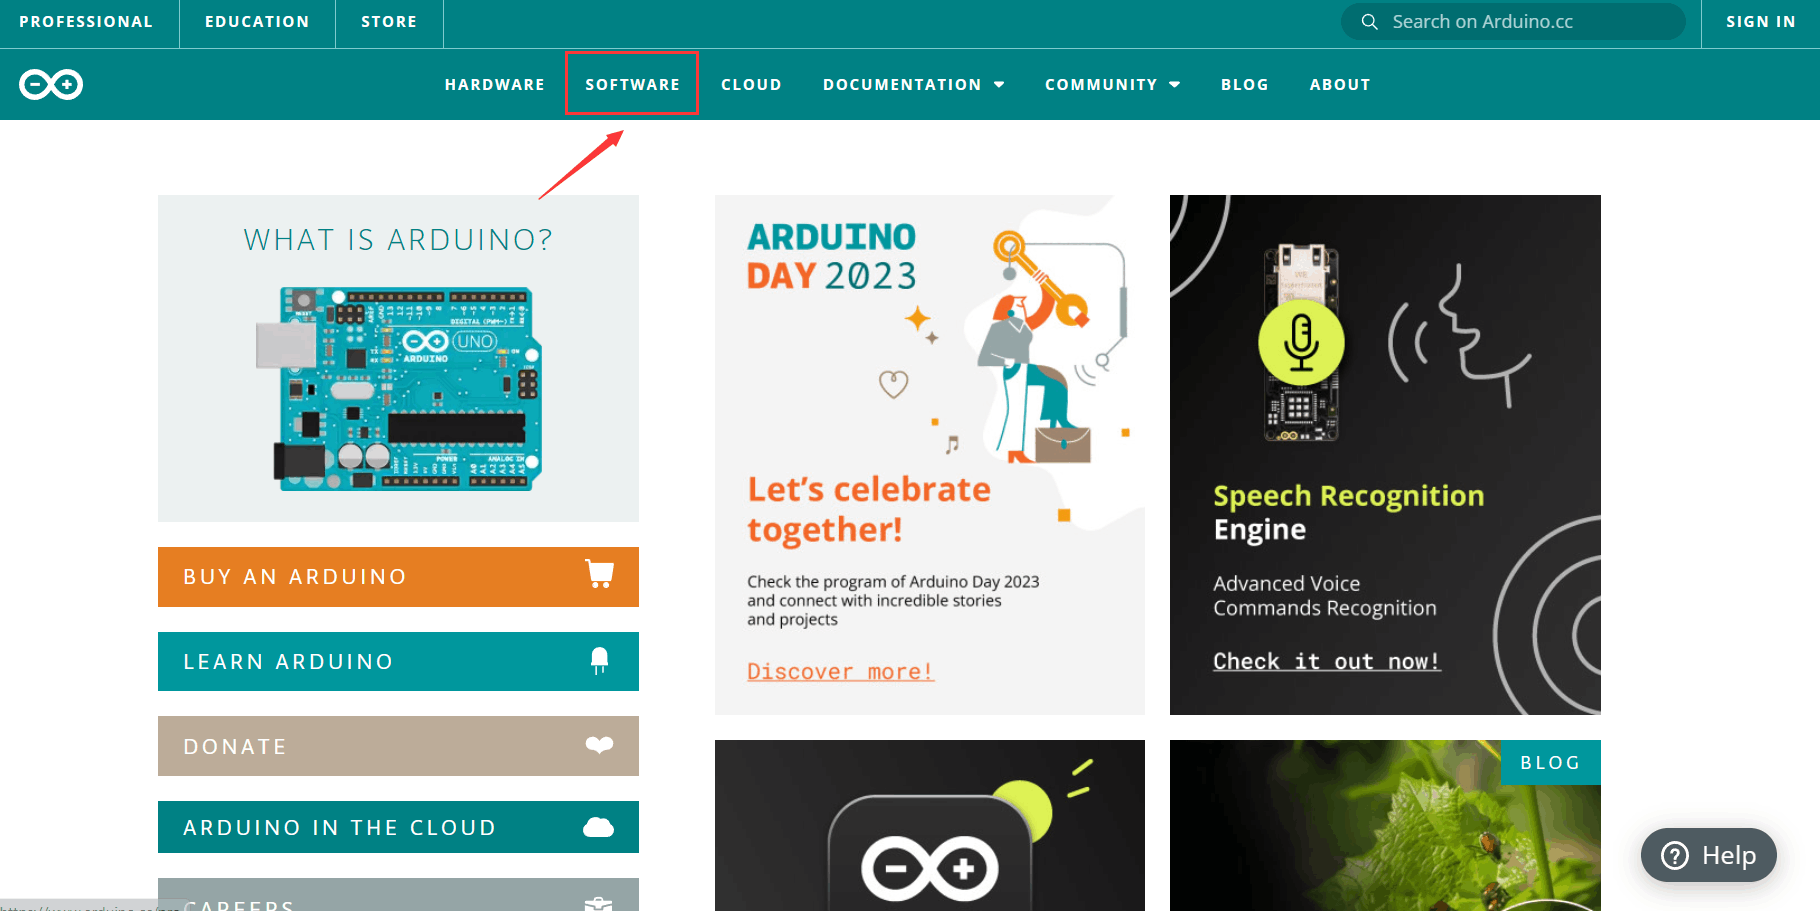
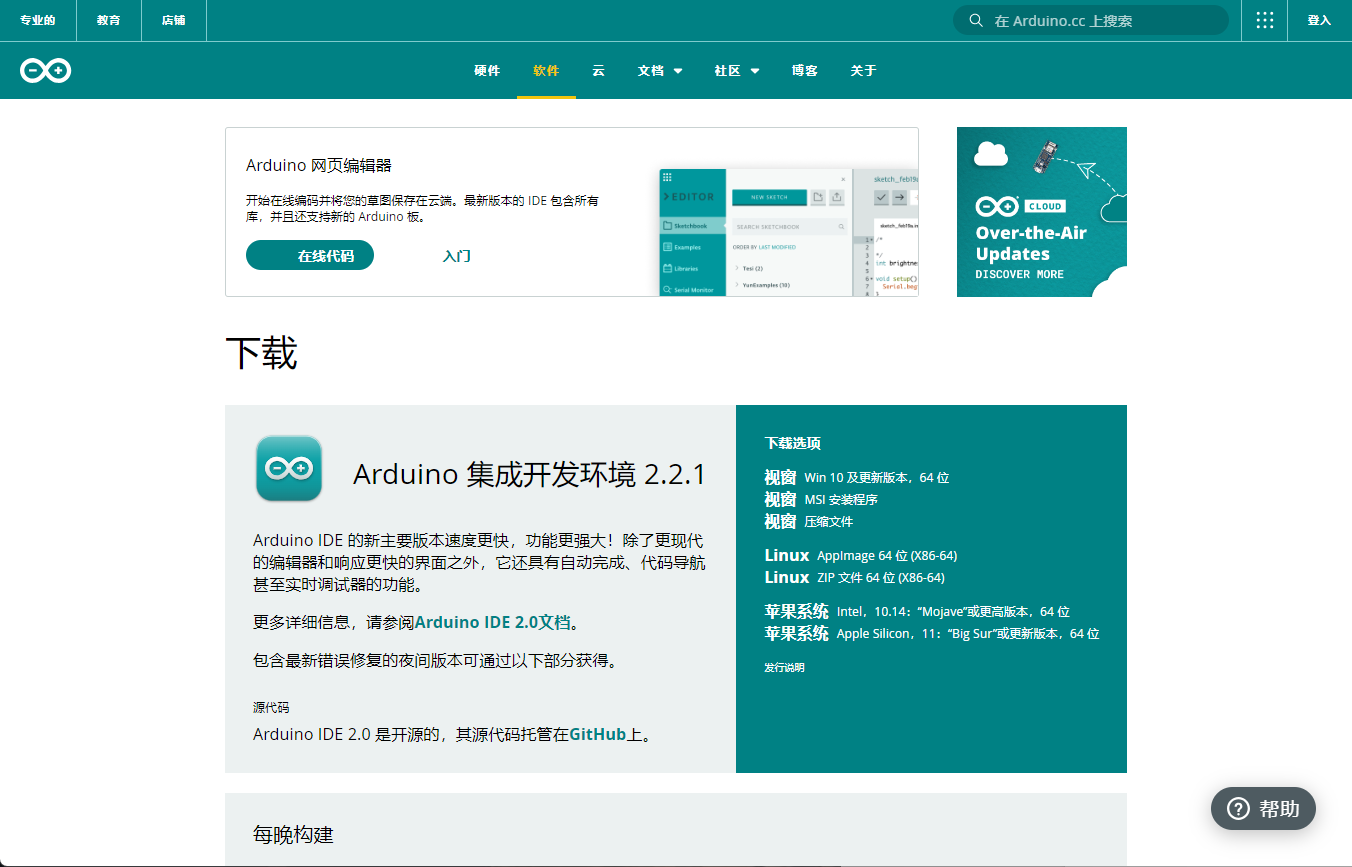
Find and download the Arduino IDE from the official Arduino website.
The download link of Arduino IDE official website is given below:
https://www.arduino.cc/en/software
Installing the Arduino IDE
Find the double-click installation file you just downloaded on your computer to start the installation.
Follow the prompts to install, and the following screen will appear to indicate that the installation is complete.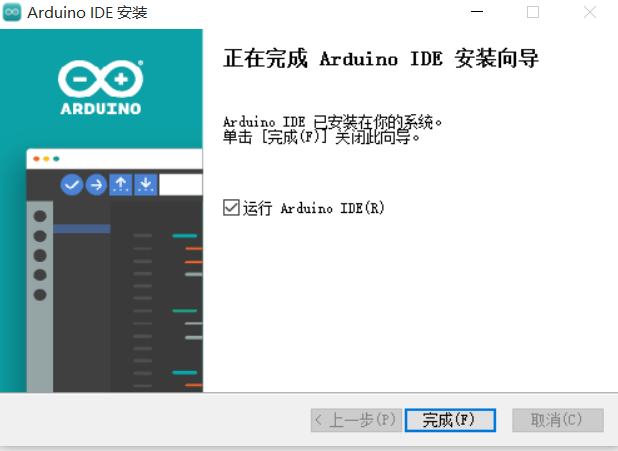
02 Interface Functions
Interface Layout
The Arduino IDE interface for Windows is shown below, and will be slightly different for MacOSX or Linux.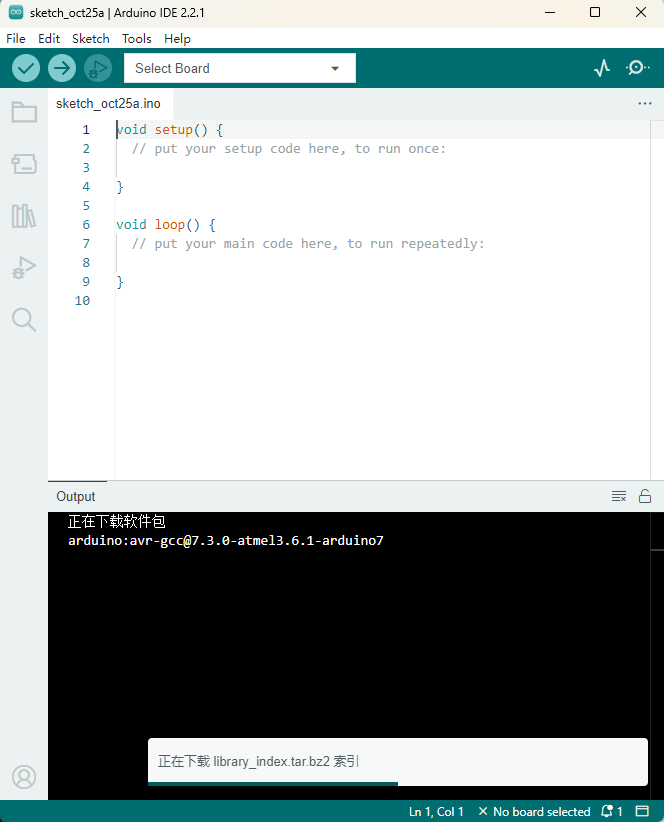
The Arduino IDE interface is divided into three sections, with the toolbar at the top, the code editing area in the middle, and the message notification area at the bottom. Below the toolbar is the tab to open the program, with the program’s filename on the tab.
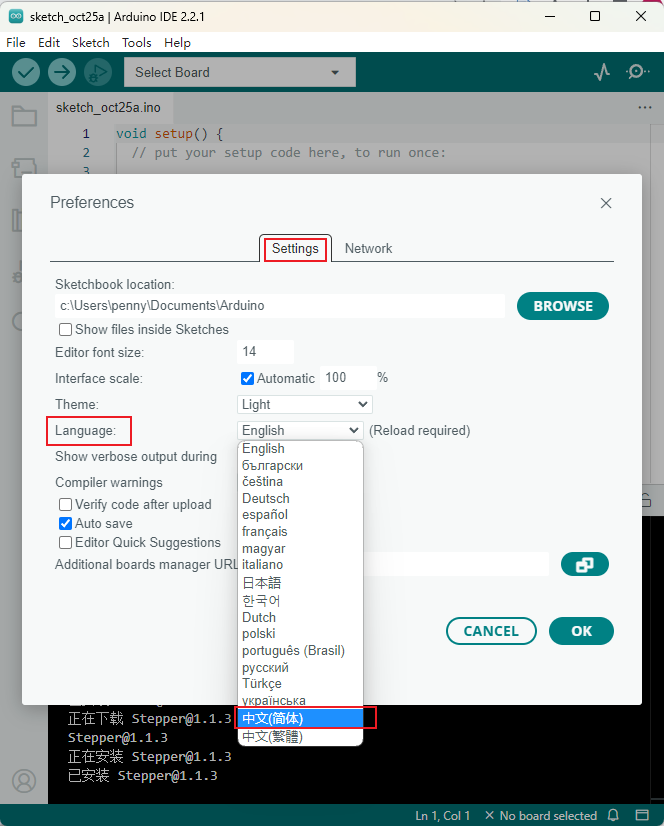
The first time you use the IDE, you can change the language of the IDE’s display by selecting the appropriate language in the Editer language option of the Preferences under the File menu, and restarting the IDE software.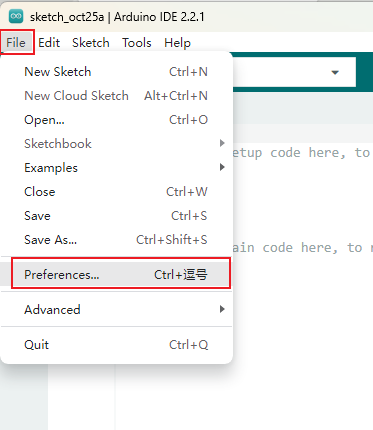
The following table lists the top toolbar buttons and their functions.
| ICON | NAME | FONCTION |
|---|---|---|
 |
Verify | Check the code for errors |
 |
Upload | Upload the current code to the Arduino controller |
 |
Debug | Monitor variable values and the program execution flow |
 |
Board Selection | Select the currently connected or about to be connected development board and interface |
 |
Serial Plotter | Obtain values from the preset serial port and plot them on an xy-axis graph |
 |
Serial Monitor | View information received from the serial port, and send messages to the connected device |
The following table lists the left toolbar buttons and their functions.
| ICON | NAME | FONCTION |
|---|---|---|
 |
Project Folder | View local or cloud-based projects |
 |
Board Manager | View and install board drivers |
 |
Library Manager | View and install specific modules, functions, and constants |
 |
Debug | Monitor variable values and the program execution flow |
 |
Search | Search for files or features |
Board and Port Selection
There are two ways to select the development board and port.
Method I:
Manually select the development board in Tools - Development Board.
Manually select the serial port in Tools-Ports.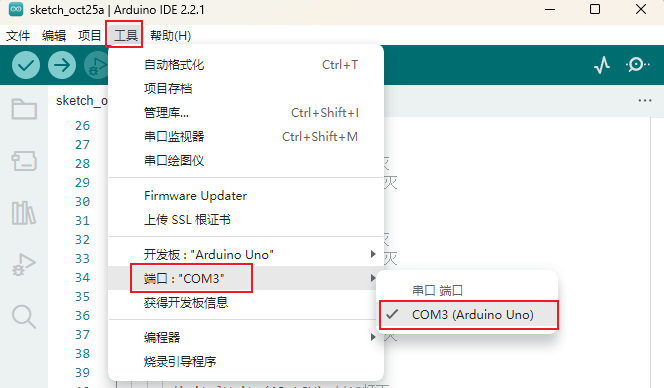
Method II:
Select Development Board in the top ribbon.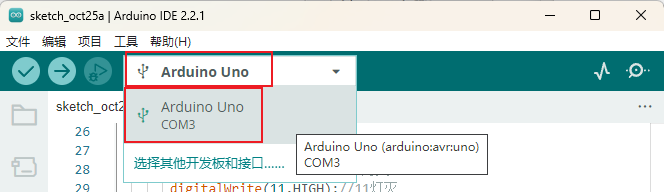
03 Programming Language
Arduino’s programming language is based on C/C++, which makes the statements in the program easier to understand through the encapsulated API, and it is possible to intuitively control the Arduino without paying attention to the complicated register configurations in the microcontroller, which enhances the readability of the program and improves the efficiency of development at the same time.
The basic structure of the Arduino program consists of two functions: setup() and loop().
setup()
After the Arduino controller is powered on or reset, it will start executing the program in the setup() function, and this part will only be executed once. Usually the setup() function completes the initialization of Arduino, such as configuring the I/O port status, initializing the serial port and other operations.
loop()
After the program in the setup() function is executed, the Arduino will then execute the program in the loop() function, which is a dead loop where the program will run repeatedly. Usually in the loop() function to complete the main functions of the program, such as driving various modules, collecting data and so on.
Arduino IDE is the official programming environment, write code, upload to arduino. support windows, linux, mac.
In addition, there are some graphical programming environments, such as Mixly, which is programmed by dragging and dropping blocks, and the interface is more friendly to beginners.
The URL for Mixly is as followed:
https://mixly.org/
Sample Program
The Arduino IDE comes with a number of example programs that are good starting material. Blink in 01.Basics, for example, uses the on-board 13-pin LED that alternates between on and off.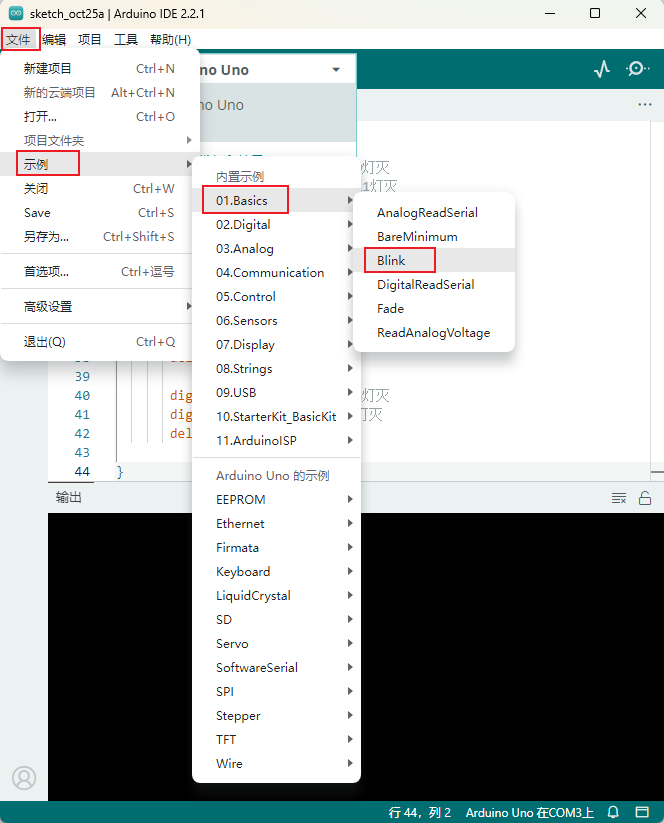

Compile and Upload
Compile the code: Project->Compile/Verify, or the 1st button on the toolbar (✓).
Check if the code is correct by compiling, if there is any error modify the code according to the message at the bottom of the IDE. Only code that passes compilation can be uploaded to the arduino board.
Upload the program: Project->Upload, or the 2nd button on the toolbar (->).
Upload successfully, the bottom status bar will prompt and the code will start running on the arduino board.
04 Hardware Connection
The Arduino UNO is a microcontroller board based on the ATmega328P. It features 14 digital input/output pins (6 of which can be used as PWM outputs), 6 analog inputs, a 16 MHz ceramic resonator, a USB connection, a power jack, an ICSP connector, and a reset button. It has everything you need to support your microcontroller; just connect it to your computer with a USB cable, power it with an AC-DC-DC adapter or a battery, and you’re ready to go. You can tinker with the UNO without worrying about doing something wrong; at worst, you can replace the chip for a few dollars and start over.
Schematic: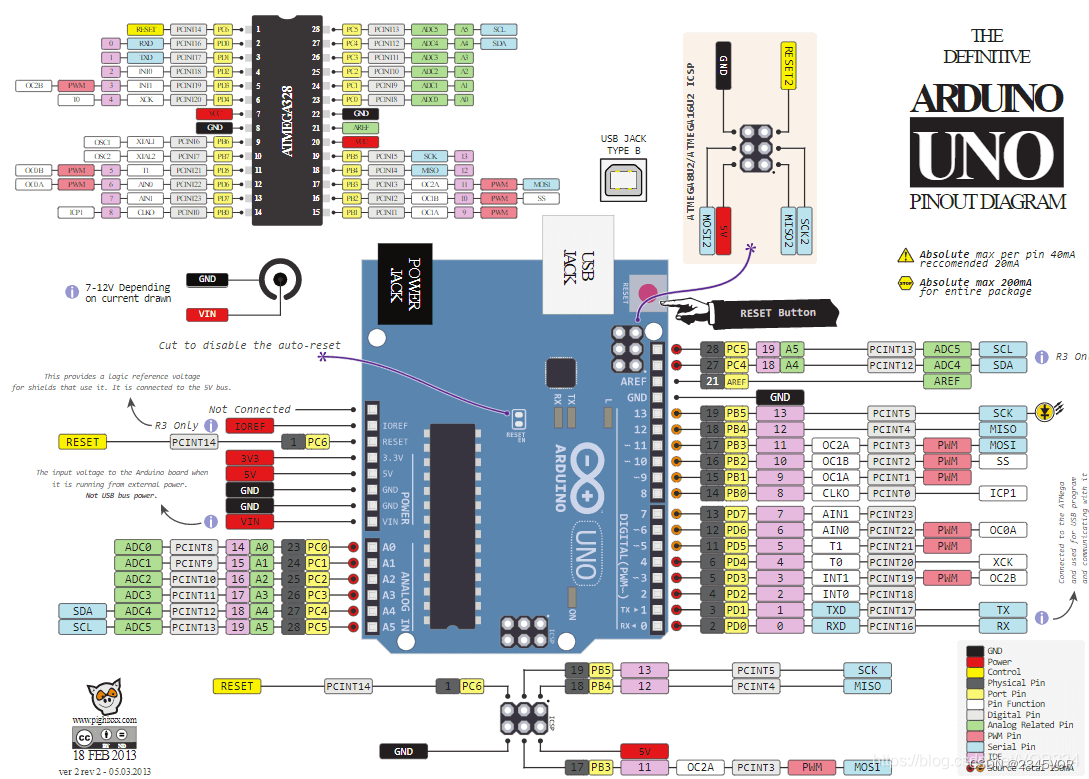
Specific hardware connection operations will be described later with different Arduino projects.
Reference
https://dshboom.top/2023/03/25/arduino%E6%95%99%E7%A8%8B-(%E4%B8%80)%E5%AE%89%E8%A3%85arduino%20ide/
https://zhuanlan.zhihu.com/p/617017855
https://zhuanlan.zhihu.com/p/360660265
https://zhuanlan.zhihu.com/p/361922292
https://blog.csdn.net/duping812/article/details/121423985
https://blog.csdn.net/vor234/article/details/118755032